Every week, you’re throwing away money — one celery stump, one bunch of green onion roots, one knob of spent ginger at a time.
The produce scraps sitting in your kitchen right now could be the start of a living, producing garden, and most people have no idea.
Regrowing vegetables from scraps isn’t a novelty hack. Done right, it’s a legitimate way to stretch your grocery budget, cut waste, and start plants with zero seed cost.
The trick is knowing which scraps are worth saving, exactly how to start them, and — critically — what to do after the initial sprouts appear. That last part is where most people get stuck.
Why Regrowing Scraps Is More Powerful Than Most People Realize
The typical conversation around regrowing scraps stays shallow: “put your green onion roots in a glass of water.” But the real value goes much deeper than that one trick.
- You skip the germination stage entirely. These are already-established root systems. They bounce back faster than seeds and don’t require grow lights, heat mats, or the anxiety of waiting.
- The variety is already proven. If you bought that celery because you liked it, the regrown plant will produce more of the same. No seed catalog gambling.
- It’s a low-pressure entry point. If you’ve been hesitant about starting a vegetable garden, regrowing scraps lets you build confidence before committing to a full plot or raised bed.
- It changes how you shop. Once you start regrowing, you start buying produce differently — choosing bunches with longer roots, picking ginger with more nodes, keeping fennel bases intact instead of trimming them off at the store.
If you’re already interested in fast-growing vegetables to fill your garden quickly, regrowing scraps fits naturally alongside that strategy — you get harvestable results from scraps while your seeds are still germinating in the ground.
Garden Planner
The 24-page planner timed to your county's real frost dates. Planting windows, monthly checklists, and a harvest log you'll fill with pride by August.
Your Free 24-Page Garden Planner
Built for your exact ZIP code — planting dates, harvest log, and a month-by-month plan. 15-second sign-up.
What You Need Before You Start
Most regrowing guides skip setup entirely and then wonder why readers quit after two weeks. Here’s the honest list of what actually matters:
- Small shallow containers or jars — wide-mouth mason jars, small glasses, or cut-down plastic containers all work. Avoid deep containers for the water stage; the root node just needs to touch water, not be fully submerged.
- Non-chlorinated or filtered water — tap water with heavy chlorine can slow regrowth noticeably. Let tap water sit out overnight, or use filtered water. This makes the biggest difference with lettuce and celery.
- Indirect light to start — a windowsill with bright, filtered light beats direct harsh sun for the first week. Once root systems develop and you transplant to soil, you can move the plant to your sunniest spot.
- Potting mix for stage two — most scraps need to eventually move from water to soil to produce a meaningful harvest. A well-draining potting mix with some compost works best.
- Patience through the first 48–72 hours — this is where most people quit. The first two days look like nothing is happening. Day three is usually when you see the first green tips emerge.
The Best Vegetables to Regrow From Scraps (With What Actually Works)
Not all scraps are created equal. Here’s a breakdown of the ones actually worth your counter space — along with the details most guides leave out.
Green Onions and Scallions — The Most Reliable Regrow
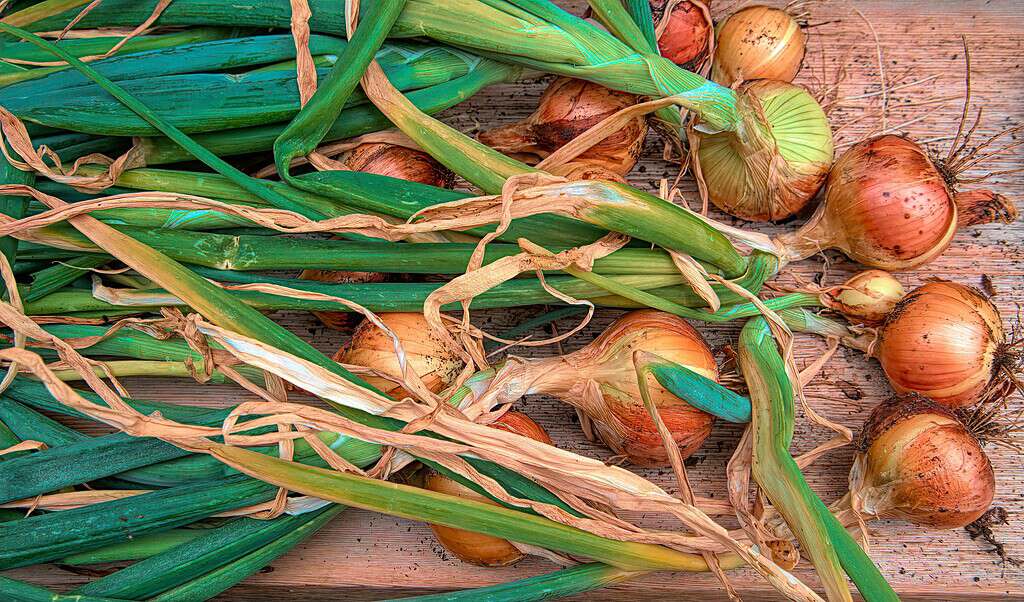
Green onions are the gold standard of scrap regrowing and the best place to start.
Cut the white root end to about an inch, place it root-side down in a jar with a shallow layer of water (just enough to cover the roots), and set it on a sunny windowsill.
What most people miss: green onions can be harvested and regrown multiple times from the same root cluster. After your third or fourth harvest, however, the flavor intensity drops.
That’s your signal to pot the root in soil — it’ll thrive for months more with actual nutrients to draw on. One bunch of store-bought scallions, handled this way, can keep your kitchen stocked for two to three months.
Change the water every two days to prevent bacterial slime, and avoid letting the cut stalk end sit submerged — only the roots should be in water.
Celery — Regrow the Whole Stalk Structure From a Stump
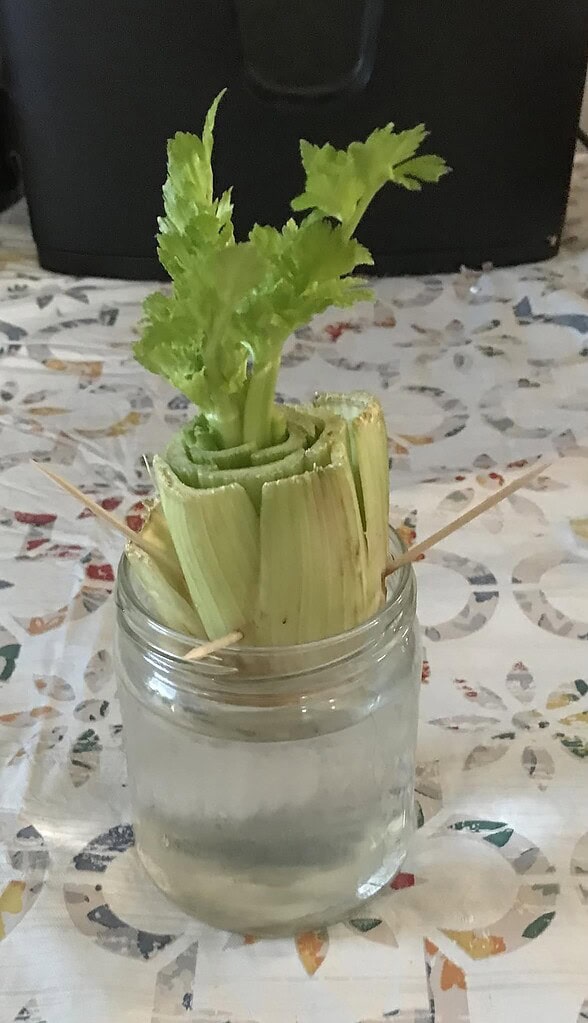
Cut the base off your celery bunch, leaving about two to three inches of stump. Place it cut-side up in a shallow bowl with just enough water to reach halfway up the base.
Within a week, you’ll see small green leaves sprouting from the center.
The key detail nobody mentions: the outer stalks of a regrown celery plant will never reach supermarket size while sitting in water.
To get truly harvestable stalks, you need to pot the base in soil once you see those first leaves. Plant it so just the top half-inch of the base sits above the soil surface, water regularly, and give it as much direct sun as possible.
Realistically, you’ll have fresh tender inner stalks you can snip for soups, stir-fries, and stocks within three to four weeks of potting.
Romaine Lettuce and Leafy Bases
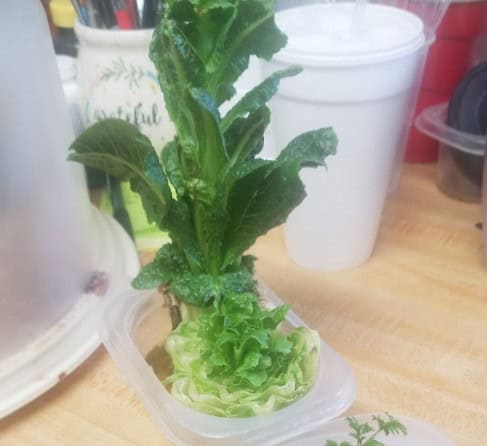
Romaine hearts, butter lettuce, and bok choy all regrow well from the base.
Cut two to three inches from the bottom, set it in a shallow bowl of water, and place it in indirect light. Change the water every other day. Expect small leaves within four to five days.
Lettuce regrowth from scraps produces a fraction of the original head.
The leaves you get are tender and excellent for garnishes or fresh snipping, but you’re not replacing your salad supply from one stump.
The real value is having living, harvestable greenery on your counter with zero effort.
Lettuce also does best in cooler temperatures — avoid placing your regrow container near a heat source or in intense direct afternoon sun.
Garlic — Regrow as Greens or Full Bulbs
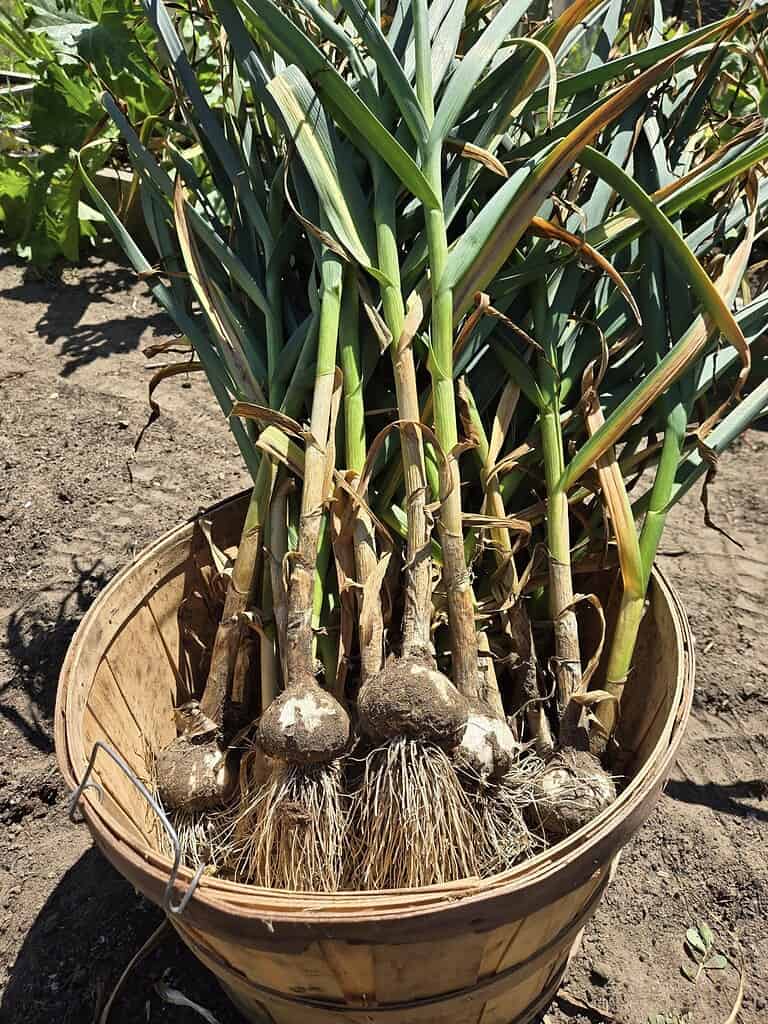
You’ve probably found a garlic clove sprouting in the back of your pantry.
That green shoot is edible — it has a mild, fresh garlic flavor perfect for finishing dishes — and you can keep harvesting it by trimming while the clove stays rooted in a small pot of soil.
For full bulb regrowth, plant individual cloves pointy-side up about two inches deep in a pot or garden bed. In cooler seasons, planted cloves will develop into full bulbs over several months.
This isn’t a quick return, but you’re producing garlic from cloves that would have gone off in your pantry anyway.
One thing most guides miss entirely: garlic benefits from a cold period. If you’re in a warm climate, refrigerate your cloves for two to four weeks before planting to simulate winter dormancy. This dramatically improves bulb formation compared to planting straight from a warm pantry.
Ginger — One of the Most Rewarding Long-Game Scraps

Take a plump ginger piece with at least one or two visible nodes — those small bumpy “eyes” on the surface. Soak it in warm water overnight to wake up the dormant growing points, then plant it in a container with the nodes just below the soil surface. Keep the soil consistently moist but not waterlogged, and place it somewhere warm.
Ginger is a tropical plant that won’t tolerate frost, so keep it indoors in cooler climates. It grows slowly — don’t expect drama for three to four weeks — but once established, it’s genuinely productive.
You can begin harvesting small pieces of fresh ginger by carefully digging at the edges of the pot after four to five months, leaving the main plant intact to keep growing season after season.
If you’re exploring unconventional ways to grow food indoors, pairing ginger with growing mushrooms at home creates a surprisingly productive indoor system using very little space and mostly materials you already have.
Lemongrass — The Grocery Store Stalk That Becomes a Full Plant
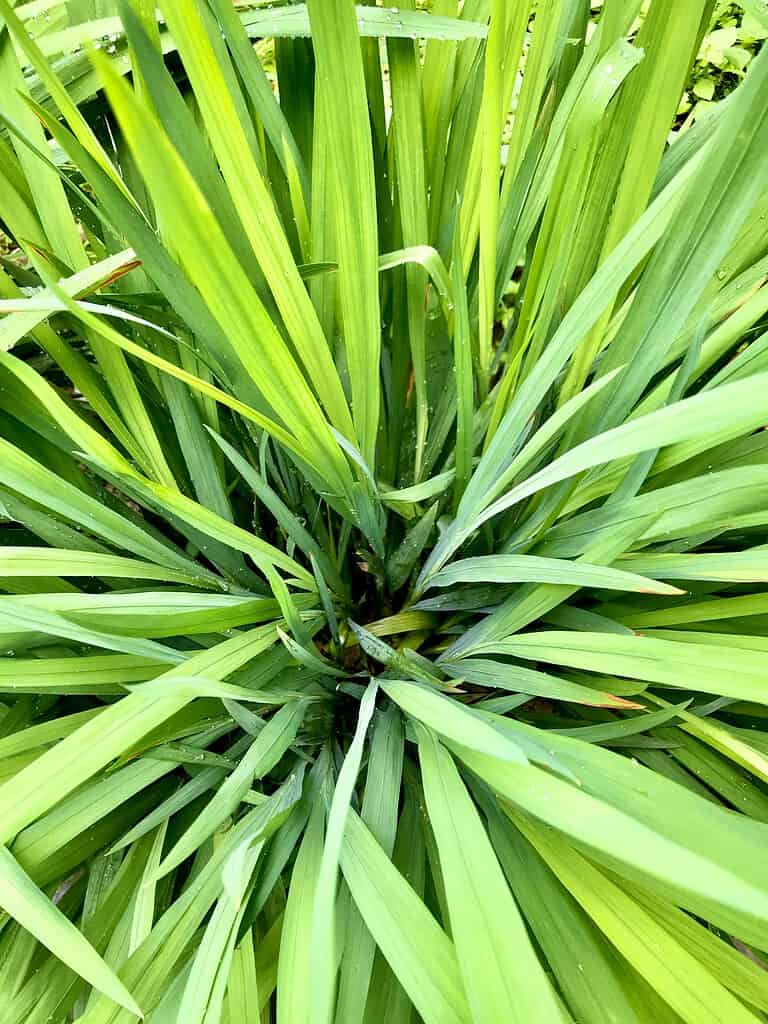
This one surprises people. Fresh lemongrass stalks from the grocery store still have enough root base to regrow into a full plant.
Place the stalks in a tall glass with a couple of inches of water, making sure the bulb end is submerged. Change the water every few days, and within two weeks you’ll see new green growth at the top and visible root development at the base.
Once roots are about an inch long, transplant into a large container — lemongrass gets substantial, so a five-gallon pot is ideal — with well-draining potting mix.
In warm climates it grows outdoors year-round; in cooler regions, bring it in during winter.
Established lemongrass produces fresh stalks continuously, and you can snip outer stalks for cooking or tea while the plant keeps growing from the center.
Fennel — Regrow the Bulb, Harvest the Fronds
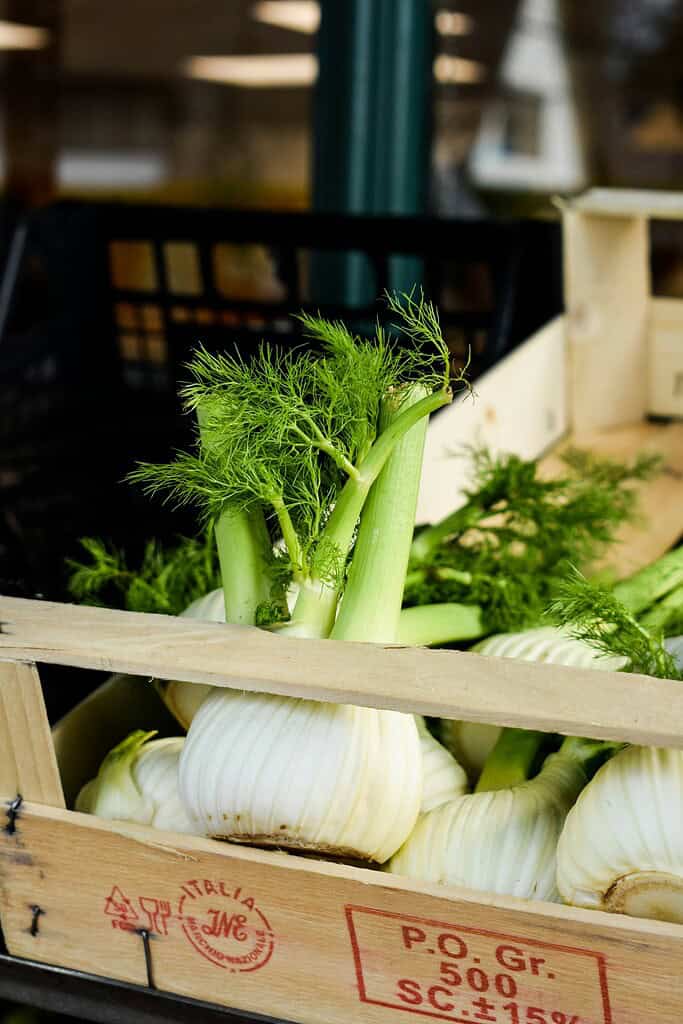
Most people throw away the fennel base after slicing the bulb, but it regrows beautifully.
Place the trimmed fennel base cut-side up in a shallow bowl of water.
Within a week, feathery green fronds start emerging from the center — fully harvestable, with the same anise-like flavor as fresh fennel, excellent in salads, pasta, and alongside fish.
Like celery, potting the fennel base in soil after initial sprouting extends its productive life significantly.
Fennel is also a known pollinator attractor, so if you’re moving it outdoors into a garden bed, it earns its place through companion planting benefits as well — drawing in beneficial insects that support the rest of your vegetable garden.
Miss it by a week and you lose the crop. The free 24-page planner pins down your exact dates — last frost, first frost, and the weekly steps between — so you plant on the days that actually work for your ZIP.
The Water-to-Soil Transition: The Step That Makes or Breaks Your Results
Here’s where most beginner scrap-regrowers get stuck. They see early growth in water and either keep the plant in water indefinitely — where it slowly weakens — or rush it into soil before roots are ready — where it struggles to establish. Neither works well.
The right time to transplant is when roots are clearly visible and at least half an inch to one inch long. At that point, the plant has the structural anchor it needs to settle into soil without shock. When transplanting:
- Use potting mix, not garden soil — it’s lighter and won’t compact around delicate new roots.
- Pre-moisten the soil before planting so roots meet moisture immediately on contact.
- Don’t bury more than necessary — just enough to anchor the plant and cover the root system.
- Keep the soil consistently moist for the first week, but not waterlogged — the plant is adjusting to a new growing medium.
- Expect a brief “sulk period” — some yellowing or temporarily slowed growth is normal during transition. It usually resolves within three to five days.
For those moving plants into outdoor beds, raised beds are ideal for scrap-grown transplants — the loose, well-amended soil makes root establishment much easier compared to compacted in-ground soil, and you have better control over drainage.
Free Planting Guides for This Article
Get exact planting dates, frost schedules, and growing tips for your zone:
Scraps That Look Promising — But Usually Disappoint
Some popular regrowing suggestions circulate endlessly online but consistently underperform in real kitchens. Save yourself the counter space.
- Onion bottoms (bulb onions): The base of a regular yellow or red onion can sprout in water, but the resulting greens are thin, bitter, and nothing like fresh onion. Not worth it unless you specifically enjoy the shoots.
- Avocado pits: Widely shared, chronically disappointing. Takes months to produce even a seedling, and a tropical tree started this way will never produce fruit in most home climates. Fun as a project with kids, not practical as a food source.
- Potato eyes: Grocery store potatoes are commonly treated with a sprout inhibitor. They can technically grow, but commercially grown potatoes carry disease risk that can linger in your soil for years. Dedicated seed potatoes are a far better investment.
- Grocery store herb stem cuttings: Basil and mint stems can root in water, but they’re propagation cuttings — not scrap regrowing in the same sense. If you want reliable herb production at home, our full guide on how to grow basil covers everything from container growing to preventing bolting in summer heat.
Best gardening planner I've used in 10 years — and I keep coming back to it every season.
Fitting Scrap Regrowing Into Your Bigger Growing Setup
Scrap regrowing works best as one piece of a larger growing system, not a standalone activity. Here’s how to connect it to everything else happening in your garden:
- Use regrown transplants to fill seasonal gaps. When you have open space in a bed between plantings, potted scrap transplants can fill it without waiting for seeds. Green onions, fennel, and celery are particularly easy to slot in this way.
- Build a scrap-to-compost loop. Anything that doesn’t regrow well — or reaches the end of its productive life — goes straight to the compost pile. No food waste, and double the value from every piece of produce you bring home.
- Match regrowing with a relaxed planting style. If you prefer a less rigid, plant-what-grows approach, scrap regrowing pairs naturally with the chaos gardening method — you grow what you have, where you have space, without strict planning or schedules.
- Plan zones for your scraps as your setup grows. If you’re thinking bigger picture about your outdoor space, a solid homestead layout plan can help you designate dedicated areas for potted scraps, herb beds, and vegetable rows — so everything has a home and nothing competes for the wrong space.
How Hard Is It to Garden in Your County?
Every county has a unique Gardening Difficulty Score based on frost risk, soil quality, drought, altitude, and climate trends. Find yours — plus personalized frost dates, planting calendars, and soil data.
Check Your County's Score →Start Regrowing Today — Your Kitchen Is Already Full of Free Plants
You don’t need seeds, a greenhouse, or a green thumb to start regrowing vegetables from scraps. You need a jar, some water, a windowsill, and the habit of pausing before you toss that root end in the bin.
Start with one thing this week — a bunch of green onions is the easiest entry point, and you’ll see results within three days.
Once you see those first green tips pushing up from a root you were about to throw away, the mindset shift kicks in: your kitchen isn’t just a place you cook — it’s a place you grow.
From there, add celery, then ginger, then lemongrass. Before long, your counter has a small living pantry of plants that keep producing — all from food you would have thrown in the trash.
Have you tried regrowing vegetables from scraps? Which ones worked best for you — and which ones were a total flop? Drop a comment below and let the community know what’s been thriving on your windowsill!
- Tomatoes
- Peppers
- Beans
- Squash
- Cucumbers
- Basil
Ready to Design Your Dream Garden Bed?
Feeling inspired to build something beautiful?
If you’re ready to go beyond just one garden bed and truly design a space that feels intentional, productive, and charming, I put together something special for you.
Inside 101 Garden Bed Ideas, you’ll find creative layouts, raised bed designs, space-saving solutions, and inspiring setups you can actually recreate in your own yard – whether you’re working with a tiny backyard or a full homestead.
Start planning your dream garden today.

Frequently Asked Questions
Can I regrow vegetables from conventional produce, or do I need to buy organic?
Conventional produce works fine for most scrap regrowing — green onions, celery, lettuce, and lemongrass regrow reliably regardless of whether they were organically grown. The main exception is potatoes, which are frequently treated with a sprout inhibitor that prevents regrowth.
For most other vegetables, organic versus conventional makes very little difference in your results.
If a particular scrap consistently refuses to sprout while others from the same bunch succeed, a post-harvest treatment on the produce may be the culprit.
How long can I keep a plant in water before it must move to soil?
It depends on the vegetable. Green onions can cycle through three to four harvests in water before flavor and vigor weaken noticeably — at that point, soil extends productive life significantly.
Celery and lettuce should move to soil within two to three weeks of sprouting, or growth slows to an unproductive trickle.
Ginger skips the water stage entirely and goes directly into soil after its overnight soak.
A useful general rule: if you’re seeing slow growth or yellowing despite regular water changes, the plant is signaling that it needs soil nutrients.
My regrown lettuce or celery tastes bitter. What went wrong?
Bitterness in regrowing vegetables is almost always caused by heat or light stress.
Lettuce turns bitter quickly when temperatures climb above 75°F or when it receives several hours of intense direct sun — keep leafy regrows in bright, indirect light in the coolest part of your kitchen.
Celery bitterness is less common but occurs when the plant dries out repeatedly; inconsistent watering stresses the plant and concentrates bitter compounds in the stalks.
Harvesting younger, smaller growth rather than letting leaves or stalks get large before cutting also helps — younger growth is almost always milder and more flavorful.
Can I skip the indoor water stage and plant scraps directly into an outdoor garden bed?
Yes, with some caveats. Green onion stumps can go directly into a garden bed or large outdoor container — they’re robust enough to establish without a water rooting phase.
Celery and fennel bases benefit from the water stage before outdoor planting, especially in unpredictable seasons.
The biggest risk with skipping straight to outdoors is exposure to weather variability during the vulnerable establishment phase — a sudden cold snap or heat wave can set the plant back significantly before it’s anchored.
Starting indoors for the first one to two weeks gives a practical buffer before moving outdoors.
Does the water need to be changed every single day, or is that overkill?
Every other day is the practical sweet spot for most setups.
Changing it daily isn’t harmful but isn’t necessary unless you notice cloudiness or a slimy film on the container walls — both signs of bacterial buildup. In warm kitchens above 75°F, bacteria multiply faster, so daily changes may be warranted in summer.
In cooler kitchens below 65°F, every two to three days is plenty. What matters most is keeping the water clear and the container itself clean — rinse the container with hot water each time you change it, not just the water inside.
Residue left on container walls is what causes slime to develop, and it will spread back into fresh water quickly if not addressed.
Level Up Your Garden
Our most popular gardening guides