Mushrooms are one of the most rewarding crops you can grow at home — and one of the most underrated.
They take up almost no space, fruit quickly, thrive on materials most people throw away, and turn forgotten corners of the kitchen, basement, or backyard into productive little ecosystems.
Better yet, you don’t need acres of land or even a sunny window to get started.
If you’ve been looking for a low-effort, high-reward project to add to your homestead, mushrooms might be the perfect fit.
In this guide, you’ll discover 10 types of mushrooms to grow at home — from buttery Oyster Mushrooms to gourmet Lion’s Mane — plus four beginner-friendly methods that work whether you live in an apartment, a suburban home, or on a few acres.
Why Grow Mushrooms at Home?
There’s a reason mushroom cultivation is having a moment.
Growing your own gourmet and medicinal mushrooms saves money (specialty varieties run $15–$25 a pound at the store), turns kitchen waste like coffee grounds and cardboard into food, and produces fast — many varieties go from inoculation to harvest in just 4 to 8 weeks.
Mushrooms also pair beautifully with the rest of your homestead routine. They thrive in shaded, damp corners that don’t work for vegetables, they recycle yard debris like logs and wood chips, and you can stack a few buckets in a closet without any soil at all.
If you’re looking for easy homestead projects you can start this week, growing mushrooms checks every box.
Garden Planner
The 24-page planner timed to your county's real frost dates. Planting windows, monthly checklists, and a harvest log you'll fill with pride by August.
Your Free 24-Page Garden Planner
Built for your exact ZIP code — planting dates, harvest log, and a month-by-month plan. 15-second sign-up.
10 Best Types of Mushrooms to Grow at Home
Each variety below has its own personality — some are gateway mushrooms that practically grow themselves, others reward patience with gourmet harvests. Here’s where to start.
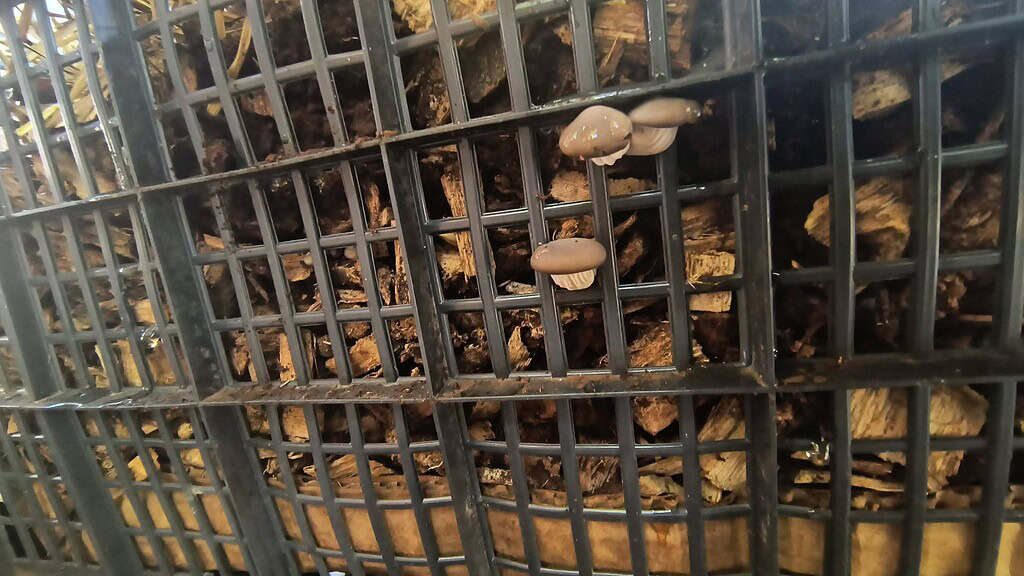
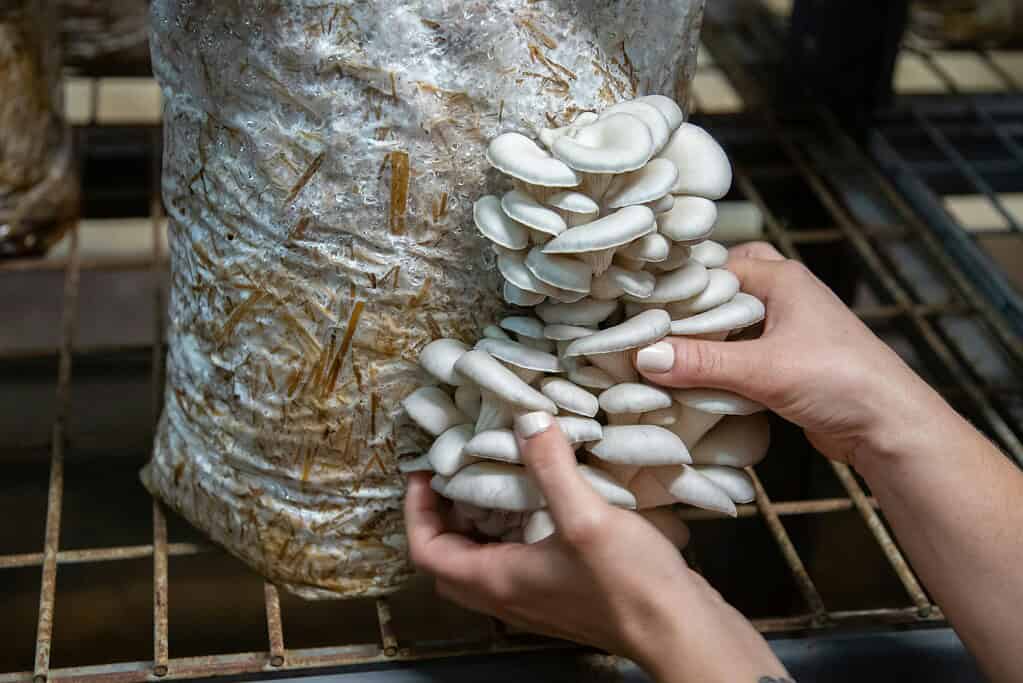
1. Oyster Mushrooms
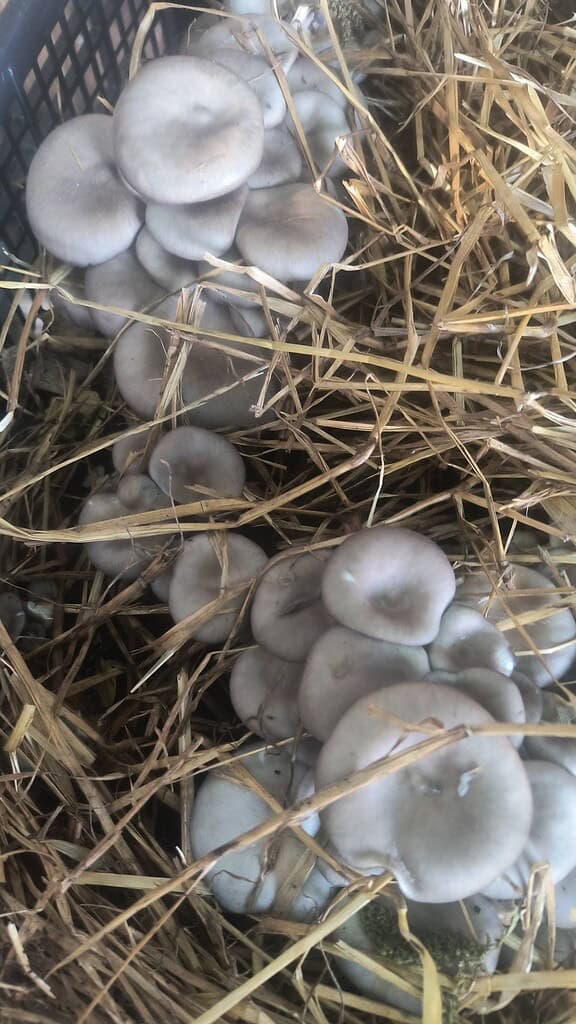
Oyster Mushrooms are the gateway crop of mushroom cultivation.
They grow on practically anything — straw, sawdust, cardboard, and especially used coffee grounds — and they fruit in clusters within just a few weeks of inoculation.
Their fan-shaped caps come in white, gray, pink, and golden varieties, all with a delicate, slightly sweet flavor that holds up beautifully in stir-fries and pasta dishes.
They’re also incredibly forgiving of beginner mistakes, recovering quickly from temperature swings or inconsistent humidity. If you’ve never grown mushrooms before, start here.
2. Shiitake Mushrooms

Shiitake Mushrooms are the second-most cultivated mushroom in the world for good reason — they’re meaty, rich in umami, and store well dried.
Traditionally grown on hardwood logs (oak, maple, or beech), they reward patience: it can take 6 to 18 months from inoculation to first flush, but a single log will then keep producing for 4 to 6 years.
The flavor of home-grown shiitakes is on a completely different level than the spongy ones at the supermarket. If you have access to freshly cut hardwood, this is one of the most rewarding long-term projects you can take on.
3. Lion’s Mane Mushrooms

Lions Mane Mushrooms look like white pom-poms and taste shockingly like crab or lobster when sautéed in butter.
They’ve also gained huge attention for their potential cognitive and nerve-health benefits.
They grow well on hardwood substrate or supplemented sawdust and absolutely thrive indoors, making them a perfect candidate for a kitchen-counter grow kit.
Lion’s Mane is also one of the easier gourmet varieties — it doesn’t require fanatic humidity control, just a few light mistings a day during fruiting.
4. Button Mushrooms
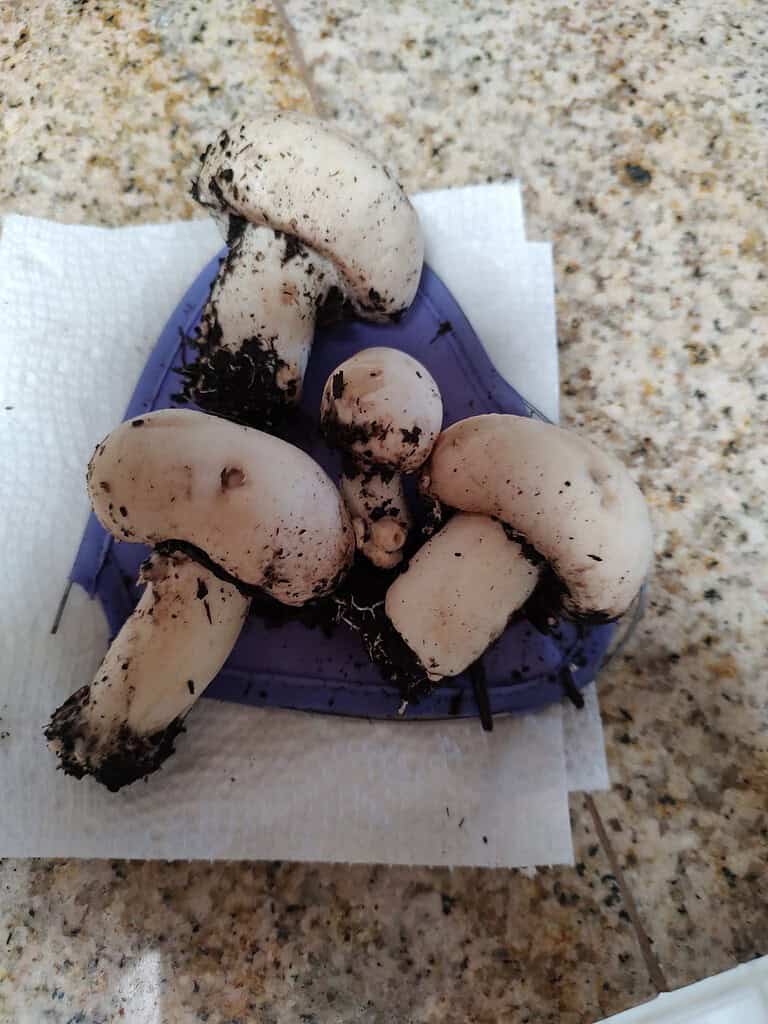
Button Mushrooms are the familiar little white caps in every grocery store, and yes — you can grow them at home.
They’re a composted-manure mushroom, so growing them is more about substrate preparation than wood choice. Buckets or shallow trays filled with sterilized compost work well, and a cool basement or garage offers ideal conditions.
They’re not the fastest mushroom to fruit, but if you cook with them every week, growing your own beats paying for plastic-wrapped trays at the store.
5. Portabella Mushrooms
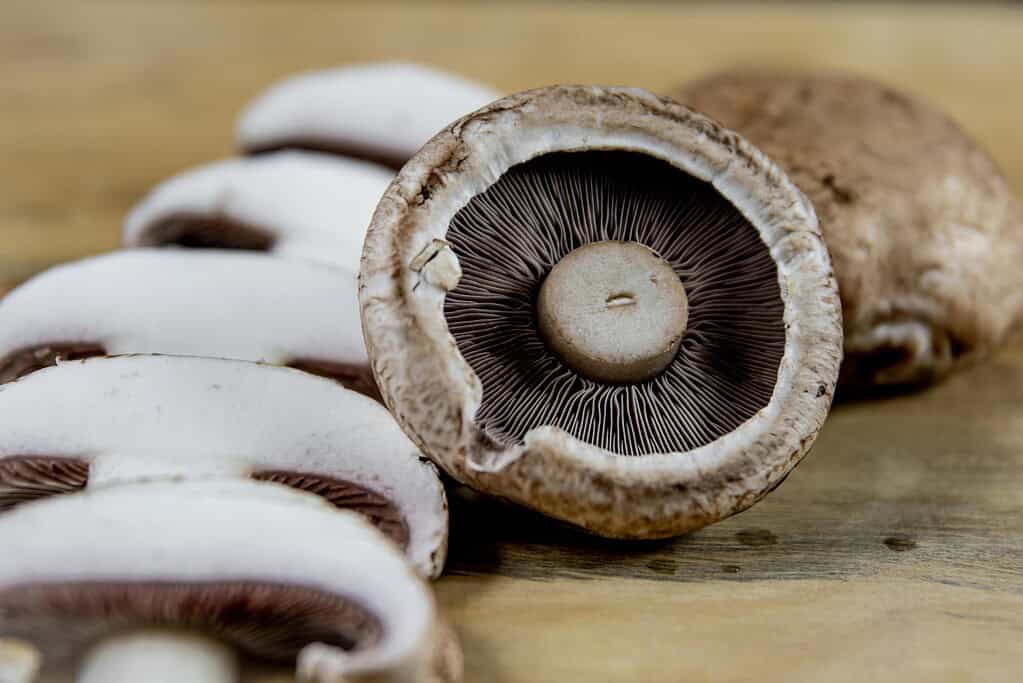
Portabella Mushrooms are simply mature Button Mushrooms that have been allowed to open up and develop deeper flavor. Same species, same substrate, same growing method — just more patience.
The reward is meaty caps thick enough to grill like a burger or stuff with cheese and breadcrumbs. If you’re already growing buttons, leaving a few to mature into portabellas is the easiest “two crops in one” trick in mushroom cultivation.
6. Enoki Mushrooms
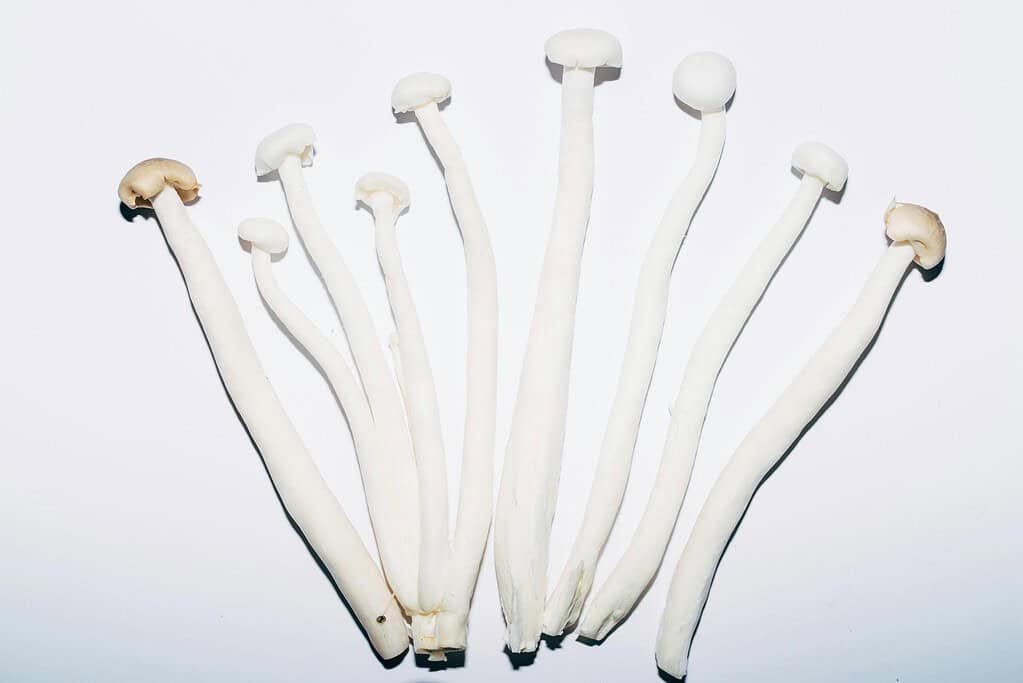
Enoki Mushrooms are those long, slender white mushrooms with tiny caps you see in Japanese soups and hot pots. They’re typically grown indoors in jars or narrow bottles, which forces them to stretch upward toward the light.
A cool, dark environment (around 45–55°F) produces the pale, delicate Enoki you recognize. Wild-grown Enoki actually look completely different — brown, stout, and tougher — which is why home cultivation is so worth the effort.
They’re a great choice for small spaces and temperature-controlled setups.
7. Winecap Mushrooms
Winecap Mushrooms (also called King Stropharia or Garden Giants) are an outdoor gardener’s dream. You grow them in a bed of fresh hardwood chips, often tucked between vegetable rows or under fruit trees.
The mycelium breaks down the wood chips into rich soil while producing massive burgundy-capped mushrooms with a flavor somewhere between potato and asparagus.
They’re nearly impossible to mess up — just keep the bed shaded and damp, and they’ll fruit summer through fall. For homesteaders, Winecaps double as a soil-building crop.
8. Turkey Tail
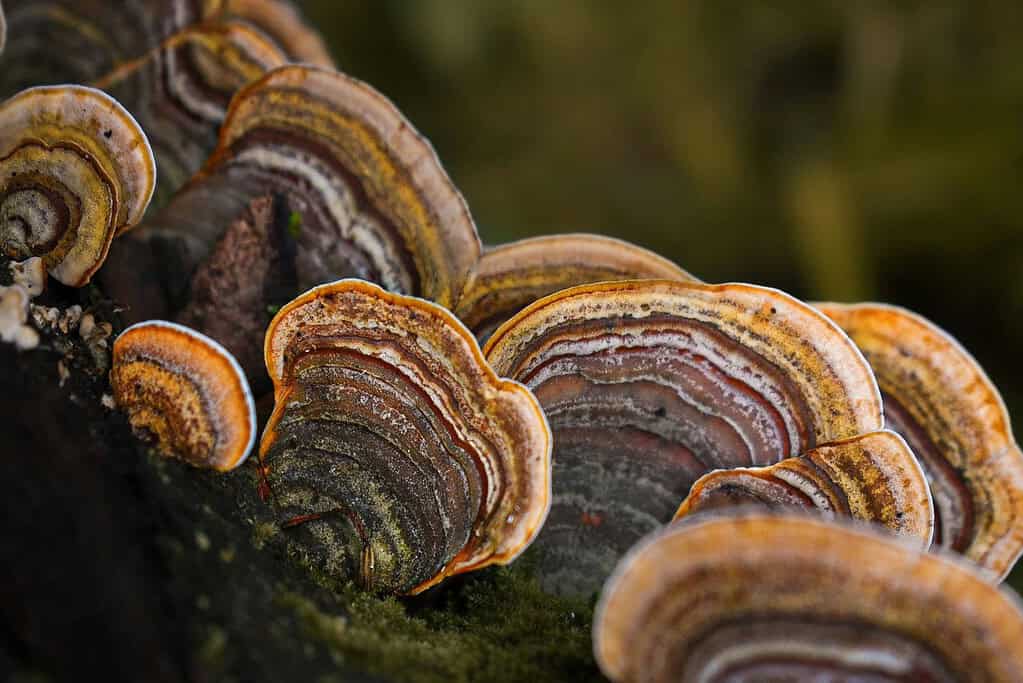
Turkey Tail is one of the most striking mushrooms in the forest — fan-shaped, banded with concentric rings of brown, tan, and cream.
It’s primarily grown for its medicinal properties (it’s been studied extensively for its immune-supporting compounds), often dried and brewed into tea.
It grows readily on hardwood logs and stumps, the same way Shiitake does, and is essentially maintenance-free once inoculated. Just inoculate a log, set it in a shady spot, and forget about it for a year.
It’s also a great primer if you’re getting into wild food foraging — Turkey Tail is one of the easiest wild species to identify.
9. Chicken of the Woods Mushrooms
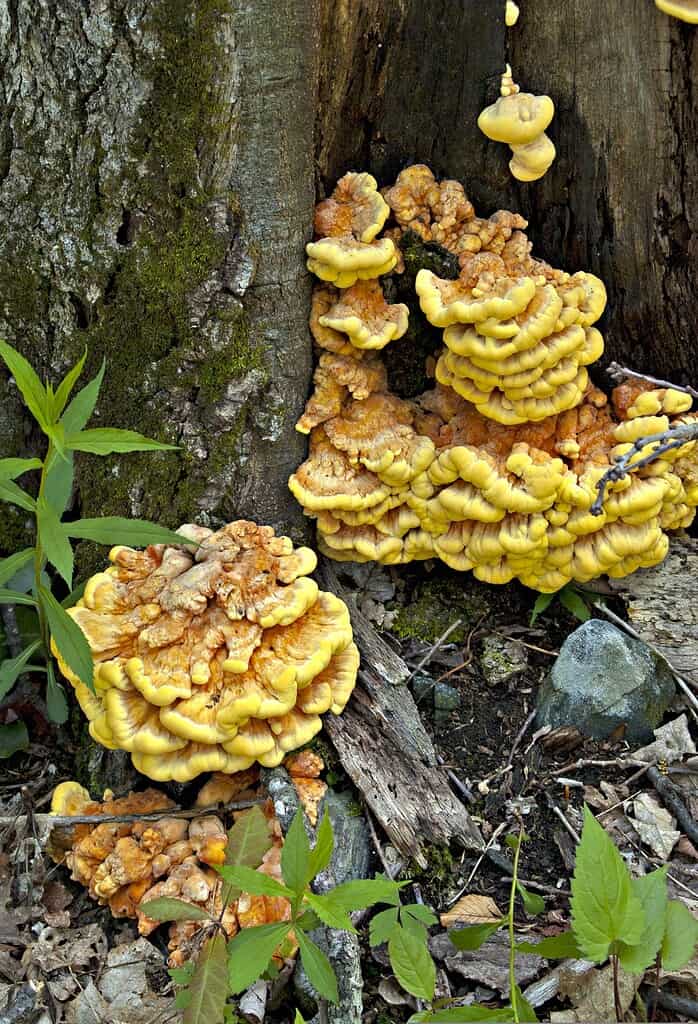
Chicken Of The Woods Mushrooms are bright orange and yellow shelf mushrooms that genuinely taste like chicken when cooked properly.
They’re more commonly foraged than cultivated, but if you have a hardwood log or stump (especially oak), you can inoculate it with Chicken of the Woods plug spawn and harvest your own.
They’re slow to establish but produce dramatic, multi-pound clusters once they get going. Always cook them thoroughly — some people have a sensitivity to undercooked Chicken of the Woods.
10. Maitake (Hen of the Woods) Mushrooms
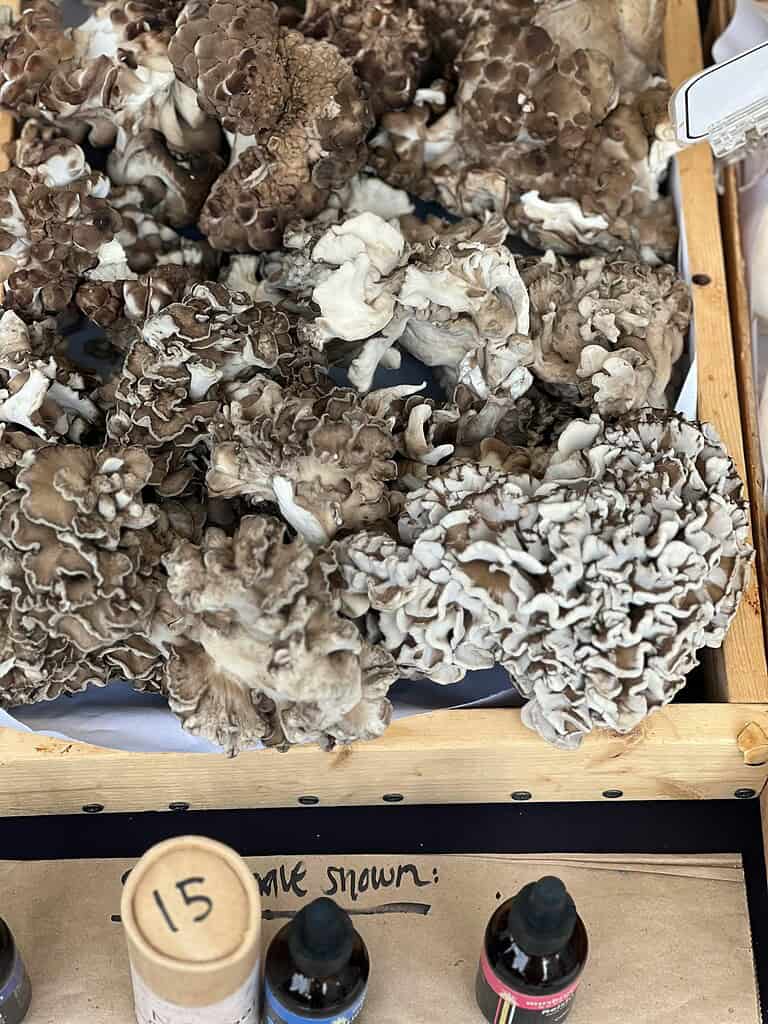
Maitake Mushrooms — also called Hen of the Woods — are a prized gourmet and medicinal mushroom that grows in feathery, gray-brown clusters at the base of oak trees.
Cultivated maitake is grown on hardwood logs (oak is best) buried partially in the ground, where they’ll fruit in autumn for several years.
The flavor is rich, earthy, and slightly peppery, and the texture stays satisfyingly firm even when sautéed for a long time.
They take 12 to 24 months to begin producing, but home-grown Maitake is genuinely a delicacy — at the farmers market it can sell for $30 or more per pound.
4 Easy Growing Methods for Beginners
Once you’ve picked your variety, the next step is choosing how to grow it. The four methods below cover almost every space, budget, and skill level.
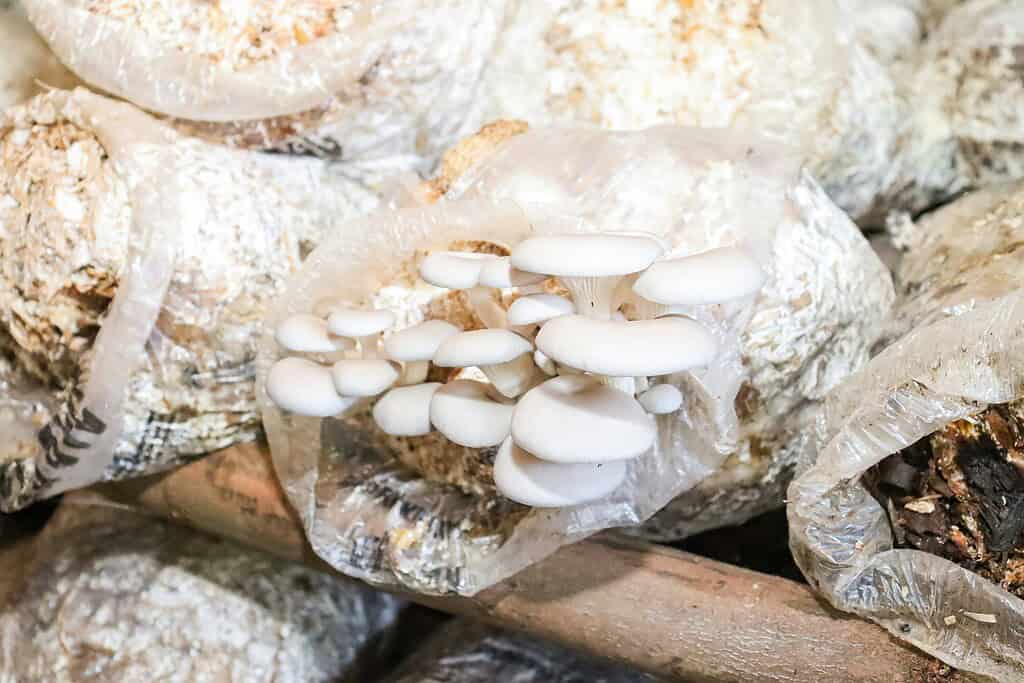
Growing Mushrooms In Buckets
This is the simplest scalable method on this list, and it’s especially well-suited for Oyster Mushrooms.
The setup is straightforward: take a clean 5-gallon bucket, drill ½-inch holes every 4 inches around the sides, fill it with pasteurized straw layered with mushroom spawn, and seal the top. In 2 to 4 weeks, fruit bodies will start popping out of every hole.
The bucket method costs almost nothing to set up, takes up less than a square foot of floor space, and gives you reliable harvests with minimal fuss.
It’s also a great fit for anyone learning to turn a tiny backyard into a homestead, since you can stack buckets vertically against a shaded wall or in a corner of a balcony.
Growing Mushrooms On Logs
Growing mushrooms on logs is the most traditional method and the one most associated with serious mushroom homesteading.
It works best for Shiitake, Turkey Tail, Lion’s Mane, Chicken of the Woods, and Maitake.
The process: cut fresh hardwood logs (oak, maple, beech, or birch) 3 to 4 feet long and about 4 to 6 inches in diameter, drill rows of holes, hammer in inoculated plug spawn, and seal each hole with melted wax.
After inoculation, stack the logs in a shaded, damp spot — somewhere with good airflow but protected from direct sun.
They’ll need 6 to 18 months for the mycelium to fully colonize the wood, but once they start fruiting, a single log will produce for 4 to 6 years.
If you already have outdoor wood storage figured out, these firewood storage ideas can easily be adapted for keeping inoculated logs dry, off the ground, and pest-free.
Growing Mushrooms Indoors
Growing mushrooms indoors is the most beginner-friendly method, especially if you don’t have outdoor space.
Pre-inoculated grow kits — usually a sealed bag of colonized substrate with a slit cut in the side — fruit on your kitchen counter with nothing more than a daily misting. They’re foolproof, mess-free, and produce a generous harvest in 10 to 14 days.
Lion’s Mane, Oyster, Shiitake, and Pink Oyster all do well indoors. The key is steady humidity (around 80–90% during fruiting) and indirect light. Many people set up a small “fruiting chamber” using a clear plastic tote and a humidifier, especially in dry climates.
If you’ve already mastered keeping things alive on a windowsill, you’ll find indoor mushrooms easier than expected. For related setup ideas, see this guide on how to start an indoor herb garden.
Growing Mushrooms In Coffee Grounds
This is the ultimate “use what you’d throw away” project — and it’s almost exclusively used for Oyster Mushrooms, which thrive in caffeinated substrates.
Coffee grounds are pre-pasteurized by the brewing process, which means you can skip the sterilization step that complicates other methods.
The recipe: collect about 2 pounds of fresh used coffee grounds (still warm if possible, and within 24 hours of brewing), mix with about ½ cup of Oyster Mushroom spawn, and pack into a clean container or filter-equipped bag with a few small air holes.
Keep it in a dark, room-temperature spot for 2 to 3 weeks until the substrate is fully white with mycelium, then move it to indirect light and start misting. You’ll have your first flush of Oyster Mushrooms in 7 to 10 days.
The method also pairs perfectly with a regular composting routine — if you’re already running compost tumblers and bin systems, the spent substrate finishes off into incredible compost after fruiting.
Miss it by a week and you lose the crop. The free 24-page planner pins down your exact dates — last frost, first frost, and the weekly steps between — so you plant on the days that actually work for your ZIP.
Free Planting Guides for This Article
Get exact planting dates, frost schedules, and growing tips for your zone:
How to Clone a Grocery Store Mushroom for Free, Endless Spawn
Once you’ve grown your first batch, you don’t have to keep buying spawn — you can clone any mushroom you want, including ones from the produce section, using almost no equipment.
This is one of those tricks that feels like cheating once you learn it.
The simplest method is called the stem butt technique:
- Take a fresh, healthy mushroom (Oyster and Lion’s Mane work especially well — avoid the typical white button, which is harder to clone successfully).
- Slice off the very bottom of the stem, including the small “footprint” of mycelium it was sitting in.
- Press that piece, fuzzy side down, into a small container of damp, pasteurized cardboard, sawdust, or coffee grounds.
- Seal the container with a few air holes and keep it warm (around 70°F) and dark for 1 to 3 weeks. You’ll see white mycelium spreading outward from the stem butt — that’s your homemade spawn.
Once the substrate is fully colonized, you can use it to inoculate a much larger batch the same way you’d use store-bought spawn.
The only catch: if you clone a hybrid or commercially bred mushroom, the resulting strain may grow weaker over multiple generations. Wild-foraged or specialty-farm mushrooms produce the most vigorous clones.
5 Mushroom Growing Myths That Sabotage Beginner Harvests
Most failed first harvests trace back to a handful of widespread myths — not skill or equipment. Clearing these up before you start saves a lot of frustration (and wasted spawn).
Myth 1: Mushrooms Need Total Darkness to Grow
The opposite is actually true. Mycelium will happily colonize substrate in the dark, but most species need indirect light to trigger fruiting.
A windowsill with bright but indirect light works perfectly — direct sun, on the other hand, will dry your mushrooms out fast.
Myth 2: You Need a Sterile Lab Setup
For beginner methods like buckets, coffee grounds, and grow kits, simple pasteurization (or no preparation at all) is enough.
Full sterilization with a pressure cooker only matters if you’re making your own grain spawn from scratch — and most home growers never need to.
Myth 3: Mushrooms Grow From Seeds
They actually grow from “spawn” — colonized grain, sawdust, or wooden plugs that already contain living mycelium. Seeds aren’t part of the mushroom life cycle at all.
This is why ordering “mushroom seeds” online almost always disappoints; what you actually want is labeled spawn from a reputable supplier.
Myth 4: More Water Means Bigger Mushrooms
Soggy substrate is the number-one killer of home grows. Mushrooms need humidity in the air — not waterlogged growing medium.
A daily light misting beats a heavy watering every time, and overwatered substrate quickly invites mold instead of mushrooms.
Myth 5: All Mushrooms Want the Same Conditions
Pink Oysters love 70–80°F warmth, while King Oysters prefer a cool 50–60°F. Pairing the wrong variety with your environment is one of the most common reasons a “perfect” setup still fails to fruit.
Always check your specific variety’s temperature range before choosing where to grow it.
Best gardening planner I've used in 10 years — and I keep coming back to it every season.
How Hard Is It to Garden in Your County?
Every county has a unique Gardening Difficulty Score based on frost risk, soil quality, drought, altitude, and climate trends. Find yours — plus personalized frost dates, planting calendars, and soil data.
Check Your County's Score →Pick Your First Mushroom and Start Growing This Week
Mushroom cultivation is one of those rare homestead projects where the hardest part is just getting started.
Pick one variety from the list above — Oyster Mushrooms in coffee grounds is the ideal starter combo — and commit to a single small batch this week.
You’ll be harvesting in less time than it takes to grow a head of lettuce, and you’ll quickly understand why so many homesteaders end up with a dedicated mushroom corner in their kitchen, basement, or backyard.
Start small, document what works, and don’t be afraid to experiment. Each variety has its own personality, and half the joy is figuring out which mushrooms suit your space and palate.
Have you grown mushrooms at home before, or is this your first time? Share your experience, your favorite variety, or any questions in the comments below — we’d love to hear what’s working in your setup.
Plan Your Garden With Confidence!

Ever start planting… and then realize halfway through that things feel a little scattered?
A simple plan changes everything.
When you sketch your layout first, you can see what fits, what flows, and what actually makes sense for your space. It saves time, money, and a whole lot of second-guessing later.
Our free Garden Planner helps you map out beds, organize plant spacing, rotate crops, and keep track of seasonal tasks – all in a clean, printable format you can actually use.
Whether you’re designing a low maintenance front yard or planning your full homestead garden, this gives you a clear starting point.
Less chaos. More clarity. A garden that works.
- Tomatoes
- Peppers
- Beans
- Squash
- Cucumbers
- Basil
FAQs
Are home-grown mushrooms safe to eat?
Yes — as long as you’re using mushroom spawn from a reputable supplier and following sanitation basics. The risk people associate with mushrooms comes from foraging and misidentifying wild species, which doesn’t apply when you’re growing from labeled, lab-tested spawn.
Just discard any growth that smells off, looks slimy, or shows green or black mold (instead of white mycelium), and always cook your mushrooms thoroughly before eating.
How long do mushroom grow kits keep producing?
Most countertop grow kits will give you 2 to 3 flushes (harvests) over 4 to 8 weeks before the substrate is exhausted. To extend that, soak the kit in cold water for 12 to 24 hours between flushes to rehydrate it.
Once it stops producing, the spent substrate makes excellent compost or can be transplanted into an outdoor wood chip bed for a chance at additional fruiting outdoors.
Do I need special equipment to grow mushrooms at home?
Not for beginner methods. Bucket and coffee-grounds setups need almost nothing beyond what’s already in your kitchen — a drill, a spray bottle, and clean containers.
If you scale up to log inoculation, you’ll need a high-speed drill bit sized to your spawn plugs, food-grade wax, and a wax dauber. A pressure cooker becomes useful only when you’re sterilizing your own substrate from scratch, which most home growers never need to do.
Can I grow mushrooms outdoors year-round?
It depends on your climate and the variety. Winecap Mushrooms and log-grown Shiitake will fruit reliably during warm, humid months and go dormant in winter — they’ll come back the next growing season as long as the substrate stays intact.
In freezing climates, outdoor logs and beds essentially “pause” until temperatures rise again. Indoor methods, on the other hand, give you year-round harvests regardless of the weather.
Why are my mushrooms growing oddly shaped or not fruiting at all?
Long, spindly stems with tiny caps usually mean low oxygen — open up the fruiting chamber and increase fresh air exchange. No fruiting at all (after a substrate is fully colonized) typically points to humidity or temperature issues.
Most varieties need a temperature drop of 5 to 10°F to trigger fruiting, plus humidity around 85 to 90%. If you’re doing everything right and still nothing happens after 4 to 6 weeks, the spawn may have been weak or contaminated — it’s worth starting fresh with a new batch.
Level Up Your Garden
Our most popular gardening guides


