Building a mini farm in your backyard might sound like something that requires a lot of land, but that really is not the case.
Even a small space can produce a surprising amount of food when it is planned well.
A few raised beds, some vertical growing space, and maybe even a small chicken coop can turn an ordinary backyard into a productive little homestead. It is less about how much land you have and more about how you use it.
If you have been wanting to grow more of your own food and make your backyard work harder for your family, this guide will show you how to build a mini farm in a small backyard space step by step.
Why a Small Backyard Mini Farm Is More Achievable Than You Think
Many aspiring homesteaders assume that farming requires land—lots of it.
But micro homesteading and urban agriculture movements have proven that productivity is about smart design, not just square footage.
A well-organized mini farm can produce hundreds of pounds of food per year on a typical suburban lot.
The key is intentional planning: using vertical space, choosing high-yield crops, and layering your growing systems to maximize output.
Garden Planner
The 24-page planner timed to your county's real frost dates. Planting windows, monthly checklists, and a harvest log you'll fill with pride by August.
Your Free 24-Page Garden Planner
Built for your exact ZIP code — planting dates, harvest log, and a month-by-month plan. 15-second sign-up.
A Simple 8-Step Plan to Build a Mini Farm in a Small Backyard Space
If you’ve been waiting until you have more space, more money, or more time—this guide is your sign to start now. You can build a thriving mini farm incrementally, adding elements as your confidence (and budget) grow.
Step 1: Assess Your Space and Set Realistic Goals
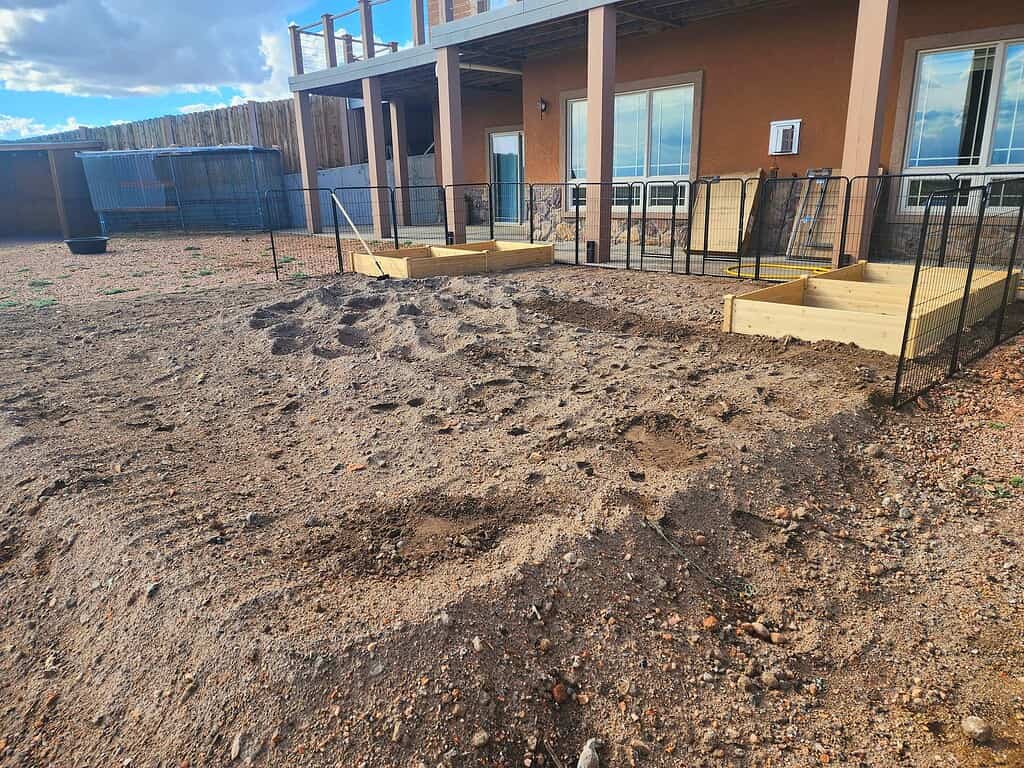
Before buying seeds or building raised beds, take stock of what you’re working with.
Walk your backyard at different times of day and note where the sun falls for 6 or more hours—these are your prime growing zones.
Observe where water pools after rain, which areas get strong wind, and where existing trees or structures cast shade.
Once you understand your space, set concrete goals.
- Are you aiming to grow enough salad greens for daily consumption?
- Supplement your grocery bill with seasonal vegetables?
- Raise a small backyard flock?
Having a clear vision will guide every decision you make. If you need help organizing your garden zones, the free Garden Planner from The Ultimate Homestead is an excellent starting tool.
Sketch a Simple Layout Before You Build
Even a rough hand-drawn sketch helps you visualize spacing, pathways, and zoning.
Divide your backyard into functional areas: a growing zone (beds and containers), a composting zone, a water storage area, and if space allows, a small animal zone.
Use your sketch to think through foot traffic—you’ll want clear pathways between beds to make harvesting easy.
For layout inspiration, browse our guide to homestead garden layouts to see what other small-space growers have achieved.
Step 2: Choose Your Growing Systems Wisely
One of the biggest advantages of a small backyard mini farm is that you can mix and match growing systems to make the most of limited space.
Here are the most effective options for small-space growers:
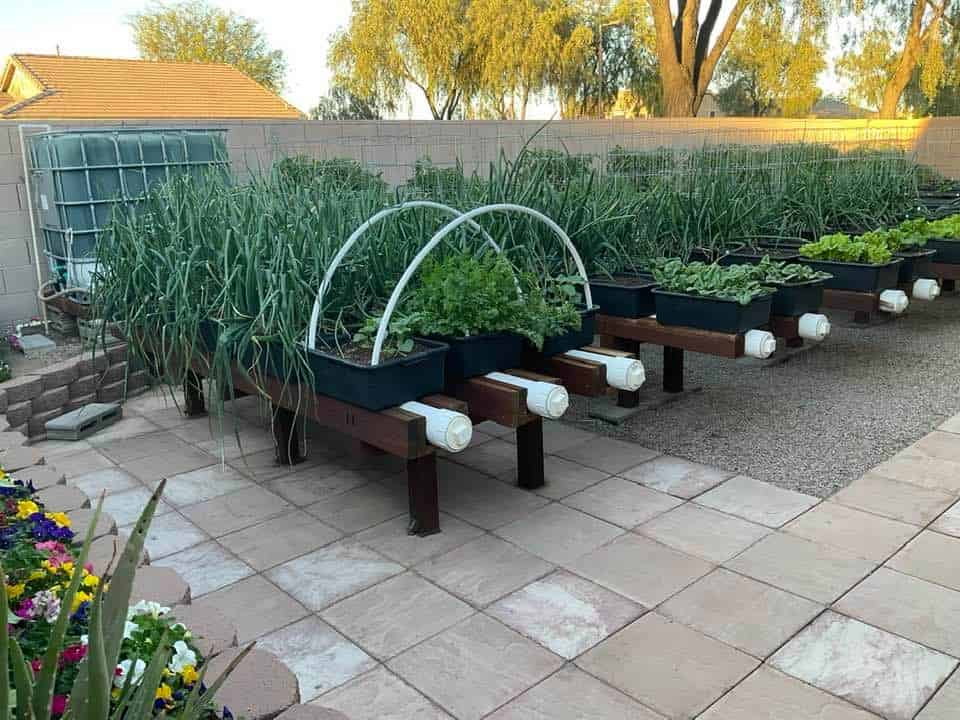
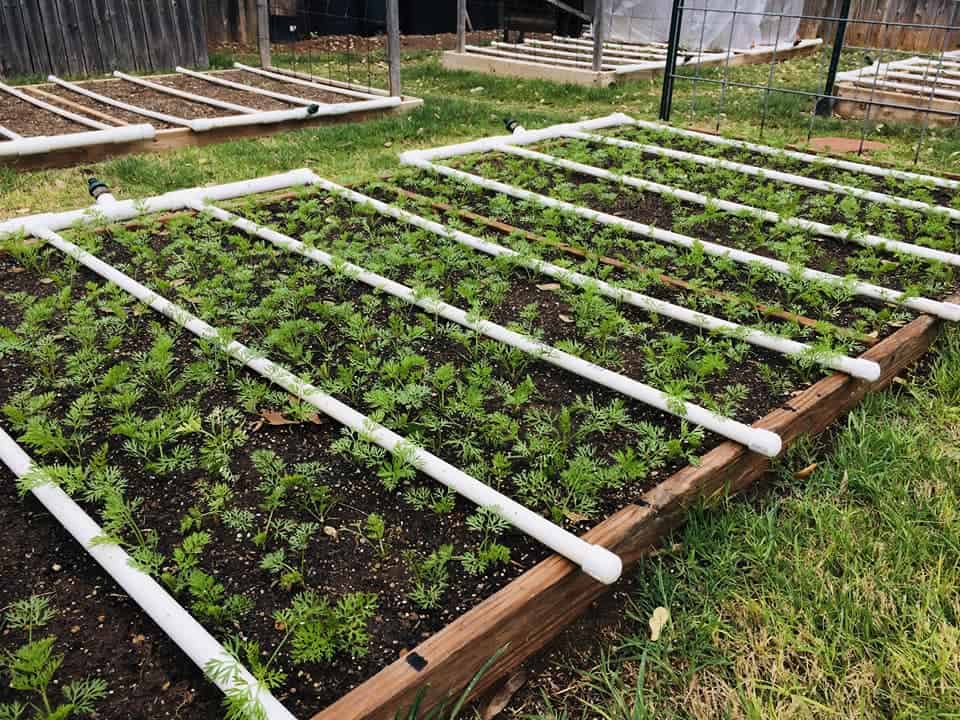
Raised Garden Beds
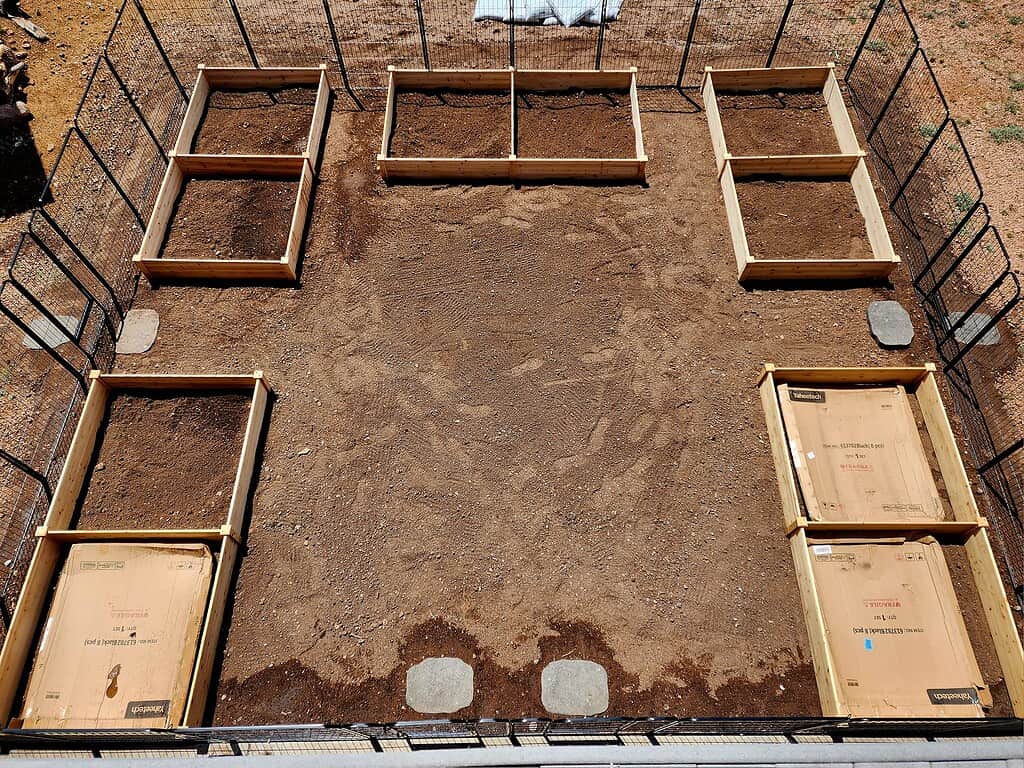
Raised beds are the foundation of most mini farms. They warm up faster in spring, drain better than in-ground soil, and let you control soil quality completely.
A standard 4×8 raised bed can grow an impressive amount of food—lettuce, kale, carrots, beets, tomatoes, peppers, and more.
Start with two or three beds and expand as you learn what grows best in your microclimate. If budget is a concern, check out our guide to building raised beds with no money using reclaimed materials.
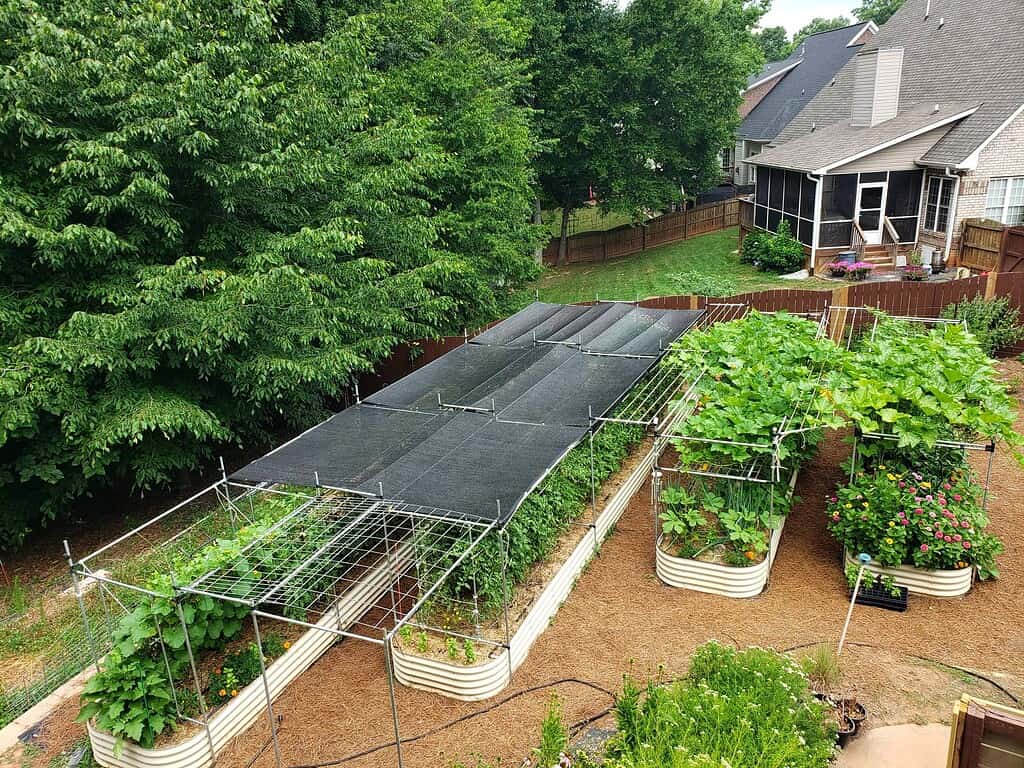
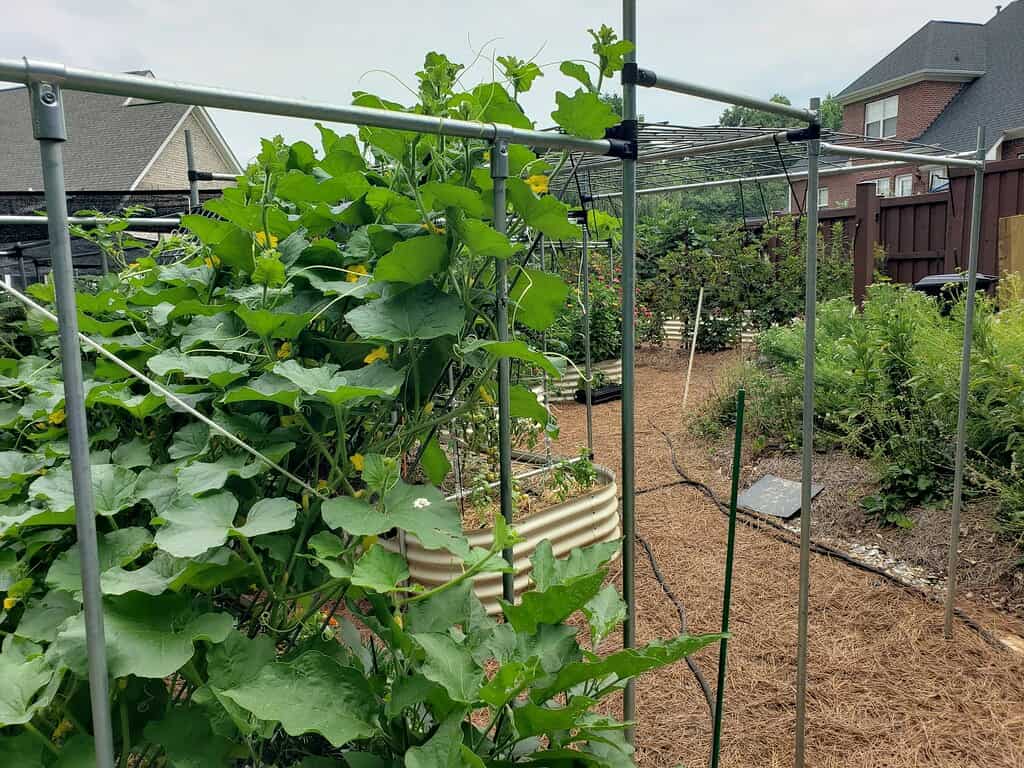
Vertical Gardening
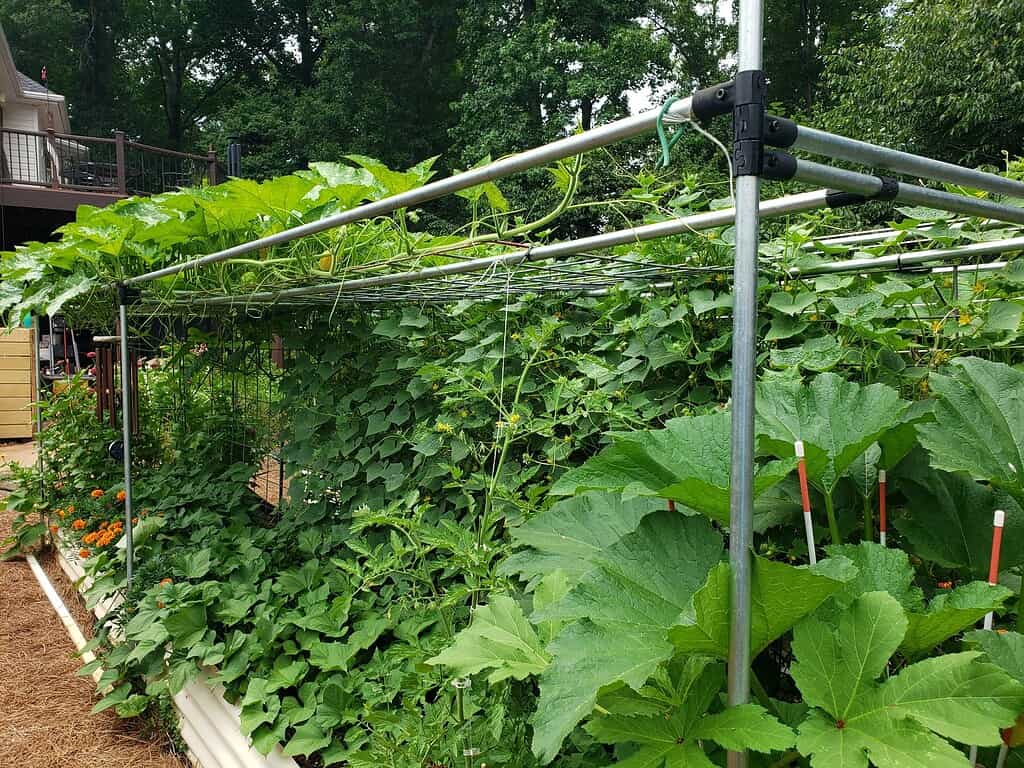
When horizontal space is limited, go up.
Trellises, cattle panels, and wall-mounted planters allow you to grow vining crops like cucumbers, beans, squash, and tomatoes without sacrificing ground-level planting space.
A single cucumber trellis can support six or more plants in just a few square feet of footprint. Lean trellises against fences, build A-frame supports, or install wall pockets along a south-facing wall.
Vertical growing also improves air circulation, which reduces fungal disease pressure.
Container Gardening
Containers are incredibly versatile—move them to follow the sun, tuck them on patios and porches, or stack them vertically.
Almost any vegetable can thrive in a container if the pot is large enough. Our container vegetable garden guide covers the best crops, pot sizes, and soil mixes to get you started.
Herbs like basil, thyme, parsley, and rosemary are particularly well-suited to containers and can be kept close to your kitchen door for easy harvesting.
Step 3: Select the Best Crops for a Small Backyard Farm
Not all vegetables are created equal when it comes to small-space productivity. Focus on high-value, high-yield crops that earn their keep in limited square footage.
Top Vegetables for Small Backyard Farms
Leafy greens like lettuce, spinach, kale, and Swiss chard are some of the most productive crops per square foot you can grow.
They mature quickly, can be harvested repeatedly (cut-and-come-again), and thrive in cooler temperatures.
Spinach and lettuce can be succession-planted every two weeks so you always have a continuous harvest through spring and fall.
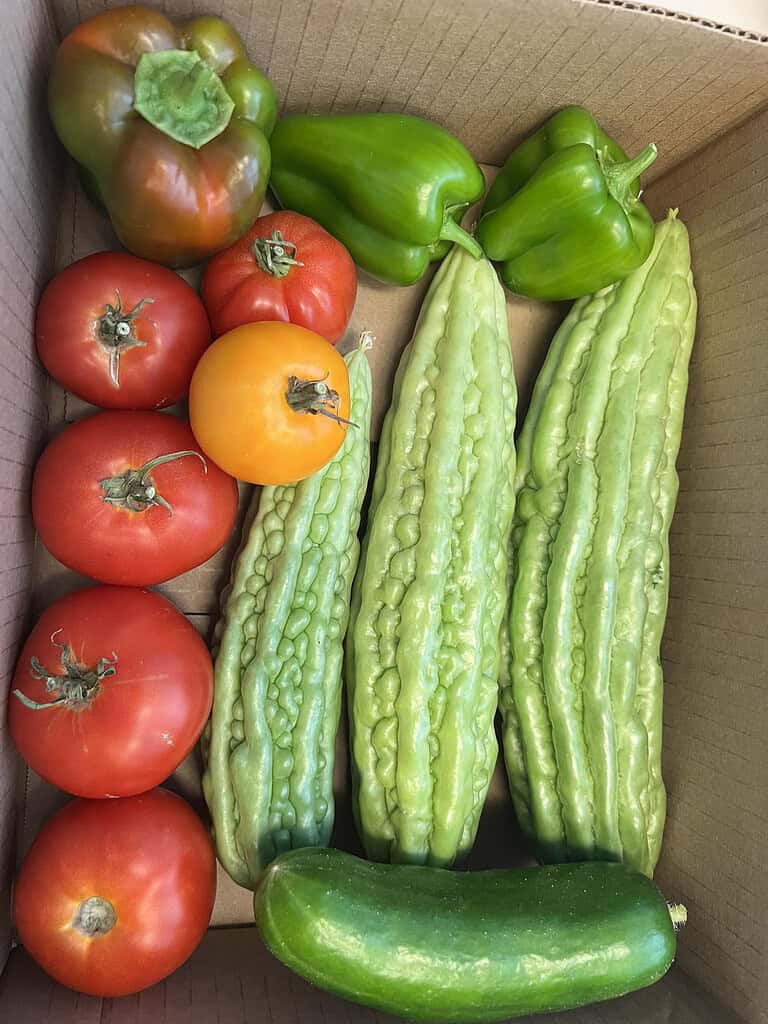
Tomatoes, peppers, and cucumbers are warm-season workhorses that produce heavily from a single plant. Train them vertically to save space and keep them productive all season long.
Root vegetables like carrots, beets, and radishes are invisible above ground and double the capacity of any bed—pair them with taller crops like tomatoes or trellised beans to maximize every inch.
Our easiest vegetables to grow list is a great reference for beginners who want reliable harvests without overwhelming complexity.
Don’t Overlook Herbs
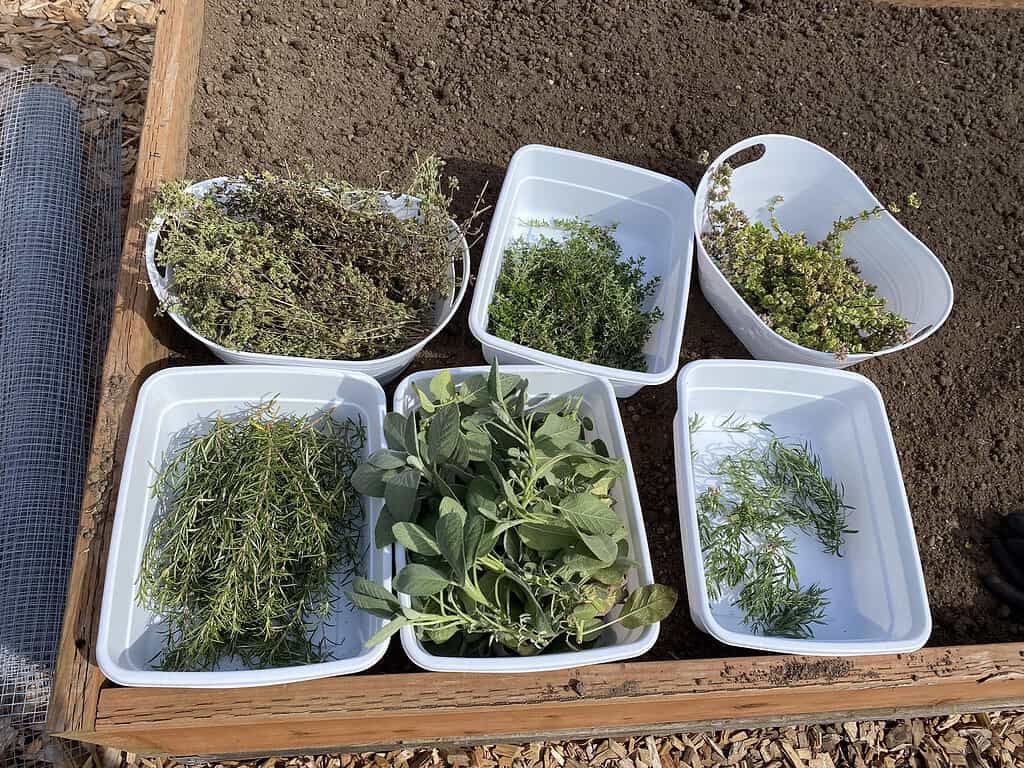
Herbs punch above their weight in terms of value. Growing your own basil, thyme, oregano, chives, and mint means you’ll rarely need to buy them again—and fresh herbs elevate every meal.
Consider building a dedicated herb garden near your back door or in containers on your patio. Once established, most perennial herbs require minimal care and will return year after year.
Use Companion Planting to Maximize Production
Companion planting is the practice of growing mutually beneficial plants together to improve yields, deter pests, and use space efficiently.
Classic combinations include tomatoes with basil, the Three Sisters (corn, beans, squash), and carrots with onions.
Our in-depth companion planting guide walks you through the best pairings for every major vegetable so you can plant smarter, not harder.
Step 4: Build Healthy Soil on a Small Scale
Healthy soil is the foundation of a productive mini farm. In raised beds and containers, you control the soil mix entirely—which is a massive advantage over in-ground gardening.
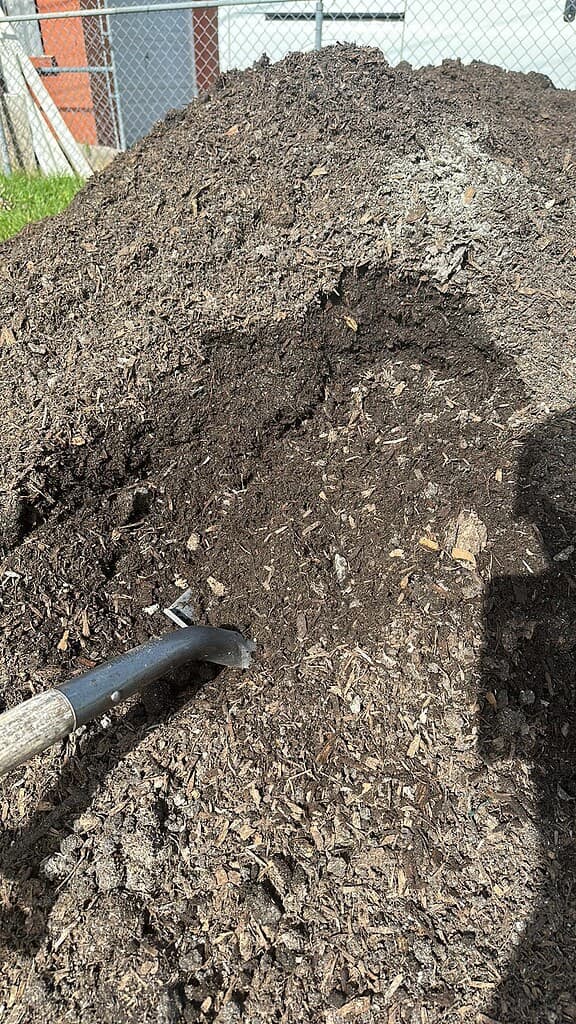
Start with a quality mix of topsoil, compost, and aeration material like perlite or vermiculite.
Refresh your beds each season with a 1–2 inch layer of compost to replenish nutrients and maintain soil structure.
Start Composting Right Away
Every mini farm should have a composting system. Kitchen scraps, garden waste, and even chicken manure (if you keep backyard hens) can be turned into rich, free fertilizer.
Even a small corner of the yard is enough for a simple pallet compost bin. If you’re new to composting, our beginner’s guide to composting covers the basics in plain language.
Regular composting closes the loop on your food system—your food scraps become the fuel for next season’s harvest.
Use Natural Fertilizers
Beyond compost, natural fertilizers like fish emulsion, worm castings, and kelp meal support vigorous plant growth without synthetic chemicals.
If you’re on a tight budget, learn to make your own liquid fertilizer from comfrey leaves, nettle, or banana peels—all incredibly effective and completely free once you have the ingredients growing in your garden.
Step 5: Set Up Efficient Water Management
Water management is critical in a small backyard farm because raised beds and containers dry out faster than in-ground beds.
Setting up an efficient irrigation system saves time, conserves water, and keeps your plants consistently hydrated—which directly translates to better yields.
A simple drip irrigation system connected to a timer is one of the best investments you can make for your mini farm.
Drip irrigation delivers water directly to the root zone, reduces evaporation, and significantly cuts down on fungal disease by keeping foliage dry.
Pair your irrigation system with a DIY rain barrel system to harvest rainwater and reduce your water bill. Even a single 55-gallon barrel can supply days of watering for a modest backyard farm.
Step 6: Add Small Animals for a True Mini Farm Experience
What truly sets a mini farm apart from a regular vegetable garden is the integration of small animals.
Even in limited space, a small backyard flock or a compact animal setup can dramatically increase your farm’s productivity and self-sufficiency.
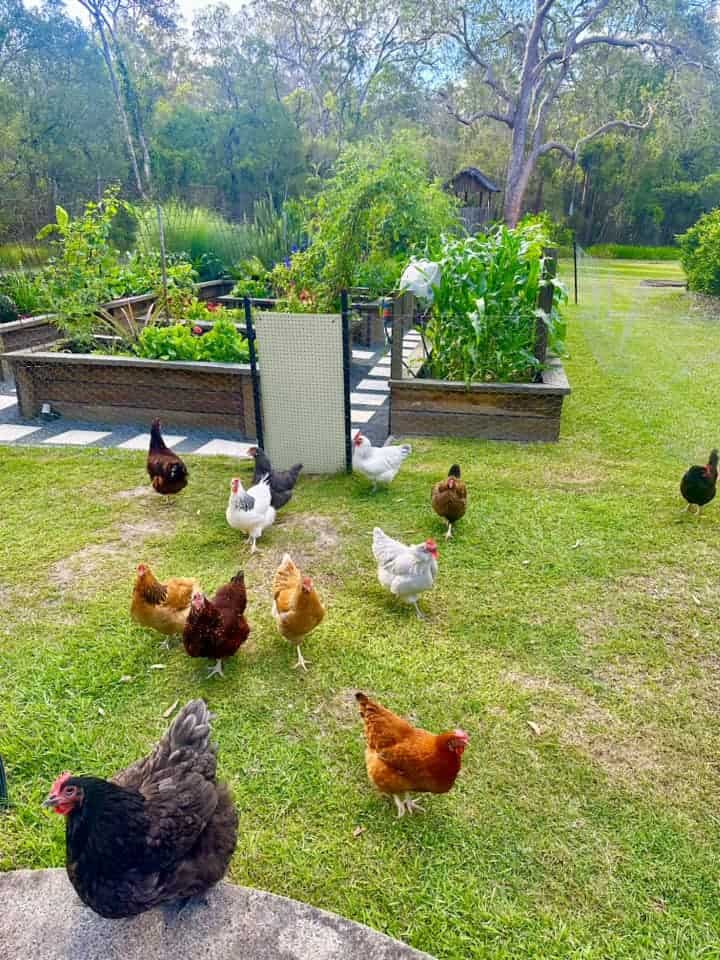
Backyard Chickens
A flock of three to six hens is manageable even in a small backyard and provides a steady supply of fresh eggs.
Hens also produce nitrogen-rich manure that, once composted, is exceptional garden fertilizer.
Before getting chickens, check your local ordinances—many municipalities allow small backyard flocks with restrictions on roosters.
Our guide to raising chickens for beginners covers everything from choosing a breed to setting up your first coop.
For space-conscious setups, explore our small chicken coop ideas for designs that fit even the tightest backyards.
Quail as a Space-Saving Alternative
If chickens feel like too much for your space, consider quail. Coturnix quail are tiny, quiet, and prolific egg layers—a small cage of six quail produces roughly one egg per bird per day.
They require a fraction of the space and feed that chickens need, making them one of the best small-space livestock options.
Read our guide on how to raise quails to learn if they might be the right fit for your mini farm.
Step 7: Preserve What You Grow
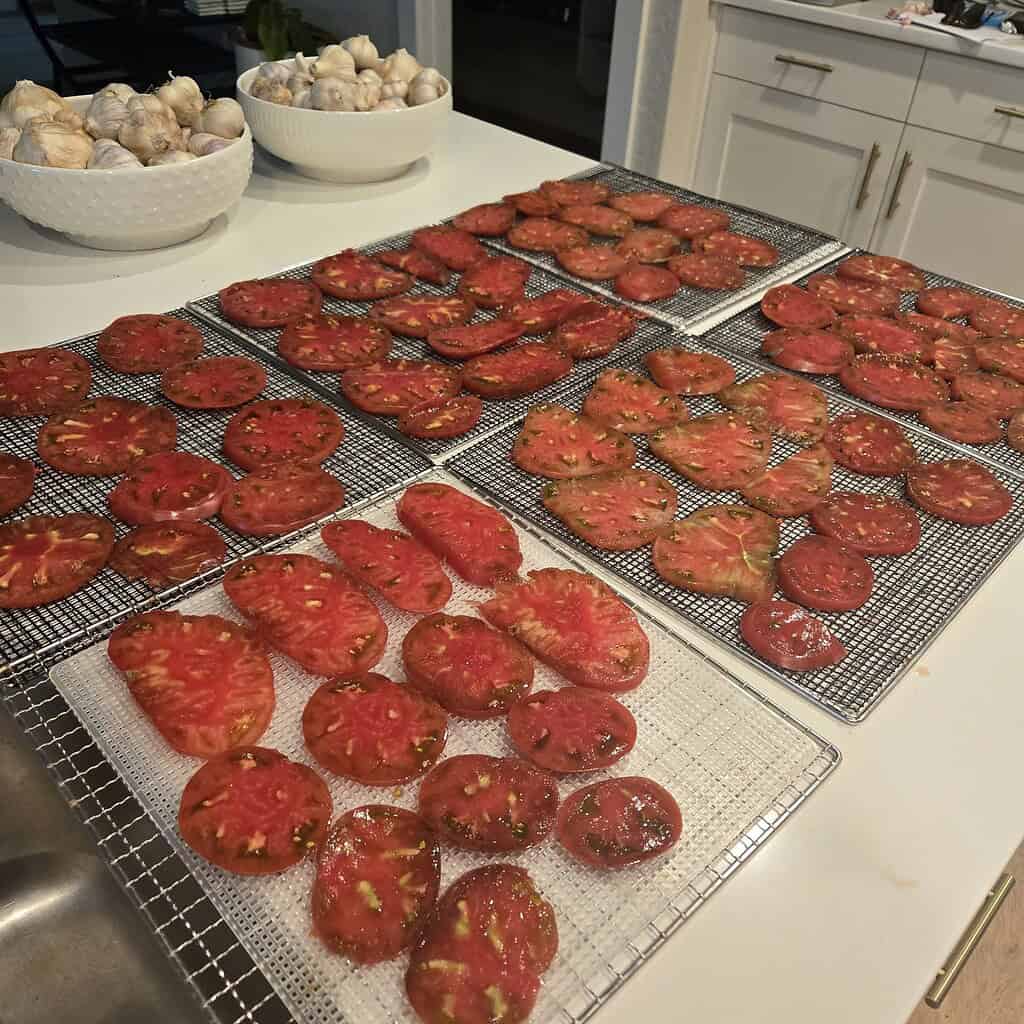
The real payoff of a mini farm isn’t just fresh summer produce—it’s the ability to preserve your harvest and eat from your garden year-round.
Learning basic food preservation skills like canning, drying, and fermenting can save you hundreds of dollars annually and drastically reduce food waste.
Start simple: dry your herbs at the peak of summer, make a few jars of tomato sauce when your plants are bursting with fruit, and freeze excess greens for winter smoothies.
If you want to dive deeper, our guide to drying herbs at home is a perfect starting point.
For those ready to tackle canning, our canning for beginners guide breaks down the process in safe, straightforward steps.
Step 8: Make Your Mini Farm Sustainable Year-Round
A truly productive mini farm keeps working across all four seasons, not just summer.
With the right tools and plant selection, you can grow food ten to twelve months out of the year even in cooler climates.
Cold frames and low tunnels extend your growing season by four to six weeks on both ends, allowing you to start seedlings earlier in spring and harvest cold-hardy greens well into winter.
Cold frame gardening requires minimal investment and can be built from reclaimed windows and scrap lumber. For a more ambitious setup, consider a small DIY greenhouse to grow year-round regardless of your climate.
Choose crops wisely by following a vegetable planting calendar specific to your growing zone.
Succession planting—sowing new seeds every few weeks—ensures continuous harvests rather than feast-or-famine cycles.
Our succession planting chart makes it easy to stay on schedule throughout the entire growing year.
Free Planting Guides for This Article
Get exact planting dates, frost schedules, and growing tips for your zone:
Start Your Mini Farm Today: Your First Three Steps
Building a mini farm in a small backyard doesn’t happen overnight—but it absolutely can happen.
The homesteaders who succeed aren’t the ones with the most land or the biggest budgets. They’re the ones who start small, learn by doing, and keep building on their progress one season at a time.
Here’s your action plan to get started this week:
- First, walk your backyard and identify your sunniest zone—that’s where your first raised bed will go.
- Second, sketch a simple layout on paper, deciding where you want beds, a compost bin, and a water source.
- Third, order seeds or seedlings for three high-yield crops suited to your current season—greens if it’s cool, tomatoes or peppers if it’s warm.
That’s it. Those three steps will put you farther ahead than a year of reading and planning without acting.
Need more inspiration? Explore our complete guide to how to start backyard farming and our collection of backyard garden ideas to see how real homesteaders are making the most of their outdoor spaces. The mini farm of your dreams is closer than you think—and the best time to start building it is right now.
Have you started a mini farm in your backyard? What’s been your biggest challenge—or your proudest harvest?
Drop a comment below and share your experience with our community! We’d love to hear what’s growing in your backyard.
Miss it by a week and you lose the crop. The free 24-page planner pins down your exact dates — last frost, first frost, and the weekly steps between — so you plant on the days that actually work for your ZIP.
How Hard Is It to Garden in Your County?
Every county has a unique Gardening Difficulty Score based on frost risk, soil quality, drought, altitude, and climate trends. Find yours — plus personalized frost dates, planting calendars, and soil data.
Check Your County's Score →Plan Your Garden With Confidence!

Ever start planting… and then realize halfway through that things feel a little scattered?
A simple plan changes everything.
When you sketch your layout first, you can see what fits, what flows, and what actually makes sense for your space. It saves time, money, and a whole lot of second-guessing later.
Our free Garden Planner helps you map out beds, organize plant spacing, rotate crops, and keep track of seasonal tasks – all in a clean, printable format you can actually use.
Whether you’re designing a low maintenance front yard or planning your full homestead garden, this gives you a clear starting point.
Less chaos. More clarity. A garden that works.
Frequently Asked Questions
How do I deal with poor native soil if I want to grow in-ground instead of raised beds?
If your native soil is compacted clay, sandy, or depleted, in-ground growing is still possible with the right soil amendment strategy.
Start by getting a soil test to understand your soil’s pH and nutrient profile, then amend accordingly with compost, aged manure, and organic matter.
The lasagna gardening method—layering cardboard, compost, and organic material directly on poor soil—can transform even the worst ground into a productive growing area without heavy digging or tilling. Give it one growing season to break down and you’ll be amazed at the results.
What permits or regulations do I need to be aware of before building a mini farm?
Before you build structures like coops, large raised beds, or greenhouses, check your local zoning ordinances and HOA rules. M
any municipalities have specific rules about livestock (including chickens and quail), beehives, and permanent structures in residential yards.
Raised beds typically don’t require permits, but fencing, coops, and greenhouses sometimes do depending on their size and whether they are considered permanent structures.
Call your local planning office or visit your city’s website to review residential agricultural codes—it’s a five-minute step that can save you from having to dismantle something you’ve built.
How do I manage pests organically without using chemical sprays in a small backyard?
Organic pest management in a small backyard farm relies on prevention and ecosystem balance.
Start by encouraging beneficial insects—ladybugs, lacewings, and ground beetles—by planting flowering herbs and companion plants throughout your beds.
Physical barriers like row covers and copper tape are highly effective against specific pests. For aphids, a strong spray of water or a homemade insecticidal soap solution works well. Neem oil is a versatile organic option for a wide range of insects and fungal issues.
The key is to monitor your plants regularly so you can catch infestations early, when they’re easiest to address without resorting to chemicals.
How much time does it actually take to maintain a small backyard mini farm each week?
This is one of the most common questions, and the honest answer is: it depends on your setup, but far less than most people expect.
A well-designed mini farm with drip irrigation, mulched beds, and low-maintenance crops typically requires 30–60 minutes of active maintenance per day during the growing season—mostly watering, harvesting, and light weeding.
During off-peak seasons, that drops to a few hours per week. If you’re balancing a full-time job, our guide to homesteading with a full-time job offers practical strategies for making your mini farm fit around a busy schedule.
Can I make money from a small backyard mini farm, or is it only useful for personal consumption?
Many small backyard farmers do generate income from their mini farms—and it doesn’t require a large operation to do so.
Selling surplus produce at local farmers markets, offering CSA shares to neighbors, growing microgreens or cut flowers for restaurant clients, selling eggs from backyard hens, or marketing value-added products like preserves and dried herbs are all viable income streams.
Our in-depth resource on how to make money on a homestead covers the most profitable ways to monetize your growing operation, no matter how small your space. Even a modest setup can generate meaningful supplemental income with the right market focus.
Level Up Your Garden
Our most popular gardening guides


