If you’ve been dreaming about adding bees to your homestead but don’t know where to start, you’re not alone. Beekeeping feels intimidating at first — the gear, the stings, the mystery of the hive.
But here’s the truth: thousands of beginners start their first hive every year with little more than curiosity and a willingness to learn, and most of them are genuinely glad they did.
Bees are one of the most rewarding additions you can make to a homestead of any size. Whether you’re just getting started with homesteading or you’ve been at it for years, a hive or two fits naturally into the bigger picture of self-sufficient living.
This guide covers everything you need to know to start your first hive — from the gear and hive types to sourcing bees, setting up your apiary, and getting through your first full season with confidence.
Why Keep Bees on Your Homestead?
Beekeeping does more than just produce honey. It’s one of those easy homestead projects that pay dividends in multiple ways — some you’ll see quickly, others that unfold over seasons.
Here’s what a healthy hive actually brings to your property:
- Pollination boost — Bees dramatically improve the yields of your vegetable garden, fruit trees, and berry patches. Many homesteaders notice a visible difference in fruit set within the very first growing season after installing a hive.
- Honey and beeswax — A healthy hive in a good location can produce 20–60+ pounds of honey per year, plus beeswax for making candles, lip balm, wood polish, and salves.
- Propolis — Bees produce this sticky resin with antifungal and antimicrobial properties. It’s harvested and used in natural health products and tinctures.
- Ecosystem support — Even one hive contributes meaningfully to local pollinator populations, benefiting your neighbors’ gardens and the broader landscape.
- Connection to the seasons — Beekeeping teaches observation, patience, and attunement to natural cycles in ways that other homestead tasks don’t quite replicate.
Bees fit right alongside other productive animals on the homestead. Just as raising backyard chickens means learning new routines and building consistent daily habits, beekeeping asks you to show up regularly — and rewards you generously when you do.
Garden Planner
The 24-page planner timed to your county's real frost dates. Planting windows, monthly checklists, and a harvest log you'll fill with pride by August.
Your Free 24-Page Garden Planner
Built for your exact ZIP code — planting dates, harvest log, and a month-by-month plan. 15-second sign-up.
Essential Beekeeping Equipment for Beginners
Before your bees arrive, you need the right gear. The startup cost is reasonable, and most of it lasts for years. Here’s what you actually need to get started:
Protective Gear
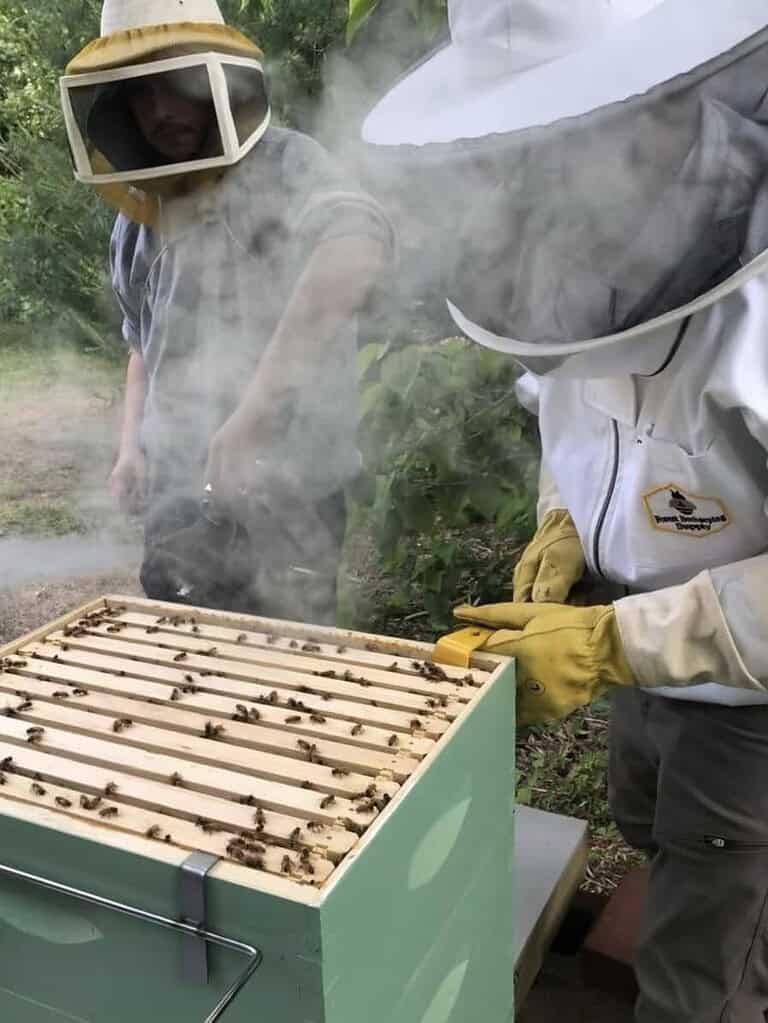
- Beekeeping suit or jacket with veil — A full suit is the safest choice for beginners. Many experienced beekeepers eventually move to just a jacket and veil, but full coverage builds confidence and keeps inspections calm early on.
- Gloves — Leather or nitrile. Leather is more protective; nitrile gives better dexterity. Start with leather until you’re comfortable reading bee behavior.
- Boots — Wear tall boots or tuck your pants into your socks. Bees investigate gaps at the ankles — don’t give them an easy target.
Hive Tools
- Hive tool — A flat pry bar used to separate frames and boxes that bees glue together with propolis. You’ll use this at every single inspection.
- Smoker — Smoke calms bees by masking alarm pheromones and triggering a feeding instinct. Learn to use it confidently — it’s your most important inspection tool.
- Bee brush — A soft brush for gently moving bees off frames without crushing them.
- Inspection notebook — Record every hive visit: date, weather, brood pattern, queen signs, honey stores, and temperament. This habit is worth its weight in gold when diagnosing problems later.
Choosing Your Hive Type: Langstroth, Top-Bar, or Warré?
There are several hive designs, each with its own philosophy and advantages. For beginners, the most important thing is choosing one type and learning it thoroughly — not bouncing between systems.
Langstroth Hive (Most Recommended for Beginners)
The Langstroth is the most widely used hive design in North America. It uses standardized removable frames, making it easy to inspect, treat, and harvest.
Replacement parts, local beekeeping knowledge, and mentors are all oriented toward Langstroth — which matters enormously when you’re troubleshooting your first hive.
- Pros: Abundant resources, interchangeable parts, ideal for honey production, widest community support
- Cons: Full honey supers can be heavy (40–60 lbs), requires bending over during inspections
Top-Bar Hive
A horizontal hive where bees build comb naturally downward from removable bars, mimicking the cavity of a hollow log.
Inspections are gentler on the bees and easier on your back. That said, fewer local beekeepers use top-bar hives, which means finding mentors and troubleshooting support is harder.
- Pros: More natural comb-building, no heavy lifting, lower upfront cost
- Cons: Lower honey yield, fragile natural comb, smaller knowledge community
Warré Hive
Designed to mimic a tree cavity, the Warré emphasizes bee health and minimal intervention over maximum honey production.
A solid choice for beekeepers primarily interested in pollination and supporting bee populations rather than maximizing harvest.
Bottom line for most beginners:

Start with a Langstroth. You'll have more local help, more online resources, and more standardized equipment options when things don't go exactly to plan.
Miss it by a week and you lose the crop. The free 24-page planner pins down your exact dates — last frost, first frost, and the weekly steps between — so you plant on the days that actually work for your ZIP.
How to Source Your First Bees
There are three main ways to get your first colony, each with different advantages:
- Package bees — A screened box containing roughly 10,000 worker bees and a caged mated queen. Ordered from a supplier and shipped in spring. This is the most common starting point and widely available. Order early — reputable suppliers sell out by January or February for spring delivery.
- Nucleus colony (nuc) — Five drawn-comb frames with established brood, honey stores, workers, and an actively laying queen. A nuc is more established than a package and easier to install successfully. Buying locally means the bees are already adapted to your climate and forage season.
- Catching a swarm — Swarms are free, local, and often very gentle. Colonies of bees searching for a new home. Many beekeeping clubs maintain swarm-catcher lists you can join. Swarms are unpredictable, so treat this as a bonus option rather than your primary plan.
Your local beekeeping association is the best place to find vetted suppliers, nuc sellers, and club package orders. Also check your state’s department of agriculture for a list of licensed apiary sellers in your area.
Choosing the Right Location for Your Hive
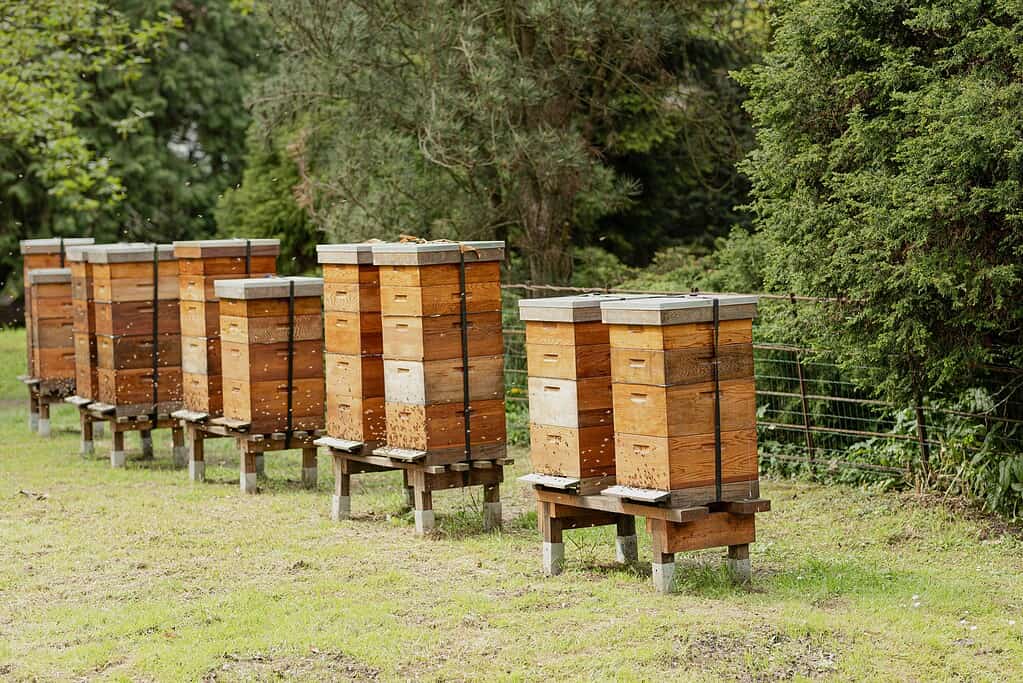
Hive placement makes a bigger difference than most beginners expect. The wrong spot can lead to overheated colonies, stressed bees, and unhappy neighbors.
Here’s what to look for when siting your apiary:
- Morning sun, afternoon shade — An east-facing entrance gets bees moving early. Afternoon shade in hot climates reduces heat stress inside the hive.
- Windbreak to the north and west — Hedges, fences, or outbuildings help during winter.
- Away from foot traffic — Position hives so the flight path doesn’t cross walkways, play areas, or neighbor property lines. A fence or hedge behind the hive naturally redirects bees upward.
- A nearby water source — Bees need water daily. If you don’t provide it, they’ll find your neighbors’ birdbaths or pool. Set out a shallow dish with pebbles or corks near the hive from day one so bees develop that habit early.
- Forage access within 2 miles — Bees forage in a radius of up to 2 miles. Wildflowers, clover, fruit trees, and diverse garden plantings all contribute to a well-nourished colony.
Beekeeping is more adaptable to small and urban spaces than most people realize. Many beekeepers in cities and tight suburban lots maintain thriving hives on rooftops, in side yards, or tucked into a corner against a fence.
If you’re approaching this from an urban homesteading perspective, bees can absolutely work — the key is managing the flight path and ensuring your neighbors know what you’re doing (and maybe offering them some honey).
Best gardening planner I've used in 10 years — and I keep coming back to it every season.
Your First Season: What to Expect Month by Month
Beekeeping is a seasonal practice, and the more you align your management with the natural rhythm of the colony, the better your results.
This is true across all of homesteading — planning your tasks around the calendar is one of the most effective habits you can build, which is why a thorough month-by-month homesteading to-do list is such a valuable tool for anyone managing multiple projects on the property.
Spring: Installation and Early Build-Up
This is when you install your package or nuc. After installation, resist the urge to open the hive every day. Give the bees 5–7 days to settle before your first inspection.
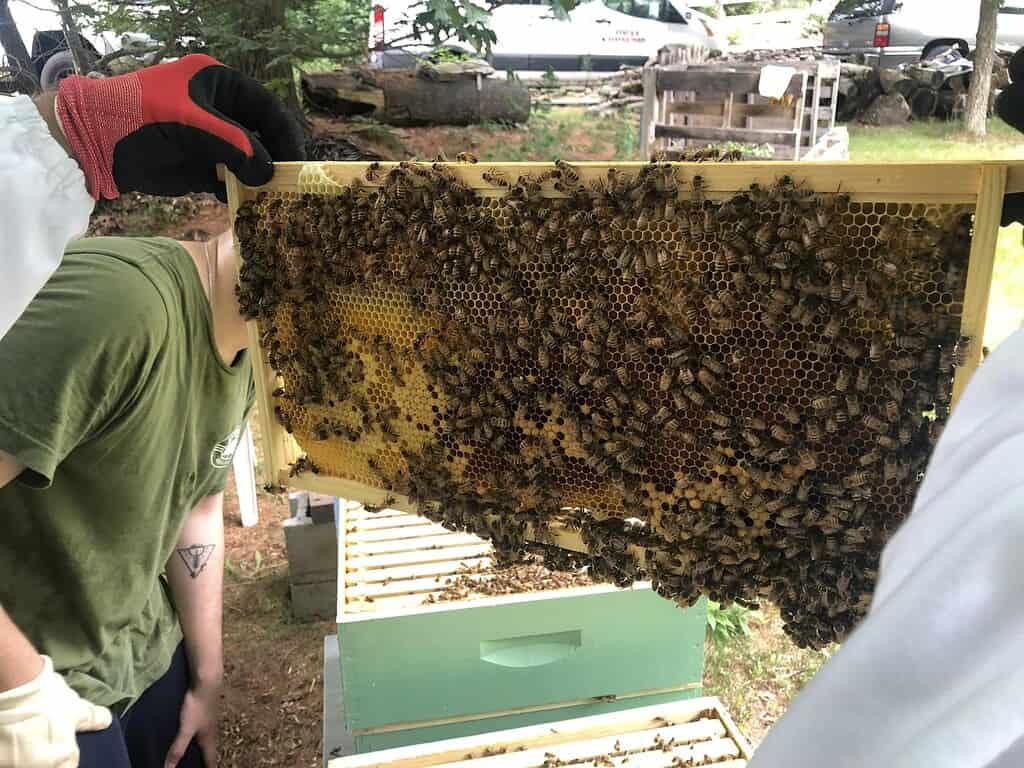
You’re looking for: eggs, young larvae, and evidence that the queen is actively laying. Add a second brood box when the first is around 70–80% full of drawn comb and bees.
Summer: Peak Activity and Swarm Prevention
Colony population peaks during the main nectar flow. Inspect every 7–10 days during build-up. Watch for queen cells (they look like peanuts hanging off the comb face) — these signal the colony is preparing to swarm.
A swarm means losing half your bees and all their foraging experience. Add honey supers as needed and give the colony room to grow.
Fall: Winterizing the Hive
The colony contracts as nectar sources dry up.
Your main fall tasks: treat for Varroa mites (the leading cause of colony collapse worldwide), confirm the colony has 60–80+ pounds of honey stores for winter, and reduce the entrance to minimize cold drafts and deter robbing bees from weaker hives nearby.
Winter: Minimal Intervention
In cold climates, bees form a tight cluster to generate warmth. Don’t open the hive during cold snaps. On mild days above 50°F, do a quick external check.
Heft the back of the hive — if it feels light, the bees are short on honey and may need emergency fondant or candy boards to survive until spring.
Common Beginner Mistakes to Avoid
Most beekeeping problems come from a handful of predictable mistakes. Being aware of them before your first season puts you well ahead of the curve.
- Inspecting too often — or not enough — Weekly inspections make sense during swarm season. But opening the hive every few days stresses bees and disrupts their work. In winter, skip full inspections entirely.
- Ignoring Varroa mites — Varroa destructor is the number-one killer of managed colonies worldwide. Monitor mite loads using an alcohol wash or sticky board, and treat when levels exceed safe thresholds. Don’t delay treatment out of a desire to be “treatment-free” before you fully understand mite biology and population dynamics.
- Starting with only one hive — Two hives are dramatically better than one. You can compare them side by side, share resources (brood, honey frames) between them, and use a strong colony to help a struggling one recover.
- Skipping the local club — A local mentor is worth more than any book or video. Beekeeping associations offer beginner courses, mentorship pairings, and in-person inspection help that’s invaluable in your first year.
- Harvesting honey in year one — First-year colonies need every pound of honey they produce to survive winter. Most experienced beekeepers don’t harvest in year one at all. Be patient — there’s plenty of honey ahead in future seasons.
Beekeeping also requires showing up consistently, even when life gets hectic.
If you’re managing a homestead alongside a full-time job, the guide to homesteading with a full-time job is full of realistic strategies for staying on top of animal and garden tasks without running yourself ragged.
- Tomatoes
- Peppers
- Beans
- Squash
- Cucumbers
- Basil
How Hard Is It to Garden in Your County?
Every county has a unique Gardening Difficulty Score based on frost risk, soil quality, drought, altitude, and climate trends. Find yours — plus personalized frost dates, planting calendars, and soil data.
Check Your County's Score →Beekeeping as Part of a Self-Sufficient Homestead
Bees aren’t just an add-on — they’re a cornerstone of a productive, resilient homestead.
Pollination, honey, beeswax, and propolis all compound in value over time, and the benefits ripple outward to every other part of your growing operation.
The principles of modern homesteading are all about integrating animals, plants, and land so that each part supports the others — and bees fit that philosophy as well as any animal you’ll keep.
Your garden performs better, your fruit trees produce more, and your understanding of the naturalworld deepens with every season you spend paying attention to the hive.
Ready to Start? Take These Steps Before Your Bees Arrive
Beekeeping isn’t as complicated as it looks from the outside — but it does reward people who prepare thoughtfully. Use this checklist to get yourself set up for a strong first year:
- Join your local beekeeping association and sign up for a beginner course or apprenticeship program.
- Order your hive equipment — two Langstroth deep brood boxes, frames with foundation, a bottom board, inner cover, and outer cover.
- Pre-order your package bees or nuc by December or January for spring delivery — suppliers sell out fast.
- Scout and prepare your hive site — level stand, windbreak, clear flight path, water source in place.
- Pick up one solid beginner book and read it before your bees arrive — The Beekeeper’s Handbook by Diana Sammataro or Beekeeping for Dummies are both excellent starting points.
Have you kept bees before, or are you thinking about starting your first hive this year?
We’d love to hear where you are in the process — drop a comment below and share what’s holding you back, what excites you most, or any questions you have.
The homesteading community here is incredibly helpful, especially for first-timers getting started!
Plan Your Garden With Confidence!

Ever start planting… and then realize halfway through that things feel a little scattered?
A simple plan changes everything.
When you sketch your layout first, you can see what fits, what flows, and what actually makes sense for your space. It saves time, money, and a whole lot of second-guessing later.
Our free Garden Planner helps you map out beds, organize plant spacing, rotate crops, and keep track of seasonal tasks – all in a clean, printable format you can actually use.
Whether you’re designing a low maintenance front yard or planning your full homestead garden, this gives you a clear starting point.
Less chaos. More clarity. A garden that works.
Frequently Asked Questions
How much does it actually cost to start beekeeping?
A single hive setup typically runs $300–$600 depending on whether you buy a beginner kit or piece equipment together yourself — this covers the hive body, frames, protective gear, smoker, and hive tool. Bees (package or nuc) add another $150–$250.
Buying used equipment through a local club can reduce costs noticeably, but inspect carefully: never use used hive components from a colony that died of American Foulbrood, a bacterial disease that can persist in the woodware for years.
Do I need a permit or license to keep bees at home?
Regulations vary widely by state, county, and municipality. Many states require hive registration with the department of agriculture — typically free or low-cost and designed for disease monitoring, not to restrict beekeeping.
Some cities and suburban areas set rules about hive setbacks from property lines or cap the number of colonies per lot. Research your local ordinances before buying a single piece of equipment, and contact your state apiarist’s office to understand registration requirements where you live.
What if I react to bee stings — can I still keep bees?
There’s an important distinction here. A mild local reaction — swelling, redness, and soreness at the sting site — is normal and not an allergy. A systemic reaction — hives elsewhere on your body, difficulty breathing, dizziness, or throat tightening — is a true allergic response and a medical emergency.
If you’ve had a systemic reaction to stings in the past, consult an allergist before starting beekeeping. Allergy immunotherapy (a series of desensitization injections) is available and has allowed many sting-allergic beekeepers to keep hives safely. Those who continue beekeeping with a known allergy typically work with a partner, always wear full protective gear, and carry an EpiPen.
What’s the best time of year to start beekeeping?
Spring is the ideal time to install your first colony. In most parts of North America, this means April or May — when temperatures are consistently above 50°F, flowers are blooming, and the colony has an entire season to build up stores before winter.
However, the planning and ordering process needs to start in late fall or early winter. Reputable bee suppliers open order books as early as November or December, and packages and nucs sell out quickly. Starting your research in winter — even if your bees don’t arrive until April — puts you in the best possible position.
How do I know if my queen is still alive without seeing her?
You don’t have to spot the queen to confirm she’s present and laying — which is good, because finding her in a busy hive can be genuinely tricky for beginners. Instead, look for her evidence: fresh eggs (they look like tiny grains of rice standing upright in the cells) and young larvae at various stages of development.
If you see eggs, the queen was present and laying within the last three days. A solid, consistent pattern of capped brood — sometimes called a “tight” brood pattern — is a sign of a healthy, productive queen. Spotty, scattered brood with many empty cells can indicate a failing or failing queen and warrants closer investigation.
Level Up Your Garden
Our most popular gardening guides


