If you’ve put time and energy into growing herbs this season, the last thing you want is to watch them wilt, yellow, and go to waste.
Drying herbs at home is one of the most practical, rewarding, and surprisingly simple food preservation skills you can develop as a homesteader.
Once you know the right methods, you’ll always have a well-stocked herb shelf — and you’ll never need to buy those overpriced, flavor-depleted jars at the grocery store again.
Whether you’re working with fresh rosemary, a bumper crop of basil, or bundles of lavender from your garden, this guide walks you through every reliable method for drying herbs at home, with practical tips to preserve the oils, color, and flavor that make homegrown herbs worth growing in the first place.
If you're just getting started with growing your own herbs, check out our guide on herb gardening for beginners to set yourself up for a successful harvest.
Why Drying Herbs at Home Is Worth the Effort
Store-bought dried herbs can sit on warehouse and retail shelves for months, sometimes years, before they reach your kitchen.
By the time they arrive, most of the essential oils — the compounds responsible for flavor and aroma — have already faded.
When you dry your own herbs, you’re preserving them at their peak freshness, right after harvest when flavor is most concentrated.
Beyond flavor, home-dried herbs give you full control over what goes into your pantry. No additives, no irradiation, no mystery.
You can also explore how to grow spices at home to expand what you can dry and preserve from your own garden.
Garden Planner
The 22-page planner timed to your county's real frost dates. Planting windows, monthly checklists, and a harvest log you'll fill with pride by August.
Your Free 22-Page Garden Planner
Built for your exact ZIP code — planting dates, harvest log, and a month-by-month plan. 15-second sign-up.
When to Harvest Herbs for Drying (Timing Is Everything)

The quality of your dried herbs starts long before you hang them up or turn on a dehydrator. Harvest timing directly affects how much flavor you’ll preserve, and there are a few key rules to follow.
Harvest Before Flowering
For most culinary herbs — basil, oregano, mint, thyme, sage — harvest before the plant begins to flower. Once a plant bolts and puts energy into producing seeds, the leaves lose potency.
The moment you see flower buds forming, it’s time to cut.
For basil especially, you’ll want to act quickly; learn more about how to prune basil to keep plants productive and prevent premature flowering.
Harvest in the Morning
The best time to harvest herbs is in the morning, after the dew has dried but before the midday sun heats the leaves.
This is when essential oil concentration is highest. Avoid harvesting during or after rain, as wet herbs are more prone to mold during drying.
Choose Healthy, Mature Sprigs
Select stems that are green, vigorous, and free from pests or disease. Avoid yellowing leaves, damaged stems, or anything that looks stressed.
For herbs like lavender, timing is particularly important — see our guide on how to harvest lavender like a pro to get the timing exactly right.
Method 1: Air Drying (The Classic Homestead Approach)
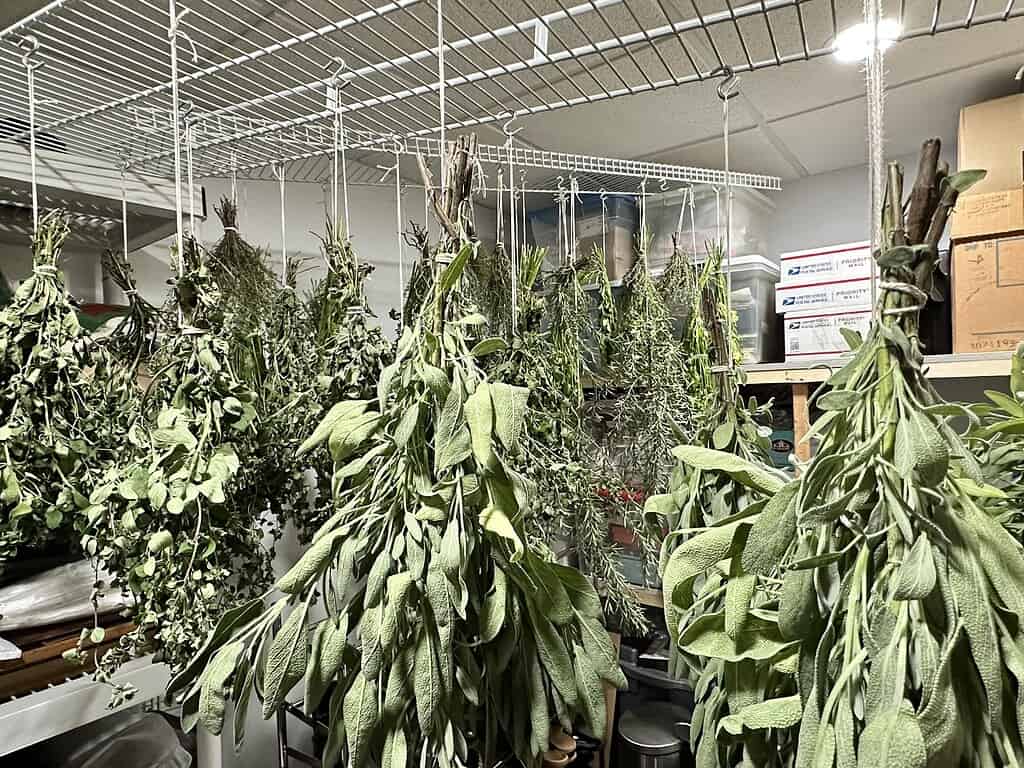
Air drying is the oldest method in the book, and for good reason — it requires zero equipment, costs nothing, and works beautifully for most herbs. The key is good airflow, low humidity, and patience.
How to Air Dry Herbs by Hanging

Gather 5–10 stems into a small bundle and secure them with a rubber band or kitchen twine.
Hang the bundles upside down in a warm, dry location with good air circulation — a covered porch, a pantry, or a warm corner of your kitchen all work well.
Avoid direct sunlight, which can bleach the color and degrade the flavor-carrying oils. Most herbs will dry completely in 1–3 weeks, depending on stem thickness and ambient humidity.
Loose-leafed herbs like basil or mint can drop leaves as they dry. A simple trick is to place a paper bag over the bundle with holes punched in the sides — this catches falling leaves while still allowing airflow.
If you have a dedicated pallet herb garden or a permanent herb growing space, keeping a bundle hook nearby makes harvest-to-drying seamless.
Best Herbs for Air Drying
Air drying works best for herbs with a low moisture content and sturdy stems. Rosemary, thyme, oregano, sage, marjoram, dill, and lavender are ideal candidates.
Basil and mint can be air dried but require extra attention since their higher moisture content increases the risk of mold.
For basil, drying indoors in a warm room with good circulation works much better than outdoor hanging in humid conditions.
Miss it by a week and you lose the crop. The free 22-page planner pins down your exact dates — last frost, first frost, and the weekly steps between — so you plant on the days that actually work for your ZIP.
Method 2: Oven Drying (Fast and Reliable)
If you need dried herbs quickly or live in a humid climate where air drying is unreliable, the oven method is your best friend.
It’s faster than air drying and still produces great results when done correctly.
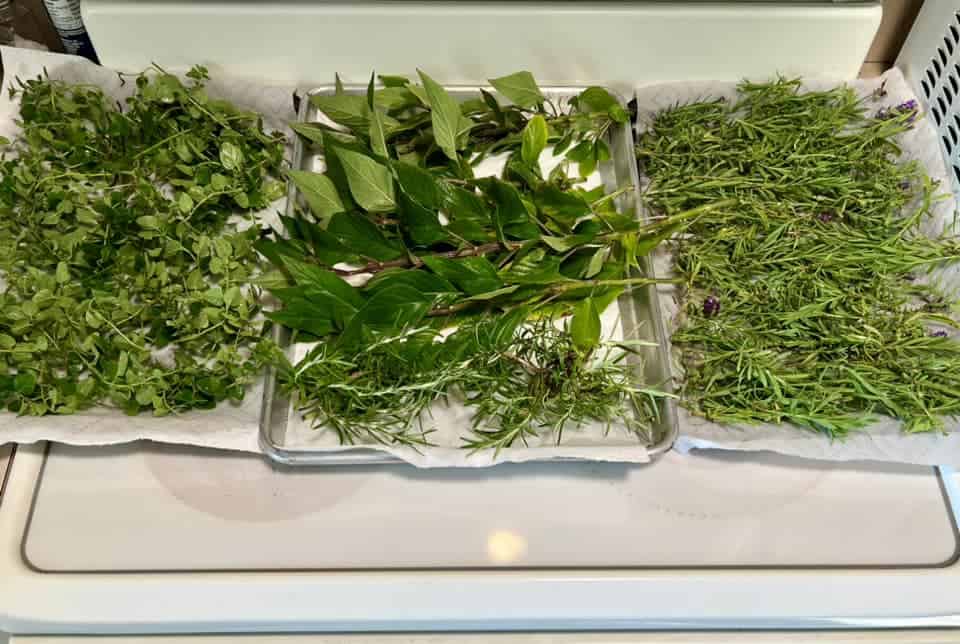
Step-by-Step Oven Drying Method
- Preheat your oven to its lowest setting — ideally between 95°F and 115°F (35°C–46°C). If your oven doesn’t go that low, use the lowest available temperature with the door propped open an inch or two to allow moisture to escape.
- Spread clean, dry herb leaves or sprigs in a single layer on a parchment-lined baking sheet.
- Place the sheet in the oven and check every 30 minutes, turning the herbs gently to ensure even drying. Most herbs will be fully dry within 1–4 hours.
- Watch carefully — the goal is drying, not cooking.
The herbs should be crispy and crumble easily when rubbed between your fingers, but they should retain their green color and scent.
If they start to turn brown or smell scorched, your temperature is too high.
Best Herbs for Oven Drying
The oven method works well for virtually all culinary herbs, including basil, parsley, cilantro, and chives — herbs that can be tricky to air dry successfully due to high moisture content.
Just keep the temperature low and check frequently.
For detailed guidance on harvesting before oven drying, our post on how to harvest dill is a helpful starting point for one of the most popular oven-dried herbs.
Method 3: Food Dehydrator (The Most Consistent Results)
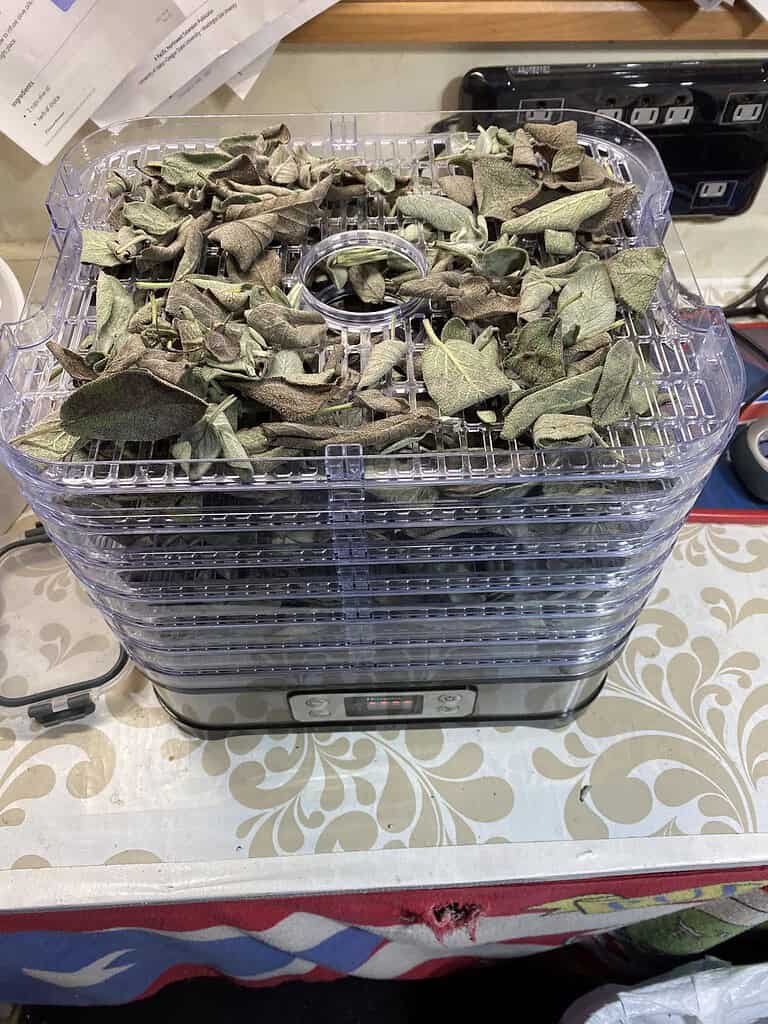
A food dehydrator is arguably the most reliable way to dry herbs at home.
It offers precise temperature control, consistent airflow, and significantly reduces drying time compared to air drying while producing better results than oven drying at higher temperatures.
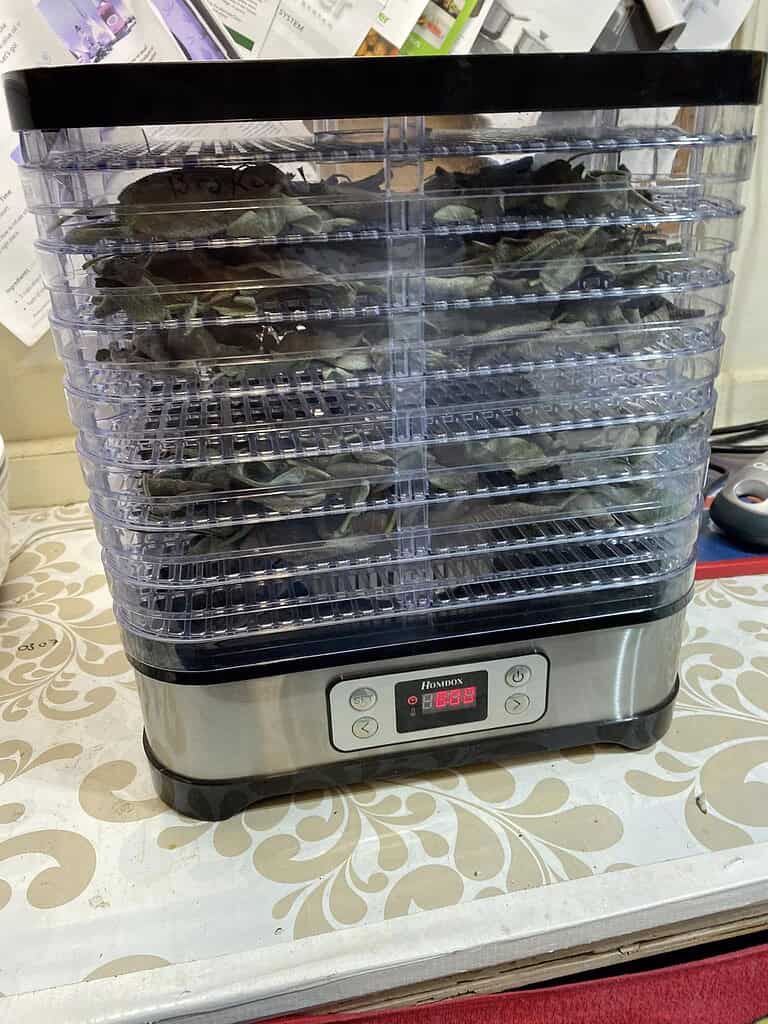
How to Use a Dehydrator for Herbs
Set your dehydrator to between 95°F and 115°F (35°C–46°C). Arrange herb sprigs or individual leaves in a single layer across the dehydrator trays, making sure they don’t overlap.
Run the dehydrator for 1–4 hours depending on the herb’s moisture content — delicate leaves like basil or mint often dry faster, while woodier herbs like rosemary or thyme may take longer.
Check periodically and remove trays as individual herbs finish drying.
If you're interested in expanding your dehydrating practice beyond herbs, there are many things to dehydrate from your garden and kitchen that can help reduce food waste and build your pantry.
A dehydrator becomes one of the most versatile preservation tools on any homestead.
Best Herbs for Dehydrator Drying
All herbs can be dried in a dehydrator, but it’s especially valuable for high-moisture herbs like basil, tarragon, lemon balm, and chervil — herbs that struggle to air dry without developing mold.
The dehydrator’s consistent, gentle heat removes moisture evenly without degrading volatile oils the way higher-heat methods can.
Best gardening planner I've used in 10 years — and I keep coming back to it every season.
Free Planting Guides for This Article
Get exact planting dates, frost schedules, and growing tips for your zone:
Method 4: Microwave Drying (For Small Batches in a Hurry)
When you only need a small amount of dried herbs quickly, the microwave is a surprisingly effective option.
This method is fast — most herbs dry in under three minutes — but it requires close attention to avoid burning.
How to Microwave-Dry Herbs
- Place a single layer of herb leaves between two sheets of paper towel on a microwave-safe plate.
- Microwave on high for 60 seconds, then check. If the leaves aren’t yet crispy and dry, continue in 20-second intervals until they are.
- Allow the herbs to cool completely before storing — they’ll crisp up further as they cool. Thicker-leafed herbs may need more time; delicate leaves like lemon verbena or mint may be done in the first 60 seconds.
The microwave method isn’t ideal for large harvests, but it’s perfect for drying a handful of herbs before cooking or for quickly testing a new variety.
How to Store Dried Herbs to Maximize Shelf Life
All the care you put into drying herbs can be undone by poor storage. Once your herbs are fully dried, proper storage is what keeps them flavorful and shelf-stable for 6–12 months.
Choose the Right Containers
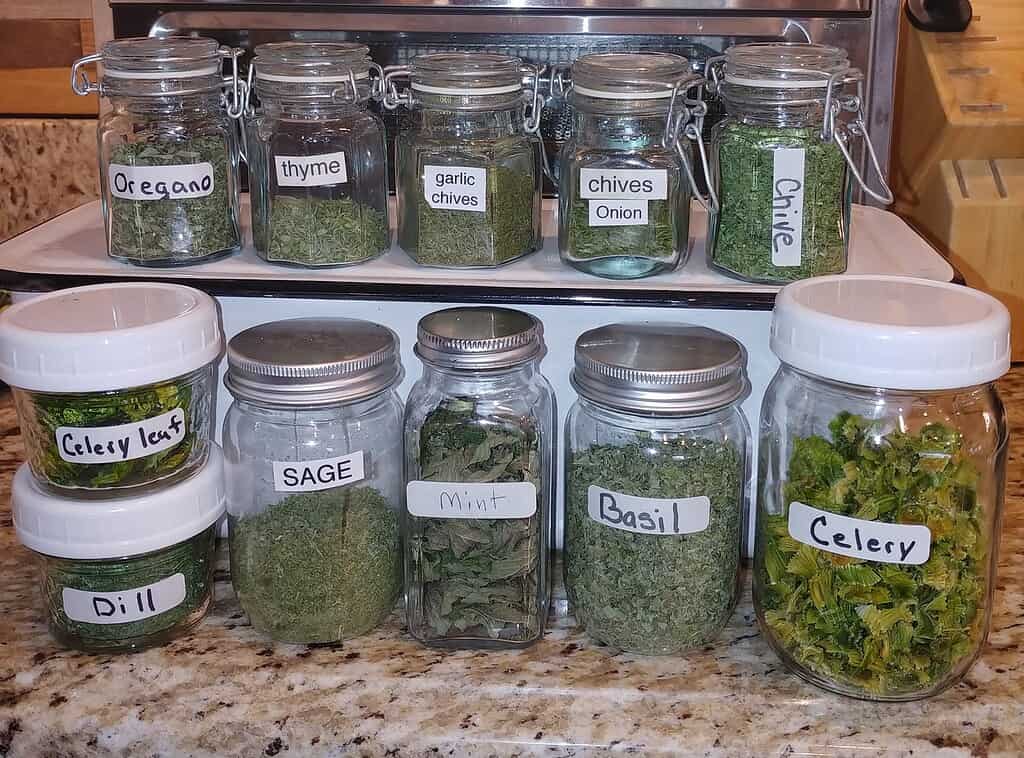
Store dried herbs in airtight containers — small glass jars are ideal. Mason jars, old spice jars, and recycled glass containers all work well.
Avoid storing herbs in plastic bags long-term, as plastic is slightly permeable and can allow the aromatic oils to dissipate over time.
Label each container with the herb name and the date it was dried.
Keep Them Cool, Dark, and Dry
Light, heat, and moisture are the enemies of dried herbs. Store your containers in a cabinet away from the stove, the dishwasher, and direct sunlight.
A cool pantry shelf or a dedicated spice drawer is ideal.
For creative organization ideas, our post on spice storage ideas offers plenty of practical solutions that work beautifully for home-dried herb collections.
Whole Leaves vs. Crushed Leaves
Store herbs as whole leaves whenever possible and crush or crumble them only when you’re ready to use them.
Crushing releases the essential oils immediately, which is great for cooking but means the herb will lose potency faster in storage.
Keeping leaves whole extends the usable life of your dried herbs significantly.
- Beans
- Carrots
- Beets
- Lettuce
- Spinach
- Brassicas
Herb-Specific Tips: Getting the Best Results from Common Herbs
Different herbs have different characteristics, and a few extra notes can help you get the most out of your drying efforts.
- Rosemary is one of the easiest herbs to dry and one of the longest-lasting once dried. It holds its flavor extremely well and works with all four methods above. If you grow it regularly, understanding how to prune rosemary correctly ensures you’ll always have an abundance of fresh material to dry throughout the season.
- Basil is trickier — it tends to turn black if air-dried without adequate warmth and airflow. The oven or dehydrator method at low temperatures produces the best results. Harvesting correctly is also key; our post on how to harvest basil explains how to pick leaves in a way that keeps the plant producing all season long.
- Thyme and oregano are robust, low-moisture herbs that air dry beautifully in small bundles. They’re also excellent candidates for dehydrator drying when you have a large harvest. Both are worth growing in bulk because they’re so versatile in the kitchen.
- Mint air dries well in warm, dry conditions but requires watchfulness for mold in humid climates. The oven and dehydrator methods both work well and give consistent results.
- Parsley can be air dried, but the oven or dehydrator method gives far better results, retaining color and flavor far more reliably. For more on growing and working with parsley, our guide to storing parsley covers both fresh and dried storage options in detail.
How Hard Is It to Garden in Your County?
Every county has a unique Gardening Difficulty Score based on frost risk, soil quality, drought, altitude, and climate trends. Find yours — plus personalized frost dates, planting calendars, and soil data.
Check Your County's Score →Building an Herb Garden Worth Drying
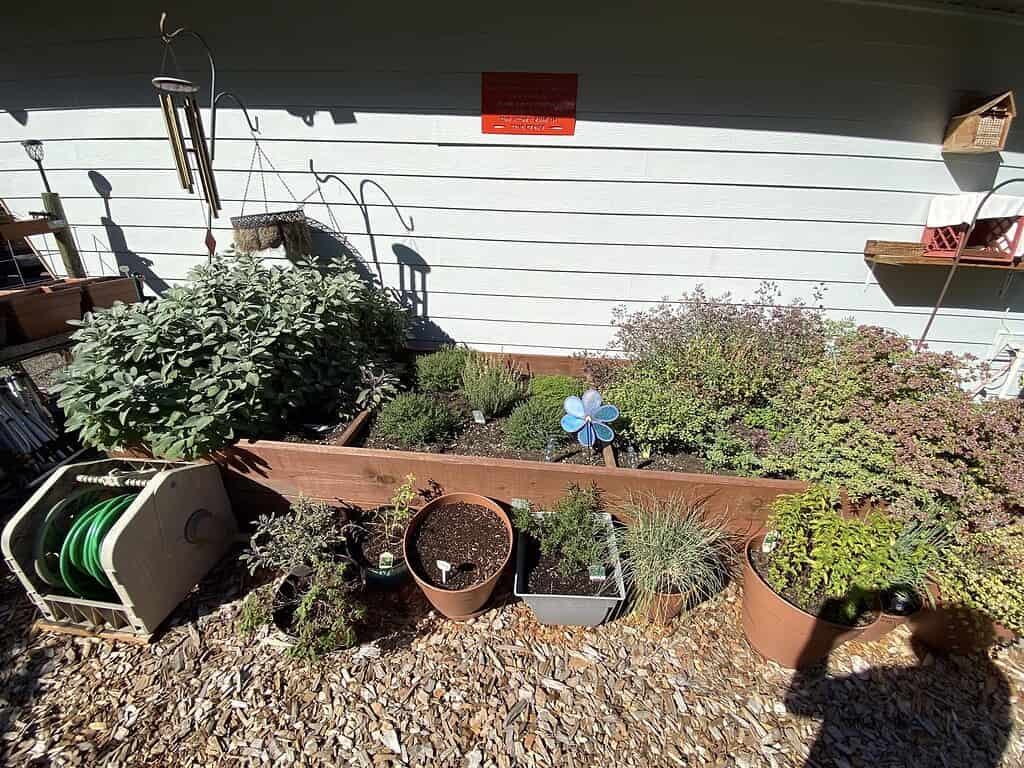
A productive drying practice starts with a productive herb garden.
If you’re planning to preserve herbs regularly, it’s worth growing in enough volume to make the effort worthwhile — and choosing varieties that are well-suited to drying.
Our post on herb garden ideas is full of layout and design inspiration to help you create a functional growing space, whether you have a large backyard or a small patio.
And if you prefer growing indoors, you’ll find everything you need in our guide on how to start an indoor herb garden.
For those interested in herbs beyond cooking — including medicinal and wellness applications — a medicinal herb garden layout paired with the ability to dry and store your harvest is a powerful combination.
Many of the same drying principles apply, though specific storage conditions may vary depending on intended use.
Start Drying Your Herbs Today
Drying herbs at home is one of those homesteading skills that rewards you every single time you reach for a jar.
A season’s worth of carefully dried rosemary, thyme, oregano, and basil can carry your kitchen through winter, reduce grocery costs, and give you the quiet satisfaction of knowing exactly where your food came from.
Whether you choose the slow, traditional beauty of air drying or the consistent efficiency of a dehydrator, the key is simply to start — and to harvest before those herbs go to seed.
Pick a method that works for your space and schedule, and commit to drying at least one batch this season. Once you taste the difference, it becomes a habit you’ll never want to break.
To complement your dried herb pantry, explore what goes into a full canning and food preservation setup — it's the natural next step in building a self-sufficient homestead pantry.
Have you tried drying herbs at home? Which method works best in your kitchen — air drying, the oven, a dehydrator, or the microwave? Drop your experience, tips, and favorite herbs to dry in the comments below — we’d love to hear what’s working for you!
Plan Your Garden With Confidence!

Ever start planting… and then realize halfway through that things feel a little scattered?
A simple plan changes everything.
When you sketch your layout first, you can see what fits, what flows, and what actually makes sense for your space. It saves time, money, and a whole lot of second-guessing later.
Our free Garden Planner helps you map out beds, organize plant spacing, rotate crops, and keep track of seasonal tasks – all in a clean, printable format you can actually use.
Whether you’re designing a low maintenance front yard or planning your full homestead garden, this gives you a clear starting point.
Less chaos. More clarity. A garden that works.
Frequently Asked Questions
Can you dry herbs that have already started to flower?
You can, but the flavor will be noticeably weaker than herbs harvested before flowering. Once a plant bolts, much of its energy shifts from leaf production to seed production, and the essential oil content in the leaves drops significantly.
That said, flowering herbs aren’t worthless — they’re still usable, just milder. Some herbs, like chamomile, are actually dried specifically for their flowers rather than their leaves, so it entirely depends on what you’re growing and why.
How do you know when dried herbs are fully ready for storage?
The simplest test is the crumble test: take a small piece of dried herb and rub it between your fingers. If it crumbles easily and feels dry all the way through with no flexibility or moisture at the stem, it’s ready.
If the stem still bends rather than snapping, or if there’s any soft or pliable texture in the leaves, it needs more drying time. Storing herbs before they’re fully dry is the most common reason for mold and spoilage in stored herb jars.
Do you need to wash herbs before drying them, and does it affect the outcome?
If your herbs came from a clean garden and haven’t been treated with sprays or exposed to heavy dust, you can skip washing and simply shake off any debris.
However, if you do wash them, it’s critical to dry them thoroughly first — pat them dry with a towel and let them air out for an hour or two before beginning any drying method.
Any remaining surface moisture dramatically increases drying time and the risk of mold, especially with air drying. A salad spinner is a great tool for removing excess water quickly before the drying process begins.
Can you dry herb roots and stems, or just the leaves?
Absolutely. Many herbs are valuable root-to-tip, and different parts are used for different purposes. Roots — like those of dandelion, valerian, or burdock — are often dried for herbal teas and tinctures and typically require longer drying times and lower temperatures than leaves.
Stems of herbs like thyme can be dried along with the leaves and then stripped afterward, but thicker stems take longer to dry and should be checked separately.
Seeds from herbs like coriander, dill, and fennel can also be dried on the stem and are excellent additions to a home spice collection.
What’s the maximum shelf life for home-dried herbs, and how can you tell if they’ve gone bad?
Most home-dried herbs remain flavorful for 6–12 months when stored properly in airtight containers away from heat and light.
Some hardier herbs like rosemary and oregano can maintain good quality up to two years. To test if a dried herb is still potent, rub a pinch between your fingers and smell it — if the aroma is strong and clear, it’s still good.
If it smells faint, dusty, or like very little at all, the herb has lost most of its oils and isn’t worth using in cooking. Signs of spoilage to watch for include any visible mold (discard immediately), an off or musty smell, or clumping that suggests moisture got into the jar.
Level Up Your Garden
Our most popular gardening guides


