There is a world of difference between a watermelon that has been trucked across the country and one you pull off the vine still warm from the sun. Homegrown watermelon is sweeter, juicier, and honestly a little addictive once you taste it.
The good news is watermelon looks intimidating but is one of the most beginner-friendly fruits you can grow, as long as you understand a few quirks that catch most first-timers off guard.
This guide walks you through the whole journey — picking the right type, choosing where to grow (yes, even on a balcony), starting seeds the right way, and the small tricks that decide whether your melon ends up sugary-sweet or watery and bland. Let’s dig in.
Why Watermelon Is Easier to Grow Than You Think
Watermelon has a reputation for needing acres of space and a perfect climate.
In reality, the plant is tough, fast-growing, and forgiving once it gets the two things it truly cares about: heat and consistent moisture.
Most failures do not come from a difficult plant — they come from planting too early into cold soil, choosing a giant variety that never finishes ripening, or harvesting before the fruit is actually sweet.
If this is one of your very first crops, it helps to have the basics of soil, sun, and watering down first. Our walkthrough on starting your first vegetable garden pairs perfectly with everything below and will save you a lot of trial and error.
Garden Planner
The 22-page planner timed to your county's real frost dates. Planting windows, monthly checklists, and a harvest log you'll fill with pride by August.
Your Free 22-Page Garden Planner
Built for your exact ZIP code — planting dates, harvest log, and a month-by-month plan. 15-second sign-up.
Start by Choosing the Right Type of Watermelon
The single biggest decision you’ll make happens before you plant anything: which melon you grow.
There are far more types of watermelon than the giant green oval at the grocery store, and the wrong pick is the number-one reason beginners run out of season before their fruit ripens.
The Main Types of Watermelon (and Which Suit Beginners)
- Icebox types (Sugar Baby, Blacktail Mountain): personal-sized 6–12 lb melons that mature fast and fit small spaces. The best starting point for almost every beginner.
- Picnic types (Crimson Sweet, Charleston Gray): the classic 15–30 lb melons. Delicious, but they need a long, hot season and lots of room.
- Seedless types: convenient to eat, but trickier — they germinate poorly in cool soil and need a seeded variety planted nearby as a pollinator. Skip these for year one.
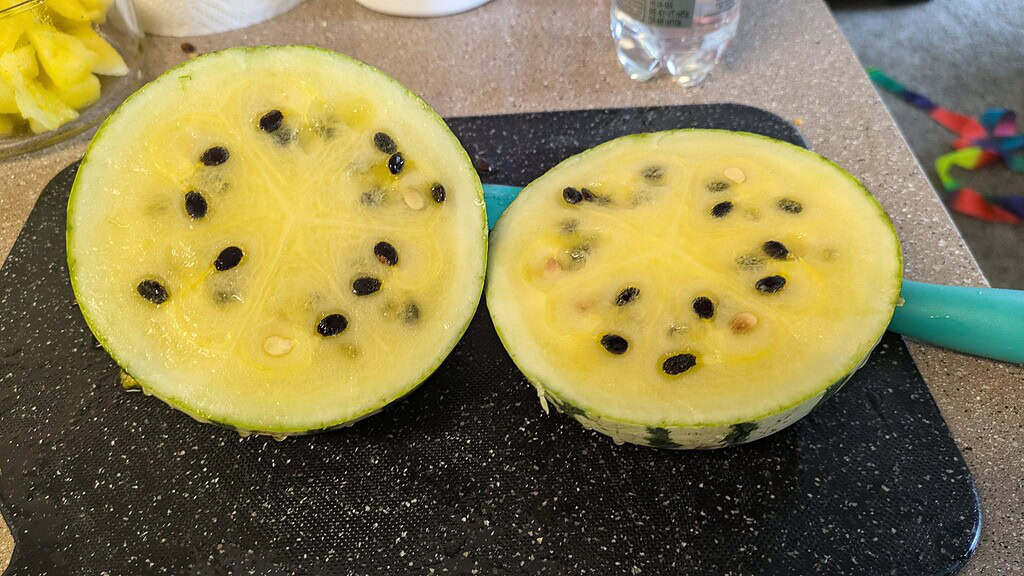
- Yellow and orange-fleshed types (Yellow Doll, Orangeglo): novelty melons with a honeyed, almost apricot-like flavor. Many are compact and great for curious beginners.
Match Days to Maturity to Your Season
Every seed packet lists a “days to maturity” number — that’s the time from transplant to ripe fruit under ideal heat.
Count the number of reliably frost-free, warm days in your area, then subtract about two weeks as a safety buffer. Choose a variety whose maturity number fits inside that window. A 90-day picnic melon planted in a region with an 85-day warm season will never finish, no matter how well you tend it.
If you’re not sure when your warm window opens and closes, lining your planting up with a regional vegetable planting calendar takes the guesswork out of timing.
And if watermelon’s longer timeline tests your patience, tucking in a few fast-growing vegetables nearby gives you quick wins while the melons take their time.
Where to Grow: Beds, Containers, Grow Bags, or a Trellis
Watermelon adapts to almost any setup as long as the roots get depth and the vines get sun.
Below, each method is broken into simple steps you can follow start to finish — pick the one that matches your space.
Growing Watermelon in Raised Beds
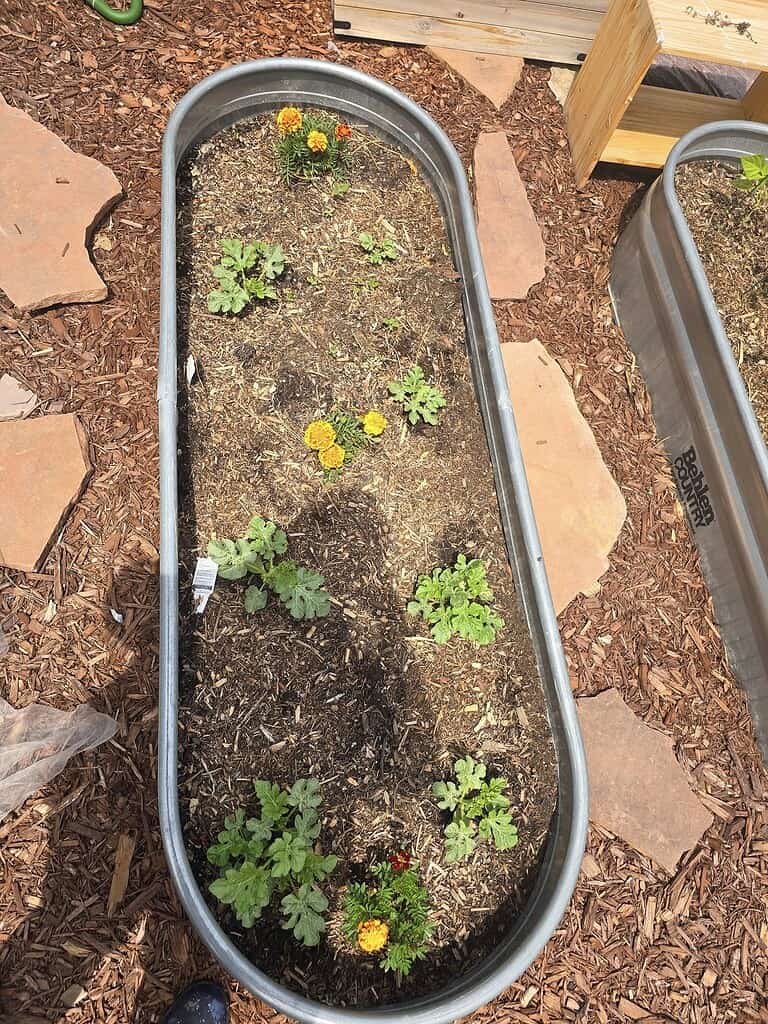
Raised beds are the sweet spot for most home growers. The soil warms earlier in spring, drains well after rain, and you control the quality of every inch. Here’s how to set one up for melons step by step:
- Go deep. Use a bed at least 18 inches deep so the long taproot can dive for moisture. A 4×4-foot footprint comfortably holds one or two plants.
- Fill with the right mix. Aim for roughly half quality topsoil and half finished compost, plus a few handfuls of aged manure or worm castings. Avoid heavy clay — melons rot in soggy feet.
- Skip the weed barrier underneath. Landscape fabric blocks roots from reaching the cool, moist soil below, which is exactly why fabric-lined beds dry out so fast.
- Shape a low mound. Form a gentle 6-inch hill where each plant will sit so it warms quickly and sheds excess water, then sow or transplant on top.
- Space generously. Give each plant about four square feet — two plants per 4×4 bed is plenty.
- Mulch and let them roam. Once seedlings are a few inches tall, mulch with straw, then let the vines trail over the bed’s edge onto a path or lawn. That’s the secret to big melons from a small bed.
The same depth-and-drainage logic behind growing strawberries in raised beds applies directly to melons — deep, rich, free-draining soil does most of the work for you.
Growing Watermelon in Containers
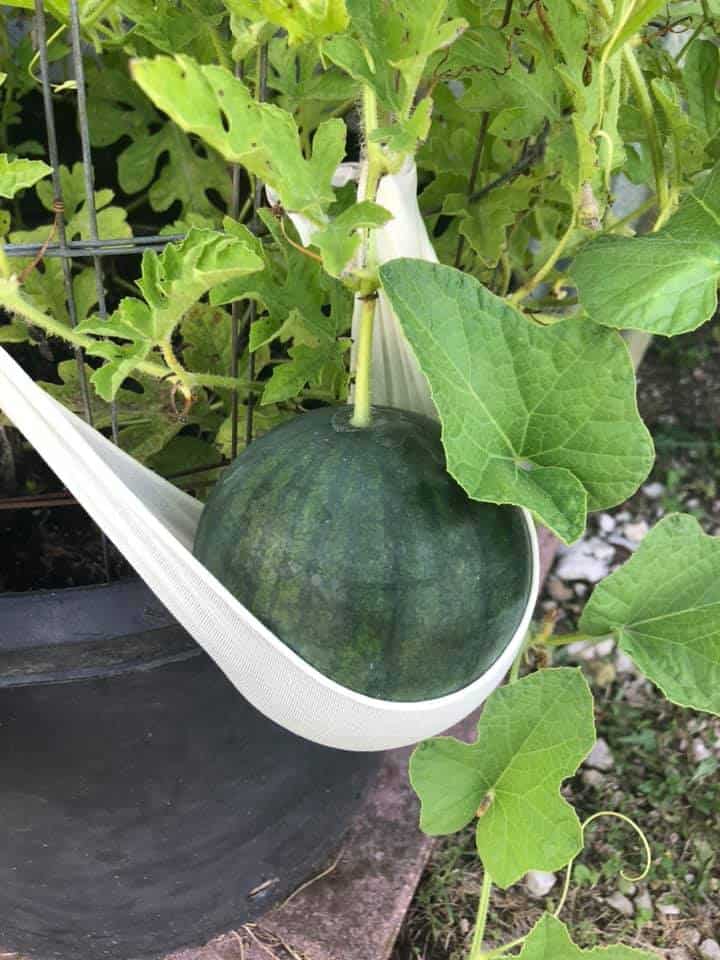
Growing watermelon in containers is absolutely doable on a patio or balcony — it just comes down to size and variety. Follow these steps:
- Pick a big pot. Use at least 15–20 gallons with drainage holes — a half wine barrel or large nursery pot is ideal. One plant per pot, no exceptions, since cramped roots equal tiny fruit.
- Use potting mix, not garden soil. Garden soil compacts and suffocates roots in a container. Blend a light potting mix with compost and a handful of slow-release organic fertilizer.
- Choose a compact variety. Stick to icebox or bush types like Sugar Baby or Bush Sugar Baby; a full-size picnic melon will sulk in a pot.
- Chase the sun. Set the pot where it gets at least 8 hours of direct sun — a south-facing patio or balcony is perfect.
- Add support early. Push a small trellis or tomato cage into the pot at planting time, or place the pot at the edge of a table so vines can trail down.
- Water and feed often. Containers dry out fast — water when the top inch is dry (often daily in summer), and feed every two weeks once flowering starts.
If you’re new to growing edibles in pots, the same care principles behind these sun-loving plants for containers carry over neatly.
Growing Watermelon in Grow Bags
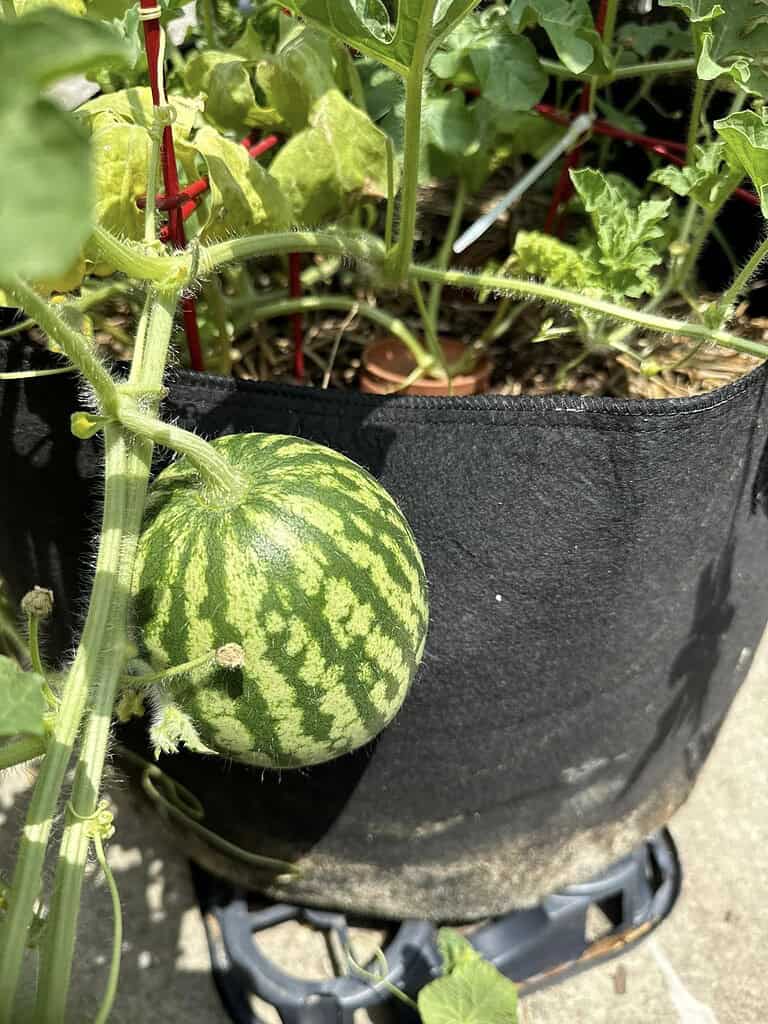
Growing watermelon in grow bags blends the best of beds and pots. The breathable fabric “air-prunes” the roots, preventing the circling, root-bound mess you get in hard plastic and producing a denser, healthier root system. Set one up like this:
- Size up. Choose a 20- to 30-gallon fabric bag — anything smaller starves the roots and limits fruit size.
- Place it before filling. Set the empty bag in full sun first; a soaked, filled bag is heavy and can tear if you drag it.
- Lift it off the ground. Rest it on a pallet, bricks, or pot feet so water drains freely and air reaches the base.
- Fill and plant. Use the same light potting-mix-plus-compost blend as a container, leave an inch at the top, then plant one compact variety and water it in well.
- Mulch the surface. A layer of straw matters here — fabric breathes, so bags dry out faster than pots, and mulch buys you time between waterings.
- Stay on top of water and food. Check moisture daily in heat and feed every couple of weeks during fruiting. A bag also sits neatly against a wall or fence, so you can lean a trellis behind it and train the vines up.
Growing Watermelon on a Trellis
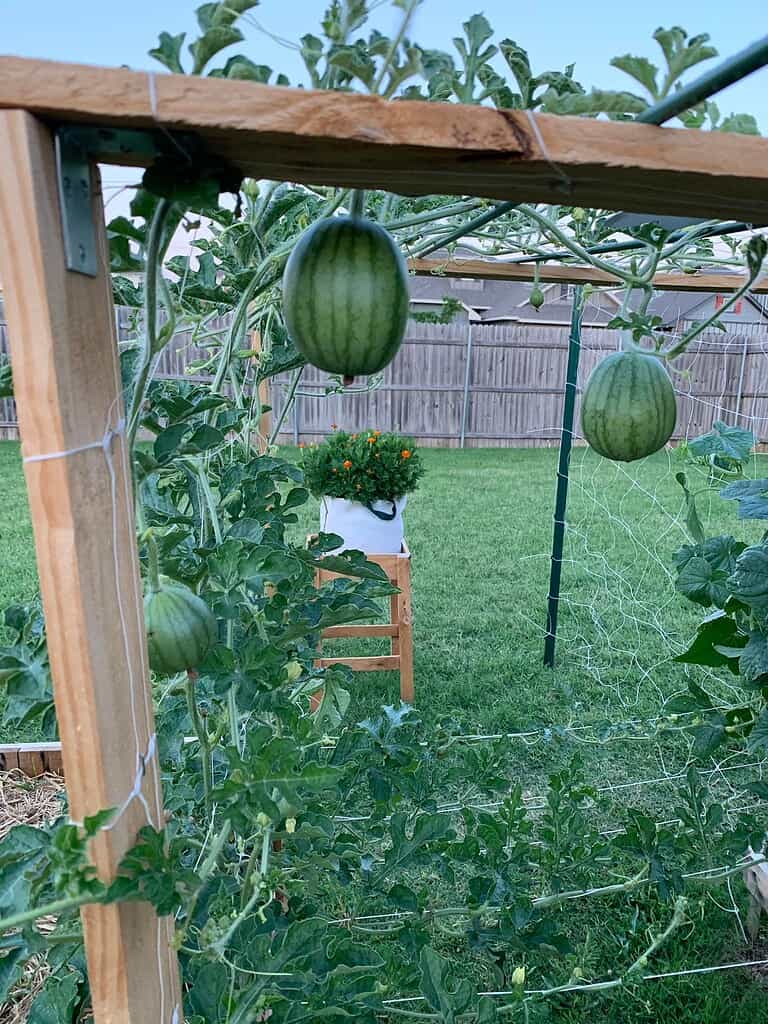
If space is truly tight, growing watermelon on a trellis lets you train the vines upward instead of letting them swallow your yard — and the lifted fruit gets better airflow and more even sun. Here’s the basic process:
- Build something strong. A cattle/livestock panel staked between two T-posts, or a wood A-frame with welded wire, works best. It must hold 20–30 lb of fruit without sagging.
- Plant at the base. Put your melon (in a bed, bag, or pot) right at the foot of the frame.
- Train and tie. Once vines reach one to two feet, guide them onto the frame and tie loosely in a figure-8 with soft twine or fabric strips, re-tying weekly as they climb fast.
- Sling the fruit. When each melon hits softball size, cradle it in a sling — a mesh produce bag, old T-shirt, or pantyhose tied to the frame above — so its weight doesn’t snap the stem.
Since this method has so many small details, we put together a full complete guide to growing watermelon on a trellis that covers frame strength, vine training, and slings step by step. For inspiration on building the structure itself, these clever squash trellis ideas work just as well for melons.
Miss it by a week and you lose the crop. The free 22-page planner pins down your exact dates — last frost, first frost, and the weekly steps between — so you plant on the days that actually work for your ZIP.
Planting Seeds (Get the Soil Temperature Right)
Watermelon seeds are picky about one thing above all: warmth. Sow them into soil colder than about 70°F and they’ll simply sit there, rot, or germinate so slowly that pests get them first.
A cheap soil thermometer poked two inches down tells you more than any calendar date.
If your soil is lagging, lay down black plastic or dark landscape fabric for a week or two beforehand to trap heat and warm things up.
A few planting pointers that pay off:
- Direct-sow when you can. Watermelon hates root disturbance, so seeds planted in place often outperform transplants. If you must start indoors, use peat or paper pots you can plant whole. Sow seeds about an inch deep.
- Plant on a small mound. A gentle hill warms faster and drains better, both of which melons love.
- Sow two or three seeds per spot, then snip (don’t pull) all but the strongest seedling to avoid disturbing the keeper’s roots.
- Resist crowding. More plants in a small bed means more competition and fewer, smaller melons — not a bigger harvest.
Caring for Your Plants: A Simple Season Roadmap
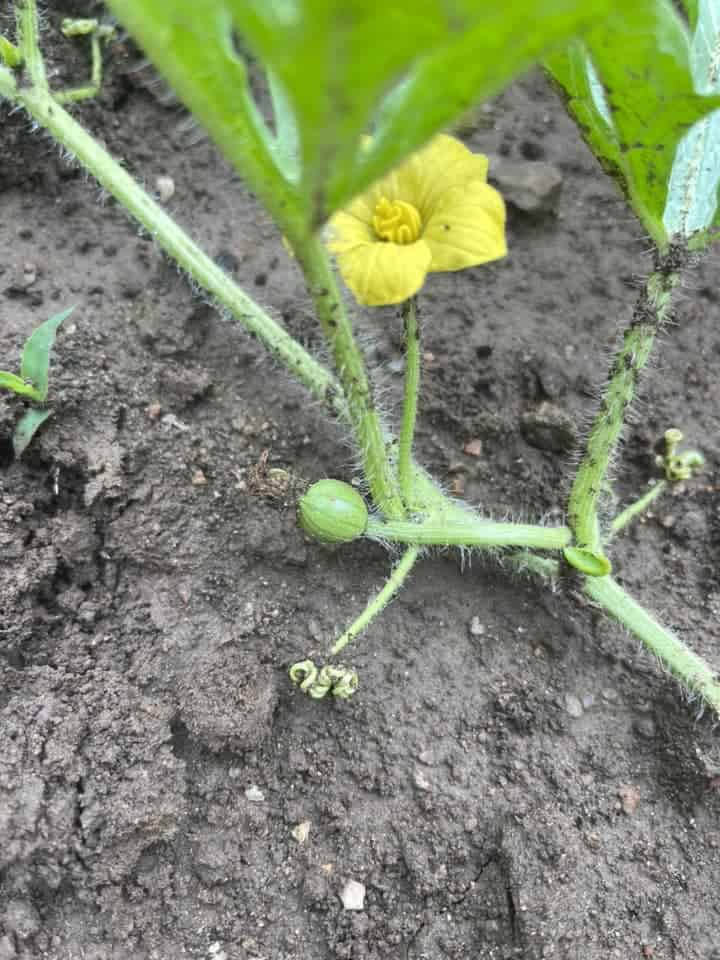
Once your seeds are in, watermelon follows a fairly predictable arc. Knowing the stages keeps you from worrying when growth seems slow — or scrambling when it suddenly takes off.
Exact timing shifts with your variety and how hot your summer runs, but here’s the general rhythm and what to do at each point:
- Days 1–10 — Germination. Keep the soil warm and lightly moist. In warm soil, sprouts usually push up within a week.
- Weeks 2–4 — Settling in. Top growth looks slow because the plant is busy building a deep root system underground. Water gently and don’t overfeed yet.
- Weeks 4–7 — Vining. Growth explodes, often a foot or more per week. Begin light feeding, and start guiding vines onto your trellis if you’re using one.
- Weeks 5–8 — Flowering. Male flowers open first, then females. If baby fruits keep shriveling, step in and hand-pollinate (covered just below).
- Weeks 7–11 — Fruit swelling. Melons balloon in size. This is the thirstiest stage — keep moisture steady and support heavy fruit with a sling or a board underneath.
- Final 1–2 weeks — Ripening. Ease off the water to concentrate the sugars, and start watching the tendril for your harvest cue.
Best gardening planner I've used in 10 years — and I keep coming back to it every season.
Free Planting Guides for This Article
Get exact planting dates, frost schedules, and growing tips for your zone:
Watering and Feeding for Sweetness, Not Just Size
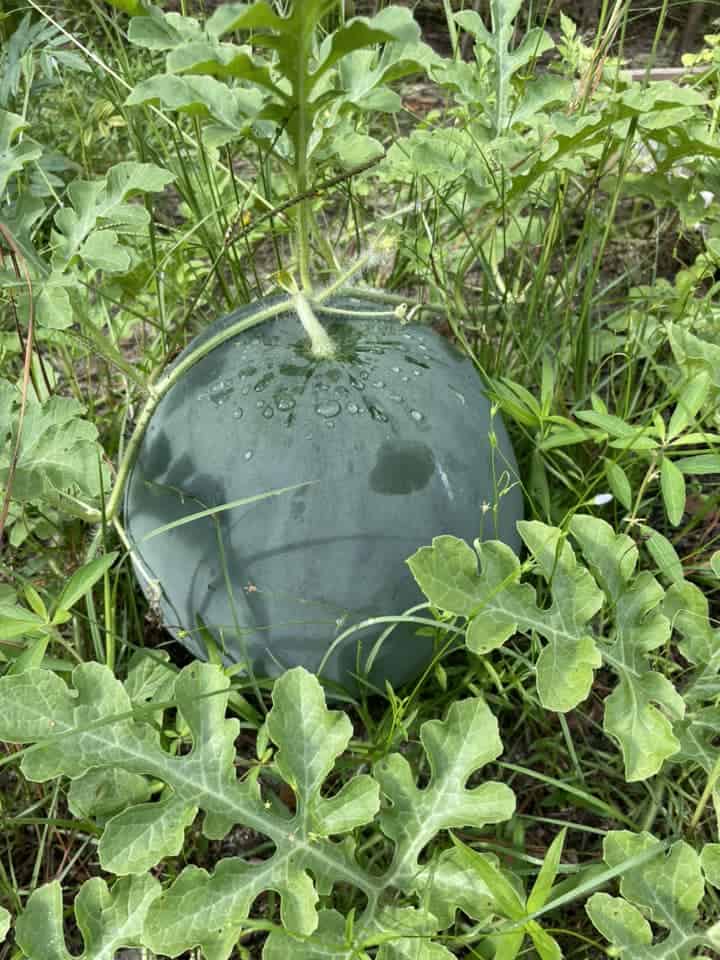
This is where good melons become great ones. Most beginners water and feed for big vines, but the goal is concentrated sugar. Two principles make the difference.
For watering, go deep and infrequent rather than shallow and daily. Soak the root zone once or twice a week so roots grow down toward stable moisture.
The pro move comes at the end: once your melons reach full size and are just finishing ripening, gradually ease off the water.
A little controlled “thirst” in those final one to two weeks pushes the plant to concentrate sugars instead of diluting them — the secret behind that intense, candy-like sweetness. Overwatering at the finish line gives you bland, watery flesh and split fruit.
For feeding, think in phases. Early on, a balanced fertilizer fuels vines and leaves. But once flowers and fruit appear, ease back on nitrogen and lean on potassium and phosphorus — nitrogen-heavy feeding now gives you a jungle of leaves and barely any melons.
Potassium in particular is closely tied to fruit sugar and quality, so a tomato-and-fruit-style feed during fruiting beats an all-purpose lawn fertilizer.
The Pollination Step Most Beginners Miss
Here’s the moment of panic for nearly every first-time grower: tiny baby melons form, then yellow and drop off. The usual cause isn’t disease — it’s pollination.
Watermelon produces male flowers first, often a week or two before the females show up, so early flowers naturally fall with no fruit behind them. That’s normal, not failure.
You can tell them apart easily: female flowers have a tiny swollen melon at the base, males have a plain straight stem. Each female bloom is only receptive for a single morning, so if bees are scarce — common on balconies and in heat above the mid-90s, when pollen goes weak — hand-pollinate.
Pick a fresh male flower, peel back the petals, and gently brush its pollen-covered center onto the middle of several females. Do it in the cool of early morning for the best set.
- Beans
- Carrots
- Beets
- Lettuce
- Spinach
- Brassicas
How to Tell a Watermelon Is Truly Ripe
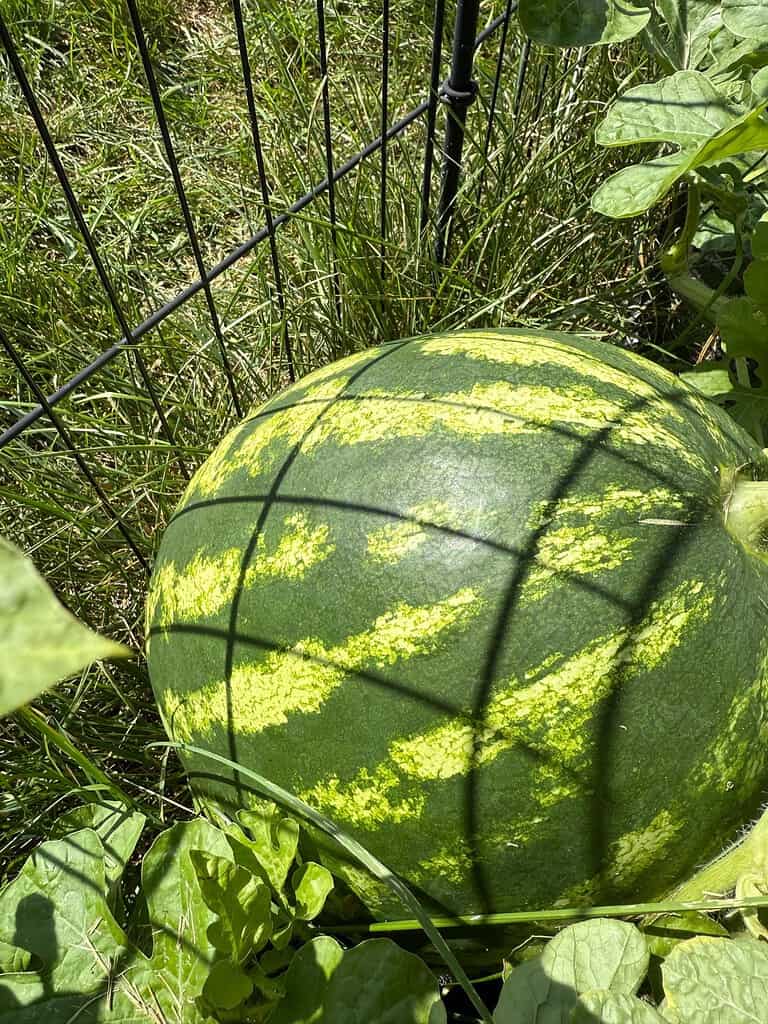
Watermelon does not keep ripening after you cut it, so timing the harvest is everything. Forget the famous “thump” test — it’s unreliable even for experts. Instead, read these three signals together:
- The curly tendril nearest the fruit turns brown and dries up. This is the most trustworthy clue — that little pigtail right at the melon’s stem.
- The ground spot turns creamy yellow. The pale patch where the melon rests should shift from white or green to a buttery, golden cream.
- The skin goes dull and hard. A ripe rind loses its glossy sheen and resists a scratch from your fingernail.
When at least two of these line up, it’s time. Because the fruit won’t sweeten any further once picked, a few days too late always beats a day too early.
How Hard Is It to Garden in Your County?
Every county has a unique Gardening Difficulty Score based on frost risk, soil quality, drought, altitude, and climate trends. Find yours — plus personalized frost dates, planting calendars, and soil data.
Check Your County's Score →Common Beginner Mistakes to Avoid
- Planting too early. Cold soil stalls or kills seeds. Wait for that 70°F reading.
- Letting one plant carry too much fruit. For sweeter, fuller melons, thin to two or three fruits per vine and let the plant pour its energy into those.
- Inconsistent watering. Swings between bone-dry and soaked cause splitting and blossom-end rot. Steady moisture, then a dry-down at the very end.
- Too much nitrogen. Lush leaves and no melons almost always trace back to over-feeding nitrogen during fruiting.
Your First Juicy Harvest Starts Now
Growing watermelon really comes down to a short checklist: pick a variety that fits your season, give the roots warm and generous soil, keep moisture steady until the final stretch, help with pollination if the bees don’t, and wait for the tendril to tell you it’s ready.
Nail those, and a raised bed, a grow bag, or even a single large pot can hand you melons sweeter than anything on a store shelf.
And once they’re picked, a little know-how on how to keep that produce fresh longer means none of your hard-earned harvest goes to waste.
Now it’s your turn. Which type of watermelon are you planting this year, and are you going with a bed, a bag, or a trellis? Drop a comment below and share your plan (or your questions) — I’d love to hear how your first juicy harvest turns out!
Plan Your Garden With Confidence!

Ever start planting… and then realize halfway through that things feel a little scattered?
A simple plan changes everything.
When you sketch your layout first, you can see what fits, what flows, and what actually makes sense for your space. It saves time, money, and a whole lot of second-guessing later.
Our free Garden Planner helps you map out beds, organize plant spacing, rotate crops, and keep track of seasonal tasks – all in a clean, printable format you can actually use.
Whether you’re designing a low maintenance front yard or planning your full homestead garden, this gives you a clear starting point.
Less chaos. More clarity. A garden that works.
Frequently Asked Questions
What should I avoid planting near my watermelon?
Keep watermelon away from other heavy-feeding sprawlers like potatoes and cucumbers, which compete for the same nutrients and can share pests and disease. Watermelon does well alongside corn (which offers light afternoon shade and a wind break) and aromatic herbs and flowers like nasturtiums and marigolds that draw in pollinators.
Why did my watermelon split open on the vine?
Splitting is almost always a watering issue. After a dry spell, a sudden heavy soak (or a big rain) makes the flesh swell faster than the rind can stretch, and it cracks. The fix is steady, even moisture throughout growth — and easing back gradually rather than flooding the plant near harvest.
How many watermelons will one plant produce?
For most home varieties, expect two to four good melons per plant. The plant can set more, but it rarely has the energy to ripen them all well. Thinning to a few fruits gives you bigger, sweeter results than letting a dozen tiny ones struggle.
Should I rotate or flip the melons as they grow?
For ground-grown melons, gently quarter-turning the fruit every week or so helps it ripen evenly and prevents a flat, pale, sometimes rot-prone spot where it sits. Be careful not to twist or kink the stem. Slipping a board, tile, or layer of straw under the fruit also keeps it clean and dry.
Can I grow watermelon from store-bought seeds?
You can sprout seeds saved from a grocery-store melon, but most supermarket watermelons are hybrids, so the plants won’t grow “true” — the fruit may look or taste nothing like the parent, and seedless melons leave no viable seeds at all. For predictable results, start with named open-pollinated or heirloom seeds from a packet.
Level Up Your Garden
Our most popular gardening guides