A beautiful paver patio is one of those backyard upgrades that seems like it should cost thousands and require a professional crew. The good news? It really doesn’t.
With a long weekend, a few sturdy tools, and the right design plan, you can lay a patio that looks like it belongs in a magazine — for a fraction of what a contractor would charge.
Pavers are the secret: affordable, forgiving for beginners, and available in enough styles to fake almost any high-end look.
Below are 12 cheap DIY paver patio ideas that weekend warriors and first-time DIYers have actually pulled off — most for under $500, some for under $200.
Pick the one that fits your space and budget, and you’ll have a patio you actually want to sit on by Sunday night.
Why a DIY Paver Patio Is the Best Bang for Your Backyard Buck
Paver patios sit in a sweet spot few backyard projects can match. They’re cheaper than poured concrete, easier to repair than stamped slabs, and infinitely more flexible than a deck.
If a paver cracks ten years from now, you pop it out and drop in a new one for the price of a coffee.
They’re also one of the few hardscaping projects you can complete without specialized equipment — a shovel, a level, a rubber mallet, a tamper, and some patience are most of what you need.
Big-box stores stock concrete pavers for as little as $1 to $3 each, and clearance sections often hide brand-new pavers at half price simply because the pallet is broken.
Planning a bigger backyard transformation? Our guide on How to Create a Backyard Oasis You'll Never Want to Leave pairs perfectly with the patio ideas below for a yard that feels like a full getaway.
Garden Planner
The 22-page planner timed to your county's real frost dates. Planting windows, monthly checklists, and a harvest log you'll fill with pride by August.
Your Free 22-Page Garden Planner
Built for your exact ZIP code — planting dates, harvest log, and a month-by-month plan. 15-second sign-up.
12 Cheap DIY Paver Patio Ideas That Look Seriously Good
Before you start digging, take a quick look at our post on 15 Backyard Garden Ideas You’ll Actually Want to Copy This Season — full of complementary touches like flower borders, raised beds, and seating zones that make a brand-new patio feel like the natural anchor of your yard.
1. Classic Square Concrete Paver Patio
The cheapest, most beginner-friendly option is also one of the prettiest when you do it right.
Standard 12-inch square concrete pavers from any home improvement store cost just over a dollar each, and a 10×10-foot patio can come together for under $250 in materials.
The trick is the prep work — a flat, well-tamped sand base and tight, even joints filled with polymeric sand. Lay the pavers in a simple grid, keep the lines crisp, and add a clean gravel or steel edge.
2. Pea Gravel and Paver Combo Patio
For maximum impact at minimum cost, mix large pavers with a sea of pea gravel. Lay big square or rectangular pavers in a loose stepping-stone pattern, then pour pea gravel in the gaps and across the rest of the patio area.
The gravel does most of the visual heavy lifting at a fraction of the cost of pavers, and the contrast between smooth stone and crunchy gravel gives the space a French country, garden-magazine feel.
Use steel edging or a buried timber border to keep the gravel from migrating into your lawn.
3. Recycled Brick Paver Patio

Reclaimed bricks are everywhere if you know where to look — Facebook Marketplace, demolition sites, old chimney teardowns, and free pickup posts on local boards. Used bricks have a softness and patina brand-new pavers simply can’t replicate.
Lay them in a herringbone, basketweave, or running bond pattern over a sand base, and you’ll have a patio that looks like it’s been there for a hundred years. Mismatched bricks in slightly different shades actually work in your favor, adding warmth and character.
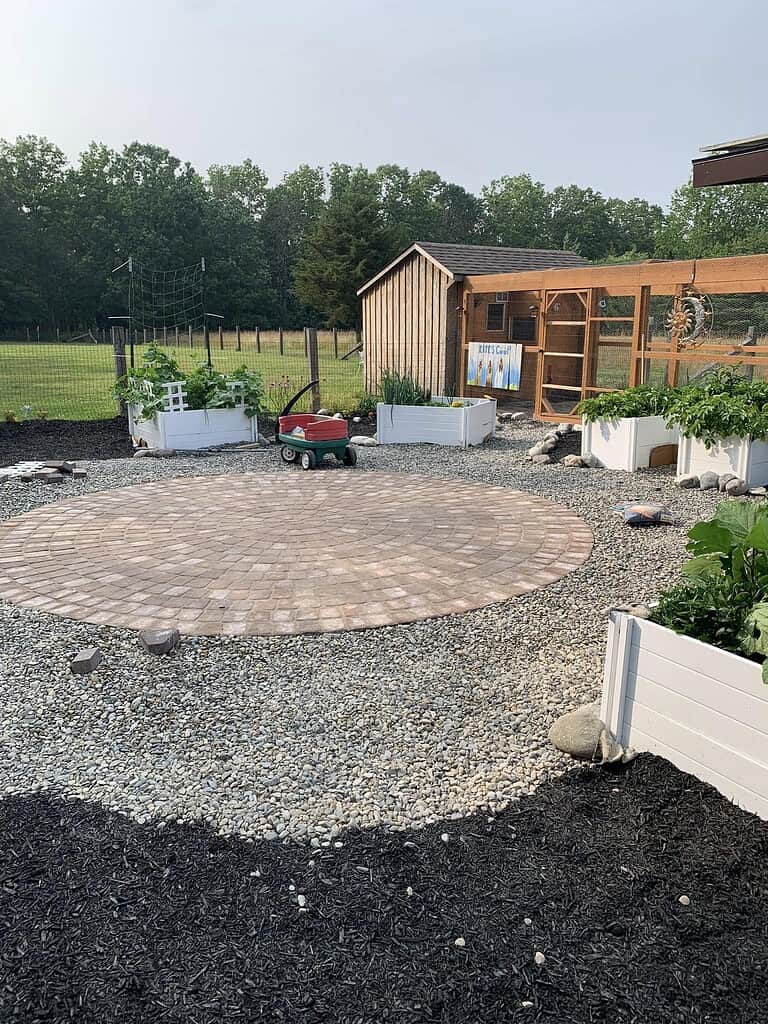
4. Circular Stone Paver Patio
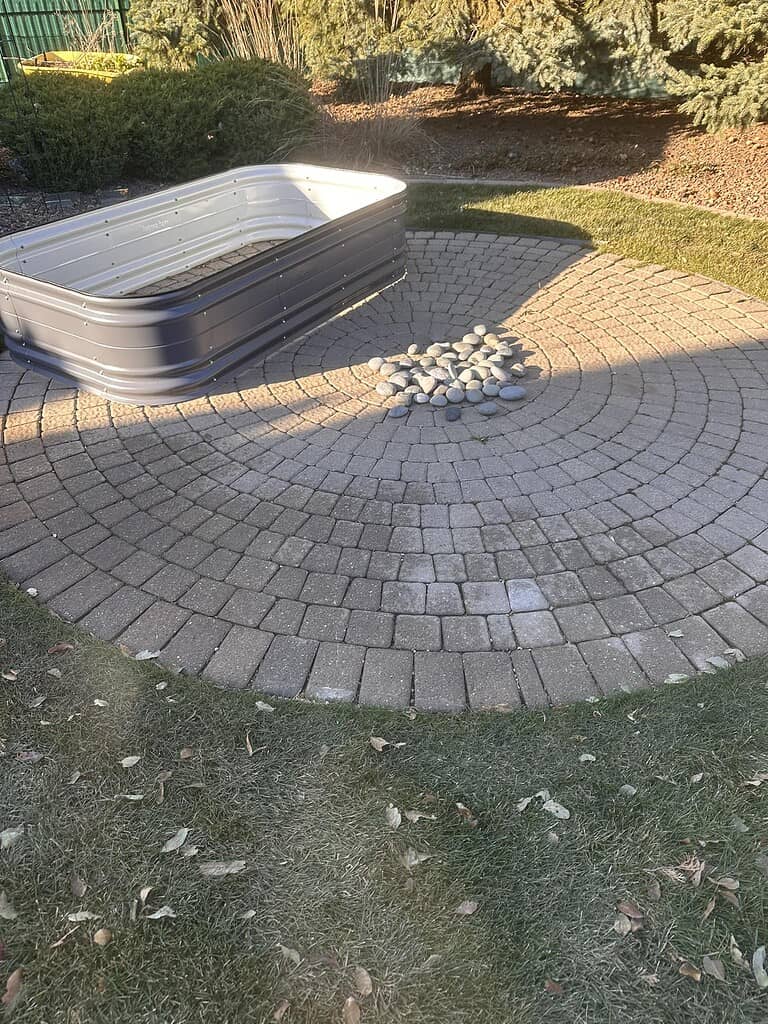
A circular patio instantly feels more designed than a rectangular one, and pre-cut paver kits make the work surprisingly simple.
Most home improvement stores sell circular paver kits in 8- to 10-foot diameters for $300 to $500 — a steal compared to a custom-cut version.
Place a fire pit, a small bistro table, or a single statement planter in the center, and the entire backyard suddenly has a focal point. Soften the outside edge with low ground cover or a curving border of perennials.
5. Wood Plank-Look Paver Patio
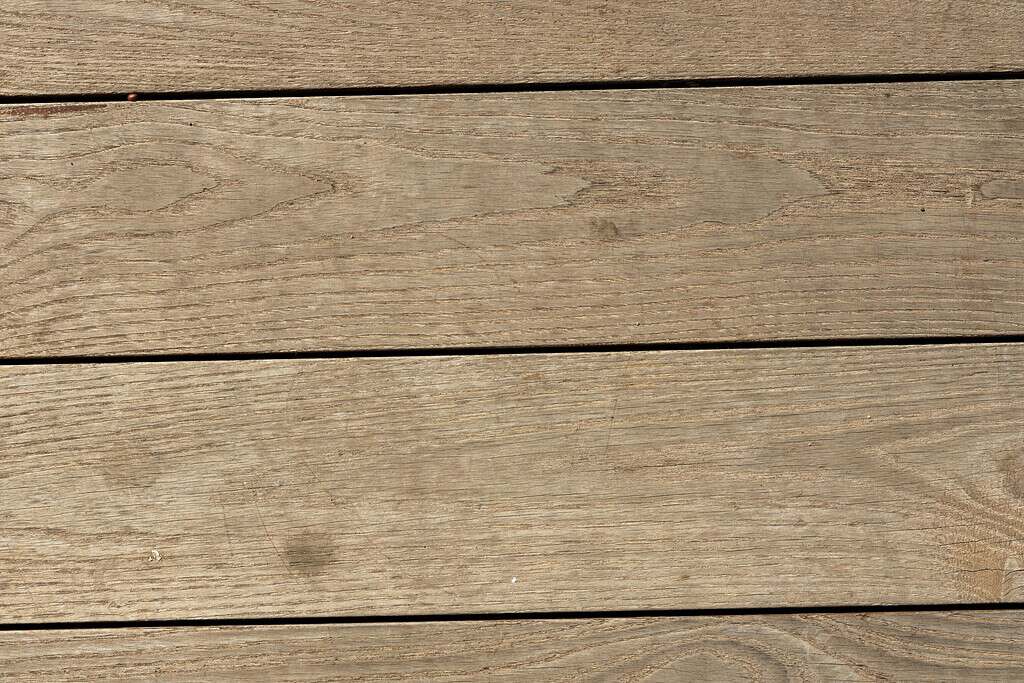
Long, rectangular pavers designed to mimic wood planks have exploded in popularity for a reason — they give you the warm, modern look of a deck without the rot, splintering, or annual staining.
They typically run $3 to $6 per plank, more than basic concrete pavers but still drastically cheaper than a real deck.
Stagger the joints like real flooring planks for the most realistic effect, and choose a gray or warm-brown tone that complements your home’s exterior.
6. Mismatched Paver Mosaic Patio
Hit the clearance aisle at every garden center within driving distance and collect every broken pallet, returned paver, and odd-lot stone you can find. Then lay them in a deliberate mosaic, mixing sizes, colors, and textures into one cohesive surface.
This idea only works if the layout looks intentional, so plan it dry first — arrange every paver on a tarp before you commit. A repeating color thread (all warm tones with one cool accent, say) ties the chaos together.
Done well, a mosaic patio looks like custom artisan work for less than the price of a single pallet of new pavers.
7. Stamped Concrete Paver Patio
Stamped pavers are made to look like cobblestone, slate, or natural stone, but they’re cast from concrete and sold at concrete prices. A 16-inch stamped slate-look paver typically runs $4 to $8 each — a quarter of what real flagstone costs.
Lay them in a slightly irregular pattern with thin grass or moss joints between them and you’ll get the feel of an old European courtyard without the European budget. This style works especially well in shaded backyards.
8. Flagstone-Style Paver Patio with Gravel Joints
True flagstone is gorgeous and astonishingly expensive.
Flagstone-style pavers — large, irregularly shaped concrete pavers cast to look like cut stone — give you the same organic look without the sticker shock. Pair them with crushed granite or fine pea gravel filling the joints instead of sand or mortar.
The loose gravel joints absorb water, soften the look, and forgive small variations in paver thickness. This style suits sloped or irregular yards where a perfectly flat patio would feel out of place.
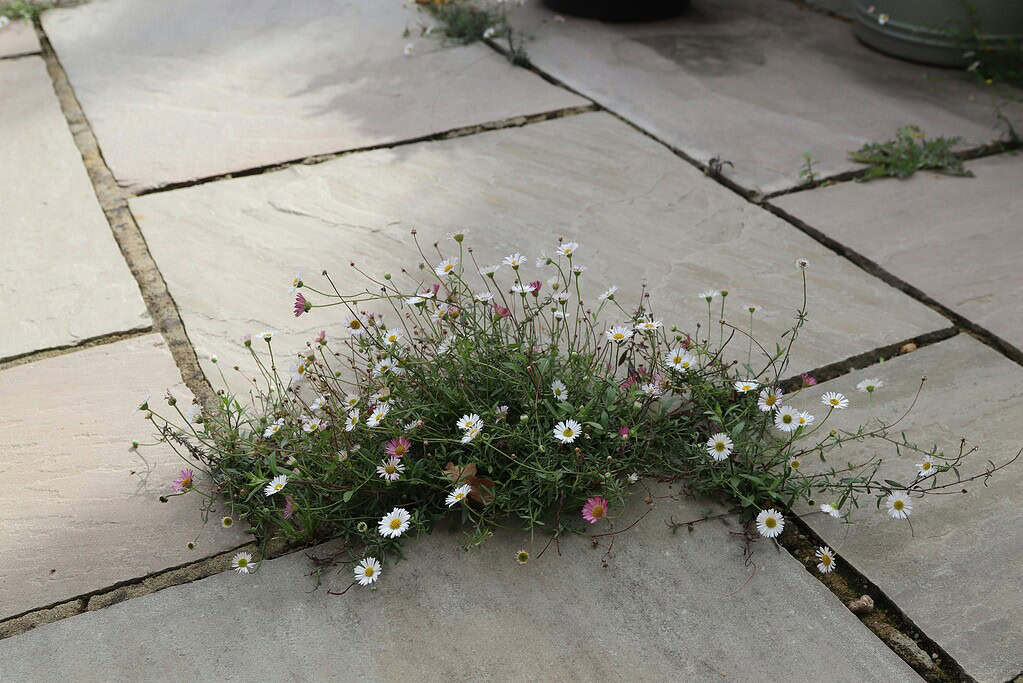
9. Grass Joint Permeable Paver Patio
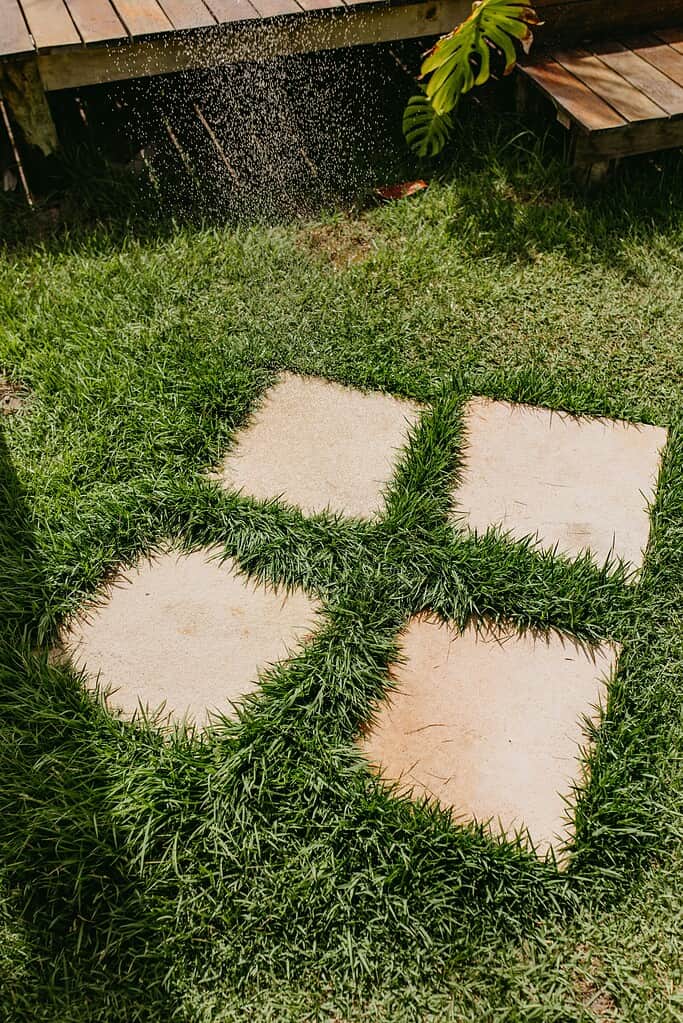
For a patio that feels like a garden as much as a hard surface, leave wide gaps between pavers and fill those gaps with a low, walkable ground cover. Creeping thyme, blue star creeper, and Irish moss all handle light foot traffic and release a soft fragrance when stepped on.
This style is permeable, environmentally friendly, and visually softer than any solid patio. It also reduces the number of pavers you need by 30 to 40 percent, keeping the project genuinely cheap.
For low-growing plants that actually survive being walked on, our post 11 Tough Yet Pretty Walkable Ground Covers You'll Wish You Planted Sooner is the go-to companion read — and our guide on How to Grow and Care for Creeping Thyme in Your Garden covers the most popular paver-joint plant in detail.
10. Pallet Wood Edged Paver Patio
Pallets are usually free if you ask the right businesses — hardware stores, plant nurseries, and small warehouses often have piles they’d love to give away. Disassembled pallet wood makes a beautiful, rustic edge to frame a small paver patio.
Use the planks as a raised border, anchor them with rebar or stakes, and seal them with an outdoor wood preservative. The contrast of warm, weathered wood against cool stone reads as cottagecore and high-end at once.
11. Stencil-Painted Paver Patio
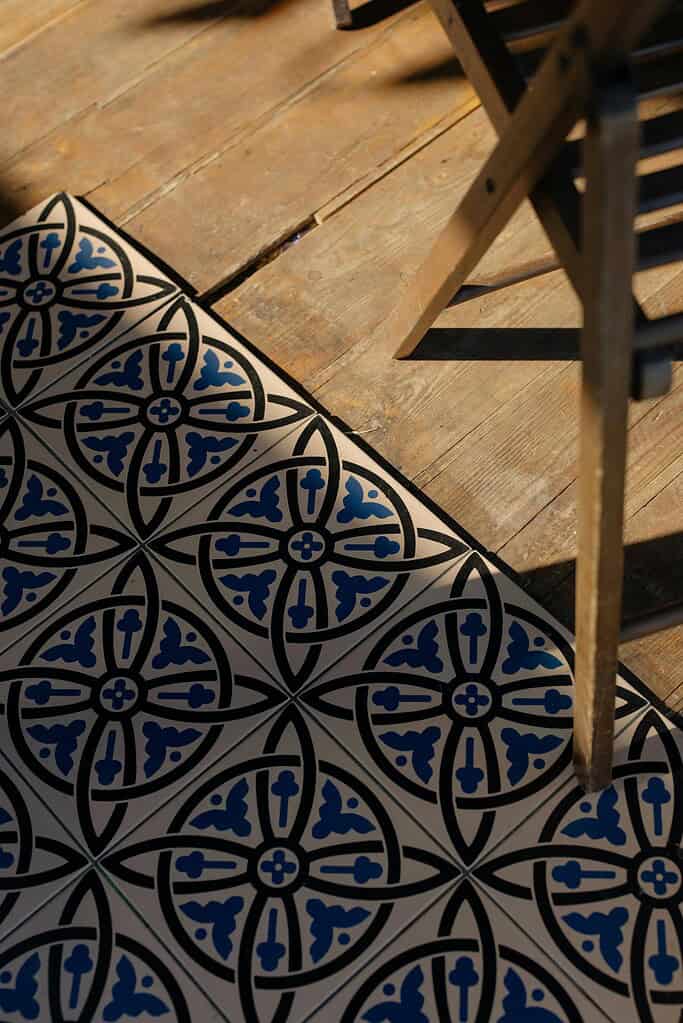
This is the cheapest patio facelift on the entire list. If you already have plain concrete pavers — or even an existing concrete slab — you can transform them with outdoor concrete paint and a stencil for the cost of a few cans of paint.
Moroccan tile patterns, encaustic-style designs, and simple geometric repeats look like expensive imported tile from a few feet away. Use a quality concrete primer and a UV-resistant outdoor paint so the design holds up to sun, rain, and foot traffic.
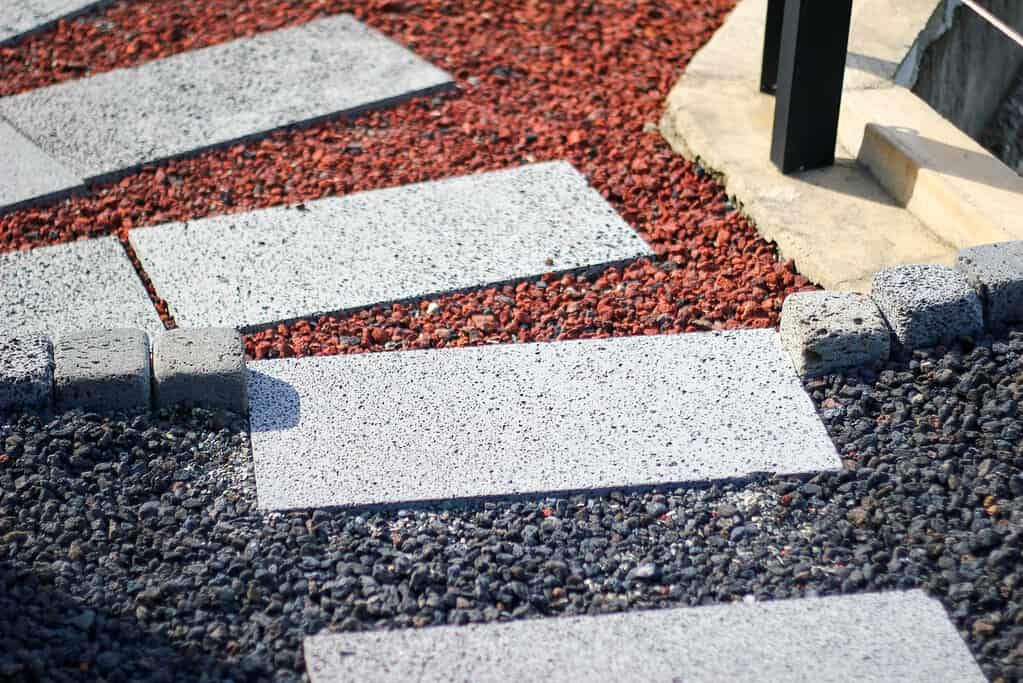
12. Paver and River Rock Border Patio
Frame any paver design with a 12- to 18-inch band of smooth river rock around the outside edge, and the whole patio instantly looks more polished.
The river rock acts as a transition zone between hard pavers and soft lawn or planting beds, softening the edge and adding texture.
It also improves drainage along the perimeter and keeps mulch or grass from creeping onto the pavers — especially striking when paired with low landscape lighting tucked into the rocks.
If this idea catches your eye, you'll love our roundup of 11 Budget-Friendly River Rock Landscaping Ideas That Still Look High-End — several border treatments in there pair perfectly with any paver patio design.
Smart Ways to Save Even More Money on Your DIY Paver Patio
Even with cheap pavers, costs creep up fast if you don’t shop carefully.
The biggest single way to cut your bill is to buy in bulk from a local landscape supply yard rather than pre-bagged from a big-box store. A pallet from a yard often costs 30 to 50 percent less per piece than the same pavers sold individually at retail.
Sand and base material show even bigger savings — a cubic yard of paver base from a supply yard runs about $30 to $50, while bagged base from a hardware store can cost three times that for the same coverage.
Don’t sleep on Facebook Marketplace, OfferUp, and local “buy nothing” groups, either. Homeowners constantly post leftover pavers from completed projects, often free or at a fraction of retail.
Time your project around end-of-season clearance sales too — late summer and early fall are when home improvement stores discount outdoor hardscaping inventory most aggressively.
Once your patio is built, dressing it up is the fun part. Our list of 12 Gorgeous Patio Plants That Are Surprisingly Easy to Grow is the natural next read — a few well-placed containers will make the new space feel finished.
Miss it by a week and you lose the crop. The free 22-page planner pins down your exact dates — last frost, first frost, and the weekly steps between — so you plant on the days that actually work for your ZIP.
Common Mistakes to Avoid When Laying a DIY Paver Patio
1. Skipping the base layer. The most common reason DIY patios fail is an inadequate base. Pavers laid directly on dirt sink, shift, and tilt within a season.
A proper base means at least 4 inches of compacted gravel topped with about an inch of leveling sand — the difference between a patio that lasts 20 years and one redone in two.
2. Forgetting the slope. A paver patio should slope away from your home at roughly a quarter inch per foot. A perfectly level patio collects water against your foundation and pools in the middle after every rain.
3. Skipping edge restraints. Without a solid border, pavers slowly drift outward, joints widen, and the entire surface loosens. Plastic, steel, or buried timber edge restraints are cheap, hidden, and absolutely essential.
4. Using regular sand in the joints. Plain sand washes out the first time it rains hard. Polymeric sand hardens slightly when activated with water and locks the pavers together while still allowing some flexibility.
Roll Up Your Sleeves and Build Your Dream Patio This Weekend
A paver patio is one of those rare home projects where the difference between “I’ll hire someone” and “I’ll do it myself” is genuinely just one weekend and a willingness to dig.
The materials are forgiving, the techniques repeatable, and the result transforms how you use your backyard.
Pick the idea from this list that fits your space and budget. Sketch it out, make a single trip to the supply yard, then start digging on Saturday morning — by Sunday night, you’ll have a patio you actually want to sit on with morning coffee, friends and a fire, or a book and something cold.
Want more ways to make your outdoor space feel like a destination? Our guide on The Ultimate Summer Garden Guide for a Lush Backyard Glow Up walks you through the planting, lighting, and finishing touches that turn a brand-new patio into the centerpiece of your yard.
Have you tackled a DIY paver patio of your own — or are you about to? Drop your favorite design idea, biggest budget tip, or hard-won lesson in the comments below!
Best gardening planner I've used in 10 years — and I keep coming back to it every season.
How Hard Is It to Garden in Your County?
Every county has a unique Gardening Difficulty Score based on frost risk, soil quality, drought, altitude, and climate trends. Find yours — plus personalized frost dates, planting calendars, and soil data.
Check Your County's Score →Ready to Design Your Dream Garden Bed?
Feeling inspired to build something beautiful?
If you’re ready to go beyond just one garden bed and truly design a space that feels intentional, productive, and charming, I put together something special for you.
Inside 101 Garden Bed Ideas, you’ll find creative layouts, raised bed designs, space-saving solutions, and inspiring setups you can actually recreate in your own yard – whether you’re working with a tiny backyard or a full homestead.
Start planning your dream garden today.

Frequently Asked Questions
How long does a DIY paver patio typically last?
A properly installed paver patio with a compacted gravel base, leveling sand, polymeric sand joints, and edge restraints can easily last 25 to 30 years with minimal maintenance. The pavers themselves are extremely durable, and any individual piece that cracks or stains can be lifted and replaced without disturbing the rest. The most common reason DIY patios fail much sooner is inadequate base preparation.
Do I need a permit to build a paver patio in my backyard?
In most municipalities, ground-level paver patios under a certain size — typically 200 to 400 square feet — do not require a permit because they aren’t considered permanent structures. However, regulations vary widely by city, county, and HOA, and some areas regulate impervious surface coverage even for small projects. A quick call to your local building department before you break ground is a good idea, especially near a property line or a known utility easement.
Should I use polymeric sand or regular sand between paver joints?
For most paver patios, polymeric sand is the better choice. It contains additives that bind together when activated with water, creating a firm joint that resists weeds and washes out far less easily. Regular sand is cheaper but tends to disappear within a year or two of normal weather. The exception is permeable patios with grass or moss joints, where you actually want loose growing medium between the stones.
Can I lay pavers directly on grass or dirt without digging?
You can, but you almost certainly shouldn’t if you want the patio to last. Pavers placed directly on grass or untreated soil sink unevenly, tilt as the soil shifts with seasonal moisture, and develop wide gaps as weeds push through underneath. The exception is a temporary install, like a small stepping-stone path or a single seating spot you don’t mind redoing in a year or two.
What’s the best time of year to build a paver patio?
Spring and early fall are the ideal windows for laying a paver patio. The ground is workable, temperatures are mild, and polymeric sand cures best in moderate humidity without extreme heat. Summer is doable but the labor is brutal and rapid drying can cause polymeric sand to set unevenly. Avoid winter installations in cold climates entirely — frozen ground is impossible to excavate properly and frost heave will wreck a patio installed over insufficiently compacted base material.
Level Up Your Garden
Our most popular gardening guides


