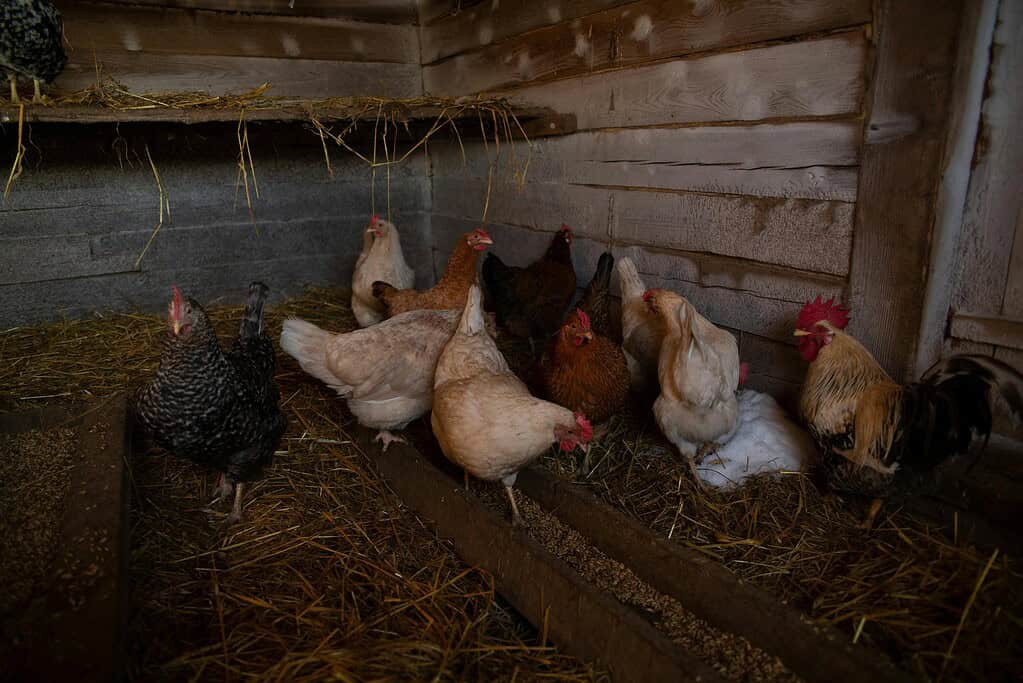
The outside of a chicken coop gets all the attention — the paint, the run, the cute little door. But the inside? That’s where your hens actually live, sleep, lay, and spend most of their time.
And if the interior isn’t set up right, it doesn’t matter how pretty the exterior looks. Your hens will be stressed, egg production will drop, and you’ll spend way more time cleaning than you should.
Whether you’re setting up a brand-new coop or rethinking an existing one, these ten inside chicken coop ideas will help you create a space your flock genuinely thrives in — not just survives in.
10 Smart Inside Chicken Coop Ideas to Try This Year
Here are 10 smart inside chicken coop ideas you can start using right away for a better coop setup.
1. Optimize Your Coop’s Ventilation Without Creating Drafts
Ventilation is the single most important factor inside a chicken coop — and also the most misunderstood.
Chickens release a tremendous amount of moisture and ammonia through their droppings and breath. Without proper airflow, that buildup leads to respiratory illness, frostbite in winter, and an overall miserable environment.
The key is ventilation without drafts. Vents should be placed high on the walls — above roosting height — so fresh air circulates without blowing directly on your sleeping hens.
Here’s what to aim for:
- At least 1 square foot of ventilation per 10 square feet of floor space (more in humid climates)
- Vents positioned on opposite walls to allow cross-ventilation
- Hardware cloth covering all openings to keep predators and wild birds out
- Closeable vents so you can adjust airflow during cold spells
A well-ventilated coop smells clean and stays drier — two things that directly impact flock health and how often you need to deep-clean. If ammonia hits you the moment you open the coop door, your ventilation needs immediate attention.
2. Set Up the Right Number of Nesting Boxes
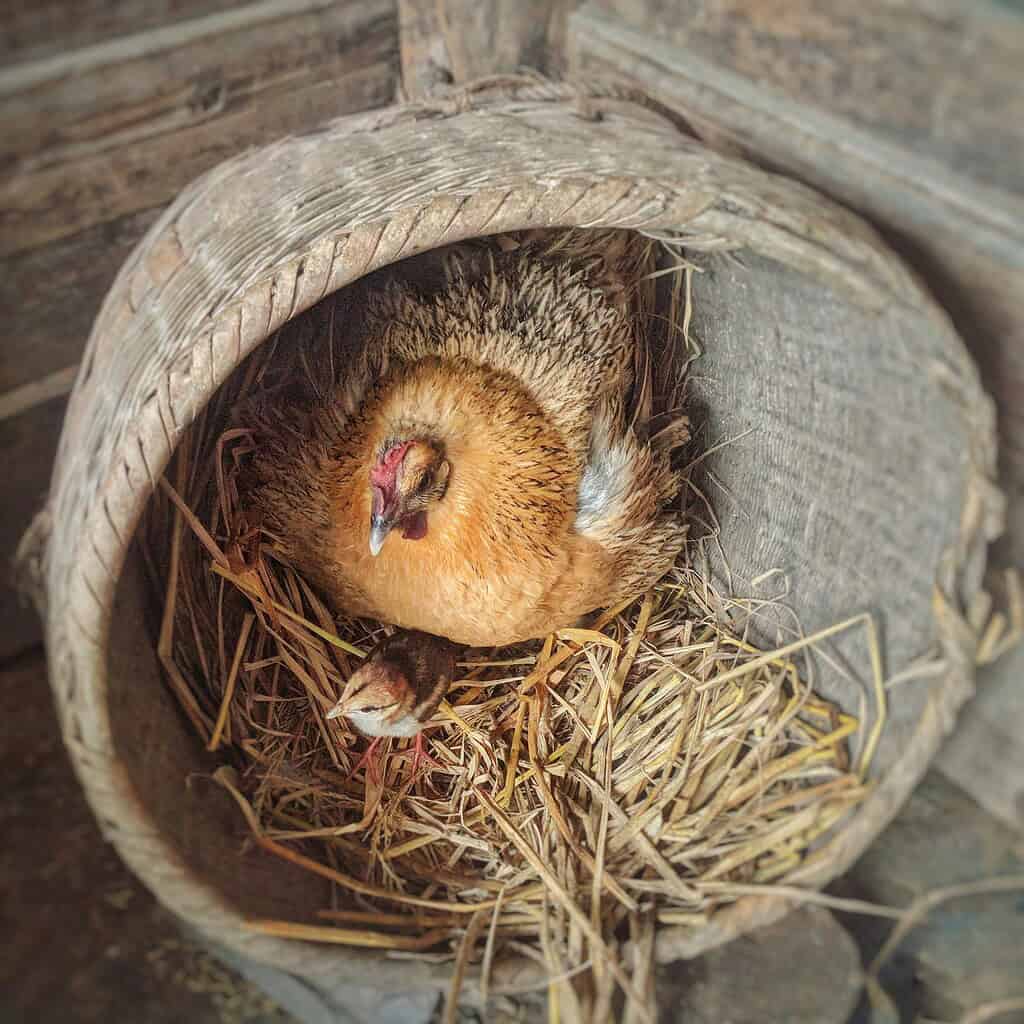
Nesting boxes are where your hens lay their eggs, and the setup matters more than most people realize. Too few boxes creates competition, stress, and broken eggs. Too many wastes space. The rule of thumb most experienced keepers swear by: one nesting box for every 3 to 4 hens.
But the number is only part of it. Here’s what makes a nesting box genuinely hen-friendly:
- Size: Around 12 x 12 inches for standard breeds, slightly larger for heavy breeds
- Height: 18 to 24 inches off the ground — low enough to access easily, high enough to feel secure
- Darkness: Hens prefer dimmer, slightly enclosed spaces when laying — a partial front cover or curtain helps
- Bedding: 3 to 4 inches of clean straw or pine shavings to cushion eggs and encourage use
- Position: Always lower than roosting bars, so hens aren’t tempted to sleep in them overnight
Roll-out nesting box designs — where eggs roll gently to a collection tray — are worth considering if you have issues with hens breaking or eating their own eggs.
3. Use the Deep Litter Method for Easier Cleanup
If you’re doing full coop cleanouts every week and wondering why it’s so exhausting — the deep litter method might change your life.
Instead of scooping out bedding frequently, you allow it to build up in layers over time, adding fresh material on top regularly.
The composting action that occurs in the lower layers actually generates a small amount of heat and reduces odor naturally.
To make it work well:
- Start with 4 to 6 inches of coarse bedding such as pine shavings or straw on a dry dirt or wood floor
- Add a thin layer of fresh bedding once or twice a week and stir the existing material
- Only do a full cleanout once or twice a year, typically in spring and fall
- Ensure your coop has good ventilation — this method fails fast in a damp, poorly ventilated space
The aged litter from this method is also excellent for your garden. If you’re not already composting your chicken manure, you’re leaving some of the best free fertilizer on the homestead just sitting there.
4. Install a Poop Board Under the Roosting Bars
Chickens do the majority of their pooping while they sleep — which means the area directly beneath their roosting bars takes a beating every single night.
Without a poop board (also called a dropping board), all of that lands in your bedding, accelerating the buildup of ammonia and forcing more frequent cleanouts.
A dropping board is simply a flat surface — plywood, a smooth board, or a tray — positioned 8 to 10 inches below the roosting bars. You scrape it off every morning or every couple of days, and your bedding stays dramatically cleaner.
This one change alone can cut your coop maintenance time significantly. We covered the full strategy behind this in our post on the chicken coop poop shelf trick — it’s a genuinely simple upgrade with a big payoff.
Sprinkle a little food-grade diatomaceous earth or wood ash on the board before scraping to reduce sticking and help with moisture absorption.
5. Build a Defined Roosting Area at the Right Height
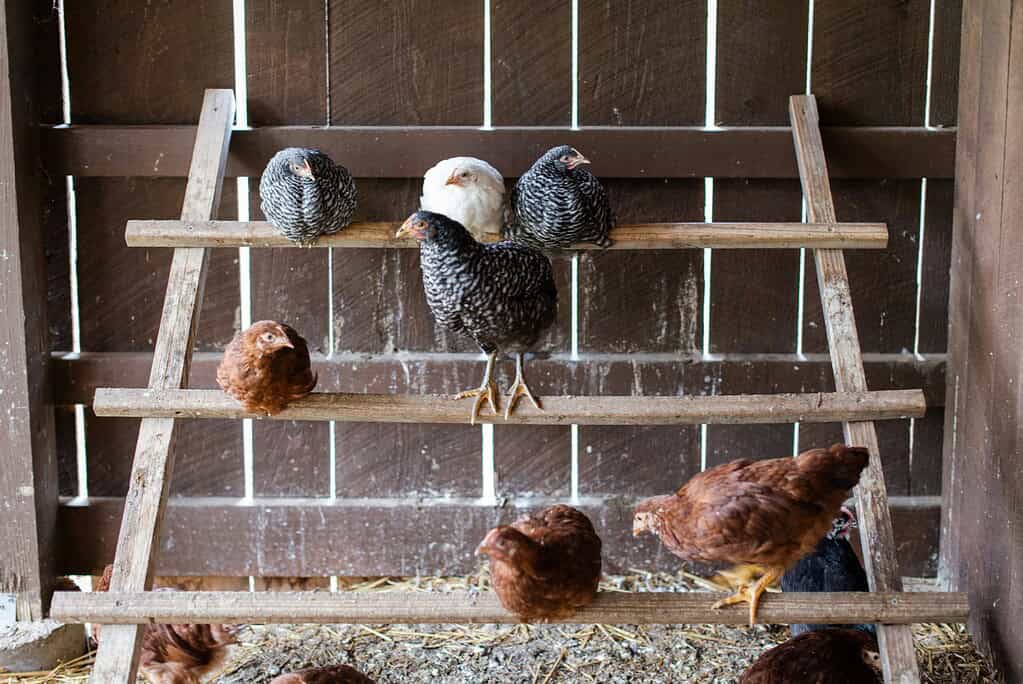
Roosting bars are where your hens rest and sleep every night, and getting the setup wrong causes more problems than most people expect — from fighting over spots to foot injuries and bumblefoot.
Here’s what a well-designed roosting area looks like inside a coop:
- Bar diameter: 2 to 4 inches wide — rounded or oval is better than square to prevent foot sores
- Height: 18 to 36 inches off the ground depending on breed; heavier breeds need lower bars
- Length: 8 to 12 inches of bar space per hen
- Layout: If using multiple bars, stagger them ladder-style — all at the same height is also fine to avoid pecking order disputes over the highest spot
- Material: Untreated wood works great; avoid slippery materials like plastic pipes
Always make sure roosting bars are positioned higher than nesting boxes.
Chickens instinctively want to sleep at the highest point available — if the nesting boxes are higher, you’ll constantly find hens sleeping (and pooping) in them.
6. Add Supplemental Lighting to Support Winter Egg Production

Hens need roughly 14 to 16 hours of light per day to maintain consistent egg production.
In winter, daylight hours drop significantly — and so does your egg count, sometimes to nearly zero. Adding a simple light inside the coop can bridge that gap without stressing your flock.
A few things to keep in mind:
- Use a low-wattage LED bulb (25–40 watts equivalent) — enough to read by, not blinding
- Add the extra hours in the early morning rather than the evening so hens still wind down naturally at dusk
- Use a timer to keep the schedule consistent — irregular light confuses the flock
- Avoid using red heat lamp-style lighting as a substitute — these aren’t designed for laying stimulation
Note that some keepers prefer to let their hens have a natural winter break to rest their reproductive systems. This is a valid choice — especially for older hens. Younger, first-year hens typically handle supplemental lighting with no issues.
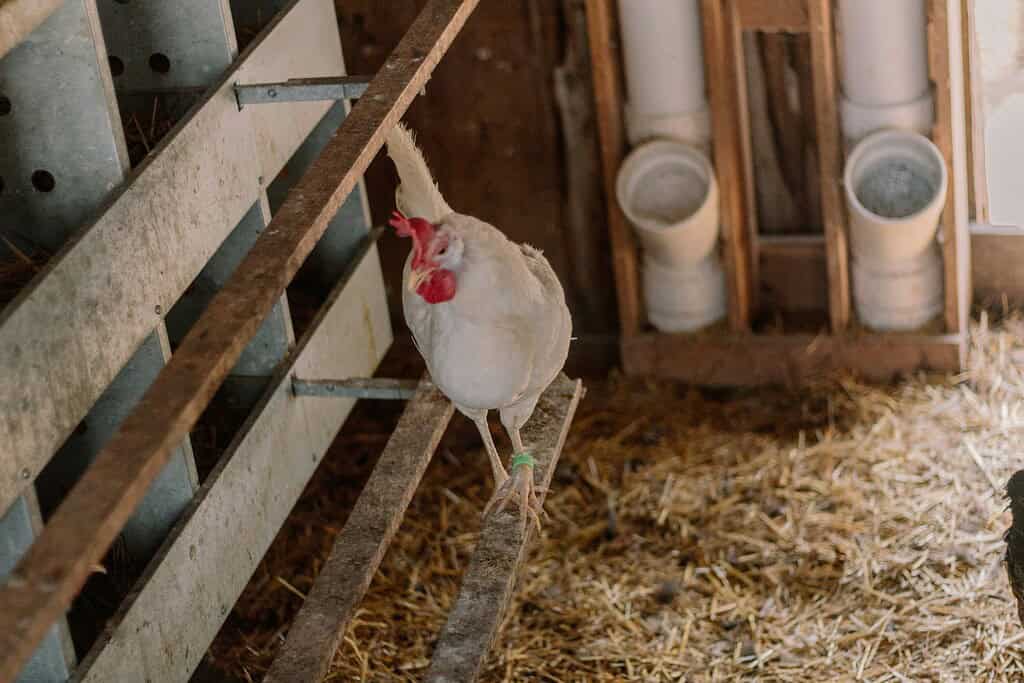
7. Make Feeders and Waterers Accessible and Easy to Clean
Where and how you position feed and water inside (or at the entrance to) your coop affects both sanitation and how much feed your hens actually waste.
Chickens scratch — constantly — and if your feeder sits on the floor, they’ll kick bedding, poop, and debris into it all day long.
Better positioning makes a real difference:
- Hang feeders at back height — roughly level with the hen’s back when she’s standing — to reduce spillage
- Use nipple waterers or covered drinkers rather than open dishes to keep water clean longer
- Move waterers outside or to a covered run if possible — water inside increases humidity and mold risk
- Clean waterers at minimum every 2 to 3 days; daily is ideal in summer
If you’re planning to expand your flock or rethink your setup entirely, our roundup of large chicken coop designs worth upgrading to includes several layouts that show smart feeder and waterer positioning in practice.
8. Hang Boredom Busters and Enrichment Items
Chickens cooped up for long stretches — especially during winter or bad weather — will take out their frustration on each other.
Feather pecking, bullying, and even cannibalism can all stem from boredom and overcrowding. A few simple enrichment items inside the coop can make a significant difference.
Ideas that work well:
- A cabbage or treat ball hung from the ceiling that spins when pecked
- A flock block — a pressed seed and grain block that keeps them busy pecking throughout the day
- Hanging bundles of herbs like dried oregano, lavender, or mint — these also have mild antibacterial and calming properties
- A mirror mounted low on the wall — hens are surprisingly entertained by their own reflections
- Perches and platforms at varying heights to create more vertical space and interest
Want to go further with coop personality and enrichment? We have a whole post on practical chicken coop décor ideas that actually benefit your flock — not just pretty touches, but functional ones too.
9. Use Safe, Hen-Friendly Flooring
The floor of your coop is often overlooked, but it plays a huge role in cleanliness, predator protection, and your hens’ foot health. There’s no single “best” floor — the right choice depends on your climate, coop size, and how hands-on you want to be with maintenance.
Here’s a quick rundown of the most common options:
- Dirt floor: Natural and easy, but harder to keep dry and more vulnerable to digging predators
- Wood floor: Easy to clean, predator-resistant, but needs to be sealed and checked regularly for rot
- Concrete floor: The most durable and predator-proof option, but cold in winter and hard on feet without thick bedding
- Sand: Excellent drainage and naturally pest-inhibiting; works beautifully as a base layer, especially in dry climates
Whatever floor type you choose, always cover it with adequate bedding — pine shavings, straw, hemp, or a combination. A bare floor of any material is hard on feet and rapidly accumulates waste with nowhere to go.
10. Create a Dedicated Space for Broody Hens
If you keep hens long enough, you’ll eventually deal with a broody hen — one who has decided she’s going to sit on a nest and hatch eggs whether you like it or not.
Broody hens can be disruptive to the rest of the flock, blocking nesting boxes and occasionally becoming aggressive toward other hens trying to lay.
Having a small, separate area inside or adjacent to the coop for broody hens solves a lot of headaches:
- A small sectioned-off corner with its own nesting space, food, and water
- Enough room for a hen and eventually her chicks to move around safely
- Easy access for you to check eggs and remove failed ones without disturbing the whole flock
If you do hatch chicks regularly, a dedicated brooder setup outside the main coop is even better. Our guide to DIY brooder box ideas that make raising chicks easier walks through several setups that work well for both hatched and purchased chicks.
Garden Planner
The 24-page planner timed to your county's real frost dates. Planting windows, monthly checklists, and a harvest log you'll fill with pride by August.
Your Free 24-Page Garden Planner
Built for your exact ZIP code — planting dates, harvest log, and a month-by-month plan. 15-second sign-up.
Why the Inside of Your Coop Matters More Than You Think
A lot of first-time chicken keepers spend a huge amount of energy on the coop exterior — the run design, the aesthetic, the roof — and then throw together the interior as an afterthought.
It’s an understandable mistake, but it’s one that shows up fast in the form of reduced egg production, sick birds, and constant maintenance headaches.
Your hens spend the majority of their time inside the coop — sleeping, laying, eating, socializing, and sheltering from weather and predators. The interior environment directly affects:
- Egg production — stress, poor lighting, and inadequate nesting space all suppress laying
- Flock health — ammonia buildup and moisture lead to respiratory illness fast
- Behavior — overcrowding and boredom cause pecking, bullying, and feather damage
- Your time — a well-designed interior is dramatically easier and faster to clean and maintain
The good news is that most interior improvements are low-cost and high-impact. You don’t need to rebuild your coop — you often just need to rethink how the space is being used.
Whether you’re working with one of the best small chicken coop setups for a tight yard or something more spacious, the same interior principles apply.
Free Planting Guides for This Article
Get exact planting dates, frost schedules, and growing tips for your zone:
How to Keep the Inside of Your Coop Smelling Fresh Year-Round
If your coop smells strongly of ammonia, something is off — and it’s not just unpleasant for you.
Ammonia at even moderate concentrations irritates your hens’ respiratory tracts, making them more vulnerable to illness. Keeping the smell under control isn’t just about comfort. It’s about flock health.
Here are the most effective strategies:
- Fix ventilation first. No product or trick compensates for a coop that doesn’t breathe properly. Fresh air is your number one odor management tool.
- Scrape the poop board daily. Removing droppings from the highest-concentration area (under the roosts) before they break down is the single most impactful daily habit.
- Add fresh bedding regularly. You don’t need to do a full clean often if you keep adding dry material on top and stirring it into the existing litter.
- Sprinkle agricultural lime or wood ash on damp spots to neutralize odor and absorb moisture — never use hydrated lime, which burns.
- Use dried herbs. Hanging bundles of mint, rosemary, or lavender inside the coop adds a pleasant scent and can deter insects naturally.
- Control moisture at the source. Move waterers outside if possible, check for roof leaks, and make sure your coop floor drains well.
Also remember that the bedding and manure you remove from your coop doesn’t have to go to waste. Properly managed, it becomes excellent garden compost.
If you’re new to that process, our detailed guide on composting chicken manure the right way at home will walk you through everything safely.
Miss it by a week and you lose the crop. The free 24-page planner pins down your exact dates — last frost, first frost, and the weekly steps between — so you plant on the days that actually work for your ZIP.
Common Mistakes to Avoid When Setting Up the Inside of a Chicken Coop

Even experienced chicken keepers make some of these. Knowing what to watch out for from the start can save you a lot of backtracking.
- Not enough space per bird. The general minimum is 4 square feet of coop space per standard-sized hen. Crowding is the root cause of many flock behavior problems.
- Placing nesting boxes higher than roosting bars. Hens will always roost at the highest available point — if boxes are higher, they’ll sleep in them, creating a cleanup nightmare.
- Using the wrong bedding. Cedar shavings are toxic to chickens. Stick to pine shavings, straw, hemp, or dried leaves. Avoid anything moldy or wet.
- Skipping the pop door latch. A coop door that doesn’t latch securely is an open invitation for nighttime predators. Always use a two-step latch that a raccoon can’t figure out.
- Relying on a heat lamp for warmth. Heat lamps are a fire hazard and can prevent birds from properly acclimating to winter temperatures. Healthy hens with dry, well-ventilated housing tolerate cold far better than you’d expect. Focus on draft prevention, not heat.
- Ignoring the run connection. The inside of your coop works best as part of a system. If hens don’t have enough outdoor access and enrichment, they’re stuck inside longer — and the interior takes more of a toll. If you haven’t already sorted out your run setup, these must-know tips before building a chicken run are a great place to start.
How Hard Is It to Garden in Your County?
Every county has a unique Gardening Difficulty Score based on frost risk, soil quality, drought, altitude, and climate trends. Find yours — plus personalized frost dates, planting calendars, and soil data.
Check Your County's Score →Start with One Change and Build From There
You don’t need to overhaul your entire coop in a weekend. Pick the one change from this list that will make the biggest immediate difference for your flock — whether that’s finally adding a dropping board, improving your ventilation, or hanging a few enrichment items — and start there.
A well-designed coop interior isn’t just about your hens’ wellbeing (though that matters enormously). It’s also about making your daily routine easier, your weekly maintenance shorter, and your overall chicken-keeping experience more enjoyable.
Happy hens lay better, stay healthier, and are genuinely a pleasure to keep.
And if you’re still figuring out the right breed for your setup — since different breeds have very different space, roost height, and enrichment needs — our complete chicken breeds guide for homesteaders can help you make the best match for your goals and climate.
Now it’s your turn — which of these inside chicken coop ideas are you trying first, or which change has made the biggest difference in your setup? Drop a comment below and share what’s worked for your flock!
Best gardening planner I've used in 10 years — and I keep coming back to it every season.
Frequently Asked Questions
How often should you completely clean out the inside of a chicken coop?
If you’re using the deep litter method and staying on top of poop board scraping, a full cleanout is typically needed only once or twice a year — usually spring and fall.
If you’re using thinner bedding and doing spot cleaning, you might need a full cleanout every 4 to 6 weeks. The biggest tell is smell: if ammonia is noticeable when you open the door, it’s time regardless of your schedule.
What is the best bedding to use inside a chicken coop?
Pine shavings (medium to large flake) are the most popular choice — they’re absorbent, affordable, and widely available. Straw works well in nest boxes and as a top layer in colder months.
Hemp bedding is gaining popularity for its superior absorbency and lower dust. Avoid cedar shavings (toxic to chickens), sawdust (too fine and dusty), and anything damp or moldy.
Do chickens need a heat source inside the coop during winter?
In most climates, no. Healthy chickens with dry feathers and good coop ventilation are remarkably cold-hardy. Most cold-weather problems (frostbite, illness) actually stem from moisture and poor airflow rather than temperature alone.
Heat lamps pose a significant fire risk and can prevent birds from properly acclimatizing. Focus on eliminating drafts, keeping bedding dry, and choosing breeds suited to your climate rather than adding heat.
How do you stop hens from sleeping in the nesting boxes?
The most reliable fix is ensuring your roosting bars are positioned higher than the nesting boxes. Chickens always want to sleep at the highest available point. If boxes are higher or at the same level, hens will choose them over the roosts.
You can also block nest boxes off at night for a few weeks using a piece of cardboard until the hens get into the habit of roosting properly. Make sure there’s enough roosting bar space for all birds to sit comfortably without competing for spots.
Can you use sand as the main flooring inside a chicken coop?
Yes — coarse builder’s sand (not fine play sand) works very well as coop flooring, especially in dry climates. It drains well, doesn’t compact the way soil does, and is easy to rake clean. Droppings dry out on the surface quickly, which reduces ammonia.
The main downside is that sand gets cold in winter and can be heavy to replace. Many keepers use sand as a base layer and add pine shavings or straw on top for warmth and cushioning during colder months.
Level Up Your Garden
Our most popular gardening guides


