Starting seeds indoors is easier than you think – all you need are some trays, a light, and the right mix.
A fine seed-starting mix (finer and lighter than potting soil) gives baby roots room to push out of the seed. Think of a seed tray as a mini green bed: fill it with moist mix, pop in seeds, and cover them.
Covering with a dome or clear wrap helps keep humidity high at first. (Tip: Seeds love about 60% humidity during germination, so a dome is like a cozy blanket for sprouts.)
Once seedlings poke through, move the cover aside or open any vents to avoid rot.
Indoor gardening tech has really stepped up, so you can pick a setup to match any budget or space.
Below we’ve rounded up budget-friendly starter kits, midrange light systems, and pro-level gear, plus handy add-ons like heat mats and self-watering trays.
Disclosure: This post may contain affiliate links. If you buy through these links, we might earn a small commission at no extra cost to you. Thank you!
Budget-Friendly Starter Kits
These are all-in-one seed-starting kits and simple setups that won’t break the bank. They usually include trays, domes, and sometimes grow pellets – perfect if you’re just getting started.
1. Burpee Greenhouse Indoor Starting Kit (72-Cell)

- Includes two 36-cell trays, water tray, 72 coir pellets, and dome lid.
- Comes with plant markers and diagrams to track seedlings.
- Grow up to 72 seedlings; tray size: 10″ x 20″.
- Pellets expand with warm water; follow seed packet tips.
- Non-GMO and guaranteed quality from Burpee.
Includes: Two 36-cell trays (72 total cells), a clear dome lid, a removable water reservoir base, coconut coir pellets, plant markers and instructions.
This Burpee kit is a classic beginner favorite. The clear dome keeps moisture in (acting as a simple humidity dome) and the lower reservoir lets you water without disturbing the seeds.
TechGearLab actually reports this setup “ensures your seedlings will always be evenly watered,” and in their tests 100% of the cells sprouted, calling it “a solid choice for beginners”.
Space & maintenance
It’s just 10×20 inches footprint, so it fits on a tabletop.
When seedlings appear, simply vent or remove the dome daily so they don’t drown in moisture. (No panicking though – if your dome has no vents, just lift it off occasionally as Leslie Halleck suggests.)
Note: The included coir pellets expand in the cells; some users find them fiddly. But on the plus side, you’ve got markers and a diagram, so you’ll know which seed is which.
2. VIVOSUN 6-Pack Seed Starter Trays (72-Cell, with Dome)

- Adjustable dome with vent and drain holes for moisture control.
- Works with heat mats up to 120℉; made of durable material.
- Reusable trays suitable for various seeds and seedling blocks.
- Easy transplanting and centralized plant management.
- Includes 6 seed trays, 6 bases, 6 domes, tools, and 10 labels.
Includes: Six reusable 72-cell trays (12 cells each), green base trays, and one large clear humidity dome (fits 2 stacked trays).
Similar concept to the Burpee kit but simple: trays and a cover. You can seed 432 plants at once (if you have that many seeds!).
The sturdy green trays have drain holes so excess water seeps into the bottom pan. The dome is generously tall, so it can be used over two stacked trays for extra humidity.
Self-watering tip
These trays don’t have a built-in wicking mat, but the base collection tray still helps. For easy watering, you simply fill the bottom pan.
Keeping water in the bottom is like giving your seedlings their own miniature reservoir – they’ll wick up moisture as needed.
As TechGearLab found with similar trays, having a reservoir “takes a bit of the headache out of germination”, and you’ll often see uniform sprouting.
Beginner note: After germination, lift or vent the dome a bit each day. This lets seedlings toughen up and prevents fungal funk. Leslie Halleck warns that too-high humidity can invite disease, so cracking the dome open after sprouts appear is key.
Garden Planner
The 22-page planner timed to your county's real frost dates. Planting windows, monthly checklists, and a harvest log you'll fill with pride by August.
Your Free 22-Page Garden Planner
Built for your exact ZIP code — planting dates, harvest log, and a month-by-month plan. 15-second sign-up.
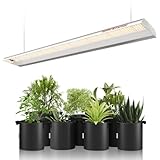
Grow Light Fixtures & Kits
Once seeds sprout, light is critical (they’ll stretch to reach it!). These systems put a grow light on an adjustable stand or include a light fixture, ranging from small starter lights up to bigger racks.
3. iPower 36W 4-Foot LED Grow Light Stand

- Ideal for seed starting, cuttings, and indoor plants.
- Easy height adjustment with sturdy metal frame.
- 36W LED with red & blue spectrum for max growth.
- Safe isolated LED driver design, no shock risk.
- Measures 50 x 18.5 x 46 inches; simple assembly; 1-year warranty.
A complete 4-foot LED seedling stand. It has a four-lamp LED fixture (36W total) mounted on a black metal rack stand. Height-adjustable lamp bar and wire shelf.
Key features
Covers a roughly 4×4 ft area (just like a 40W fluorescent T5), with plug-in boards for each LED tube. The stand has a sturdy triangular base (18″ wide) for stability. You can also stack your seed trays on the shelf below.
Think of this as an all-in-one germination station. 36W isn’t crazy bright, but it’s enough to grow herbs or veggies in those seed trays.
The LEDs are full spectrum “daylight” style (cool white). Assembly is straightforward – even a beginner can snap it together.
It’s one of the most popular 4-ft LED kits around. Home gardeners like that it comes with both the lights and stand.
If your space is tight, the vertical stand is a solid pick – you can grow on the shelf and shine light down on trays.
Tip: Keep the light a few inches above the seedlings so they don’t get too hot. LED means low heat, but for super-close drops a little safety never hurts.
4. Jump Start 4-Foot T5 Grow Light System (with Timer)

- Complete T5 grow light kit with stand and 6-ft cord.
- Built-in timer with 12/12 or 18/6 light cycle options.
- Adjustable stand for optimal plant coverage and growth.
- Durable fixture with reflective interior for better light output.
- Easy, tool-free assembly; fits up to 48 inches wide.
A 4-ft T5 fluorescent grow light fixture with a built-in timer, plus a stand. An“old-school but reliable.” The Jump Start system includes a 6400K full-spectrum bulb, a sturdy metal stand, and a timer for easy lighting cycles.
Key features
6400K daylight bulb (no hype color – actual white light), height-adjust clamp to raise/lower the light bar, and a 12- or 18-hour timer so you don’t forget to turn it off. Assembly is super easy, no soldering or anything.
Beginner-friendly
This kit’s selling point is simplicity. You hit one button and it will do 12-on/12-off or 18-on/6-off schedules. (Seedlings like about 16 hours of light a day, so many folks set it to 18/6.)
The fluorescent tubes run cooler than older CFL bulbs, so you can keep them just 2–4 inches from sprouts.
T5 bulbs are less fancy than LEDs but very effective. They have a broad spectrum and penetrate canopies nicely. If LEDs seem intimidating, this is “mother-approved” tech – lights like these have been used in home gardening for decades.
It’s often called a safe, solid choice if you’re short on lighting budget but still want good results.
Beginner tip: If you add a small fan nearby, it mimics a gentle breeze (per Gardenary advice), which strengthens stems. Also, as it includes a dome cover idea, remember to vent that once you see tiny leaves.
5. Spider Farmer SF600 LED Grow Light (2×4 ft Coverage)
- High output with 384 LEDs and 11,000 lumens using only 72W.
- Full spectrum light (red, IR, warm-white, blue) supports all growth stages.
- Lightweight, plug-and-play design—ideal for small spaces.
- Long lifespan (50,000 hours) with moisture-resistant coating.
- 5-year warranty and local support centers worldwide.
A high-efficiency full-spectrum LED panel (74W draw) that covers about 2×4 feet. This is a 2025 new model from Spider Farmer, a respected LED brand.
Key features
Uses OSRAM diodes (384 total), dimmable output, and a broad “sunlike” spectrum. 5000 lumens output with very low heat. The slim profile and hanging design make it ideal for shelf setups or grow tents (though we’re using it for seedlings).
If you’re treating seed-starting like a mini indoor farm, this is a pro-grade option. Spider Farmer lights are energy-saving (they brag about “sunlike” spectrum).
You get more photons (and better control) for your dollar compared to basic LEDs. Think of it as giving your seedlings the power of the sun in a 74-watt package.
Casual note: 74W only? Yep – LED tech. It runs cool, so it can hang just 6–12 inches above plants. That makes it a solid pick if you want strong seedlings without high power bills. No timer built-in, but you can plug it into a timer strip.
6. Barrina 4FT T8 LED Grow Light (6-Pack Tubes)

- New upgrade: safer design with new male-female connectors (Barrina GM Series compatible).
- Full spectrum light supports all plant stages from seed to fruit.
- Updated chips provide even light distribution and high efficiency.
- Low power draw (252W) with 1152 LEDs and reflector design for 17–20% more efficiency.
- Easy setup—link up to 6 light strips with included cords and hardware.
- Includes 6 lights, 3 power cords, 5 link cords, clips, tape, and cable ties.
A set of six 4-foot LED tubes (252W total) that can be wired together. This Barrina kit includes a V-shaped reflector for each tube and linking cables so you can line up multiple tubes. (Barrina is famous for LED tube conversions.)
Key features
Full spectrum daylight (6×42W = 252W total draw, equivalent to ~1400W old incandescent). You can hang these on a support frame or lay them on a shelf. They come with metal end brackets and on/off switches for each pair.
252 watts is serious light. This is for big projects or if you have a larger rack. You might break it up (3 tubes per light bar) for multiple levels.
In small seed-starting rooms, folks often hang these horizontally in multiples for uniform cover. They’re waterproof, so spilled water is no biggie.
Budget note: Even though it’s 6 lights, Barrina tubes are surprisingly affordable, so this is still “budget-friendly” on a per-watt basis. Plus, you can use any fixture – even retrofit old fluorescent holders if you want.
Tip: Make sure to mount them securely (they’re heavy). And remember, more light isn’t always better – start with them raised higher and lower them if plants start to lean.
Heating & Humidity Accessories
These add-on components can really help improve germination rates and make life easier. They’re not mandatory, but many home growers swear by them for stronger, happier seedlings.
7. VIVOSUN 10″x20″ Seedling Heat Mat

- Keeps soil at 68–86℉ (20–30℃) for seed starting and cuttings.
- Far-infrared heat delivers stable, gentle warmth to boost germination.
- Durable, flexible, waterproof (IP67) design—easy to clean and store.
- Fits standard 1020 trays (10″ x 20.75″) and uses only 20W of power.
- Great for seeds, brewing, or terrarium use—indoors only.
- Heats up to 104℉ with optional thermostat and humidity dome.
A flat 10″×20″ heating pad that sits under seedling trays. It gently warms the soil. This model is UL-certified and waterproof.
Key features
Pads the bottom of your tray with about +10–20°F above ambient. It draws only ~25 watts. It’s durable (black plasticy cover) and UL safety-approved, so you can run it safely 24/7. No timer included – just plug in directly.
Seeds germinate fastest in warm soil. As botanical experts note, many seeds need consistent soil temps around 65–75°F to sprout quickly.
A heat mat gives you that springtime soil even in winter! Users report much better germination when temps are stable.
Beginner tip: Place the mat on a stable surface (like a table), put your seed tray on top, and then the dome if you use one.
Do NOT cover the mat with heavy insulation or let it fold – just leave it flat. You can also use a separate thermostat controller for accuracy, but you’ll see a big difference even without one.
8. VIVOSUN Heat Mat + Digital Thermostat Combo

- Maintains ideal 68–86℉ (20–30℃) for seed starting and cuttings.
- Far-infrared heat boosts germination with stable, root-safe warmth.
- Durable, flexible, waterproof (IP67) mat—easy to clean and store.
- Only 20W power use—great for plants, brewing, or terrariums.
- Heats up to 104℉; best paired with thermostat and humidity dome.
The same 10″×20″ heat mat, plus a plug-in digital thermostat controller. The thermostat lets you set your desired soil temp (e.g. 72°F) and it will turn the mat on/off to hold that temp.
Key features
UL-certified, ETL safety marks. The thermostat’s probe plugs into the mat and can be adjusted to 40–110°F. Cables are long enough to tuck the temp probe down at root level. Kit sells for about $25 (cheap investment).
Even better germination control. As one source notes, “seedlings love consistency, and regular temperatures above at least 60°F … are essential”.
The thermostat means you won’t accidentally roast them; once sprouts appear you can dial temp down. It’s a frequently-chosen combo for beginners who want foolproof results.
Tip: Always test the setup first: put a small thermometer in the soil to check the actual temp before planting. Most users set these mats to around 75°F soil for veggies.
Humidity Domes – Why They Matter
Keep in mind: when seeds germinate they don’t yet have fully developed roots. They survive off stored moisture and can easily dry out.
That’s why humidity domes (covers) are so useful at first. They keep the air around the sprouts moist. Horticultural experts recommend keeping RH ~60% for the first leaves.
In practice, that means: once you see tiny green cotyledons, pop off or vent the dome a bit every day.
If you leave a dome on too long without air flow, condensation and mold can form. (You’ll often see vents built into pro domes to prevent that.)
Self-Watering Trays – No Fuss Watering
Another pro tip: use self-watering trays or reservoir kits. The Burpee kit above is a built-in example – the base holds extra water so seedlings wick what they need.
This cuts down on dry spells and overwatering alike. In fact, testers found that a good self-watering tray can give you nearly “set and forget” germination with 100% of cells sprouting.
If your kit doesn’t have one, you can mimic it by carefully watering from the bottom or getting a tray with a standpipe fill. It’s a great hack for beginners or if you’ll be away for a couple of days.
Miss it by a week and you lose the crop. The free 22-page planner pins down your exact dates — last frost, first frost, and the weekly steps between — so you plant on the days that actually work for your ZIP.
How Hard Is It to Garden in Your County?
Every county has a unique Gardening Difficulty Score based on frost risk, soil quality, drought, altitude, and climate trends. Find yours — plus personalized frost dates, planting calendars, and soil data.
Check Your County's Score →Tips for Seed Starting
1. Light Distance: Keep your grow light just a few inches above the tops of seedlings (LEDs run cool so no burn) and raise it as they grow. Good light prevents legginess.
2. Watering: Check trays daily. Damp (not soggy) soil is ideal. With a self-watering tray, top up the reservoir when it’s low; without one, water gently from bottom or use a spray bottle.
3. Space Saving: If you’re tight on space, consider a multi-tier grow light stand (like the iPower above) or stacking a few spider racks.
4. Spectrum: You’ll see terms like “full spectrum.” In short, blue light (400–520 nm) encourages bushy leafy growth and red light (610–720 nm) encourages blooming. Full-spectrum LEDs cover both, which is ideal for seedlings. (Even the T5 and fluorescent bulbs we listed mimic daylight.)
5. Enjoy the Process: Starting seeds is a bit of a science project – keep notes (or take pics) of how your seedlings do with each setup.
It’s normal if a few seeds don’t sprout; even experts aim for a range of 70-90% success. With the right gear above, you’ll be improving your odds and having fun along the way.
Whether you’re on a shoestring or ready to go all-out, the kits and gear above will get those seeds happily germinating and growing.
Give them warm, bright conditions, and before long you’ll have healthy seedlings ready to transplant into your garden.
Happy growing, and may your indoor greenhouse dreams come true! 🌿
Level Up Your Garden
Our most popular gardening guides


