A bare stick poking out of a pot. No flowers. A couple of limp, leathery leaves and roots the color of an old paper bag.
That is what most “dead” orchids look like the moment people decide to toss them — and it is almost always the moment they are most worth saving.
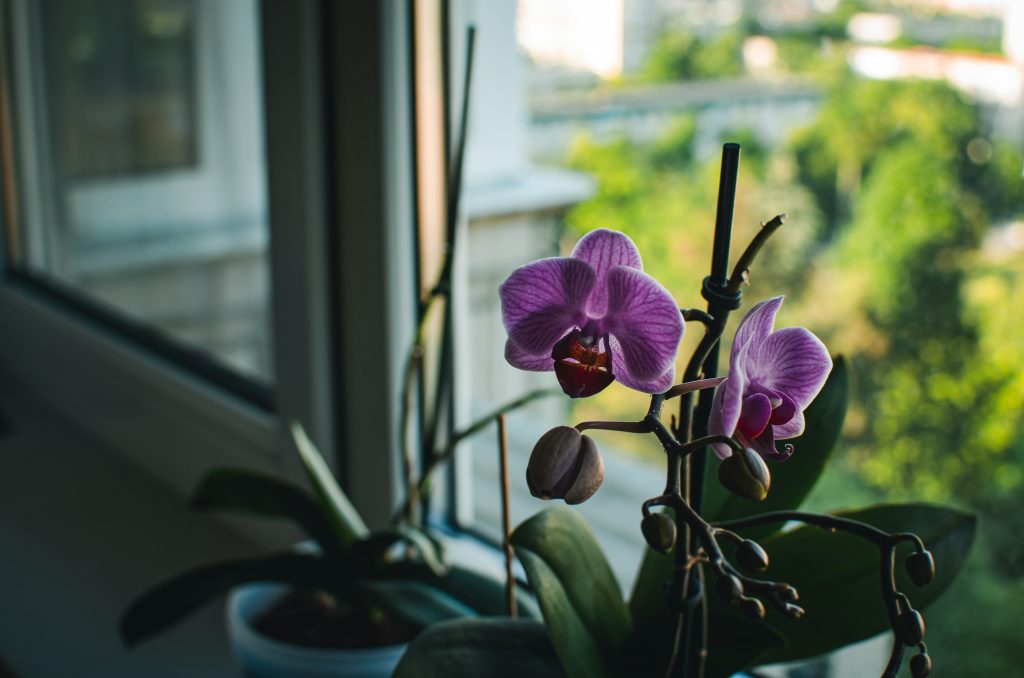
Here is the part nobody tells you when you buy that grocery-store orchid: dropping every last flower is not death. It is the plant clocking out for the season.
A Phalaenopsis (the common moth orchid) can sit flowerless for months and still be perfectly alive, quietly storing energy for its next bloom.
So before you give up, the real question is not “Is it blooming?” It is “Is it growing?”
This guide walks you through how to revive an orchid the way long-time growers actually do it — by diagnosing first and watering second.
We will decode what its roots are telling you, fix the single most common killer, and cover three rescue methods for everything from rotted roots to an orchid that has lost its roots entirely.
First, Run a Quick Triage (Don’t Touch the Watering Can Yet)
The biggest mistake in orchid rescue is reaching for water before you understand the problem.
A wilting orchid looks thirsty, so the instinct is to drown it — which, more often than not, is exactly what put it on death’s door in the first place.
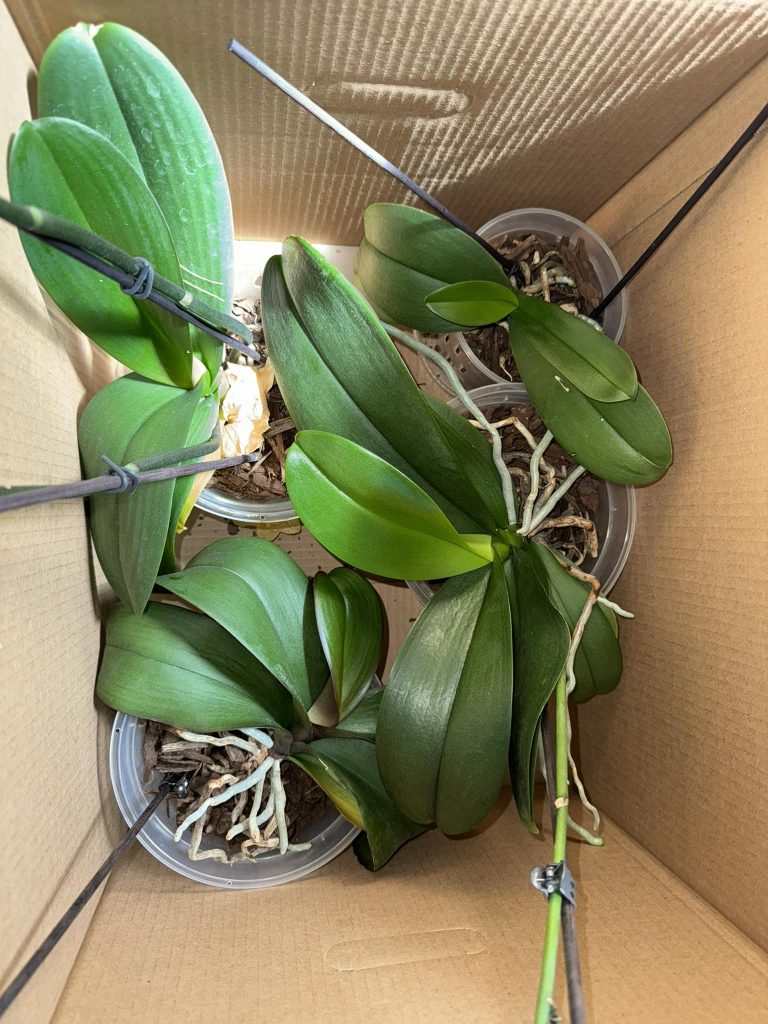
Slip the plant out of its pot and check three things, in this order:
- The roots. This is your single most reliable health readout. Firm roots mean a living plant, no matter how rough the top looks.
- The crown. That is the central point where the leaves meet. If it is brown, mushy, or smells sour, you may be dealing with crown rot, which needs urgent attention.
- The leaves. Limp, wrinkled, or yellowing leaves are a symptom, not the disease. They tell you something is wrong with the roots’ ability to drink — they rarely tell you what.
Hold off on any “treatment” until you have looked underneath. An orchid is one of the few houseplants where the answer is genuinely hidden below the surface.
Garden Planner
The 22-page planner timed to your county's real frost dates. Planting windows, monthly checklists, and a harvest log you'll fill with pride by August.
Your Free 22-Page Garden Planner
Built for your exact ZIP code — planting dates, harvest log, and a month-by-month plan. 15-second sign-up.
Read the Roots Before You Do Anything Else

Orchid roots are coated in a spongy silver layer called velamen that acts like a wetsuit, soaking up moisture and then guarding it.
Learning to read that layer is the closest thing to a cheat code in orchid care.
Here is what each root type is telling you:
- Silvery-green and firm: Healthy and a little thirsty. This is the look you are aiming for between waterings.
- Plump and bright green: Healthy and well-hydrated, usually right after a drink.
- Mushy, brown, black, or hollow: Rotted. These are dead and need to come off — they cannot recover and will spread decay.
- Shriveled, papery, or wiry: Dehydrated and dead, usually from a plant that dried out too far or sat unwatered after the media broke down.
Give the root ball a gentle wobble while you are at it. If the plant rocks loosely in the pot, it has lost most of its anchoring roots — a sign the rescue will lean on regrowing roots, not just saving the ones it has.
If you find even a few firm roots, you have a strong candidate for revival. If every root is mush or paper, do not panic yet — there is still a method for that further down.
The Real Reason Orchids “Die” (Hint: It’s Rarely Thirst)

Counterintuitive truth: a droopy, dehydrated-looking orchid is very often an overwatered one. When roots sit in soggy media, they rot and lose the ability to absorb water at all.
The leaves then go limp because the plant is parched — even though its roots are soaking wet. Pour on more water and you accelerate the rot.
This is why orchids and ordinary houseplants are not the same animal. Your pothos wants steady moisture; an orchid is an epiphyte that clings to tree bark in the wild, with roots in open air most of the day.
If you have only ever cared for soil plants, it is worth brushing up on the basics of watering plants indoors and then mentally throwing half of it out — because orchids break the rules.
The practical rule for a recovering orchid:
- Water only when the roots read silvery, not green.
- Water in the morning so the crown dries by nightfall.
- Never let the pot stand in a tray of water.
Get this one thing right and you have solved the problem behind most orchid deaths.
Miss it by a week and you lose the crop. The free 22-page planner pins down your exact dates — last frost, first frost, and the weekly steps between — so you plant on the days that actually work for your ZIP.
Performing Orchid “Surgery”: Cutting Away the Rot
Once you have identified dead roots, they have to go. Leaving rotted tissue attached is like leaving a splinter in a wound — it invites the decay to keep traveling up into the healthy plant.
Here is the process:
- Sterilize your tool. Wipe scissors or snips with rubbing alcohol, or run a flame over the blade and let it cool. Orchids transmit disease through dirty cuts.
- Trim every dead root back to firm, living tissue. Do not be timid — a smaller, healthy root system beats a large, rotting one every time.
- Dust the cuts. A sprinkle of ground cinnamon on the cut ends works as a gentle, natural fungicide and helps seal the wounds. Plain culinary cinnamon from your spice rack is fine.
- Let it air-dry for an hour or two before repotting so the cuts callus over.
If the crown itself is rotting (water pooled in the center), tip the plant sideways, blot it dry, and dab a little cinnamon there too.
Crown rot is the one issue that can take an orchid quickly, so treat it the day you spot it.
Rescue Method 1: Repot Into the Right Media
A trimmed orchid needs a fresh home — never garden soil, which suffocates the roots and holds far too much water. Orchids are potted in chunky, airy material that drains almost instantly.
Your two main options:
- Bark mix: Drains fast and dries between waterings, which forgives the chronic overwaterers among us. Best for people whose hands are heavy on the watering can.
- Sphagnum moss: Holds moisture longer and is gentler on a plant rebuilding its roots, but it punishes overwatering. Best when you can be disciplined.
Use a pot with plenty of drainage — clear plastic nursery pots are a grower favorite because they let you watch the roots and judge moisture at a glance.
Tuck the plant in just deep enough to stay upright, and resist packing the media tight. Air is the point.
Skip fertilizer for now. A stressed plant cannot use it, and the salts can burn fragile new roots. Wait until you see fresh growth before feeding.
Best gardening planner I've used in 10 years — and I keep coming back to it every season.
Rescue Method 2: The “Sphag and Bag” for a Rootless Orchid
This is the trick that saves orchids everyone else has written off — the ones with no usable roots left at all.
The idea is to recreate a humid, greenhouse-like pocket that encourages the plant to push out new roots before it dehydrates. Growers call it “sphag and bag”:
- Lightly dampen a handful of sphagnum moss — moist, not dripping.
- Set the orchid’s base on the moss inside a clear container or a zip-top bag, with the leaves above the moss line.
- Seal it loosely to trap humidity, and place it somewhere warm with bright, indirect light — never direct sun, which will cook it inside the bag.
- Open it for a few minutes every day or two for fresh air, and re-moisten the moss only when it dries.
Over several weeks, new root nubs typically appear. It is slow and it tests your patience, but a rootless orchid that throws fresh roots in a humidity tent is one of the most satisfying saves in all of houseplant keeping.
Rescue Method 3: Water Culture for the Stubborn Cases
When an orchid keeps losing roots in bark no matter what you do, some growers switch to semi-water culture — sitting the roots in a shallow inch of water for part of the week, then letting them dry out completely for the rest.
The wet-then-dry cycle mimics tropical rain followed by dry air, and it can jump-start root growth on a plant that has stalled.
It is more hands-on than potting and not for everyone, but it is a genuine option when conventional methods have failed. Use clean water, change it regularly, and keep the crown and leaves bone dry.
- Beans
- Carrots
- Beets
- Lettuce
- Spinach
- Brassicas
Reviving a Bone-Dry, Dehydrated Orchid

The opposite problem is just as common. If the leaves are wrinkled and floppy and the roots are silvery-papery but not mushy, you are underwatering — and the fix is gentle rehydration, not a flood.
Soak the pot in room-temperature water for 10 to 15 minutes, let it drain fully, then return to a normal schedule.
Resist the urge to soak it daily; roots that swing from drought to constant moisture rot fast. Plump, firming leaves over the following week mean it is working.
Coaxing It to Rebloom Once It’s Healthy
A revived orchid earns the right to flower again — but only after it has rebuilt roots and pushed out a new leaf or two. Rushing it back into bloom on an empty tank just stresses the plant.
Three levers reliably trigger reblooming in moth orchids:
- Light. Bright but indirect is the sweet spot. An east window is ideal; a south or west window needs a sheer curtain. If your home runs dark, the kind of low-effort automation behind modern homesteading — a simple grow light on a timer — does the job beautifully.
- A nighttime temperature dip. A drop of around 10°F at night for a couple of weeks is the classic cue that tells the plant to set a flower spike. It is the same principle behind cold frame gardening, where the day-to-night temperature swing drives how plants behave. A cooler room or a few autumn nights near a window often does it.
- Light feeding. Once new growth appears, a balanced orchid fertilizer at quarter strength, “weakly, weekly,” keeps it fueled without overwhelming young roots.
In the warm months, many growers summer their orchids in a shaded, breezy spot — a dappled corner of a balcony garden is perfect — where the natural airflow and temperature swings do half the work for you.
And if part of why you fell for orchids is simply loving fresh blooms around the house the way people do with cut flowers like sunflowers, a recovered, reblooming orchid pays you back for months on a single spike.
There is a quieter payoff, too. Bringing a near-dead plant back is part of the same satisfaction that draws people to urban homesteading — the small, steady reward of keeping something alive and watching it give back.
And if this orchid is the first plant you have ever nursed back from the brink, it is a great gateway to building out a collection with some of the most forgiving indoor plants that ask far less of you while you find your footing.
How Hard Is It to Garden in Your County?
Every county has a unique Gardening Difficulty Score based on frost risk, soil quality, drought, altitude, and climate trends. Find yours — plus personalized frost dates, planting calendars, and soil data.
Check Your County's Score →Mistakes That Quietly Sabotage a Recovery
Even a well-diagnosed orchid can be undone by habits that feel helpful. Steer clear of these:
- The ice cube trick. Orchids are tropical; a chunk of ice against the roots is cold stress, not convenience. Use room-temperature water instead.
- Fertilizing a sick plant. Stressed roots cannot process it, and the salt buildup burns them. Feed only after new growth shows.
- Cutting a green flower spike too soon. A green spike may rebloom. Only trim spikes that have turned brown and dry.
- Repotting in regular potting soil. It is the fastest route back to root rot. Always use orchid bark or sphagnum.
- Misting the leaves to “raise humidity.” Water sitting in the crown invites rot. Boost humidity with a pebble tray or a nearby humidifier, not a spray bottle aimed at the plant.
Your Orchid Isn’t a Goner — Start the Rescue Today
If you take one thing from all this, let it be the order of operations: look before you water.
Pull the plant out, read the roots, cut what is dead, repot into something airy, and then let time and a little restraint do the rest.
The orchid that looks like a lost cause on your windowsill is very often weeks away from a new root and a fresh spike — it just needs you to stop guessing and start diagnosing.
Pick one step from this guide and do it today, even if it is only sliding the plant out of its pot to see what is really going on underneath.
Have an orchid you’re trying to bring back — or one you already saved? Tell me what it looks like in the comments below, and let’s figure out its next move together.
Plan Your Garden With Confidence!

Ever start planting… and then realize halfway through that things feel a little scattered?
A simple plan changes everything.
When you sketch your layout first, you can see what fits, what flows, and what actually makes sense for your space. It saves time, money, and a whole lot of second-guessing later.
Our free Garden Planner helps you map out beds, organize plant spacing, rotate crops, and keep track of seasonal tasks – all in a clean, printable format you can actually use.
Whether you’re designing a low maintenance front yard or planning your full homestead garden, this gives you a clear starting point.
Less chaos. More clarity. A garden that works.
Frequently Asked Questions
How long does it take for a revived orchid to grow new roots and bloom again?
Patience is the hardest part. New roots on a rescued orchid usually appear within a few weeks to a couple of months once conditions are right, and you will often see a new leaf before any flowers.
Reblooming typically follows once the plant has rebuilt enough roots and leaves to support it — frequently several months to nearly a year out, depending on the season and light.
A plant that is growing roots and leaves is succeeding, even if it is not flowering yet.
My orchid grew a tiny plant on its flower spike instead of buds — what is that?
That little plantlet is called a keiki (Hawaiian for “baby”), and it is a clone of the parent. Orchids sometimes produce one when stressed or when hormones pool at a node.
Leave it attached until it grows two or three roots a couple of inches long, then snip it off just below the keiki with a sterile blade and pot it in its own small container of bark or moss. You have essentially gotten a free second orchid out of the deal.
Should I switch to rainwater or distilled water for a recovering orchid?
Tap water is fine for most people most of the time. But if your water is heavily chlorinated or very hard with minerals, those salts can build up in the media and stress already-fragile roots.
Letting tap water sit out overnight helps chlorine dissipate, and collected rainwater or diluted distilled water is gentler still for a plant in recovery.
If you notice a white crust on the pot or media, that is a sign your water is leaving deposits behind.
My recovering orchid has sticky residue or tiny white bugs — what do I do?
Sticky spots and small cottony white clusters usually point to mealybugs or scale, common opportunists on a weakened plant. Isolate the orchid immediately so they do not spread to your other houseplants.
Wipe visible pests off with a cotton swab dipped in rubbing alcohol, then treat with a diluted neem oil solution every week or two until they are gone.
Check the undersides of leaves and the leaf joints, where they like to hide.
Can an orchid survive with no leaves left, just roots?
It is a long shot, but not always hopeless.
As long as the crown is intact and you have firm roots, a leafless orchid can sometimes push out a new leaf if you keep it warm, humid, and in bright indirect light — the sphag-and-bag method gives it the best odds.
Recovery from this point is slow and far from guaranteed, so treat any new growth as a genuine win rather than something to expect.
Level Up Your Garden
Our most popular gardening guides


