A garden storage shed should make your backyard calmer, not become one more thing to apologize for. Yet most sheds quietly turn into a black hole — rakes tangled in the corner, half-empty fertilizer bags slumping against the wall, and a mower you have to excavate every spring.
The difference between a shed that runs your backyard and one that stresses you out is rarely the shed itself. It is the decisions you make before it goes up and in the first week after.
This guide walks through those decisions in the order that actually matters: what size you genuinely need, where to place it, how to keep it from rotting, and how to organize it so everything has a home you will actually use.
Start With an Audit, Not a Shed Catalog
It is tempting to pick a shed by how it looks or what is on sale.
Do the opposite. Spend twenty minutes taking stock of what you own, because that list — not the showroom — decides the right size and layout.
Walk your garage, patio, and current storage spots and sort everything into a few buckets:
- Long-handled tools (rakes, hoes, shovels, edgers) — these need vertical wall space, not floor space.
- Power equipment (mower, trimmer, leaf blower) — measure the largest piece, then add room to maneuver it in and out.
- Bagged and boxed goods (soil, mulch, fertilizer, grass seed) — heavy, and a magnet for moisture and rodents.
- Hand tools and small parts (trowels, pruners, gloves, twine) — easy to lose, best stored at eye level.
- Seasonal and bulky items (hoses, plant covers, patio cushions, decor) — used a few times a year and fine to store high or deep.
Once you can see the volume in front of you, a realistic size becomes obvious. A reliable rule of thumb: settle on the size you think you need, then go one size up.
Backyards grow into their storage faster than anyone expects, and the price gap between an 8×8 and a 10×10 is small compared to the regret of running out of room in year two.
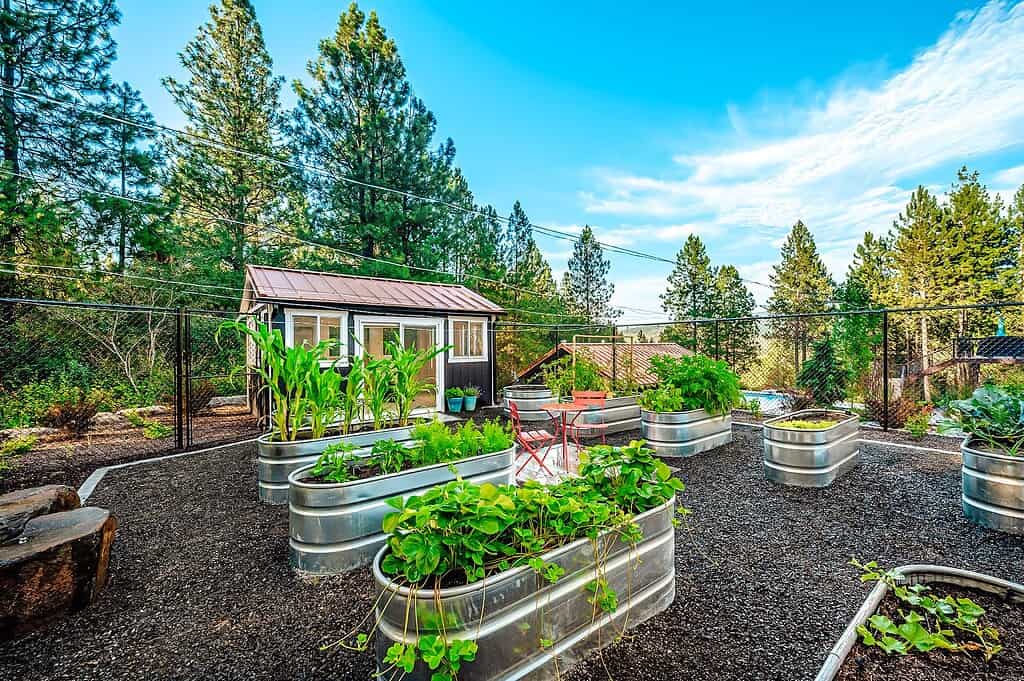
If part of your goal is freeing up growing space too, the same maximize-every-inch thinking behind productive small vegetable gardens applies just as well to how you stack and store.
Garden Planner
The 22-page planner timed to your county's real frost dates. Planting windows, monthly checklists, and a harvest log you'll fill with pride by August.
Your Free 22-Page Garden Planner
Built for your exact ZIP code — planting dates, harvest log, and a month-by-month plan. 15-second sign-up.
Where to Put the Shed: Placement Decisions That Save You Years of Regret
You only site a shed once. Get it right and it disappears into your routine; get it wrong and you will fight it every single day.
Check setbacks, drainage, and sun before you commit
Before you fall in love with a spot, confirm three things that are painful to fix later:
- Setbacks: most areas require a shed to sit a set distance from property lines and other structures. A quick call to your local planning office saves you from moving it later.
- Drainage: never place a shed at the low point where water collects. Standing water is the fastest route to a rotted floor — watch where puddles form after a heavy rain.
- Sun and shade: a little afternoon shade keeps the interior cooler in summer, but avoid placing the shed directly under trees that drop sap, debris, and the occasional limb onto the roof.
Position for access, not just appearance
Think about the trip you make most often. If you will be hauling a mower out weekly, a wide doorway facing a clear, level path matters far more than the shed facing the house.
In a tight lot, the shed becomes part of the overall plan, so it helps to think it through the way you would when designing a small garden — as one element in a layout, not an afterthought dropped in a corner.
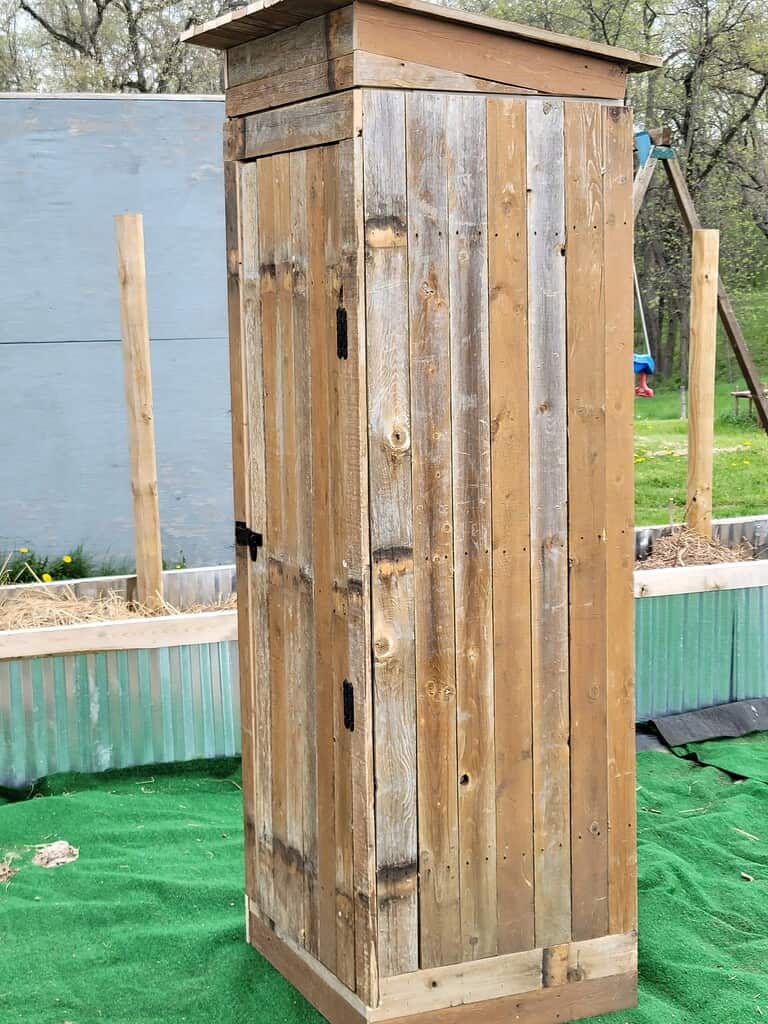
Those narrow, awkward strips down the side of the house are often the perfect home for a slim shed; these side yard ideas show how to turn that dead space into something genuinely useful.
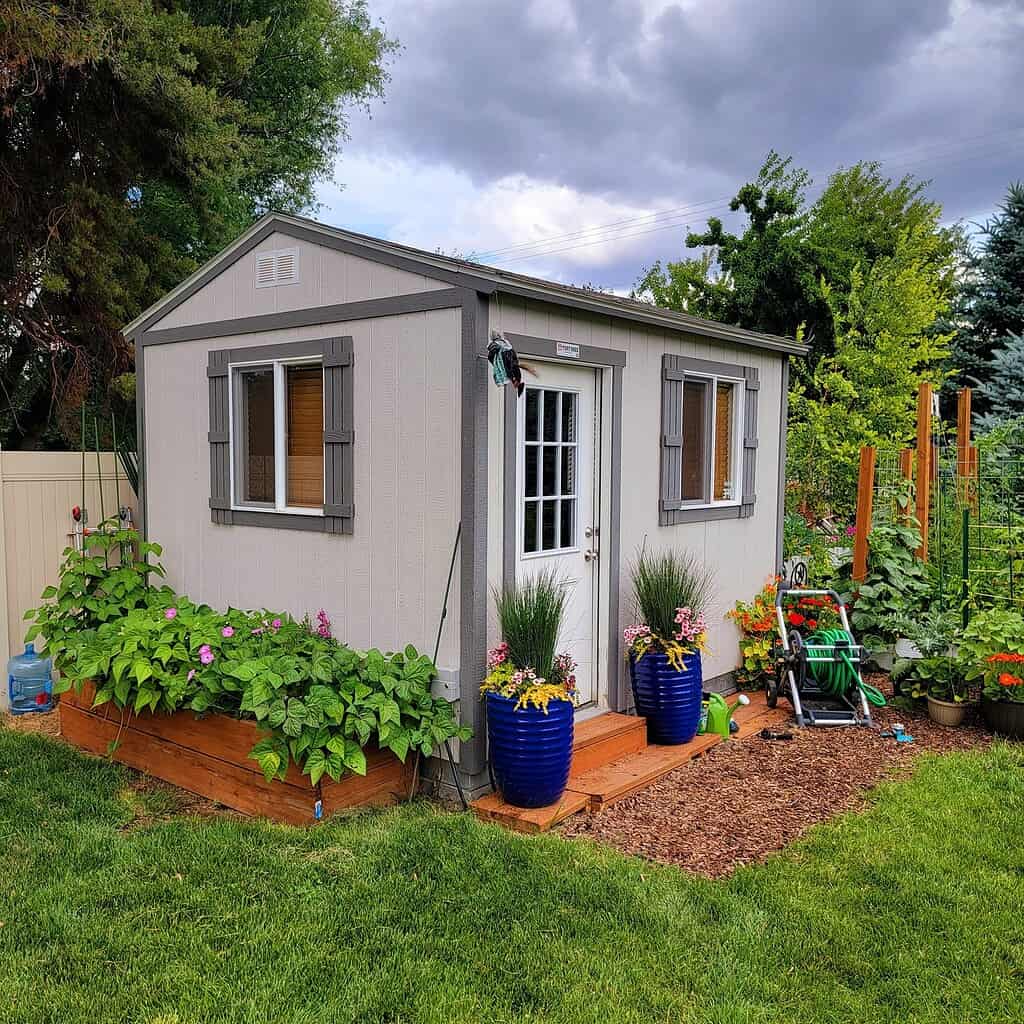
And if you want the shed to earn its keep beyond storage, there are plenty of creative garden shed ideas that double as a potting station or a quiet corner to retreat to.
Get the Foundation Right (This Is Why Sheds Rot)
The single most skipped step (and the one that quietly destroys sheds) is the foundation.
A shed set straight on grass or bare dirt wicks up ground moisture, swells, warps, and rots from the floor up within a few seasons. You have three solid options:
- Gravel pad: a bed of compacted crushed stone, 4 to 6 inches deep and framed with timber. The best all-around choice for most sheds — it drains, forgives uneven ground, and stays affordable.
- Concrete slab: the most durable and level option, ideal for heavy equipment, but also the most expensive and the most permanent.
- Pressure-treated skids or piers: timber runners or concrete blocks that lift the shed off the ground. Great for portable sheds and sloped sites, as long as air can circulate underneath.
Whatever you choose, the goal is the same: keep the floor off the wet ground and let air move beneath it. Skip this and even the nicest shed has a countdown clock running.
Miss it by a week and you lose the crop. The free 22-page planner pins down your exact dates — last frost, first frost, and the weekly steps between — so you plant on the days that actually work for your ZIP.
The Zone System: Organize by How Often You Reach for It
Random hooks and shelves are why sheds slide back into chaos.
Instead, divide the interior into zones based on how often you use things, then give each zone a fixed place. Reaching for something becomes automatic — and so does putting it back.
The daily and weekly zone
Right inside the door, at eye and arm level, keep the things you grab constantly: gloves, hand pruners, a trowel, the hose, the mower.
Nothing you use weekly should require moving three other items to get to it. This zone does the heavy lifting for keeping the whole shed tidy.
The seasonal and deep-storage zone
High shelves and the back corners are for items you touch a few times a year — plant covers, spare pots, off-season gear.
Use clear or clearly labeled bins so you are not opening five containers to find one. Heavy seasonal items still belong low; only light, bulky things go up high.
The hazard zone
Chemicals, fuel, and sharp blades get their own dedicated, separated area — ideally a locking cabinet. We will cover exactly how to handle this below, because it is the part of shed organization most worth getting right.
Wall and Vertical Storage That Actually Holds Up

Floor space is precious; wall space is usually wasted. The whole game is getting everything possible off the floor and onto the walls and rafters.
- French cleat walls: a strip of angled cleats lets you hang and rearrange custom holders for any tool. The most flexible system there is, and it carries weight far better than pegboard.
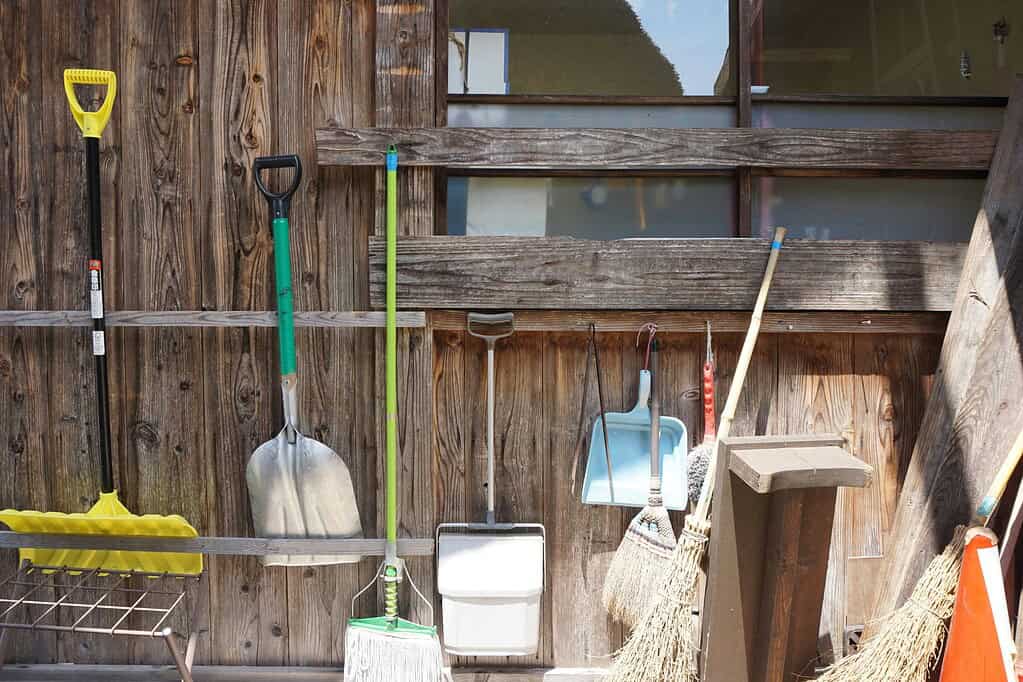
- Long-handle tool racks: a single rack of spring grips or a slotted board keeps rakes, shovels, and hoes upright and untangled instead of toppling into a pile.
- Overhead and rafter storage: the space between roof joists is perfect for long, light, seldom-used items like stakes, spare hose, and lumber offcuts.
- Magnetic strips and small bins at eye level for metal hand tools and loose hardware that otherwise vanish to the bottom of a drawer.
Pegboard works for lightweight hand tools but sags and pulls out under heavier loads, so reserve it for trowels and gloves rather than power tools.
If you are building out wall storage anyway, the same must-have fence-building tools you reach for around the yard deserve a dedicated, visible spot so they are never the thing you cannot find.
Best gardening planner I've used in 10 years — and I keep coming back to it every season.
Beat the Two Things That Destroy Shed Contents: Moisture and Mice
Control moisture before it controls your tools
A closed-up shed traps humidity, and humid air rusts metal, mildews fabric, and clumps your seed and fertilizer. Fight back with airflow and a few cheap habits:
- Add ventilation — a ridge vent, gable vents, or even a louvered panel keeps air moving and the interior cooler.
- Raise bagged goods and anything fabric off the floor onto pallets or shelves.
- Keep a few reusable desiccant tubs or a small moisture absorber near your tools and seed storage.
- Wipe metal tools dry before storing them, and a light pass of oil on blades prevents rust over a long winter.
If your shed shares a wall or a footprint with a growing space, the same ventilation logic applies to backyard greenhouse kits, where airflow is the difference between healthy plants and a mildew problem.
Make the shed unwelcome to rodents
Mice treat a quiet shed full of seed and soft nesting material as a five-star hotel. A few moves keep them out:
- Store all seed, grass seed, and pet or chicken feed in sealed metal bins — not paper bags or thin plastic that mice chew straight through.
- Seal gaps around the door, eaves, and utility entries. A mouse fits through a hole the size of a dime.
- Keep the floor clear so there is nowhere to nest unseen, and clean up spilled seed promptly.
Store Chemicals, Fuel, and Sharp Tools Safely
This is the section most guides skip, and it is the one that matters most if you have kids, pets, or simply value your eyebrows.
- Keep pesticides, fertilizers, and weed killers in their original labeled containers, up high or in a locked cabinet, well away from anything you eat or handle bare-handed.
- Store gasoline and other fuels in approved containers in a separate, ventilated spot. Never keep fuel near a water heater, mower battery, or anything with a pilot light or spark.
- Sheath or wall-mount sharp tools — machetes, loppers, saws — so no one ever reaches blindly into a bin of blades.
- Mount a small fire extinguisher by the door and keep a basic first-aid kit inside where you can reach it fast.
- Beans
- Carrots
- Beets
- Lettuce
- Spinach
- Brassicas
How Hard Is It to Garden in Your County?
Every county has a unique Gardening Difficulty Score based on frost risk, soil quality, drought, altitude, and climate trends. Find yours — plus personalized frost dates, planting calendars, and soil data.
Check Your County's Score →Build a Simple Seasonal Rotation Routine
A shed stays organized when it resets with the seasons instead of slowly silting up. Twice a year — spring and fall — spend an afternoon rotating gear so what you need next is always within reach:
- Spring: bring watering gear, hand tools, and planting supplies to the front; push covers and cold-weather tools to the back.
- Fall: reverse it, and clean and oil your tools before they sit unused for months.
Spring is also the moment to check your watering setup. If hauling hoses around wears you out, this is when drip irrigation and watering kits earn a spot near the front of the shed.
And if you grow herbs, a dry, airy shed corner can double as a curing space — the same conditions that make drying herbs at home work so well.
Keep the Shed Itself in Good Shape
The contents are only as protected as the structure around them. A little upkeep adds years to a shed’s life:
- Clear leaves and debris off the roof and out of any gutters so water drains away from the shed, not into it.
- Check the door seal and weatherstripping each season; a warped door lets in both rain and rodents.
- Re-coat or re-stain wood every few years, and touch up chips before bare wood gets a chance to soak up water.
- Trim back plants growing against the walls — trapped moisture and roots shorten a shed’s life quietly.
Turn Your Shed Into the Backbone of an Organized Backyard
A well-planned storage shed does something quietly powerful: it gives every tool a home, keeps your backyard clear, and removes a dozen small frustrations from your week.
Start with the audit, get the placement and foundation right, organize by how often you reach for things, and protect everything from moisture, pests, and mishandling.
None of it is complicated — it just has to be done in the right order.
Pick one thing from this guide to tackle this weekend, whether that is finally setting up a French cleat wall or moving your seed into sealed metal bins. Small wins compound fast in a space you use this much.
Which part of your shed drives you craziest right now — the tangle of long-handled tools, the creeping moisture, or just finding anything at all? Tell us in the comments below, and share your own best shed-organization trick so other readers can borrow it.
Frequently Asked Questions
How much should I budget for a garden storage shed?
Costs vary widely by material and whether you build or buy.
A basic resin or metal kit shed often runs a few hundred dollars, a mid-size wooden shed typically lands in the low-to-mid four figures, and a large custom or contractor-built shed can climb well beyond that.
Whatever route you take, budget separately for the foundation — a gravel pad or slab is an easy cost to forget and one of the worst to skip.
Do I need a permit to build a garden storage shed?
It depends on where you live and the shed’s size.
Many areas allow small sheds — often under 100 to 120 square feet — without a permit, but larger structures, anything on a permanent foundation, or sheds wired for electricity usually require one.
Setback rules can apply even to permit-free sheds. A quick call to your local building or planning department before you buy is always worth the few minutes.
Can I store a lawnmower and gas-powered tools in the shed over winter?
Yes, with a little prep. For gas equipment sitting idle for months, either run the tank dry or add a fuel stabilizer, and disconnect or trickle-charge batteries so they do not drain and crack in the cold.
Keep fuel in approved containers away from anything that sparks, and make sure the shed has enough ventilation that fumes never build up.
How do I get power and lighting to a shed far from the house?
For light alone, battery or solar LED fixtures are the simplest option and need no wiring at all.
For running tools or charging, you can install a dedicated underground circuit from the house, but that is a job for a licensed electrician and usually a permit.
A solar panel paired with a small battery bank is a popular off-grid middle ground for sheds where trenching a line is impractical.
Is it worth insulating a garden storage shed?
For pure tool and equipment storage, insulation is usually unnecessary — ventilation matters far more for preventing rust and mildew.
But if you plan to use the shed as a workspace, potting room, or anything you will spend real time in year-round, insulating the walls and roof makes it far more comfortable and helps moderate the temperature swings that are hard on stored items.
Level Up Your Garden
Our most popular gardening guides


