Growing grapes isn’t just for vineyards or warm-climate estates with rolling hills and stone archways. You can do it right in your backyard even in places with snow, clay soil, or nosy squirrels.
And it’s surprisingly satisfying. Not just because you get fruit (though, yes, those juicy clusters are worth the wait), but because grapes ask you to be both patient and hands-on.
You’ll dig, snip, tie, thin, watch, and repeat. They don’t want you to hover, but they do want you to pay attention.
With the right variety, a bit of space, and a willingness to prune harder than you think you should (really – this part surprises everyone), you can get your vines thriving and producing in just a few seasons.
In this article, I’ll take you through the whole process – from choosing varieties and planting techniques to pruning strategies, pest avoidance, harvesting, and even propagation.
Whether you're after table grapes for snacking or clusters for wine-making dreams, we've got the full playbook.
Let’s get into it.
Quick Overview of Grapes Plant
| Feature | Details |
|---|---|
| Common Name | Grape |
| Scientific Name | Vitis vinifera |
| Plant Family | Vitaceae |
| Native To | Mediterranean region, Central Asia |
| Type | Perennial vine |
| Sun Requirements | Full sun (at least 6–8 hours daily) |
| Soil Type | Well-draining, loamy, slightly acidic soil |
| pH Range | 5.5–7.0 |
| Water Needs | Moderate; consistent moisture during growth |
| Mature Size | Vines up to 20–30 feet, depending on variety |
| Uses | Fresh eating, juice, wine, jelly, dried fruit (raisins) |
| Fun Fact | Grapes have been cultivated for over 8,000 years! |
1. Choosing the Right Grape Variety
Not all grapes are the same. Some are bred to be sweet and snackable, others to hold up during pressing and fermenting, and some just survive better in freezing temps without throwing a fit.
So your first big decision? Pick a variety that matches both your climate and your goals.
What are you growing grapes for?
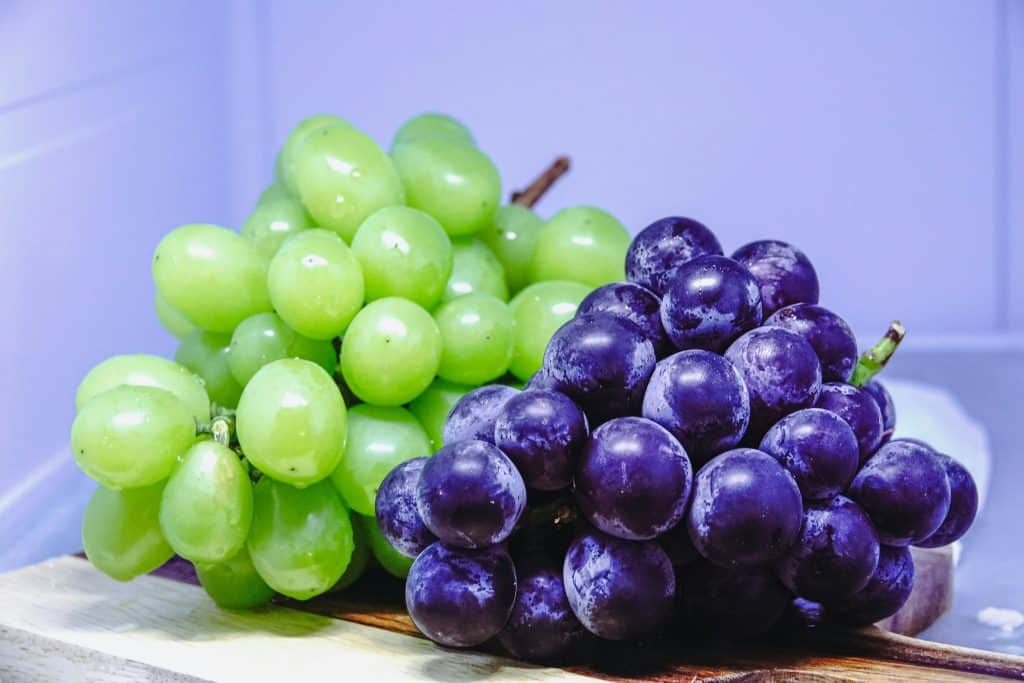
- Table grapes: Big, juicy, and often seedless – perfect for eating fresh. Varieties like ‘Himrod’ or ‘Mars’ are good picks here.
- Juice and jelly grapes: These tend to be the most cold-hardy. Think ‘Concord’ – deep flavor, robust vines, and plenty of sugar.
- Wine grapes: More finicky. These vines are often less vigorous and more sensitive to cold, but reward you with complex fruit if treated right. ‘Frontenac’ and ‘Marquette’ work well in colder areas.
Seeded vs. Seedless
Seeded grapes usually handle cold and rougher conditions better.
They're more vigorous too. Seedless varieties, while easier to eat, can be more delicate and may need winter protection, especially if you're north of Zone 6.
Cold-hardy champions
If you're gardening anywhere that sees real winter (we’re talking Zone 4 or 5), you’ll want varieties that don’t panic at the sight of frost. ‘Valiant,’ ‘Bluebell,’ and ‘Beta’ all do well where others give up.
Hot-climate picks
Got long, dry summers and mild winters? You’ve got options. Many European-style wine grapes (like ‘Cabernet Sauvignon’ or ‘Chardonnay’) do best in Zones 7 and up – just keep in mind they usually require more disease management.
Don’t just chase sweetness or name recognition. Start with what survives and thrives where you live.
When and Where to Plant Grapevines
Timing and location are everything. Planting at the wrong time, or putting your vine in a shady, soggy corner? You're basically setting it up for disappointment.
When to plant
- Colder climates (Zone 6 and below): Early spring, as soon as the soil is workable. You want the roots to establish before summer heat hits.
- Milder zones (Zone 7 and up): You can plant as early as winter, surprisingly—\ – grapevines go dormant and tolerate cool-season planting just fine.
Where to plant
Grapes love the sun. Like, all-day sun. Minimum of 6–8 hours of direct light. And they hate wet feet – so choose a spot with well-draining soil.
Skip the low spots in your yard where cold air and water settle. Also, avoid areas where herbicides like 2,4-D or dicamba have been sprayed in the last year.
These chemicals drift easily and will destroy grapevines with even a trace amount. (Yes, even from a neighbor’s yard. It’s that sensitive.)
Good airflow matters
Spacing vines out and giving them a breezy spot isn’t just for looks – it helps prevent mildew and fungal diseases, which grapes are annoyingly prone to. Avoid tight corners or walls where the air gets trapped.
3. Preparing the Soil for Grapevines
You don’t need perfect soil. You just need not bad soil that drains well and holds warmth.
Grapes are surprisingly adaptable, but if your dirt turns into a swamp after rain or feels like bricks when dry, you’ll need to do some prep work.
Drainage is non-negotiable
Standing water is the enemy. Grapevines hate wet roots – it’s a one-way ticket to rot.
If your soil stays soggy for more than a day or two after rain, mix in coarse sand, grit, or even crushed stone around the planting zone. In heavier clay soils, a raised mound or bed can help.
Compost? Yes. Mulch? Not so fast.
Mix a generous amount of well-rotted compost or soil conditioner into the planting hole. It boosts structure and adds nutrients.
But here's the thing: don’t mulch around the base of your grapevine especially early in the season. Mulch keeps soil cool, and grape roots like it warm to wake up and get growing.
If you want grapes to break dormancy early and build momentum, keep the base clear. You can mulch a few feet away for weed control if you must, but leave the root zone exposed.
Soil pH and type
Grapes aren't picky about pH, but they do best in slightly acidic to neutral soil (somewhere between 5.5 and 7). Loamy or sandy loam is ideal. Avoid pure sand or dense clay unless you're willing to work in amendments.
4. How to Plant Bare-Root Grapevines
Bare-root grapevines look like sticks with a few sad roots when they show up, but don’t let appearances fool you—they’re alive, and they’ll bounce back fast with the right start.
Prep before planting
First, trim back the roots to about 6 inches. This sounds harsh, but it stimulates new feeder roots to form close to the trunk. Snip off any broken or overly long ones while you're at it.
If the canes are long and awkward, you can trim them too – just leave at least one good bud.
Digging the hole
You’ll need a hole about 2 feet deep and wide. Build a mound of soil in the center and spread the roots over it like you’re draping them on a dome. It helps prevent J-rooting and gives the vine a strong anchor.
Placement matters
- The lowest bud on the cane should sit just above the soil surface.
- The graft union (if there is one) must stay above ground, by a few inches ideally. It looks like a swollen knuckle where two pieces were fused.
Don’t forget support
Install your trellis, fence, or wire system before planting if you haven’t already. Wrestling support posts into the ground after your vine is growing is… not fun.
Backfill with soil (not fertilizer), tamp it down, and water deeply at the base. That’s it. You're in.
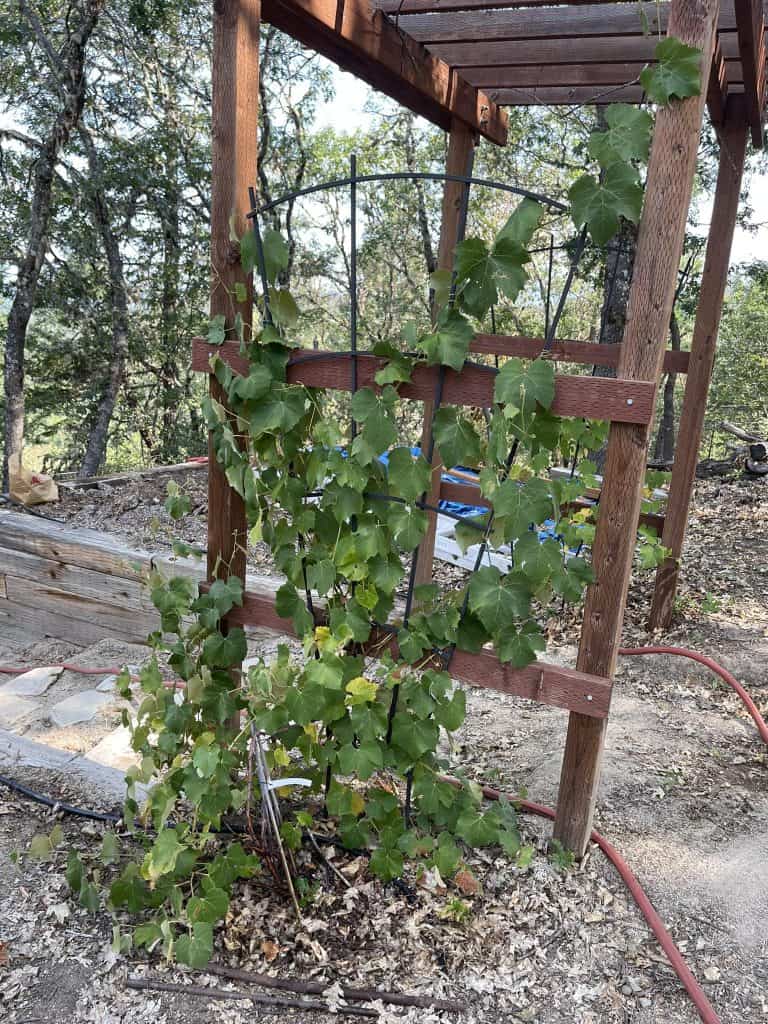
5. Training and Trellising Young Vines
This is where things start looking like an actual grapevine, not just a stick in the ground. Training your vine isn’t just about looks – it shapes the entire structure, airflow, and fruit production for years.
Start with support
Don’t wait until the vine is out of control. Set up a trellis, arbor, or fence system early. Grapes aren’t good at standing on their own – they sprawl and tangle. Give them direction from day one.
A simple two-wire trellis (with wires at about 3 and 6 feet high) works well for most backyard growers. Some go fancier, but this gets the job done.
Year 1: less is more
In the first year, let just three vertical shoots grow. Pick the strongest and most upright ones and gently tie them to the support wires using soft ties.
Everything else? Pinch it off. You’re building the foundation, not fruit production (yet).
Year 2 and beyond
Once a main cane reaches your top wire, cut off the tip. This forces it to send out lateral shoots (aka arms). Train those horizontally along the support.
As those laterals grow, keep tying them loosely to the wire. Don't let them flop or twist. Grapes grow like they’ve had too much coffee – fast, aggressive, and chaotic if you don’t guide them.
A little pinching helps
In spring and early summer, pinch back any side shoots (those little suckers growing off the laterals). You’re encouraging strength and simplicity in the structure. Think of it like bonsai with fruit.
6. Watering and Feeding Grapevines
Grapevines aren't thirsty plants once established, but that doesn’t mean you can ignore them. It’s more about watering smart than watering often.
Water deep, not often
Focus water directly at the root zone. Not on the leaves. Wet foliage is a fast-track to disease – powdery mildew and other fungal problems love moisture.
Water deeply and then wait. Let the soil dry a bit before watering again. For young vines, you might water every week or two during dry spells. Mature vines need even less.
In the fall: cut back
As summer winds down, reduce watering. This helps the vine harden off its canes for winter—basically getting tougher and more resistant to cold damage.
Feeding: less is more
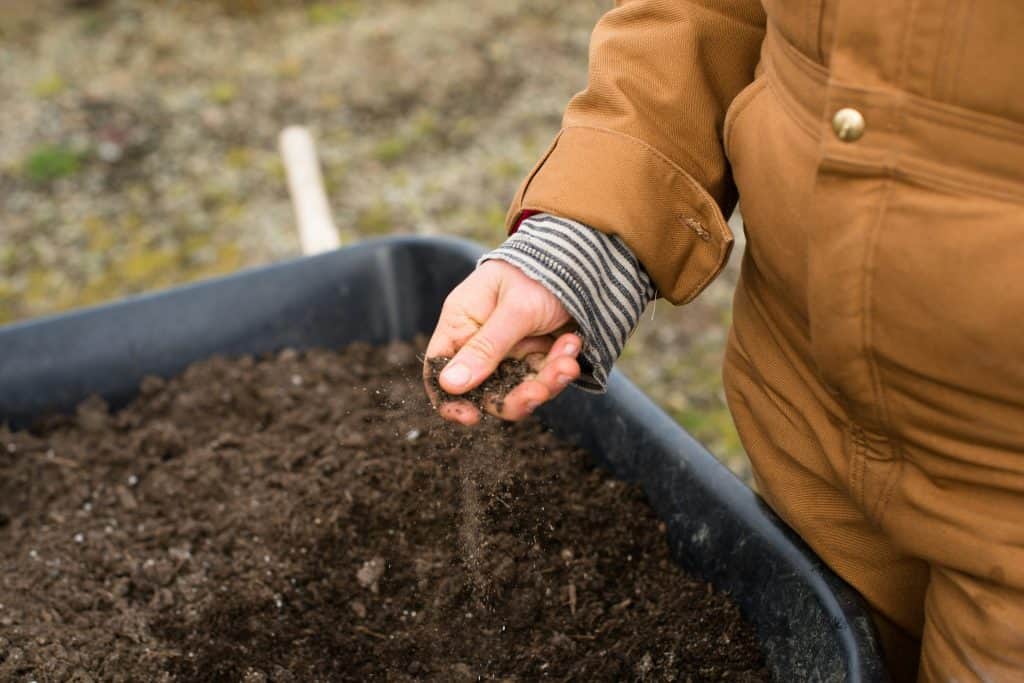
Skip the fertilizer unless your vines look sickly or stunted. Grapevines are low-demand feeders. For the first two or three years, just spread a layer of compost around the base in early spring – that’s often all they need.
Too much nitrogen = lush leaves, weak fruit. And that’s not what you’re after.
7. Pruning Techniques for Long-Term Success
Here’s where most first-time grape growers panic: you’re supposed to cut off most of the vine. Like, almost all of it. And yes, it feels wrong. But if you don’t prune hard, your grapes will suffer – small fruit, poor flavor, tangled vines.
Grapes grow on new wood. Not the old, gnarly stuff. So you want to leave just enough of last year’s growth to produce healthy shoots this year.
Prune during winter when the plant is dormant. You’ll probably remove 80 to 90 percent of the previous year’s growth. That’s normal.
How many buds should you leave? It depends:
- If you’re growing for fresh eating, juice, or jelly, leave around 40 to 60 buds across the vine.
- For wine grapes, cut that number in half – only 20 to 30 buds. You’re aiming for quality over quantity.
If you’re training for shade, not fruit, go easier on pruning. Leave more canes to encourage fuller leaf coverage.
Have an old, messy vine that’s been neglected or damaged? You can cut the whole thing back to just a few inches above the ground during dormancy.
It’ll send up new canes in spring, and you can train one of those as a new trunk. It’s a fresh start.
8. Managing Vines in the First 5 Years
Those early years aren’t about fruit. They’re about setting the vine up for long-term health and productivity. Think of them as the vine’s childhood – structure first, grapes later.
For the first two years, pull off any flowers that show up. Yes, even if it hurts to do it. The energy should go into building roots and trunk, not making grapes too early.
In years three through five, you can let a few clusters develop, but keep it minimal. Too much fruit too soon will stress the vine and slow its growth.
During that time, keep shaping the structure. In midsummer, thin out the grape clusters with long scissors.
This isn’t just about reducing weight – it helps more light and air get to the fruit that remains, which keeps disease down and boosts flavor.
Once the main cane reaches your desired height (usually the top wire), cut off the top to encourage horizontal arms. Then train those laterals out flat along the support.
All this early work pays off. By year six or seven, your vine will be stable, productive, and a whole lot easier to manage.
9. Preventing Pests and Diseases Naturally
Keeping your grapevines healthy isn’t about spraying every time you see a bug. It's about building a setup that naturally discourages pests and disease from the start.
Sunlight and Airflow Make a Huge Difference
Dense, shaded vines hold moisture and block airflow – two things that fungi love. Space your vines generously and prune every year to keep the canopy open. Let the breeze move through. Let the sun hit the fruit.
Keep It Clean
Every fall, remove all fallen leaves, old grapes, and pruning scraps from around your plants. Don’t leave debris to rot under the vines – it becomes a breeding ground for next season’s problems.
Cut Out Trouble Early
The second you see a diseased shoot, damaged fruit, or powdery leaf, snip it off and throw it out. Waiting just makes the problem bigger. Be ruthless and quick.
Manual Beetle Control
Japanese beetles show up mid to late summer and they’re relentless. The best strategy? Go out in the morning, every few days, and knock them into a bucket of soapy water. It works.
Harvest Early to Beat Wasps
Yellow jackets and multicolored Asian lady beetles will go after grapes the moment they start to ripen. Don’t give them the chance – harvest as soon as the fruit tastes ready. Waiting for perfect bunches just invites damage.
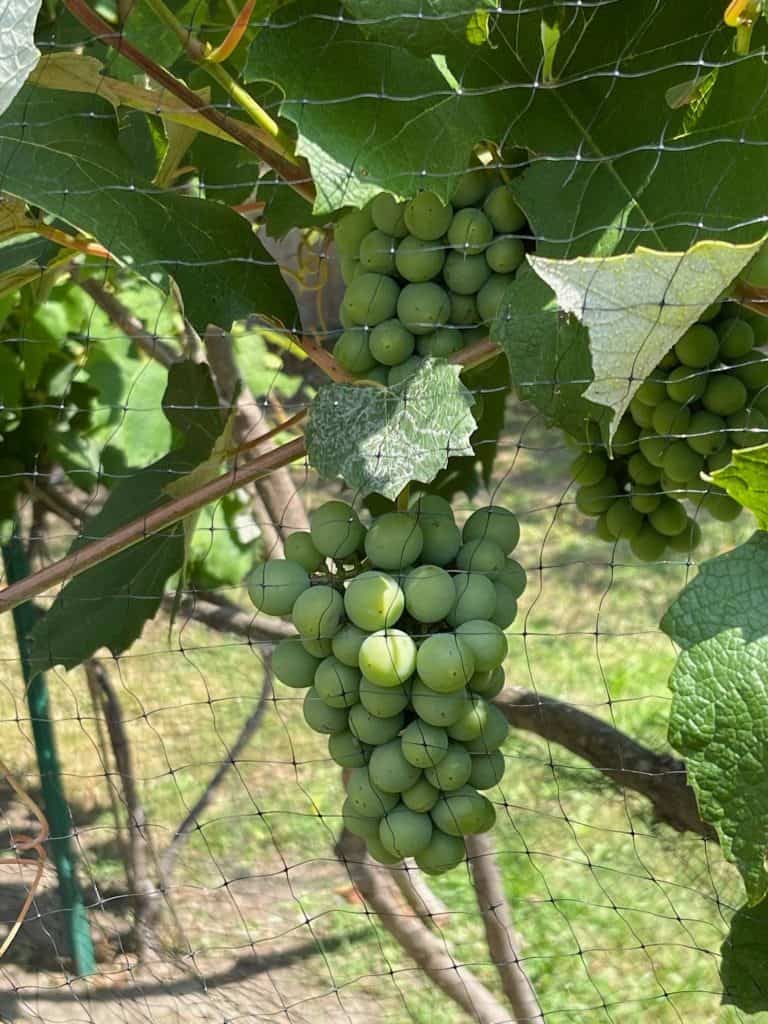
Netting
Birds? Don’t even try to fight them without netting. Shiny objects and noise machines are temporary fixes. Use fine mesh netting over your vines to keep birds, insects, and other pests away from ripening grapes.
Avoid Herbicides Near Grapes
Grapevines are extremely sensitive to common weed killers like 2,4-D and dicamba. They can be damaged even if the spray was used far away and drifted over.
If you hire someone to do yard work or have a neighbor who’s a heavy sprayer – talk to them about avoiding these chemicals near your vines.
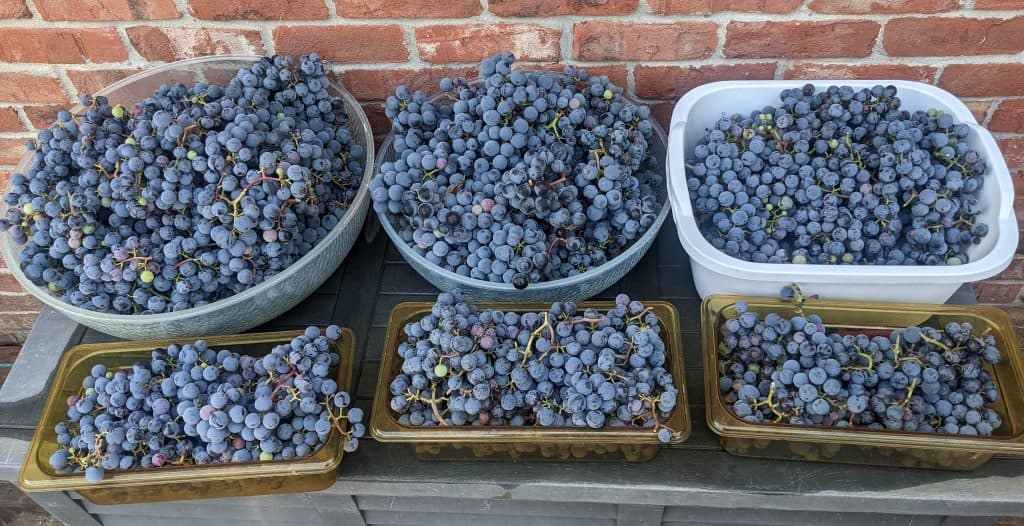
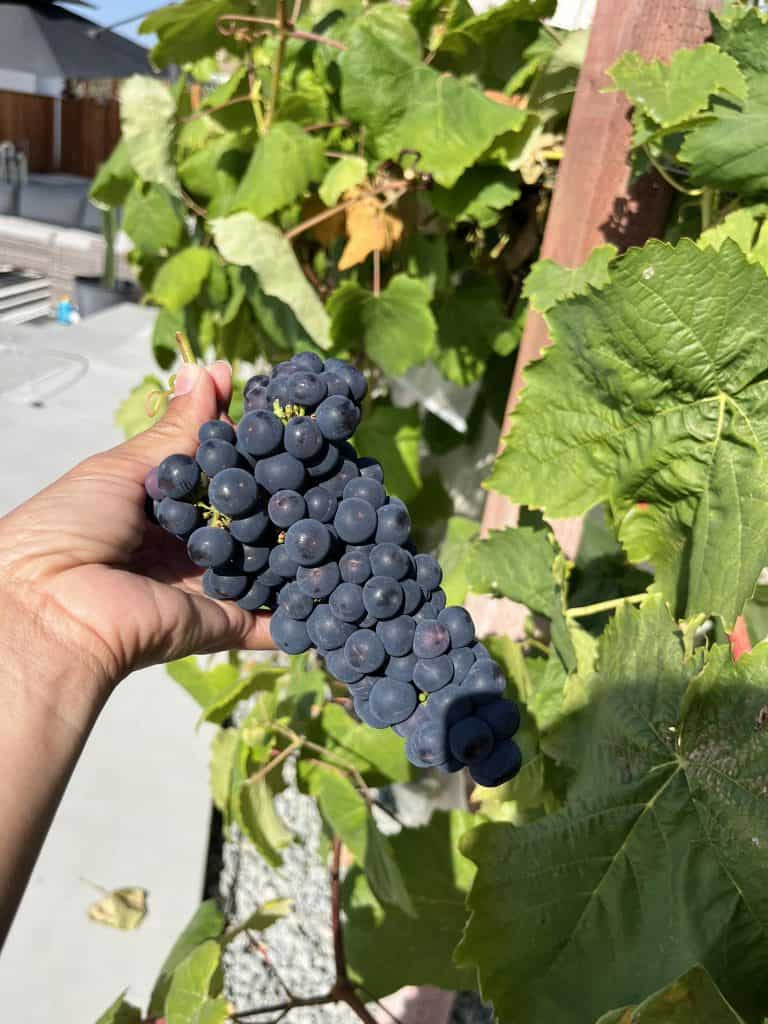
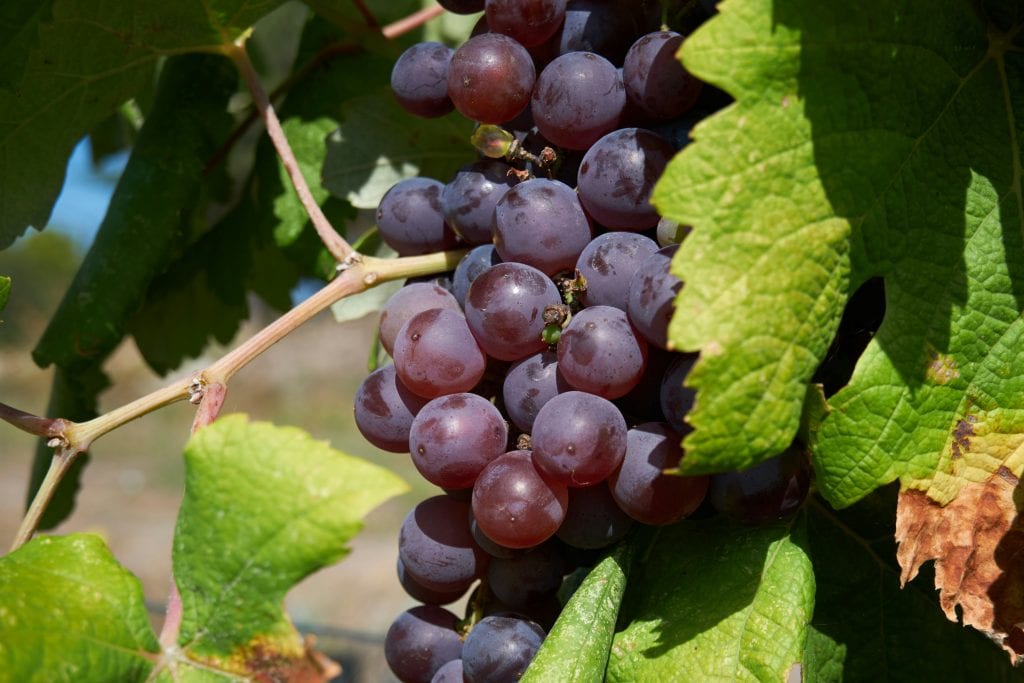
10. Harvesting Grapes at Peak Ripeness
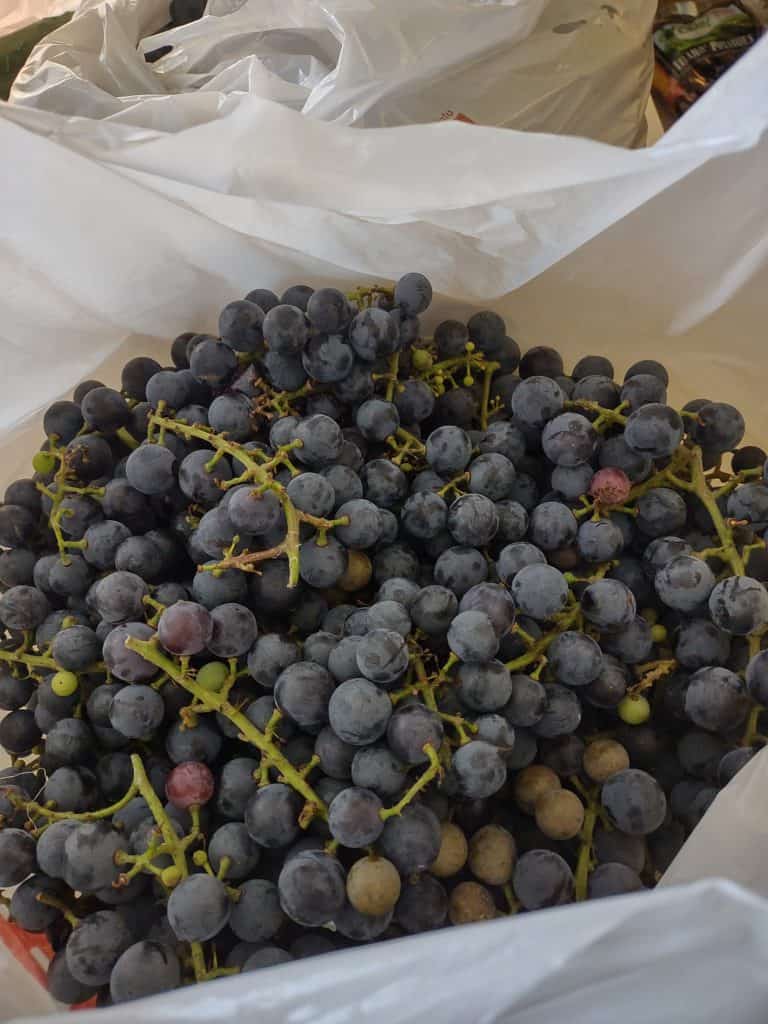
This is the moment you’ve been waiting for – clusters hanging heavy on the vines, deep in color and just begging to be picked.
Grapes don’t keep ripening after you pick them. What you harvest is what you get. So timing matters.
Taste Over Looks
Just because grapes have changed color doesn’t mean they’re ready. A lot of varieties turn red, purple, or golden well before they’re actually sweet and flavorful.
The only real test? Pop one in your mouth.
Taste a few from different parts of the vine. Grapes near the top or in full sun might ripen faster than shaded ones. If they taste flat, give it a few more days. If they’re sweet and full-flavored, it’s go time.
Cut, Don’t Yank
Use pruning shears or heavy scissors to harvest – don’t just pull the clusters off. Grapes are attached firmly, and yanking them can damage the vine or crush nearby fruit. Clip the stem right where the cluster meets the cane.
Handle them gently. Ripe grapes bruise easily.
Pick Early in the Day
Harvest in the morning if you can. Grapes are firmer and cooler then, which helps preserve their quality. Avoid picking in the heat – warm fruit spoils faster, and you're more likely to squish things.
12. Cooling and Storing Grapes After Harvest

Freshly picked grapes are delicate. To keep them tasting great, cool them down right away and store them properly. It’s the difference between a week of sweet snacking and a pile of shriveled leftovers.
Cool Immediately
As soon as you harvest, bring the grapes into the shade or indoors. If you have a cooler, use it. The faster you lower the temperature, the longer the fruit will last.
Letting grapes sit out in the sun after harvest speeds up spoilage. Even an hour makes a difference.
Store in the Fridge
Put grape clusters in a breathable container or a loosely closed bag. Don’t seal them up tight – grapes need a little air movement or they’ll start molding.
Store them in the fridge, ideally in the crisper drawer, and keep them unwashed until just before you eat them. Washing too early introduces moisture that leads to rot.
Most homegrown grapes will last about 1 to 2 weeks in the fridge. After that, they start to lose their snap.
Plant your grapevine, prune in winter, enjoy the harvest.
Growing grapes might seem complicated at first glance – there’s pruning, training, pest management, all that – but once you understand the rhythm, it clicks.
The vines don’t ask for much: a good spot, strong support, sunlight, a bit of discipline with the shears, and some trust in the process.
Whether you’re growing for fresh snacks, jam jars, or a someday bottle of homemade wine, grapes reward your effort with abundance.
And the truth is, few things feel more satisfying than picking a perfect cluster from a vine you trained and tended yourself.
Start small. Stay consistent. And don’t be afraid to cut hard in winter.
Frequently Asked Questions
1. Can grapes be grown in containers or pots?
Yes, but it takes extra care. Use a large container (15+ gallons), provide a sturdy trellis, and be ready to water more often. Stick to smaller or dwarf varieties if possible.
2. How many years until I get a full harvest?
You’ll start seeing light fruiting by year 3, with full production usually kicking in by year 5 or 6. The early years are about structure, not yield.
3. How do I manage powdery mildew without chemicals?
Prune regularly for airflow, avoid overhead watering, and thin fruit clusters in summer. If needed, organic sulfur sprays can help if applied early.
4. When is the best time to prune grapevines?
Late winter, while the vines are still dormant but just before new growth begins. In most regions, this means February or March.
5. Can I grow new vines from store-bought grapes?
Not really. Store-bought grapes won’t produce viable seeds for the same plant, and cuttings aren’t an option unless you get them directly from a vine. For propagation, start with cuttings from a known healthy vine.
Ready To Transform Your Garden?

Are you looking for the best way to layout your garden beds? Maybe you're feeling a bit stuck on how to make the most of your space?
We’ve got you covered! Check out our 101+ Garden Bed Layout Ideas for your next raised bed project. This guide is filled with creative and practical ideas that can help you design a garden that fits your style, whether you’re just starting out or have been gardening for years.
Get your copy today and get inspired to bring your gardening dreams to life.