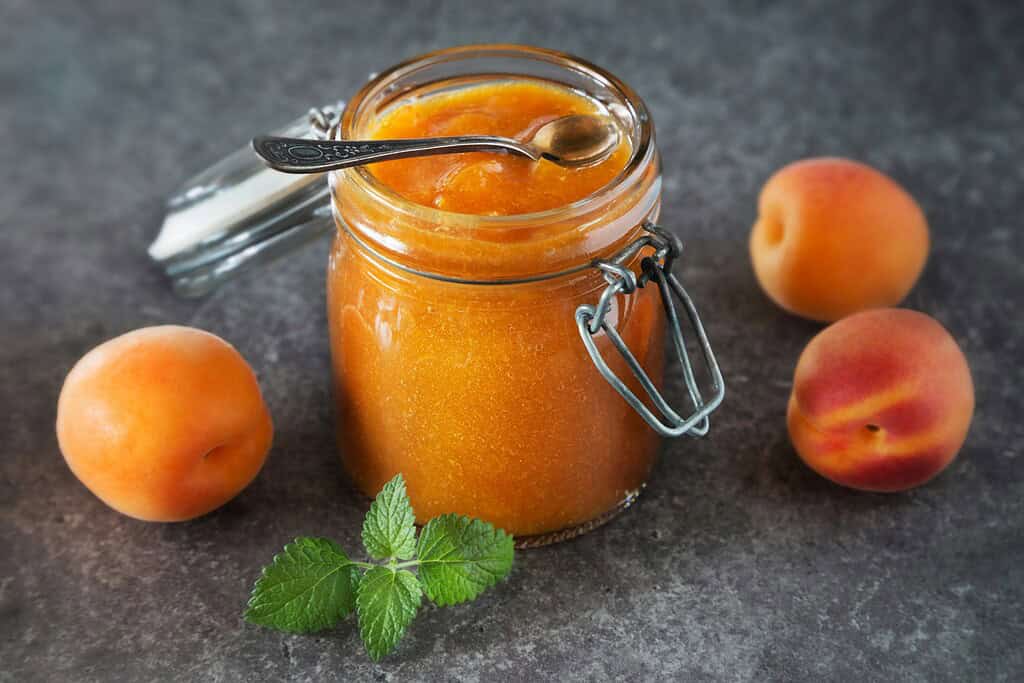
Apricots – with their sunny color and naturally sweet-tart taste – make one of the most flavorful jams you can put on the shelf.
The best part is, you don’t need commercial pectin.
Apricots contain enough natural pectin, and when combined with sugar and a little bottled lemon juice, they cook down into a rich, golden jam that’s perfect for spreading, baking, or gifting.
This recipe is adapted from the National Center for Home Food Preservation (NCHFP), which means it’s been tested for both flavor and safety.
Unlike many homemade jam recipes floating around online, this one follows USDA guidelines so you can feel confident about storing your jars for up to a year or more.
Whether you’re brand new to canning or simply want a tried-and-true formula, this apricot jam recipe is a wonderful place to start.
Apricot Jam Ingredients
This tested apricot jam recipe requires only three simple ingredients, making it one of the easiest preserves to prepare.
Because it relies on the fruit’s natural pectin, you won’t need any store-bought thickeners – just fresh apricots, bottled lemon juice, and sugar.
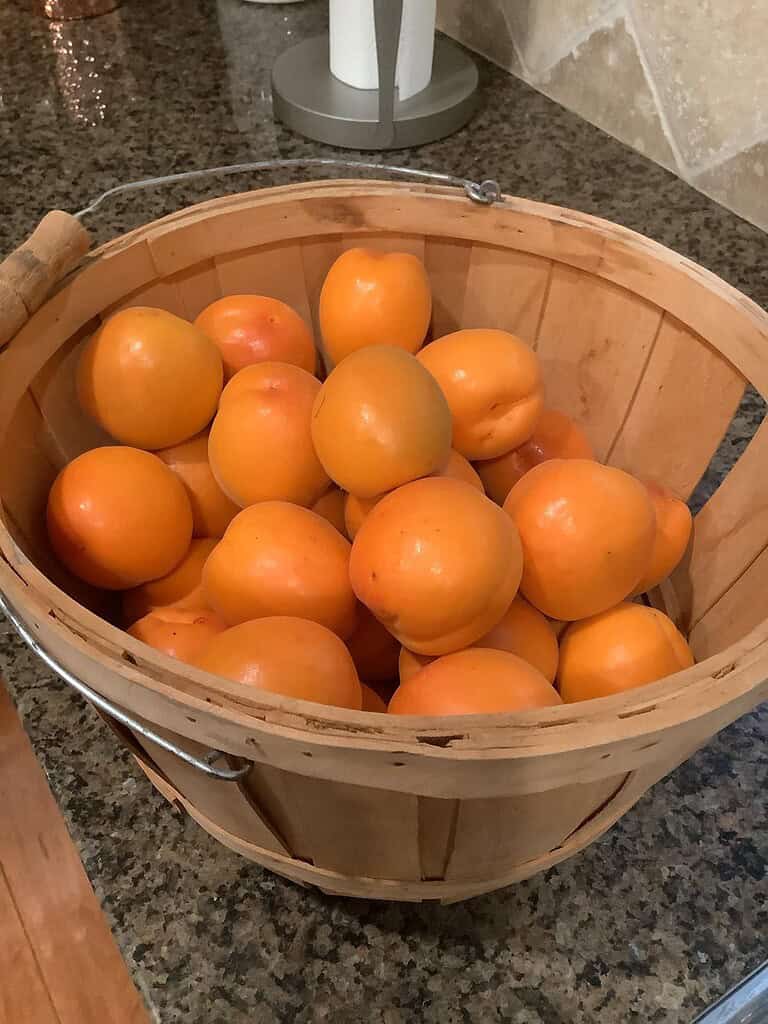
- 2 quarts crushed, peeled apricots (about 5–6 pounds whole fruit)
- ¼ cup bottled lemon juice (ensures safe acidity)
- 6 cups sugar
This recipe makes about 10 half-pint jars (or 5 pint jars). Half-pints are the most common size for jams, but pint jars process safely for the same amount of time.
(Keep in mind that yields can vary slightly depending on the juiciness of your apricots and how long you cook the jam.)
Looking for more ways to fill your pantry? This recipe is included in our Jam Series. Take a peek at the others here.
Essential Equipment for Canning Apricot Jam
One of the best things about this apricot jam recipe is that it doesn’t require any fancy tools.
If you’ve done any canning before, you likely already have most of what you need.
If you’re new to home preservation, these essentials will make the process smooth, safe, and efficient.
- Half-pint or pint canning jars
- Two-piece lids and screw bands
- Large heavy-bottomed pot
- Boiling water canner or deep stockpot with rack
- Canning funnel
- Jar lifter
- Bubble remover or plastic spatula
- Clean towels and paper towels
Apricot Jam Recipe in 6 Easy Steps

Making jam may seem intimidating at first, but once you try it, you’ll see how simple and rewarding it is. Follow along carefully, and you’ll have safe, shelf-stable jam in no time.
Step 1: Prepare the Apricots
Wash apricots under running water. Peel them if desired (peeling gives a smoother jam, but leaving skins on adds a bit of texture).
Remove the pits and crush the fruit with a potato masher or food processor until you have 2 quarts of crushed apricots.
Step 2: Sterilize the Jars
Because this recipe has a short processing time at lower elevations, sterilizing jars may or may not be required depending on your altitude:
- 0–1,000 ft: Processing time is only 5 minutes → jars must be sterilized. Boil jars for 10 minutes (adding 1 extra minute for each additional 1,000 ft of elevation).
- 1,001 ft and above: Processing time is 10 minutes or longer → pre-sterilizing jars is optional. Simply wash them in hot, soapy water and keep hot until ready to use.
This way you avoid unnecessary double sterilizing while still ensuring food safety.
Step 3: Cook the Jam
In a large heavy pot, combine the apricots, ¼ cup bottled lemon juice, and 6 cups sugar. Heat slowly while stirring until the sugar dissolves.
Bring the mixture to a boil and cook rapidly, stirring often, until the jam thickens – about 25 minutes. As it gets close to done, stir more frequently to prevent scorching.
Step 4: Fill the Jars
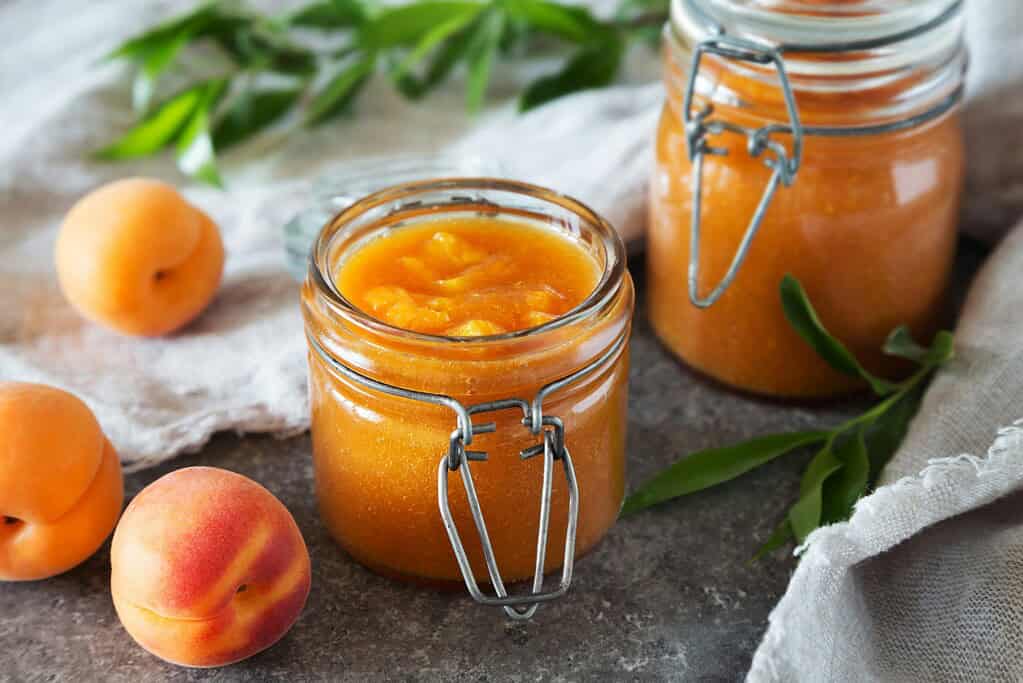
Remove the jam from the heat. Using a funnel, ladle the hot jam into hot jars, leaving ¼ inch of headspace at the top.
Slide a spatula or bubble remover around the inside to release trapped air bubbles. Wipe rims with a clean damp towel, then apply lids and screw bands until fingertip-tight.
Step 5: Process in a Boiling Water Canner
Place the filled jars on a rack in your boiling water canner.
Make sure jars are covered by at least 1 inch of boiling water. Cover, return to a boil, and process for the time recommended in the altitude chart (see below).
- 0–1,000 ft: 5 minutes
- 1,001–6,000 ft: 10 minutes
- Above 6,000 ft: 15 minutes
For more details on the canning process, check out our easy water bath canning guide.
Step 6: Cool and Check the Seals
When the time is up, carefully remove jars using a jar lifter. Place them on a towel, leaving space between jars, and let them cool for 12–24 hours without disturbing them.
Once cool, press the center of each lid – a sealed jar will not flex up or down.
Refrigerate any jars that didn’t seal and use within a few weeks.
How to Store Homemade Apricot Jam Safely
Once your jars of apricot jam are processed and sealed, proper storage is key to keeping them fresh and safe for months to come.
Following these guidelines will help you get the best flavor and longest shelf life.
Pantry Storage
- Store sealed jars in a cool, dark, and dry place such as a pantry, cupboard, or basement.
- Keep away from direct sunlight, heat sources, or damp areas, which can shorten shelf life.
- Properly canned apricot jam will maintain its best quality for 12–18 months.
After Opening
- Once a jar is opened, keep it refrigerated.
- Use within 3 to 4 weeks for the best taste and safety.
Unsealed Jars
Use these jars within 3 to 4 weeks, just like opened jam.
If any jars did not seal properly, refrigerate them right away.
For more tips on storing your homemade preserves, check out our best canned food storage tips.
Creative Ways to Use Apricot Jam
Homemade apricot jam is far more versatile than just a topping for toast.
Its sweet-tart flavor pairs beautifully with both sweet and savory dishes, making it a pantry staple you’ll reach for often. Here are some delicious ways to enjoy it:
Breakfast Favorites
- Spread on warm toast, English muffins, or fresh-baked biscuits
- Swirled into oatmeal, cream of wheat, or plain yogurt
- As a filling for crepes or layered between pancakes
Baked Goods and Desserts
- Spoon into thumbprint cookies for a fruity center
- Layer inside sponge cakes or roll cakes for added moisture and flavor
- Use as a glaze over fruit tarts or cheesecakes
- Stir into homemade ice cream for a ripple of jammy goodness
Savory Pairings
- Brush over roasted chicken or pork as a glaze
- Serve alongside cheese boards with brie, goat cheese, or sharp cheddar
- Mix with Dijon mustard for a quick sandwich spread or dipping sauce
Everyday Uses
- Stir into sparkling water or cocktails for a fruity twist
- Add to salad dressings for a balance of sweet and tangy
- Mix with barbecue sauce for a unique flavor upgrade
With a little creativity, you’ll find apricot jam complements far more than breakfast – it can elevate everyday meals and add a special touch to gatherings.
Common Problems (and How to Fix Them)
Even with a tested recipe, things don’t always go perfectly in the kitchen.
Here are some common issues you might run into when making apricot jam – and how to solve them so your hard work doesn’t go to waste.
Jam Didn’t Set
- Possible causes: Undercooking, overly watery fruit, or not enough sugar.
- Fix: Re-cook the jam with a little more sugar and lemon juice until it passes the spoon “sheet test.” If it stays runny, use it as a syrup for pancakes, waffles, or yogurt.
Jam Turned Out Too Thick
- Possible cause: Overcooking or cooking over too high heat.
- Fix: When you open a jar, stir in a spoonful of hot water to loosen the jam. Next time, test consistency earlier during cooking.
Foam on Top
- Possible cause: Natural fruit foaming during cooking.
- Fix: Skim foam off before filling jars. You can also add ½ teaspoon butter during cooking to reduce foaming.
Jars Didn’t Seal
- Possible cause: Jam residue on jar rims, faulty lids, or improper processing.
- Fix: Refrigerate unsealed jars right away and use within 3–4 weeks. Do not attempt to reprocess after jars have cooled completely.
Jam Crystallized During Storage
- Possible cause: Too much sugar or uneven sugar dissolving.
- Fix: Warm the jar gently and stir before serving. The crystals don’t affect safety – just texture.
Start Canning Your Own Apricot Jam Today
With just three simple ingredients and a little time in the kitchen, you can capture the sweet, tangy flavor of apricots in a jar – no pectin required.
This USDA-tested recipe makes it easy to stock your pantry with safe, shelf-stable jam that will last all year long.
Now it’s your turn: gather your apricots, fire up the canner, and enjoy the satisfaction of homemade jam that’s perfect for breakfasts, desserts, and savory dishes alike.
Have you tried this apricot jam recipe, or do you have your own favorite twist? Share your tips and experiences in the comments below – I’d love to hear from you!
Frequently Asked Questions (FAQs)
Do I need to peel the apricots for jam?
Peeling is optional. Skins will soften as the jam cooks, but peeling creates a smoother texture. If you prefer rustic, chunky jam, you can leave them on.
Why does this recipe use bottled lemon juice instead of fresh?
Bottled lemon juice has a standardized acidity level, which is important for safe canning. Fresh lemons can vary in acidity, so they are not recommended in tested recipes.
Can I reduce the sugar in apricot jam?
Not in this recipe. The sugar is essential not only for flavor and texture, but also for safe preservation. If you want to make a low-sugar jam, use a tested low-sugar recipe from NCHFP or a low/no-sugar pectin product.
Can I use pint jars instead of half-pints?
Yes. This recipe has been tested for both half-pints and pints, and the processing time is the same for both jar sizes.
How can I tell when the jam is thick enough?
Dip a spoon into the hot jam and let it run off. If the jam runs together in a sheet instead of dripping like syrup, it’s ready.