If you’ve got a basket of fresh strawberries, this tested recipe from the National Center for Home Food Preservation is one of the best ways to preserve them.
With just three core ingredients – strawberries, sugar, and powdered pectin – you’ll get a vibrant jam with a reliable set every time.
This isn’t just a family recipe; it’s been scientifically tested for safety, so you can confidently water bath can your jars for shelf-stable storage. That means homemade jam you can enjoy all year long.
Why Make Strawberry Jam With Pectin
Strawberries are naturally low in pectin, which is the ingredient that helps jam set to the right consistency.
Without added pectin, strawberry jam often requires longer cooking, which can result in a softer set and a slightly cooked flavor.
Using powdered pectin ensures that your jam thickens quickly, allowing you to capture the fresh, bright taste of strawberries without overcooking them.
Another advantage of adding pectin is consistency. With a tested recipe, you can count on your jam setting properly every time, rather than wondering if the berries have enough natural pectin to gel.
This makes the process more reliable – especially for beginners or anyone who wants a guaranteed result.
Pectin also reduces the amount of guesswork when it comes to sugar and cooking times. Since the recipe is already balanced for safety and quality, you don’t need to experiment with ratios.
The result is a beautifully set jam with a vibrant color and flavor that tastes just like summer strawberries.
Looking for more ways to fill your pantry? This recipe is included in our Jam Series. Take a peek at the others here.
What You Need to Make Strawberry Jam
- 5 ½ cups crushed strawberries (about 3 quart boxes fresh berries)
- 1 package powdered pectin
- 8 cups sugar
Yield: 9–10 half-pint jars
Step-by-Step Instructions for Making Strawberry Jam with Pectin
Making strawberry jam at home is simple once you know the process.
Each step – from preparing the berries to processing jars in a boiling water canner – is important for achieving the best flavor, texture, and safety.
Follow along and you’ll have shelf-stable jam ready to enjoy all year.
Step 1: Prepare the Strawberries
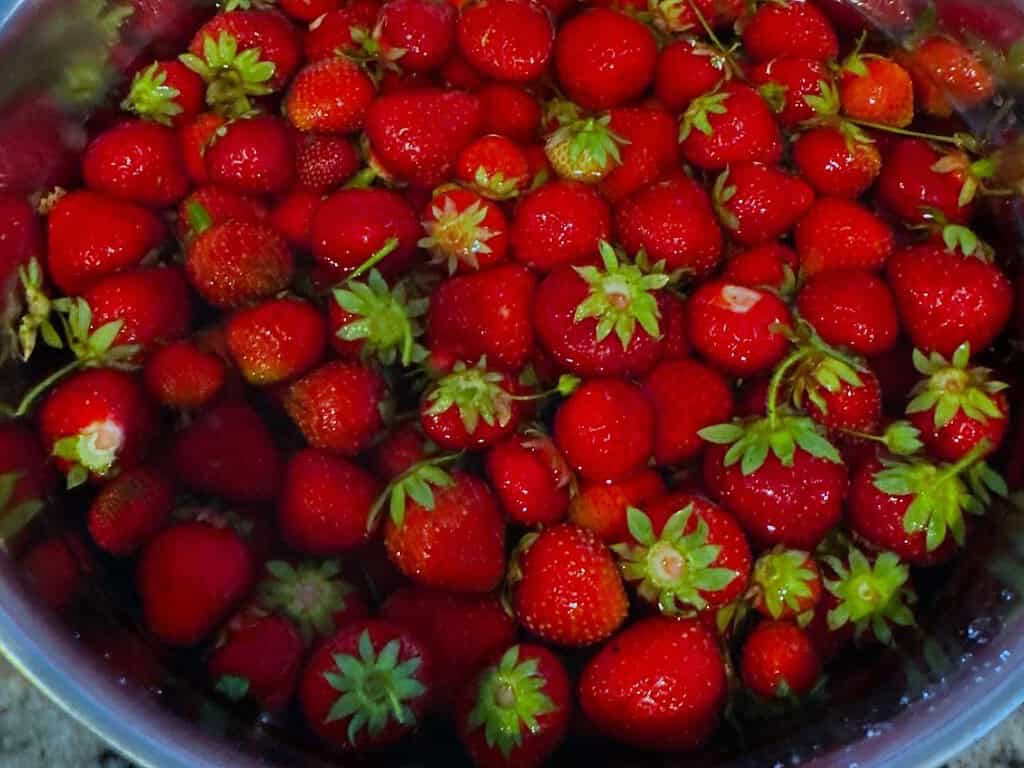
Start by choosing fully ripe, bright red strawberries for the best flavor. Wash the berries thoroughly under cool running water, then remove the stems and leafy caps.
Once cleaned, crush the strawberries using a potato masher or similar tool. Do not puree them completely; a bit of texture makes the jam more appealing.
Measure out 5 ½ cups of crushed fruit, which usually requires about three quart boxes of fresh strawberries.
Step 2: Cook the Jam
Transfer the crushed strawberries into a large, heavy-bottomed kettle. Stir in the powdered pectin until it is evenly distributed.
Place the kettle over high heat, stirring constantly, and bring the mixture to a full rolling boil—one where the bubbles cover the entire surface and do not stop when stirred.
Add the sugar all at once, stirring continuously to dissolve it completely. Return the mixture to a hard boil and let it boil vigorously for one full minute, stirring constantly to prevent scorching.
When the minute is up, remove the kettle from the heat and skim off any foam that rises to the top.
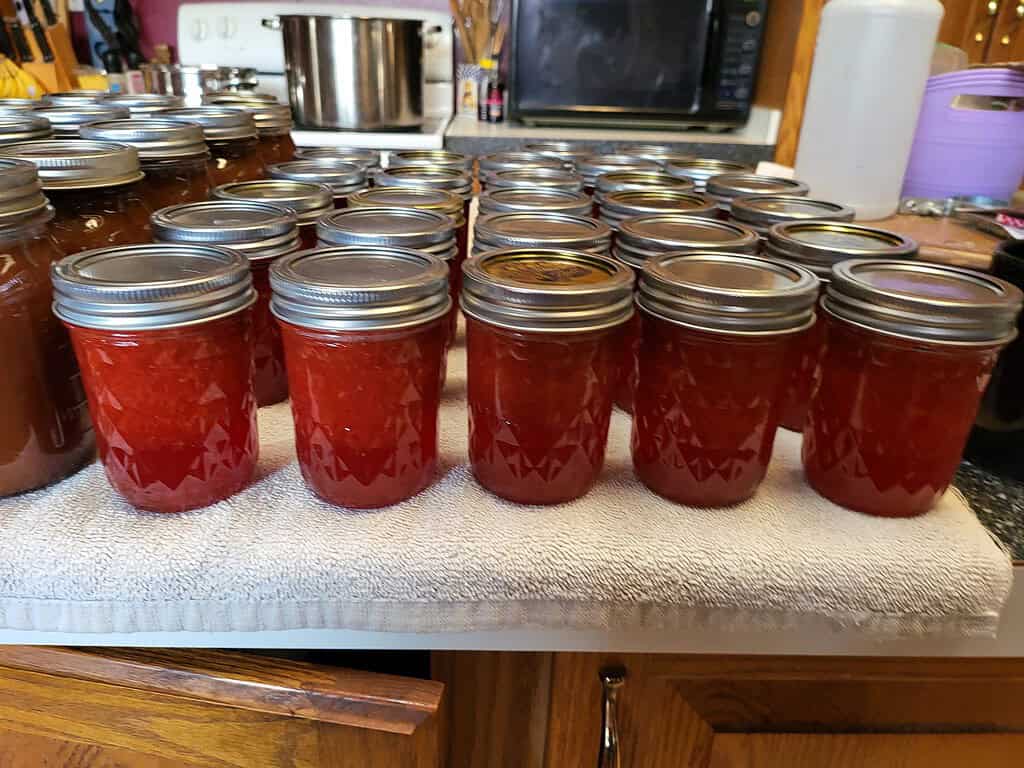
Step 3: Fill the Jars
Working quickly while the jam is hot, ladle it into sterilized half-pint jars. Leave ¼ inch of headspace at the top of each jar to allow for proper sealing.
Wipe the rims with a clean, damp cloth to remove any jam residue that might interfere with the seal.
Place the prepared lids on top of the jars and screw on the bands until they are fingertip-tight – snug, but not over-tightened.
Step 4: Process in a Boiling Water Canner
Arrange the filled jars upright on a rack inside your boiling water canner.
Make sure the jars are covered with at least one inch of water. Place the lid on the canner and bring the water to a full rolling boil.
Once boiling, process the jars for the amount of time listed below according to your elevation:
| Jar Size | 0–1,000 ft | 1,001–6,000 ft | Above 6,000 ft |
|---|---|---|---|
| Half-pints or pints | 5 minutes | 10 minutes | 15 minutes |
When processing is complete, turn off the heat, remove the canner lid, and let the jars rest in the hot water for 5 minutes. This step helps prevent siphoning and improves seal formation.
For more detailed tips and safety steps, visit our easy water bath canning guide to make sure your jam stays fresh and shelf-stable.
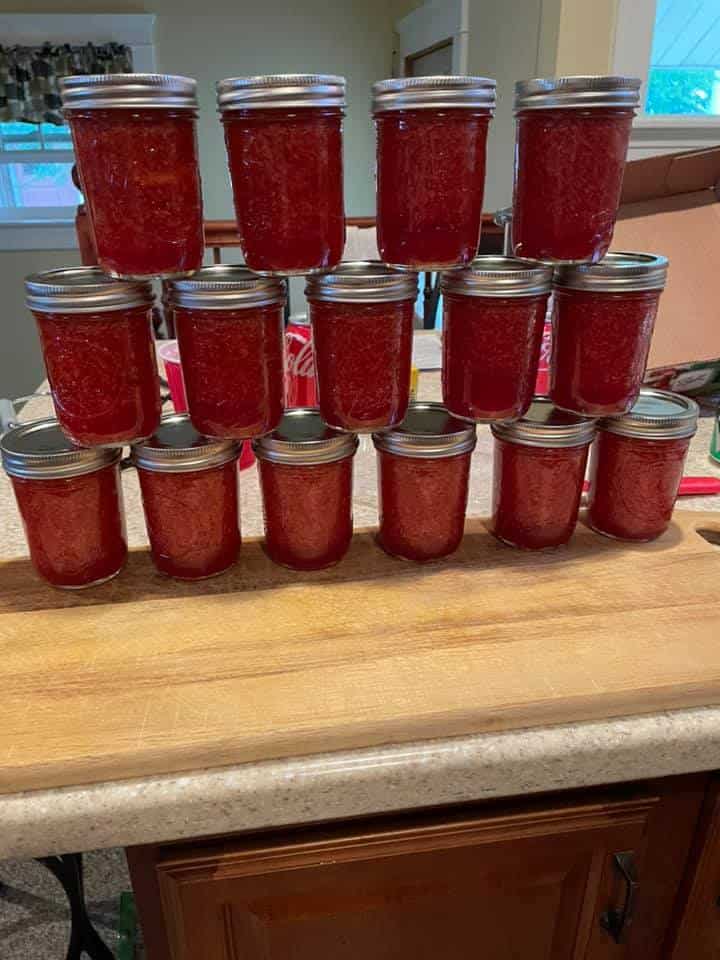
Step 5: Cool and Store
Use a jar lifter to carefully remove the jars from the canner, placing them on a towel-lined surface.
Leave at least an inch of space between each jar, and allow them to cool undisturbed for 12–24 hours. As the jars cool, you’ll often hear a “ping” sound, which indicates that the lids are sealing.
After the cooling period, test the seals by pressing the center of each lid. If it does not flex up and down, the jar has sealed properly.
Label the jars and store them in a cool, dark place for up to one year. Any jars that did not seal should be refrigerated immediately and used within 3–4 weeks.
Storage and Shelf Life of Homemade Strawberry Jam
Knowing how to store your strawberry jam correctly is just as important as making it. Proper storage ensures both safety and quality so you can enjoy your jars throughout the year.
Shelf-Stable Storage
When jars are processed in a boiling water canner for the recommended time and have properly sealed, they are safe to store at room temperature.
Keep the sealed jars in a cool, dark place such as a pantry or cupboard.
Avoid storing near direct sunlight or heat sources, as this can shorten the shelf life. Under proper conditions, your jam will keep its best quality for up to one year.
For more helpful advice on keeping your preserves in peak condition, check out our best canned food storage tips.
Refrigerated Storage
Once a jar has been opened, it should always be stored in the refrigerator.
Open jars of strawberry jam will maintain good flavor and texture for about three to four weeks. Be sure to use a clean utensil each time you scoop jam out of the jar to avoid contamination.
If a Jar Doesn’t Seal
Occasionally, a jar may not seal after processing.
In that case, place it directly into the refrigerator and use it within three to four weeks, just like an opened jar. These unsealed jars are not safe for pantry storage.
Freezing Jam
If you prefer, you can also freeze strawberry jam instead of canning it (if you're new to preserving, check out our guide to canning for beginners to explore both options confidently).
For best results, leave a little extra headspace in the jar (about ½ inch) to allow for expansion during freezing.
Frozen jam keeps well for up to a year, though it is best enjoyed within six months for optimal flavor.
Use These Simple Tips for Better Results

Homemade jam is simple, but a few details make all the difference between a reliable set and a disappointing batch. Here are some tested tips to help you succeed every time.
Use Fully Ripe Strawberries
The best jam starts with good fruit. Choose fully ripe, bright red strawberries for maximum flavor and sweetness. Underripe berries may have more natural pectin, but they won’t taste as sweet.
Stick with ripe berries and rely on the powdered pectin in the recipe to achieve the perfect set.
Measure Carefully
Accurate measurements are essential in canning recipes.
Too much fruit, too little sugar, or an incomplete package of pectin can throw off the set and compromise safety. Use standard measuring cups and level them off for consistency.
Don’t Reduce the Sugar
It may be tempting to cut the sugar for a less sweet jam, but sugar is part of what makes this recipe safe for long-term storage.
It works with pectin and heat to create the gel and also helps preserve the jam. If you want to make a lower-sugar version, look for a specifically tested low-sugar recipe with special pectin.
Use the Right Equipment
A heavy-bottomed pot distributes heat evenly and reduces the risk of scorching.
A wide surface area also helps water cook off quickly, which leads to a better set. A jar lifter, canning funnel, and clean towels will make filling and handling jars safer and easier.
Check Seals After Cooling
Always let jars cool undisturbed for 12–24 hours. Once cool, press the center of each lid.
If it does not flex up and down, the jar is sealed. Any jar that doesn’t seal should be refrigerated and used promptly.
Adjust for Altitude
Processing times vary depending on your elevation. Follow the tested time adjustments to ensure your jam is safe.
At higher altitudes, water boils at a lower temperature, so jars need more time in the canner. Refer back to the processing table whenever you can jam at home.
Delicious Ways to Use Strawberry Jam

A good jar of strawberry jam can go far beyond toast. Here are a few ways to make the most of it:
- Spread on warm biscuits or toast – Let it melt in a little for the perfect bite.
- Spoon over pancakes or waffles – Skip the syrup and go for a thick layer of jam instead.
- Stir into plain yogurt – Adds sweetness and color without needing extra sugar.
- Swirl into cake batter – Marble it into pound cake or coffee cake before baking.
- Top ice cream or cheesecake – Works as an instant fruit sauce.
- Fill cookies or tarts – Perfect for thumbprint cookies or small pastry shells.
- Layer in trifles or parfaits – Pairs well with cream and sponge cake.
Make Your First Batch of Strawberry Jam Today
Homemade strawberry jam is one of those rewarding kitchen projects that pays you back every time you open a jar.
With just strawberries, sugar, and pectin, you can capture the taste of summer in a safe, shelf-stable way that lasts all year.
The process is straightforward, and once you’ve tried it, you’ll see how easy it is to make jam a part of your canning routine.
So gather your berries, prepare your jars, and enjoy the satisfaction of filling your pantry with something you made yourself.
Have you tried this strawberry jam recipe? Share your results, favorite twists, or any questions you have in the comments below – I’d love to hear your jam stories!
FAQs
1. Can I use frozen strawberries for this recipe?
Yes. Frozen strawberries work well, but be sure to thaw them completely before crushing. Measure the fruit after thawing to ensure you have the correct amount.
2. Can I reduce the sugar in this recipe?
No, not if you plan to can the jam for shelf storage. The full amount of sugar is necessary for the jam to gel properly and remain safe. If you want a lower-sugar option, look for a tested recipe that uses low- or no-sugar pectin.
3. How long will canned strawberry jam last?
When processed correctly in a boiling water canner and stored in a cool, dark place, sealed jars will keep their best quality for up to one year. Once opened, refrigerate and use within three to four weeks.
4. Do I need to sterilize jars before filling them?
If you process the jars for 10 minutes or more, you do not need to pre-sterilize them; washing them in hot, soapy water is sufficient. The canning process itself will sanitize them.
5. What if one of my jars doesn’t seal?
If a jar doesn’t seal after cooling, simply refrigerate it and use the jam within three to four weeks. Unsealed jars are not safe for pantry storage.