Rainwater harvesting is a smart, old-fashioned way to make use of what nature gives you for free.
Whether you live out in the country or in town, collecting rainwater can help you water your garden, flush toilets, wash your car, or even drink – if you set it up right.
It can lower your water bill, help during dry spells, and keep you from relying so much on city water.
In this guide, we’ll go over what you need, how to set it up, and how to make sure the water stays clean. It’s easier than most people think – and once it’s in place, it just keeps working.
Understanding the Basics of Rainwater Harvesting

Rainwater harvesting is just the practice of collecting rain where it falls, storing it, and using it when you need it. At the heart of it, you’re guiding rain from a surface (usually a roof) into a tank or barrel so it doesn’t go to waste.
From there, it can be used for all kinds of things, from watering your plants to flushing your toilet.
Most systems have a few main parts:
- Catchment surface – Usually your roof, but it can also be other flat surfaces like a shed roof, paved area, or even rock.
- Gutters and pipes – These move the rainwater from the catchment area into your storage.
- Filter or screen – To keep out leaves, bugs, and other debris.
- Storage tank – Where the water is held until you’re ready to use it.
- Outlet or pump – Depending on how you plan to use the water, you may just use gravity or hook it up to a pump.
This method isn’t new – people have been doing it for generations. What’s changed is that we now have better filters, tanks, and plumbing options to make it more efficient and cleaner.
But the core idea is still simple: save rain when it falls, so you have water when it doesn’t.
It’s not just for big setups or off-grid folks, either. Even a basic system can make a difference, especially if you live where water’s expensive, restricted, or not always reliable.
Choosing and Designing Your Collection System
Before setting anything up, it’s worth taking a step back and thinking about what you actually need from your rainwater system.
Not all setups are the same – and they don’t need to be. What works for a small garden in the suburbs won’t be the same as what’s needed on a rural property with livestock.
Know Where You’re Catching Water From
Most folks start with their roof, which makes sense – it’s already sloped and has gutters. But if you have a barn, shed, carport, or even a sloped concrete area, those can collect rain too.
In wide-open areas, rock catchments or landscaped zones can be set up to guide water into a tank.
The more surfaces you collect from, the more water you’ll get. That’s especially helpful if you live in a place where rain is rare but heavy when it does come.
Estimate How Much You Can Collect
To get a rough idea, multiply the square footage of your roof by the average annual rainfall in your area (in inches), then multiply that by 0.623.
That gives you the number of gallons you can collect in a year.
This number helps you size your tank right. No sense in having a 5,000-gallon tank if you only ever collect 500 gallons a year – or in falling short when you really need the water.
Pick the Right Type of System
There are two main ways to move water into your tank:
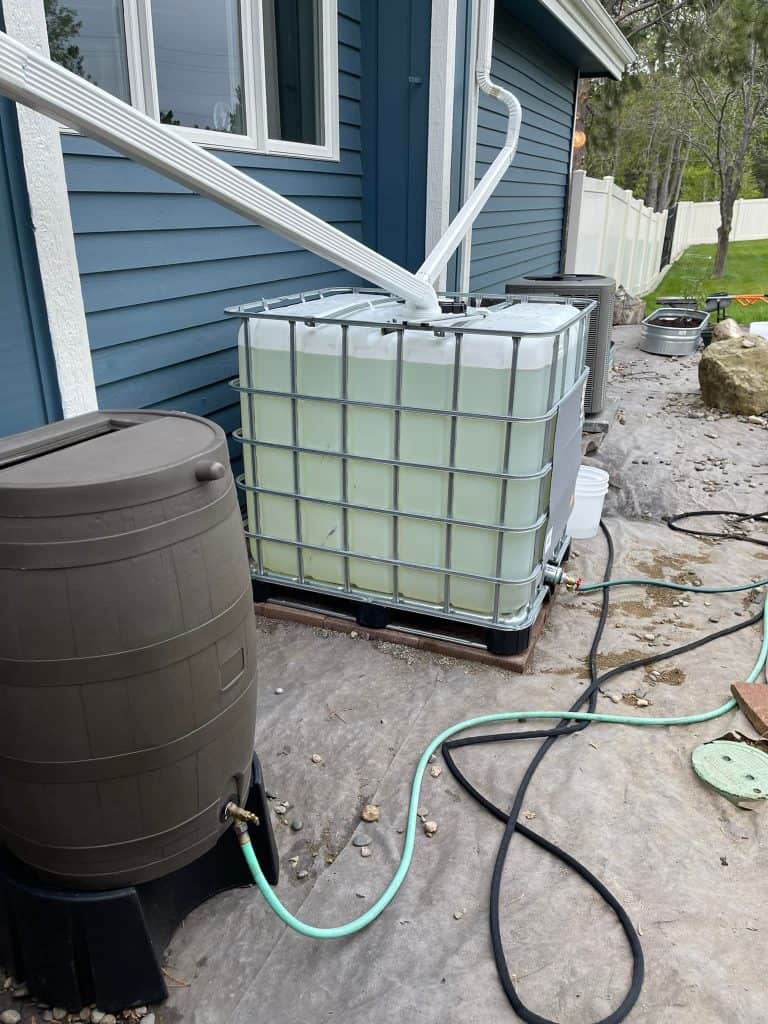
- Dry systems work best if your tank sits right next to your building. Water flows directly from the gutters into the tank with no underground piping. These are simple and cheaper to build.
- Wet systems use underground pipes to carry water from multiple downspouts to a tank placed further away. These are good if you want to collect from the whole roof or multiple buildings – but they do cost more and need good planning to drain properly.
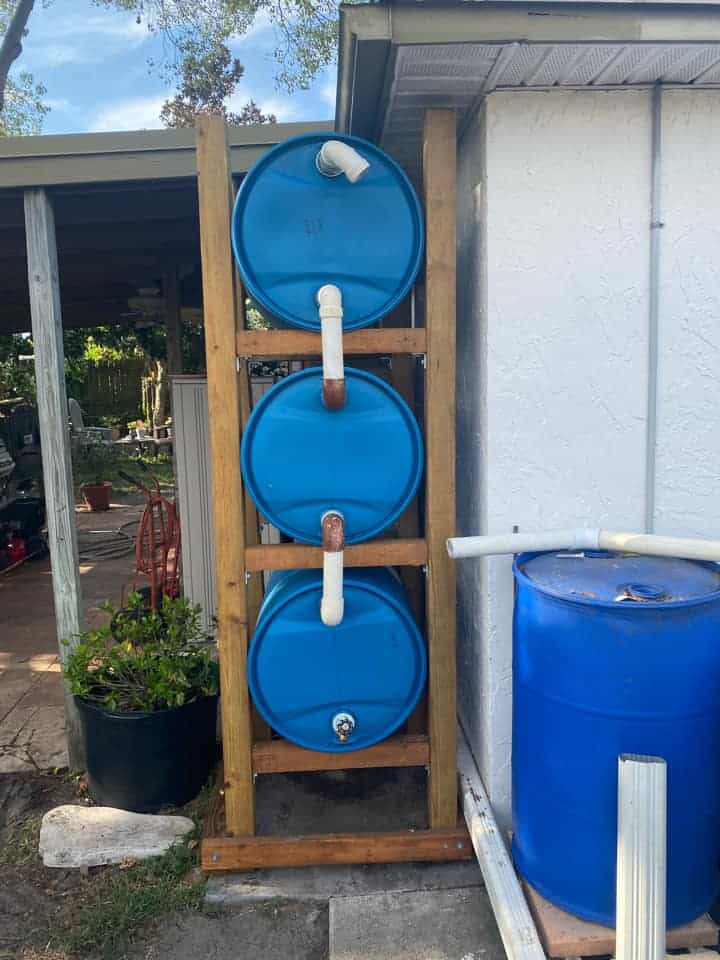
Keep It Flexible
It’s smart to build with change in mind. A modular setup lets you add more tanks, shift things around, or expand if your needs grow.
For example, if you start with a small garden but later add livestock or a greenhouse, you’ll be glad you didn’t box yourself in.
Designing it right from the start can save you time and money later on. Think about what you want now, but also what you might need down the road.
Placement and Setup
Once you know how much water you can collect and what kind of system you’ll use, the next step is figuring out where to put everything – especially your storage tank.
Placement matters more than people think, and getting it right upfront can save you trouble later.
Choose a Spot That’s Easy to Reach
Put your tank where it’s easy to get to for both regular use and maintenance.
You’ll need to check filters, clean out debris, and keep an eye on the water level. If it’s tucked away in a hard-to-reach corner, chances are you’ll avoid it – and that’s when problems start.
Also, think about safety. Make sure the ground is solid and level, and that the tank won’t be in the way of driveways or foot traffic.
A full tank can weigh several tons, so it needs a good base – gravel or a concrete pad works well.
Use Distance to Your Advantage
If you’re using a wet system, you can place the tank farther from the house. That gives you more flexibility, especially if the area around your home is tight or already full. Just make sure the underground pipes have the right slope so water keeps moving and doesn’t sit in the lines.
For dry systems, the tank needs to be close to the downspout. Keep the piping short and sloped so water flows freely without pooling.
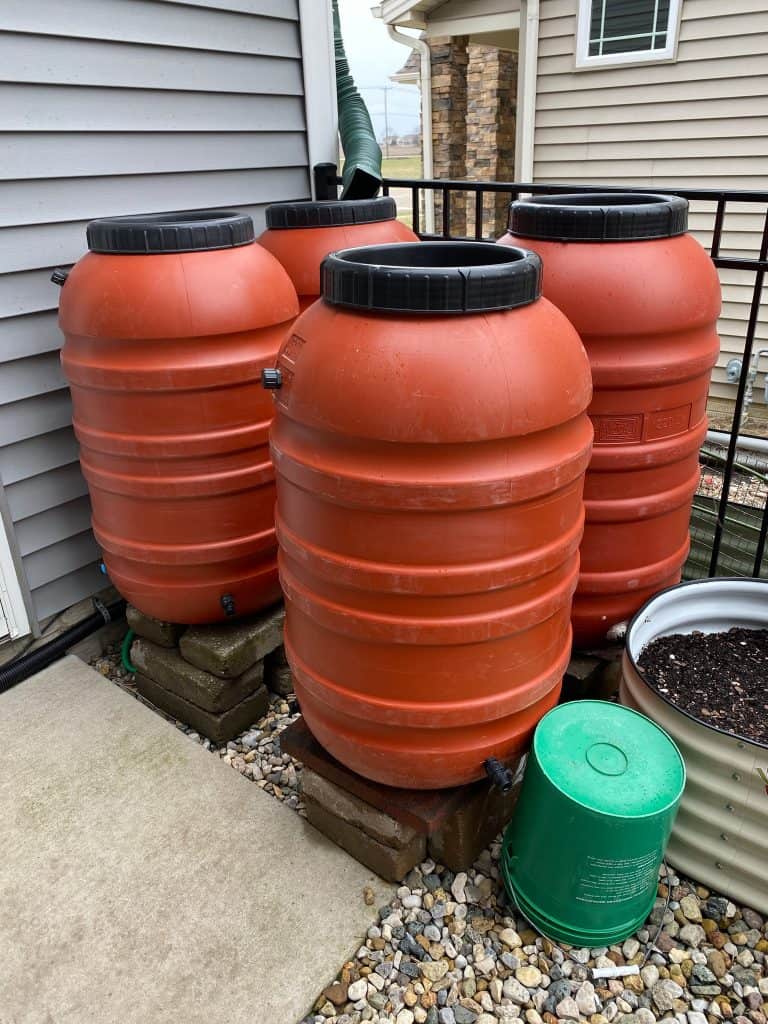
Choose the Right Tank Material
Not all tanks are created equal. If the tank will be sitting in the sun, go with one that’s UV-resistant.
This helps prevent algae from growing inside, which keeps your water cleaner over time. It’s one of those small things that makes a big difference down the line.
Don’t Forget Overflow and Drainage
Every tank needs an overflow pipe.
When it fills up, the extra water needs to go somewhere that won’t cause flooding or erosion. Run the overflow to a safe area – like a garden bed, swale, or soakaway pit.
Also, think ahead about where the water might drain during heavy rains. You want to collect rainwater, not cause a mess around your home or foundation.
Filtering and Treating Rainwater for Safe Use
If you’re collecting rainwater, you’ll want to keep it as clean as you can – especially if you plan to use it indoors, for irrigation systems, or as drinking water.
The good news is, most of this can be handled with a few simple parts that don’t need much upkeep.
Start with Pre-Filtration
Before water even reaches the tank, it should go through a few filters to catch leaves, sticks, and other debris. Start with:
- Gutter guards or screens – These keep big stuff out right at the top.
- Rain heads (or downspout filters) – These catch smaller bits and let water flow through cleanly. Many of them are self-cleaning, so you won’t have to mess with them too often.
This first step helps a lot. If you skip it, your tank will fill with gunk—and that’s a lot harder to clean out later.
Add a First-Flush Diverter
The first bit of rain that hits your roof is usually the dirtiest. It carries dust, bird droppings, pollen, and other grime that’s built up since the last rain.
A first-flush diverter sends that dirty water away from your tank before the cleaner water starts flowing in. It’s a small add-on, but it makes a big difference in water quality.
Treat It if You Want to Drink It
If you're planning to use rainwater for drinking, cooking, or brushing teeth, it needs to go through post-tank filtration. That usually means:
- A fine sediment filter to catch small particles
- A carbon filter to remove any smells or odd tastes
- A UV sterilizer to kill off bacteria, viruses, or other germs
You don’t need all of this if you're just watering plants or washing the car – but if it's going into your mouth, don't cut corners.
Keep Pests Out
Still water can attract mosquitoes, especially in warm weather. To stop them and other critters:
- Install a screen on the tank inlet
- Add an insect-proof flap valve on the overflow pipe
These are small parts, but they keep bugs from breeding inside your system.
Prevent Algae with the Right Tank
If sunlight hits the water inside your tank, algae can start to grow.
That’s why it’s important to use a UV-resistant tank or keep your tank shaded. A dark, sealed tank also helps limit algae and keeps your water smelling clean.
Plumbing, Pumps, and Distribution
Once you’ve got clean water in your tank, the next step is figuring out how you’ll get it to where it’s needed. Some setups are as simple as a spigot and a hose, while others tie into irrigation systems or even indoor plumbing.
The right setup depends on how you plan to use the water – and how far it needs to go.
Hooking Into Outdoor Use
For most people, the easiest place to start is using rainwater outside. You can connect a hose directly to the tank for hand watering, or hook up to a drip irrigation or sprinkler system.
Just make sure to include an inline irrigation filter after the pump. It catches any leftover debris and helps protect your sprinklers or emitters from clogging.
Using a Pump for Water Pressure
If gravity won’t do the job – or if you’re running water to a distance or uphill – you’ll need a pump. A basic pressure pump can move water through hoses or into your irrigation system without trouble.
Some folks also add a pressure tank, which keeps the flow steady and helps the pump last longer by cycling less often.
Connecting to Your Home’s Plumbing
You can route rainwater into your home for things like toilet flushing or washing clothes.
These are indoor uses that don’t require the water to be drinking-safe, but you’ll still want it filtered and free of grit to protect your appliances and pipes.
If you go this route, be sure the rainwater lines are separate from your municipal water supply. This usually means installing a backflow prevention valve to meet code and avoid contamination.
Keep the Pump from Running Dry
If you're running an automatic irrigation system, it's a good idea to add an auto-fill feature.
This keeps a small amount of water in the tank at all times (from another source like city water or a well), so your pump doesn’t burn out if the tank runs low.
Monitor Your Water Supply
A water level indicator is a simple tool that shows how much water is left in your tank.
This helps you manage your usage, especially in dry months or when relying fully on rainwater. You can get manual gauges, or more advanced electronic ones if you prefer.
Everyday and Specialized Uses for Rainwater

Once you’ve got clean, stored rainwater, you might be surprised at how useful it can be.
Some folks only use it for their garden, while others rely on it for nearly everything. The more you make use of it, the more you reduce your need for treated water – and that adds up over time.
Outdoor Use
Rainwater is perfect for most outdoor jobs:
- Watering gardens and landscapes – It’s gentler on plants since it doesn’t have chlorine or other treatment chemicals.
- Hand watering – Great for potted plants or spots that irrigation systems don’t reach.
- Cleaning – Use it for washing cars, pets, tools, driveways, and sidewalks.
- Filling ponds, fountains, or swimming pools – It saves a lot of tap water, especially during summer.
If you’ve set up an irrigation or sprinkler system, filtered rainwater works well there too. Just be sure to protect the system with a proper filter after the pump.
Indoor Non-Potable Use
With the right setup, you can use rainwater indoors without making it drinkable. Common uses include:
- Flushing toilets
- Running washing machines
These two alone can make up a big chunk of your household water use, so switching them to rainwater can lower your utility bill and take pressure off your local supply.
Potable Use (If Treated Properly)
With good post-tank filtration and UV sterilization, rainwater can be used for:
- Drinking
- Cooking
- Brushing teeth
- Washing dishes
This is more common in off-grid setups, but it can also work in homes looking to cut off city water entirely. Just be sure to follow health guidelines, and regularly maintain your system.
Water for Livestock and Wildlife
On farms or rural properties, rainwater is a clean and natural source for:
- Horses, goats, chickens, and other livestock
- Wildlife like birds and deer
It’s especially useful in areas where well water is limited or unreliable. Clean, untreated rainwater is often safer than shallow well water for animals.
Industrial and Backup Uses
Rainwater can also work well for:
- Industrial processes that don’t require treated water, like cooling or equipment washing
- Emergency backup water if municipal supply goes out
Even a small tank can give you peace of mind during power outages, droughts, or disruptions to your regular water service.
Environmental and Long-Term Benefits
Rainwater harvesting isn’t just good for your water bill – it’s good for the land, too.
Whether you live on a big piece of property or a small city lot, collecting rain helps you work with nature instead of against it.
Cuts Down Stormwater Runoff
When rain hits roofs, driveways, or patios and has nowhere to go, it turns into runoff.
That runoff picks up oil, trash, and dirt, then dumps it into local waterways. By collecting rain before it runs off, you help keep streets, creeks, and drainage systems cleaner.
It also helps prevent soil erosion and water pooling around your home or outbuildings, especially during heavy storms.
Helps Refill Groundwater
In some areas, especially places where wells are running dry, recharging the groundwater is a big deal.
If you don’t need to store all the rain you collect, you can direct some of it into percolation pits, trenches, or recharge wells. This lets it soak slowly into the ground instead of washing away.
That small act can make a difference over time, especially in rural or drought-prone areas.
Healthier Plants and Soil
Rainwater doesn’t have chlorine or treatment chemicals, so it’s better for plants.
Long term, your soil can stay healthier and more balanced when it’s watered with clean, natural rain. It’s especially helpful for vegetable gardens, fruit trees, and sensitive plants.
Builds Independence and Self-Reliance
When you have your own water stored and ready, you’re less affected by water restrictions, rate hikes, or supply issues. Whether you live off-grid or not, having control over part of your water source adds peace of mind.
During droughts or service outages, folks with rainwater systems often keep going while others wait for help.
Supports a More Sustainable Lifestyle
A well-run rainwater system is one of the simplest ways to reduce your impact without giving up comfort or convenience.
You’re putting less strain on local water supplies, making use of natural resources, and building habits that line up with long-term conservation goals.
More and more people are starting to look at outdoor water use as the next big frontier in conservation – and collecting rain is one of the best ways to lead the way.
Start Small, Set It Up Right, and Build from There
You don’t need a big budget or a fancy system to start harvesting rainwater. Even one tank under a downspout can make a difference.
The key is to match your setup to your actual needs, use the right parts to keep the water clean, and place everything where it’s easy to access and maintain.
From there, you can grow your system as your needs grow – whether that means adding more tanks, expanding to indoor use, or turning it into a full backup supply.
The sooner you get started, the sooner you’ll have a dependable source of water right on your own land.
FAQs
1. How much rainwater can I collect from my roof?
It depends on your roof size and rainfall. As a rough guide: roof square footage × annual rainfall (in inches) × 0.623 = gallons collected per year.
2. Is rainwater safe to drink?
It can be, if it’s filtered properly and treated with something like UV sterilization. Without that, it’s best used for non-potable uses like watering or flushing.
3. What kind of maintenance does a system need?
Check and clean filters regularly, clear gutters, inspect the tank for buildup, and monitor for pests or leaks. Most of it is simple and doesn’t take much time once it’s set up.
4. Can I install a system in a small space or in the city?
Yes. Even a small barrel or tank under one downspout can collect usable water. There are compact systems designed specifically for tight spaces or urban settings.
5. How much does it cost to get started?
Basic DIY setups can cost under $200. More advanced or larger systems with pumps and filtration will cost more, but you can build it up over time as needed.
Ready To Transform Your Garden?

Are you looking for the best way to layout your garden beds? Maybe you're feeling a bit stuck on how to make the most of your space?
We’ve got you covered! Check out our 101+ Garden Bed Layout Ideas for your next raised bed project. This guide is filled with creative and practical ideas that can help you design a garden that fits your style, whether you’re just starting out or have been gardening for years.
Get your copy today and get inspired to bring your gardening dreams to life.