Starting a cut flower garden may sound intimidating, especially if you’re a beginner gardener.
The good news is that anyone can grow a beautiful patch of flowers for homegrown bouquets with a bit of planning and patience.
In this article, we’ll walk you through how to start a cut flower garden from scratch – from picking the perfect spot and easy flowers to grow, to planting, caring, and harvesting armfuls of blooms.
It’s time to transform a corner of your backyard into a thriving cut flower garden for beginners.
Let’s dig in!
Choose the Perfect Spot for Your Backyard Cut Flower Garden
Location is key to a successful cut flower garden.
Most flowering plants that produce great cut blooms prefer full sun, so pick a spot that gets at least 6–8 hours of direct sunlight each day.
The more sun your flowers receive, the more blooms they’ll produce. Observe your yard for a day to see which areas stay sunny and which fall into shade due to buildings or trees.
If your sunniest spot only gets about 4–6 hours of light, don’t worry – you can still try a few shade-tolerant bloomers like snapdragons or nicotiana, though most classic cut flowers will do best in full sun.
Also consider convenience and protection when choosing your site. Ideally, the spot should have good air circulation but not be exposed to constant strong winds (tall flower stems can snap in heavy wind or rain).
Make sure a water source is nearby for easy watering, and consider the view – you’ll want to enjoy seeing your flowers from your home too!
Start small. You don’t need a huge yard to grow buckets of flowers. Even a modest garden bed or a few containers on a balcony can become a “micro” cut flower garden.
In fact, if you’re new to gardening, it’s wise to begin with a small area so you don’t get overwhelmed. A patch as small as 4 x 4 feet or a single raised bed can yield plenty of blooms for personal use.
If you have no in-ground space, containers work too – use large pots (at least 12 inches deep and wide) placed on a sunny patio or deck. Many annual flowers like dwarf zinnias and marigolds can thrive in pots, providing you with bouquets even without a traditional garden plot.
Finally, pay attention to the soil and drainage in your chosen spot. Avoid low areas where water tends to puddle after rain, as most cut flowers do not like “wet feet”.
Look for or create well-draining soil rich in organic matter (you can improve the soil by mixing in compost before planting – for tips, check out the Berkeley method of composting). Good soil and sun will set your flowers up for success from the start.
When Should You Plant in Your Area?
Enter your ZIP code for personalized frost dates, planting schedules, and growing tips.
Prepare Your Garden Bed and Soil
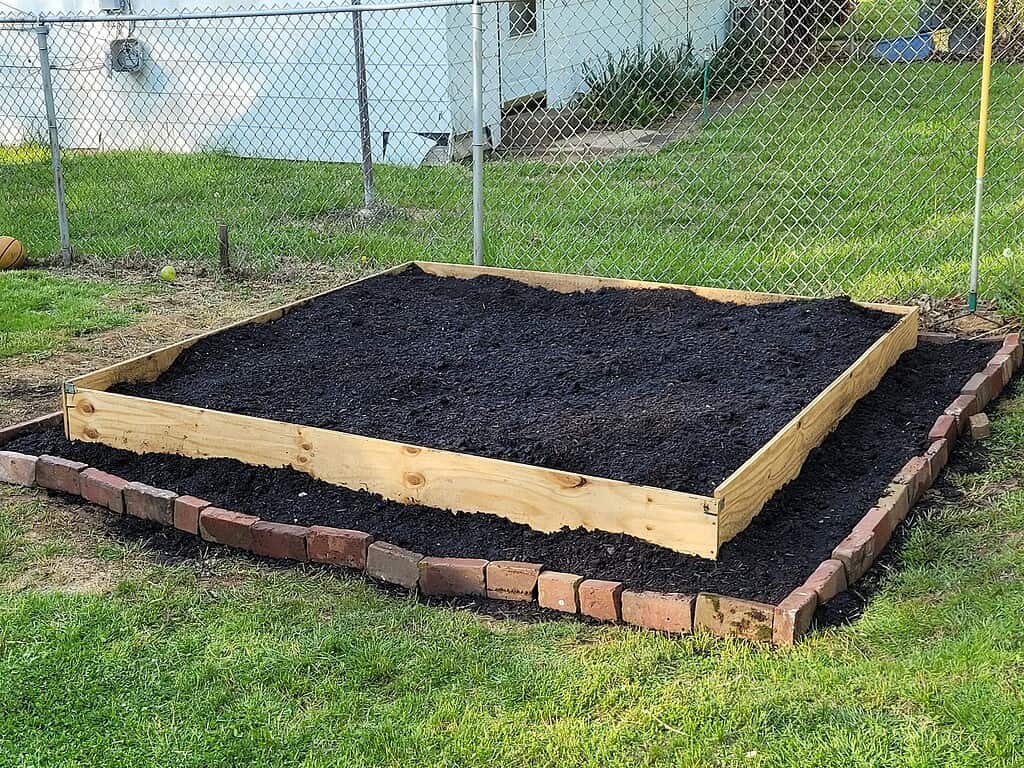
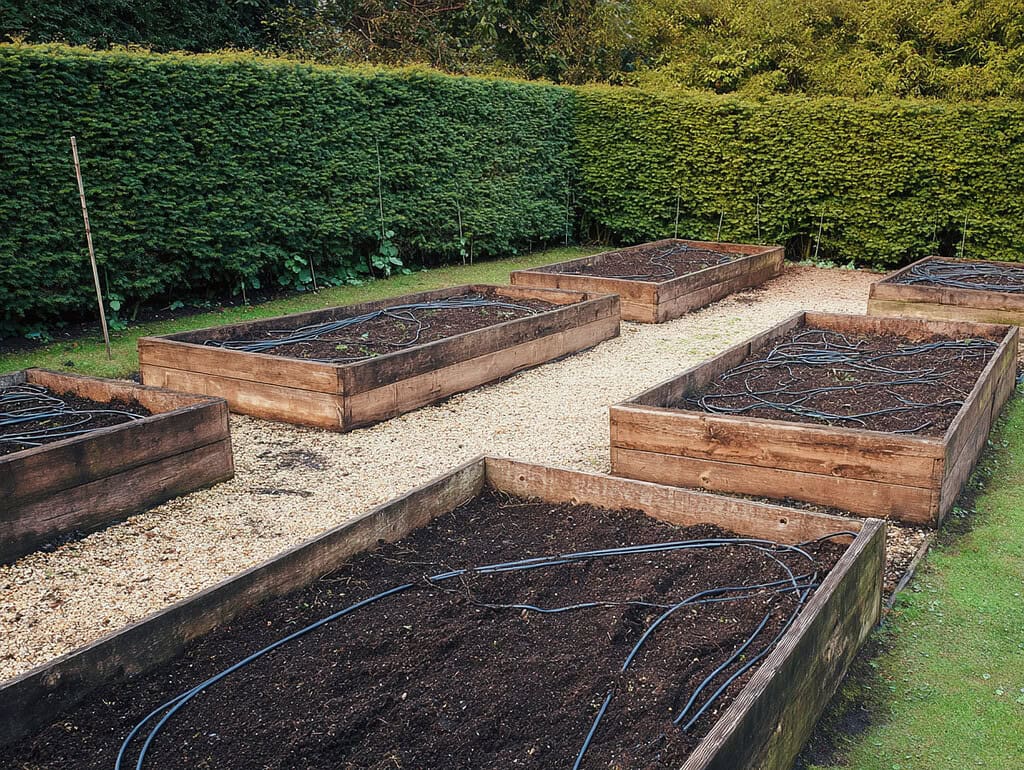
Raised beds are a great option for a small cut flower garden, as they allow you to control soil quality and drainage easily.
Whether you use a raised bed or an in-ground plot, start by clearing the area of grass, weeds, and roots. Loosen the soil to a depth of at least 6–12 inches so new roots can penetrate easily.
Work in plenty of compost or organic matter to enrich the soil – cut flowers are most productive in fertile, nutrient-rich soil that holds moisture but still drains well.
A simple soil recipe used by some gardeners is a mix of about 50% quality garden soil, 40% compost, and 10% coarse material like coconut coir or perlite for drainage. This kind of rich, well-draining soil will support healthy root growth and, in turn, strong stems and abundant blooms.
If your native soil is very sandy or heavy clay, amending with compost is especially important. In raised beds or containers, fill them with a potting mix or garden soil blend that already has organic matter.
Aim for a loose, crumbly soil texture. You can also sprinkle in an all-purpose slow-release organic fertilizer when preparing the bed (following the product instructions) to give your young plants a gentle feeding to start.
Once your bed is prepared and planted (we’ll get to planting soon), consider adding a layer of mulch such as straw or shredded bark around the seedlings.
Mulch helps suppress weeds and keeps the soil moist longer, which means you’ll water less often and your flowers will experience less stress on hot days.
Good soil prep upfront will reduce problems later and keep your cut flower garden low-maintenance.
Easy Flowers to Grow for Cutting
When you’re new to growing flowers, it’s best to choose easy, foolproof varieties that are known to thrive with minimal fuss.
Your first year is about learning, so start with just a handful of reliable flowers and you’ll be cutting bouquets in no time.
Here are some of the top beginner-friendly cut flowers and why they’re great for a backyard cutting garden:
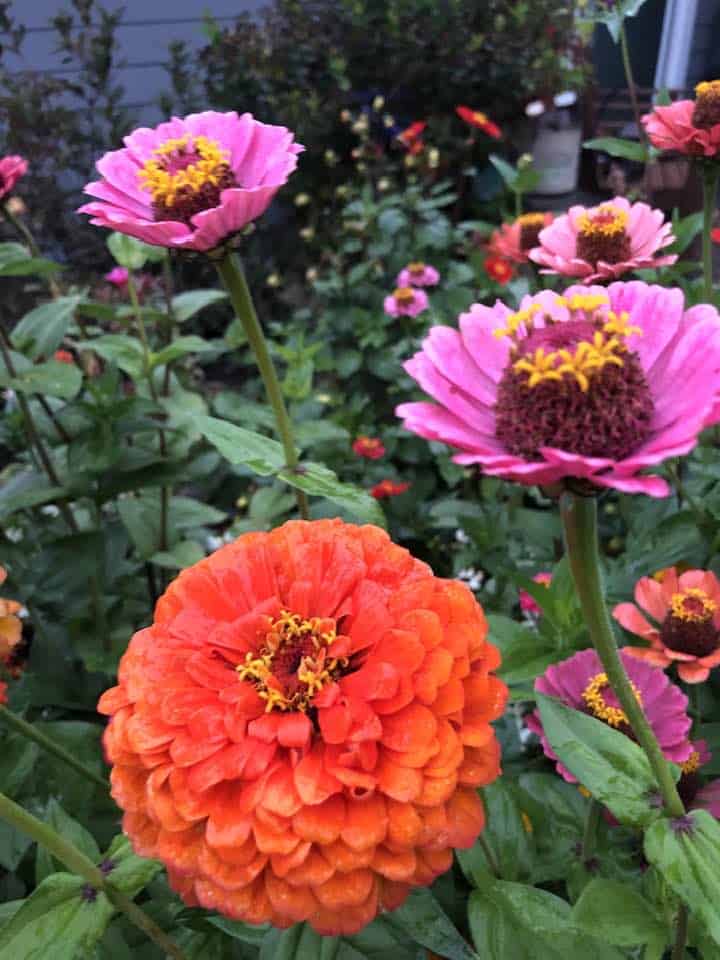
Zinnias
A true cut flower garden superstar. Zinnias are fast-growing annuals that love heat and sun.
They come in every color of the rainbow and continuously produce new blooms all summer as you cut them.
They can be direct-seeded in the garden after the last frost and will reward you with large, vibrant blooms in as little as 8–10 weeks.
For beginner success, try varieties like ‘Benary’s Giant’ which have long stems and huge flower heads.
Tip: When cutting zinnias, snip just above a pair of leaves or branching point – this will encourage the plant to send up even more flowering stems.
Sunflowers

Sunflowers add drama and height, and they’re very easy to grow from seed. Plant sunflower seeds directly in the ground after frost and they’ll shoot up quickly.
There are branching varieties that produce multiple blooms per plant, and single-stem varieties (like many “ProCut” types) that yield one big flower per seed.
Keep in mind that single-stem sunflowers are one-and-done – once you cut the bloom, that plant won’t rebloom.
To have a steady supply, plant a few seeds every 1–2 weeks for a continuous sunflower show through summer.
Sunflowers come in many colors beyond yellow (orange, red, even white) and make long-lasting cut flowers. As a bonus, they attract pollinators to your garden as well.
Cosmos
Cosmos are charming, daisy-like flowers with feathery foliage that lend an airy touch to bouquets. They tolerate heat and poor soil, making them practically foolproof.
Sow cosmos seeds after frost and by midsummer you’ll have lots of pastel pink, white, or orange blooms to cut.
Like zinnias, cosmos are “cut-and-come-again” flowers – the more you cut the blooms, the more the plant will rebloom to try to set seed.
They can grow tall (2–4 feet), so you may need to stake them or plant against a fence for support, but their delicate, fluttery flowers are worth it.
Marigolds
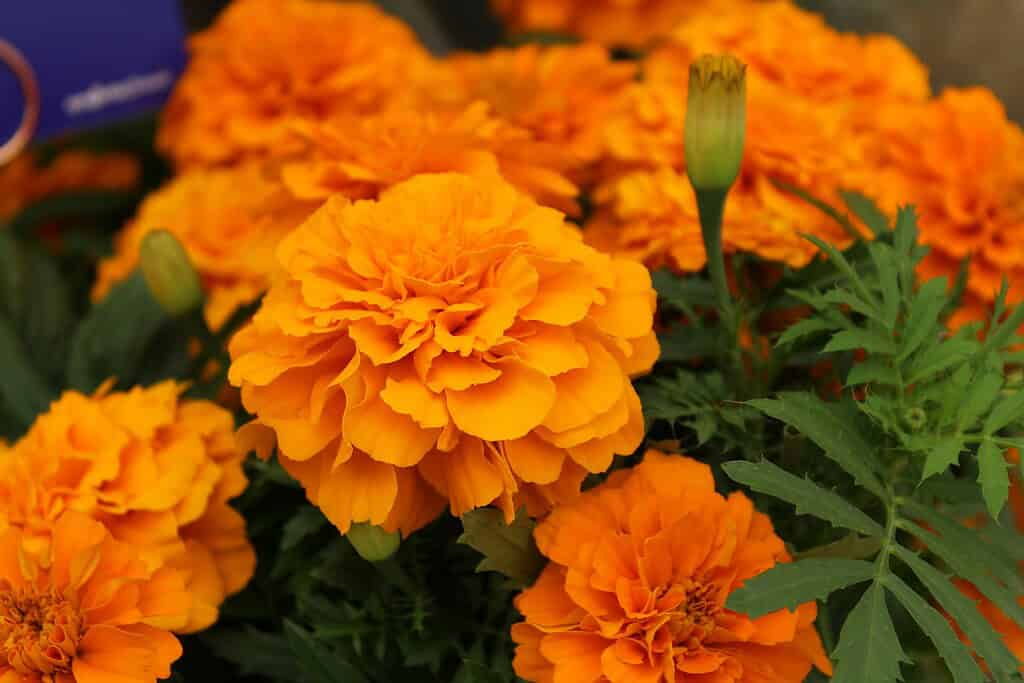
Often grown in vegetable gardens, marigolds are also great as cut flowers (especially the taller varieties like African marigolds that have big pom-pom blossoms).
They’re extremely easy to grow from seed and very hardy. Marigold blooms add cheery yellows and oranges to arrangements and the plants will bloom non-stop if you keep picking the flowers.
They also have the benefit of repelling certain pests in the garden naturally. Marigolds thrive in warm weather; just give them sun and they’ll do the rest.
Sweet Peas
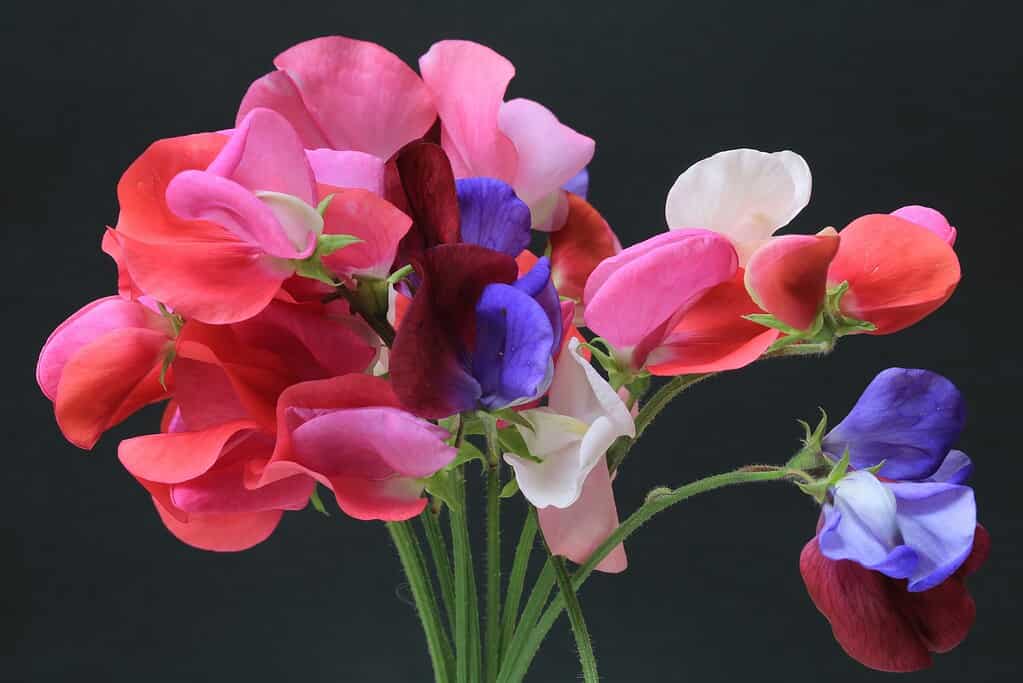
If you want spring fragrance, try sweet peas. These vining annuals have gorgeous scented blooms perfect for small posies.
Sweet peas prefer cooler temperatures, so plant them in very early spring (as soon as the soil can be worked, or start them indoors 4–6 weeks before the last frost).
Provide a trellis or support for them to climb. They’ll bloom in late spring/early summer, and you should cut the flowers often – not only to enjoy them, but because once sweet peas form pods, the plants will stop blooming.
In hotter climates, sweet peas may fade by midsummer, but for that early season harvest of fragrant blooms, they are wonderful to grow.
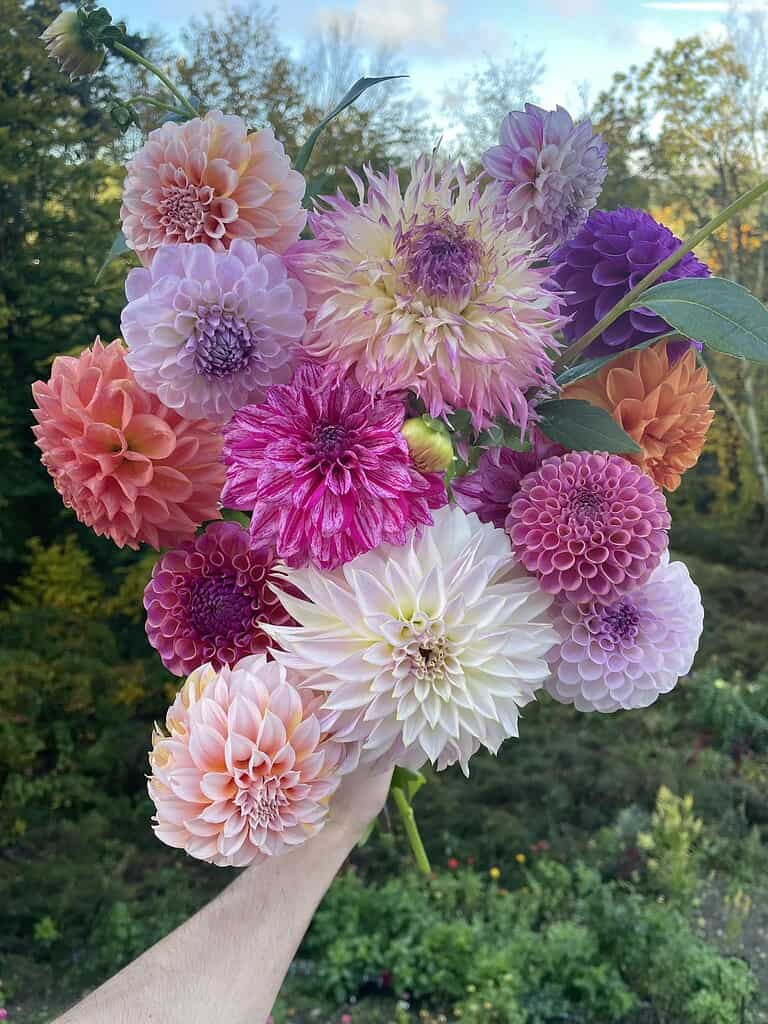
Dahlias
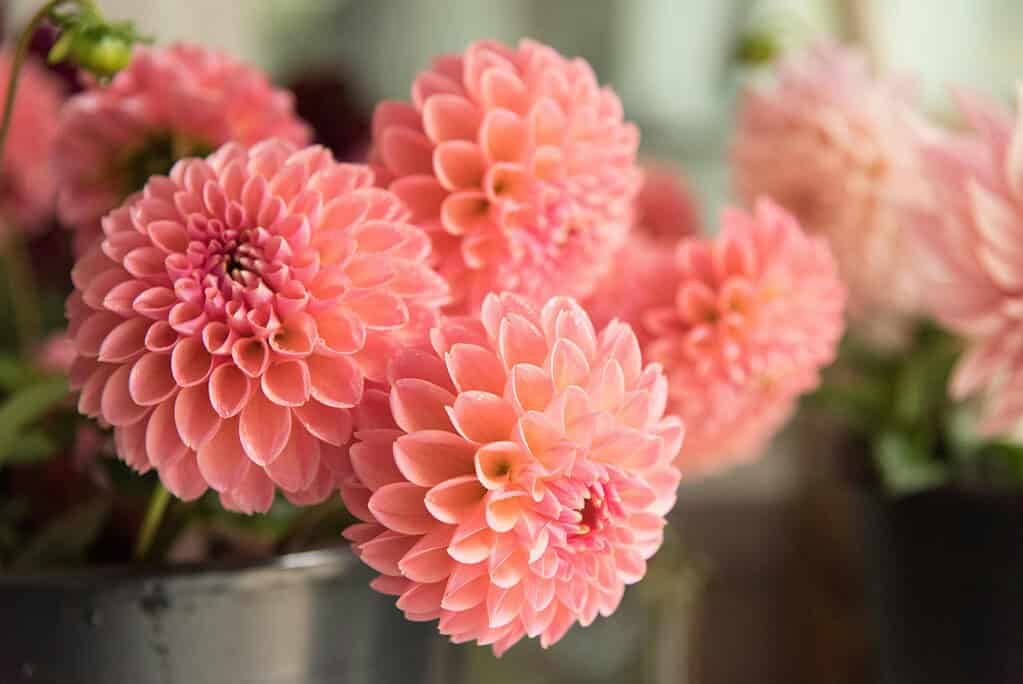
Dahlias are a bit more advanced than the easy annual seeds above only because they are usually grown from tubers (bulb-like roots) rather than seed.
However, they are high-yield cut flowers and relatively easy to grow if you start with healthy tubers. Plant dahlia tubers in spring after all danger of frost has passed (they hate cold, soggy soil).
They will leaf out and start blooming by mid to late summer, producing magnificent blooms until the first frost in fall. Dahlias come in every size from tiny pompon to giant “dinnerplate” flowers.
They do require full sun, rich soil, and consistent moisture for best results, and tall varieties need staking. But the reward is huge – the more flowers you cut, the more the plant will try to bloom again.
If you live in a cold winter area (zones 8 and below), you’ll need to dig up and store the tubers in fall to replant next year, since they won’t survive a freeze in the ground.
In mild climates, you can simply leave them in the ground and they’ll come back year after year.
Other excellent cut flowers for beginners
Snapdragons, strawflowers, celosia, black-eyed Susans (rudbeckia), sunny varieties of calendula, and bachelor’s buttons are all fairly easy to grow and make lovely additions to bouquets.
Snapdragons and calendula can even tolerate cooler spring weather (and a bit of light shade), while celosia and strawflower love heat and will also dry well for everlasting arrangements.
Feel free to experiment, but start with just a few varieties your first year. You can always expand with more types of flowers as you gain confidence (and as your vases demand more variety!).
Planting Your Cut Flower Garden: A Simple Seasonal Timeline
Now that you have your site and your flower seeds or plants ready, it’s time to get them in the ground.
Timing is very important – most cut flowers are warm-season annuals that cannot tolerate frost, so you’ll want to plant them at the appropriate time for your climate.
Here’s a simple seasonal planting timeline to guide a first-time cut flower grower (adjust these to your local growing zone and frost dates):
Early Spring (Planning and Prep)
As winter ends, start preparing for your garden. Order your seeds/tubers early (many popular varieties sell out by late winter).
Calculate your last frost date for your area – this is the average date in spring when freezing temperatures are likely to have passed.
(If you’re not sure, you can ask a local nursery or use an online frost date lookup tool.)
A lot of planting decisions will revolve around this date. In early spring, you can begin starting certain flower seeds indoors if you want a head start.
Many long-season or cold-tolerant flowers (like snapdragons, stock, or sweet peas) are often started 4–10 weeks before the last frost indoors under lights.
Check the back of your seed packets for guidance – they’ll tell you if and when to start seeds indoors for that variety.
If indoor seed starting isn’t feasible for you, plan to purchase some seedlings from a garden center for those early-blooming flowers, or focus on varieties that you can direct-sow later.
Early spring is also the time to prepare your garden bed (as discussed above) so it’s ready for planting.
After Last Frost (Planting Time)
Once your last frost date arrives (for example, mid-May in a zone 6 climate, but as early as March in warmer zone 9–10 areas), it’s time to plant the majority of your cut flowers.
This is when you can direct-sow seeds of easy annuals like zinnias, sunflowers, cosmos, marigolds, etc. directly into the prepared bed.
The soil is warming up and these seeds will germinate quickly in warm soil and lengthening daylight.
Plant according to packet instructions – usually about 1/4 inch deep for most small seeds, a bit deeper for larger sunflower seeds.
Give them a drink after sowing and they’ll start sprouting in a week or two.
If you started seedlings indoors, or purchased young plants (such as dahlia tubers or snapdragon transplants), you should also put them in the ground after the last frost.
Be sure to harden off indoor-grown seedlings first by gradually exposing them to outdoor conditions over a week or so, to avoid shock.
Space your plants as recommended, but note that in a cutting garden you can often plant a bit more densely than in a landscape garden since you’ll be harvesting frequently.
For example, rather than 12–18 inches apart for zinnias (for full bushy landscape growth), you might plant them 9 inches apart in a cutting patch to encourage longer stems and slightly smaller foliage.
After planting, keep the young plants well-watered as they establish.
Summer (Growing, Maintaining, and Successive Plantings)
As summer arrives, your cut flower garden will start blooming! Continue to water regularly (about 1 inch per week if it doesn’t rain) and weed as needed to reduce competition.
Staking or support should be added early for plants that need it – for instance, place a few bamboo stakes for tall sunflowers or a section of trellis netting for floppy cosmos. Summer is also the time to consider succession planting for certain flowers.
Succession planting means sowing a new batch of seeds every few weeks to keep your flower production going. Fast-blooming annuals that are one-time producers (like single-stem sunflowers) can be planted in waves.
For example, you might sow a row of sunflower seeds every 2–3 weeks from late spring to mid-summer, to get fresh blooms continuously.
This way, as one batch finishes flowering, the next batch will be budding.
Zinnias and cosmos will bloom continuously from one sowing (especially if you keep cutting them), but even they can benefit from a second sowing by mid-summer for late-season freshness.
By late summer, you’ll be swimming in flowers if all goes well!
Fall (Wrapping Up and Planning Ahead)
In most regions, annual cut flowers will keep blooming up until the first fall frost. As cooler weather approaches, you might let the last blooms linger for the bees or start focusing on seed saving.
You can collect seeds from many open-pollinated flowers like marigolds, zinnias, and sunflowers – dry them and save for next spring, which can save money.
If you grew dahlias and live in a frost-prone area, mark your calendar to dig up the dahlia tubers once frost blackens the foliage.
Store the tubers in a cool, dry place over winter so you can replant them next year. Clean up spent plants and add healthy, disease-free remains to your compost.
Autumn is also a great time to plant spring-blooming bulbs (like tulips or daffodils) if you want early flowers next year, but that’s optional for your cut flower adventure – for more ideas, see our guide to spectacular spring flowers.
Pat yourself on the back for a season of beautiful homegrown bouquets, and take notes on what grew well (and what you want to grow more of) for next year’s garden.
Note: Always adjust the planting timeline to your local climate. If you live in a very warm zone without much frost, you might be able to plant earlier or even have two flower seasons (spring and fall).
In very cold zones with short summers, starting more seeds indoors or choosing quicker-maturing flower varieties will help.
The key is to use that last frost date as a guidepost – wait until after the last frost for any frost-tender flowers, and count back from it for indoor seed starting.
With experience, you’ll get a feel for the rhythms of your specific garden.
Free Planting Guides for This Article
Get exact planting dates, frost schedules, and growing tips for your zone:
How to Care for Your Cut Flower Garden

Once your flower plants are up and growing, a little ongoing care will keep them healthy and blooming their best. Here are the main care tasks for a thriving cut flower garden:
Watering
Consistent moisture is important, especially when plants are young. Check your garden daily or every other day – if the top inch of soil is dry, it’s time to water.
Seedlings and young transplants have small root systems and can dry out quickly, so don’t let them wilt. Water deeply at the base of the plants rather than overhead when possible; this targets the roots and keeps the foliage dry, which helps prevent fungal diseases.
Watering in the morning is ideal (plants take up water best in cool early hours).
As plants mature, they can handle short dry spells, but for maximum flower production try not to let them go drought-stressed for too long.
A layer of mulch can greatly help maintain soil moisture and reduce how often you need to water.
Fertilizing
Big flower blooms require energy, so feeding your plants can boost their performance. If you prepared your soil well with compost, that will provide a steady nutrient release.
Additionally, when the plants start forming buds, consider giving a dose of flower fertilizer (a fertilizer higher in phosphorus and potassium, lower in nitrogen) to encourage abundant blooms.
You can use an organic liquid feed like fish emulsion or seaweed extract every 2–4 weeks, or sprinkle a granular slow-release fertilizer once or twice in the season.
Be cautious not to over-fertilize – too much can lead to lots of foliage and few flowers, or even burn the plants.
Always follow the product instructions for dilution and frequency. With a modest feeding schedule, you’ll notice an uptick in flowering and overall vigor.
Weeding
Keep weeds in check so they don’t compete with your flowers for water and nutrients. Especially in the early stages, regularly pull or hoe out weeds around your plants.
Mulching will help here as well by smothering many weed seeds. A relatively weed-free bed will let your flowers flourish with less competition.
Staking and Support
Many cut flower varieties grow tall and might flop over as they get heavy with blooms. Prepare to provide support for these to keep stems straight.
For individual plants like single sunflowers or dahlias, you can drive a stake into the ground next to the plant and loosely tie the stem to it with garden twine or velcro tape.
For beds of branching flowers like cosmos, snapdragons, or amaranth, consider stretching a layer of plastic or jute netting horizontally about 1–2 feet off the ground for the stems to grow through.
This acts like a grid that keeps them upright. Even simple bamboo stakes arranged in a grid with twine (as in the image above) can corral the stems.
It’s best to install supports early, around the time of planting or when plants are still small, to avoid damaging roots later.
Proper support will ensure you get long, straight stems that are perfect for vases.
Pinching and Deadheading
A secret to more flowers (especially for branching “cut-and-come-again” plants) is a technique called pinching. Pinching means trimming off the top of a young plant to encourage it to branch out.
For example, when your zinnias, cosmos, snapdragons, or basil are about 6–12 inches tall, you can use your fingernails or snips to pinch out the top few inches of the main stem, just above a set of leaves.
This causes the plant to send out side shoots, resulting in a bushier plant with more flowering stems.
Pinching is optional but recommended for many cut flowers – don’t worry, it won’t hurt the plant, it actually helps it! If you feel unsure, you can experiment by pinching half of a certain batch of plants and leaving the others, to see the difference.
Along with pinching early on, deadheading (removing spent blooms that you’re not collecting) is important. Any flowers you don’t cut for the vase should be trimmed off as they fade.
This prevents the plant from putting energy into seed production and instead redirects it into making new buds. In short: keep picking and trimming, and the blooms will keep on coming.
Pest and Disease Management
A healthy, well-sited cut flower garden usually has minimal pest issues, but do keep an eye out.
Common pests like aphids or Japanese beetles may show up on occasion – you can often wash aphids off with a water spray or pick beetles off by hand.
If you spot holes in leaves or other damage, try to identify the culprit (often slugs, caterpillars, or beetles) and use an appropriate organic remedy if needed (such as hand-picking, insecticidal soap, or neem oil for severe infestations).
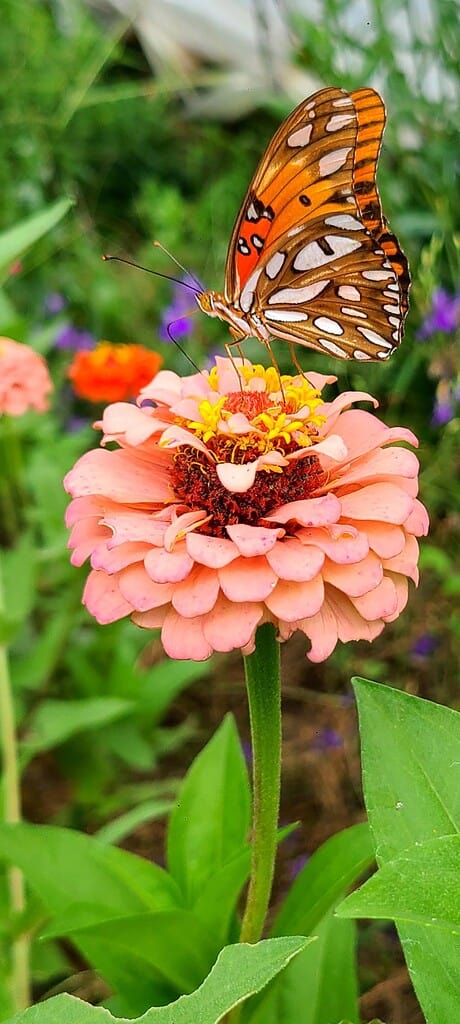
Avoid using broad pesticides that could harm beneficial insects. Many flowers will attract good bugs too, like ladybugs and pollinators, which help keep pests in balance.
Diseases are best prevented by spacing plants well for airflow, watering the soil (not the leaves), and removing any diseased foliage promptly.
If a plant looks sickly or moldy, remove it to avoid spreading issues.
But don’t be too alarmed – in a diverse flower patch, serious disease is rare.
Most of your focus will just be on watering, feeding, and cutting blooms. For more tips, check out natural pest control solutions that are safe for gardens and pollinators.
Keep Cutting!
One of the best things you can do for your cut flower garden is also the most enjoyable: harvest your flowers regularly.
Many flowering plants respond to cutting by blooming even more, since the plant is trying to make seeds and you keep removing its flowers (it’s a clever gardener’s trick!).
For instance, cosmos and zinnias will bloom profusely all season as long as you keep harvesting the blooms every few days.
If you leave too many flowers on and they form seeds, the plant gets the signal that it’s done its job and may slow down or stop flowering.
So, for maximum blooms, stroll through your garden often with your snips and fill that vase (don’t worry, we’ll cover some harvesting tips next).
Think of it as pruning with a purpose – you get bouquets, and the plant gets a signal to grow more flowers. Win-win!
By keeping up with these basic care tasks, you’ll ensure your cut flower garden stays healthy and productive from spring through fall.
It might sound like a lot, but each of these quickly becomes routine – a few minutes of watering here, some snipping there – and the reward is a garden that practically overflows with blossoms.
Growing Flowers for Bouquets: Harvesting and Enjoying Your Blooms
A freshly cut bouquet of garden blooms – featuring zinnias, dahlias, and gomphrena – is the reward for your efforts.
Harvesting your flowers correctly will ensure the longest vase life and even more flowers down the road. Here’s how to cut and enjoy your blooms like a pro:
Timing is Everything
The best time to cut garden flowers is early in the morning. In the cool morning, plants are fully hydrated from the night and the blooms are firmest.
Flowers cut early will last longer because their stems are filled with water and nutrients.
Late afternoon or evening can work as a second-best option (after the heat of day has passed), but avoid cutting in the hot midday sun.
Midday-cut flowers wilt quickly and often never perk back up, resulting in a shorter vase life. So, plan your bouquet gathering for those dewy mornings if you can.
Stage of Bloom
For the longest-lasting arrangements, don’t wait until flowers are in full bloom to cut them. Most flowers actually last longer when cut in bud or just as the petals are starting to open.
For example, if a plant has multiple buds on a stem, cut the stem when at least one bud is opening and showing color, while others are still closed. Those closed buds may gradually open in the vase.
For single-stem flowers (one bloom per stem, like a single sunflower or dahlia), cut them when the bloom is about halfway open – the petals are starting to unfurl but not yet soft or aging.
If you cut too late (fully open, or already dropping pollen), the flower may look spectacular at that moment but will not last long once cut.
Learning the ideal cutting stage for each flower type is part of the fun; you’ll get a sense as you experiment.
As a rule of thumb: slightly underripe is better than overripe when it comes to cutting flowers for bouquets.
Tools and Technique
Always use clean, sharp snippers or pruners to cut your flowers. A sharp cut is healthier for the plant and the harvested stem (jagged or crushed stems don’t take up water well).
Bring a bucket of cool water out to the garden with you. The moment you cut a stem, place it in water so it stays hydrated.
When cutting, take long stems to give yourself options for arranging (you can always trim more off later). Cut deep on the plant – ideally down to a junction where the stem meets a set of leaves or a side shoot.
This not only gives you a longer stem for the vase, but also encourages the plant to branch out and produce more stems and flowers in the future.
For example, when cutting a zinnia, cut just above a pair of leaves low on the plant; those leaf nodes will sprout new branches for more blooms.
Immediately strip off any leaves that would sit below the water line in your vase (foliage in water can rot and cause bacteria).
Keep the bucket of cut flowers in the shade and let them have a good drink for a couple of hours (this process is called conditioning) before you arrange them.
Encourage More Blooms
We’ve said it before but it bears repeating – the more you cut, the more you get from many flowering plants. Recognize which of your flowers are “one-hit wonders” versus “cut-and-come-again.”
A one-hit wonder (like a single-stem sunflower or a tulip) will only give one bloom per plant; once you cut it, it’s done. In these cases, you should plant enough of them or succession-sow so you have new ones coming along (as discussed in the timeline section).
In contrast, cut-and-come-again flowers (like zinnias, cosmos, dahlias, snapdragons, and many others) will continue to bloom after cutting, sending out new buds over and over.
For these, regular harvesting or deadheading is essential to keep them in production.
If you go on vacation and come back to find a bunch of overripe flowers that have set seed, don’t fret – just cut all that old stuff away to hopefully signal the plant to bloom again.
Consistent harvesting is the best fertilizer for an ongoing flower show.
Arranging and Vase Care
Now comes the fun – making your bouquets! There are no strict rules in arranging your garden flowers; let your creativity guide you.
You can make simple bunches of one type of flower for a bold statement, or mix different shapes and colors for a more wildflower look. As you arrange, recut each stem at an angle (for maximum water uptake) and place it in a vase of clean, cool water.
If you have commercial floral preservative (flower food), you can add it to the water according to directions – it can extend vase life.
Change the vase water every day or two, trimming the stem ends a little each time, to keep bacteria growth down and your blooms fresh.
Keep arrangements out of direct sun and away from heat sources once indoors. Most garden flowers will last about 5–7 days in a vase if cut at the right stage, with some lasting even longer.
Some, like dahlias or sweet peas, might only last 3–5 days, so enjoy those quickly.
And if you notice any flower in the vase starting to wilt or fade, remove it promptly to avoid it causing others to spoil faster.
…
Growing and harvesting your own bouquet flowers is incredibly rewarding.
You’ll find that homegrown cut flowers often last longer and look more vibrant than store-bought ones, since you’re cutting them at peak condition and not using any harsh chemicals.
Plus, you can grow varieties that you’d never find at the florist – from old-fashioned cottage blooms to funky modern hybrids.
Every time you bring a bunch of your own flowers indoors, it’s a little celebration of your gardening success. So snip away and fill your home with blooms!
How Hard Is It to Garden in Your County?
Every county has a unique Gardening Difficulty Score based on frost risk, soil quality, drought, altitude, and climate trends. Find yours — plus personalized frost dates, planting calendars, and soil data.
Check Your County's Score →Start Your Cut Flower Garden Today
You’ve learned the basics of how to start a cut flower garden – now the best thing to do is get started.
There’s truly nothing like stepping outside and returning with a armful of fresh flowers that you grew yourself. Even if you’re new to gardening, the step-by-step approach in this guide will set you on the path to success.
Begin by planning a small flower patch, plant a few easy varieties, and watch your confidence (and vases) fill up with blossoms.
Remember, even the most experienced gardeners were once beginners, so don’t be afraid to get your hands dirty and learn as you go.
So, are you ready to grow your own bouquets? Grab some seeds, prep that sunny spot, and start your cut flower garden today. We’re excited to see you succeed.
Happy gardening – and happy flower arranging! If you have any questions or want to share your own experience, please comment down below.
We’d love to hear what you’re planting or help you troubleshoot any issues.
Now get out there and enjoy the wonderful world of cut flowers in your backyard!
FAQs
When is the best time to start a cut flower garden?
Start in spring, after your area’s last frost. For most regions, that’s April or May, but it varies by zone.
Some gardeners start seeds indoors 6–8 weeks before frost for slow-growing flowers like snapdragons or sweet peas, but beginners can safely plant directly outdoors once freezing nights are over.
How much space do I need, and can I grow cut flowers in containers?
You can start small – a 4×4 ft bed or a couple of 6–10 ft rows works well. If space is limited, large pots (12”+ deep and wide) are perfect.
Many annuals like zinnias, marigolds, cosmos, and miniature sunflowers thrive in containers. Just ensure they get 6+ hours of sun and regular watering.
What are the easiest flowers to grow for cutting?
Beginner-friendly, high-yield flowers include:
- Zinnias – continuous blooms, many colors
- Sunflowers – single or branching stems
- Cosmos – airy, long-blooming
Other easy options: marigolds, calendula, snapdragons, bachelor’s buttons, sweet peas, strawflowers, and dahlias. Stick with a few of these for a successful first garden.
How can I keep my cut flower garden blooming all season long?
Key tips:
- Succession Planting: Sow new batches every 2–3 weeks.
- Regular Harvesting/Deadheading: Cut flowers often and remove spent blooms.
- Feeding & Watering: Consistent water and light feeding keep blooms healthy.
- Pinching & Pruning: Encourage branching early; trim tired plants mid-season.
- Mix Varieties: Plant early, mid, and late-season bloomers for continuous flowers.
Do I need to start seeds indoors, or can I sow directly outside?
Many easy annuals (zinnias, sunflowers, cosmos, marigolds) can be direct-sown after frost.
Indoor starting is optional for slow-growing flowers or to get an early bloom, but beginners can also buy starter plants or tubers for tricky varieties. A mix of direct-sown seeds and transplants works well.
Level Up Your Garden
Our most popular gardening guides


