Pickled ginger, or gari, is one of those simple Japanese condiments that can completely change the way a meal feels.
While it’s most famous as the pale pink slices tucked alongside sushi, you don’t need to visit a restaurant to enjoy it.
With fresh young ginger, rice vinegar, sugar, and a little salt, you can make a fresh batch right in your kitchen.
Before we get started, it’s important to know: this recipe is for refrigerator pickling only. It’s not a shelf-stable preserve. Always store it in the fridge and enjoy within the recommended time frame.
What Is Pickled Ginger (Gari)?

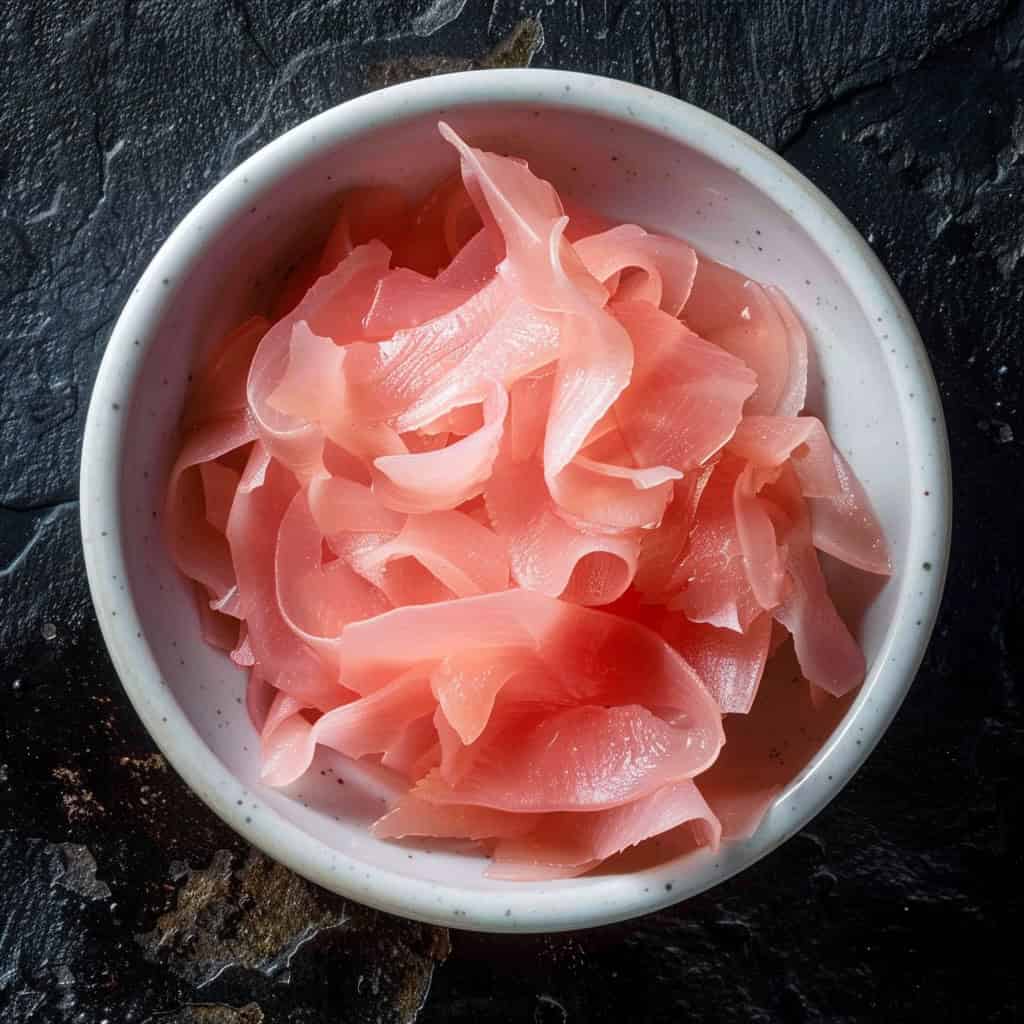
Pickled ginger, also called gari in Japan, is thinly sliced ginger that’s been lightly cured in a brine of vinegar and sugar.
The result is crisp, sweet-tart slices that carry a gentle ginger heat without the sharp bite of fresh root.
Traditionally, gari is served with sushi as a palate cleanser. A few slices between bites reset your taste buds so you can better appreciate the subtle flavors of different fish.
But it’s useful far beyond sushi night. Its light, tangy bite works beautifully with fried foods, stir-fries, rice dishes, and even as a quick refreshing snack straight from the jar.
Love Pickling? This is part of my How to Pickle Everything series! Check out more recipes:
- Quick Pickled Radishes Recipe
- Easy Pickled Beets Recipe
- Homemade Pickled Okra Recipe
- How to Make Pickled Cabbage (Only 20 Minutes!)
- How to Make Pickled Jalapeños at Home
- How to Make Pickled Cucumbers at Home
- Pickled Garlic Recipe
- Easy Pickled Banana Peppers Recipe
- Quick Pickled Carrots Recipe
- How to Make Pickled Asparagus at Home
- How to Make Pickled Cauliflower
- Crisp Pickled Green Beans Recipe
- Homemade Pickled Eggs with Beets
- Easy Pickled Cherry Tomatoes (No Canning Needed)
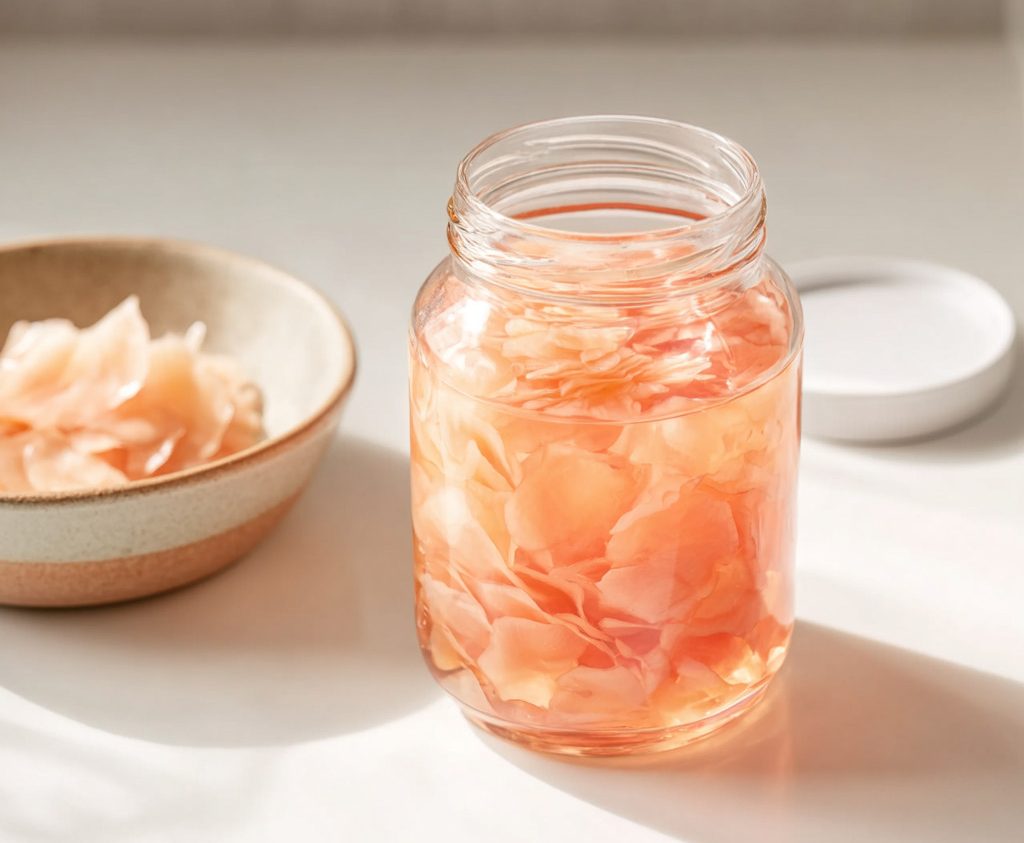
Many restaurant versions are bright pink. Traditionally, that color appears naturally when young ginger is used – it reacts with the vinegar and blushes a pale pink.
Commercial products, however, often rely on food coloring or beet extract to achieve the effect. Don’t be surprised if yours stays pale yellow – that’s perfectly normal and just as tasty.
Why Use Young Ginger for Pickling
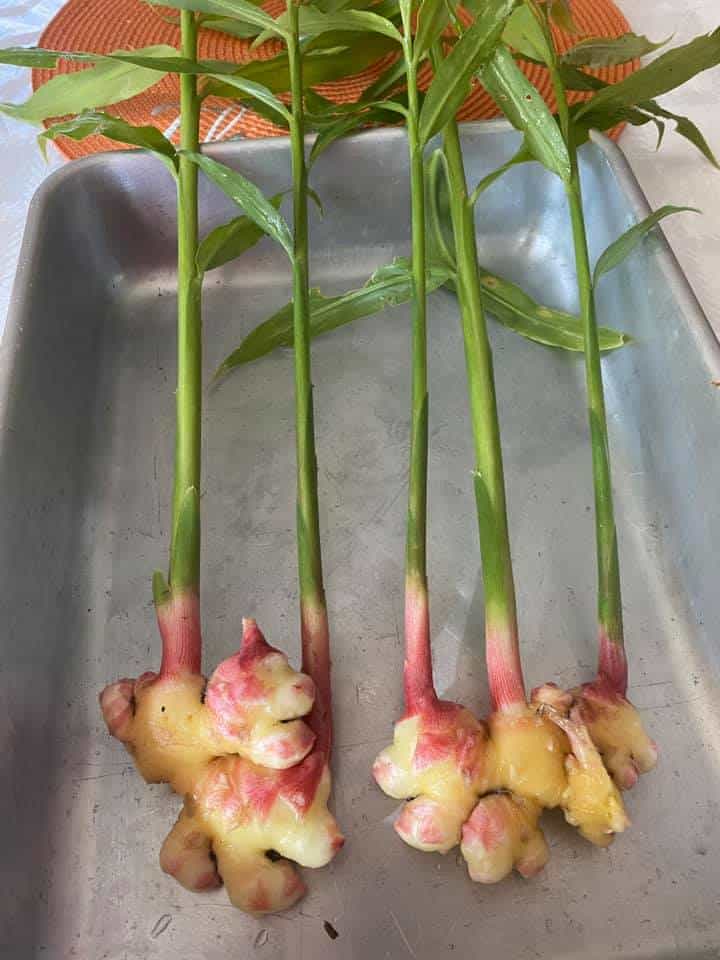
The secret to truly tender, delicately flavored gari is young ginger. Unlike the older ginger root you usually find in grocery stores, young ginger has:
- Thin, smooth skin that scrapes off easily with a spoon.
- Tender, almost juicy flesh without the tough fibers found in mature ginger.
- A naturally mild flavor, making it ideal for eating raw in thin slices.
When young ginger is pickled, it sometimes develops that beautiful, natural pink hue. That’s thanks to pigments in the tips of the rhizomes reacting with the vinegar.
If your ginger doesn’t turn pink, it just means it was more mature. The flavor will still be wonderful – it just won’t have that rosy tint.
How to Spot Young Ginger at the Market
- Smooth, pale skin (not rough or woody)
- Pinkish tips or stems attached
- A plumper, softer feel compared to older roots
If you can grow ginger at home, harvesting it early gives you the freshest, best result for pickling.
Ingredients You’ll Need (Makes About One 250 ml Jar)
This recipe makes a small batch that’s easy to manage in the fridge. Stick closely to these proportions – safe pickling depends on the right ratio of vinegar, sugar, and water.
- 200 grams young ginger (washed and peeled, ideally with pink tips)
- 1 teaspoon fine sea salt (used to draw out moisture from the ginger)
- ½ cup (120 ml) rice vinegar (5% acidity – check the label to be sure)
- ¼ cup (50 g) granulated or caster sugar
- 3 tablespoons (45 ml) filtered water
- Boiling water (enough to cover the ginger during blanching)
Scaling Tip: Keep the ratios exact. For every 200 g ginger, use 1 tsp salt, ½ cup vinegar, ¼ cup sugar, and 3 tbsp water. Never dilute the vinegar more than this – it’s needed for safe acidity.
Tools and Equipment
Pickling doesn’t require fancy gear, but a few right tools will make things easier and safer:
- Clean paper towels – To dry ginger slices and avoid watering down the brine.
- Glass jar with airtight lid – Wash and sterilize before filling. Avoid plastic, which can absorb odors and stain.
- Oven or boiling water bath – For sterilizing your jar.
- Spoon for peeling – Scrapes off thin skin without wasting ginger flesh.
- Mandoline or vegetable peeler – For ultra-thin slices. A sharp knife works too if you’re steady-handed.
- Non-reactive saucepan – Stainless steel, glass, or enamel-coated. Avoid aluminum or copper, which can react with vinegar.
- Small heatproof bowl – For salting and blanching ginger.
7 Simple Steps to Make Pickled Ginger (Gari) at Home
Making your own pickled ginger might sound intimidating, but it’s actually quite straightforward once you know the process.
Follow these seven steps carefully, and you’ll have a jar of fresh pickled ginger ready to brighten up your meals.
Step 1: Sterilize the Jar
Cleanliness is the foundation of any safe homemade pickle. Start by washing your jar and lid thoroughly in hot, soapy water, then rinse well to remove any residue.
To sterilize, place the jar (without the lid’s rubber insert, if it has one) into an oven preheated to 130 °C / 270 °F. Leave it there for 15 to 20 minutes.
This step kills off bacteria, mold spores, or yeast that could shorten the shelf life of your ginger or cause spoilage.
Keep the jar warm until you’re ready to pack it – filling a warm jar helps reduce the risk of cracks when you pour in the hot brine.
Step 2: Peel and Slice the Ginger
Next, prepare your ginger. Using a spoon, gently scrape away the thin skin of the ginger.
This method works better than a knife or peeler because it removes just the skin, leaving more of the tender flesh intact.
After peeling, check for and remove any blemishes or brown spots. Now, slice the ginger into extremely thin pieces—paper-thin is best.
This texture is what makes pickled ginger so pleasant to eat with sushi and other foods.
A mandoline or vegetable peeler makes the job quick and even, but a sharp knife will do if you don’t mind taking your time.
Step 3: Salt the Ginger
Once your ginger is sliced, transfer it to a small heatproof bowl. Sprinkle 1 teaspoon of fine sea salt evenly over the slices, then toss to coat.
Let it sit for about 5 minutes. During this time, the salt draws excess water out of the ginger and helps soften the texture.
This step also begins the flavoring process by lightly curing the slices, ensuring they won’t taste raw or overly sharp once pickled.
You’ll notice some liquid starting to collect at the bottom of the bowl – that’s exactly what you want.
Step 4: Blanch with Boiling Water
Boiling water blanching is essential to mellow out the ginger’s bite and make it tender enough to absorb the pickling brine.
Carefully pour freshly boiled water over the salted ginger until all the slices are submerged. Let it sit for about 2 minutes. Then, drain the water away completely.
Using clean hands, gently squeeze the slices to press out extra liquid, taking care not to tear them. Afterward, lay the slices on a clean paper towel and pat them dry.
Reducing excess moisture now keeps the brine from becoming diluted and ensures the ginger takes on its full flavor.
Step 5: Make the Pickling Brine
While the ginger is drying, prepare the brine. In a non-reactive saucepan (such as stainless steel, glass, or enamel-coated), combine ½ cup rice vinegar, ¼ cup sugar, and 3 tablespoons filtered water.
Place the pan over medium heat and stir gently until the sugar dissolves completely. Allow the liquid to come to a gentle boil and hold it for about 30 seconds.
This heating step not only dissolves the sugar but also helps sterilize the mixture, ensuring a safer pickle.
Once done, remove the pan from the heat and set it aside – it should still be hot when poured over the ginger.
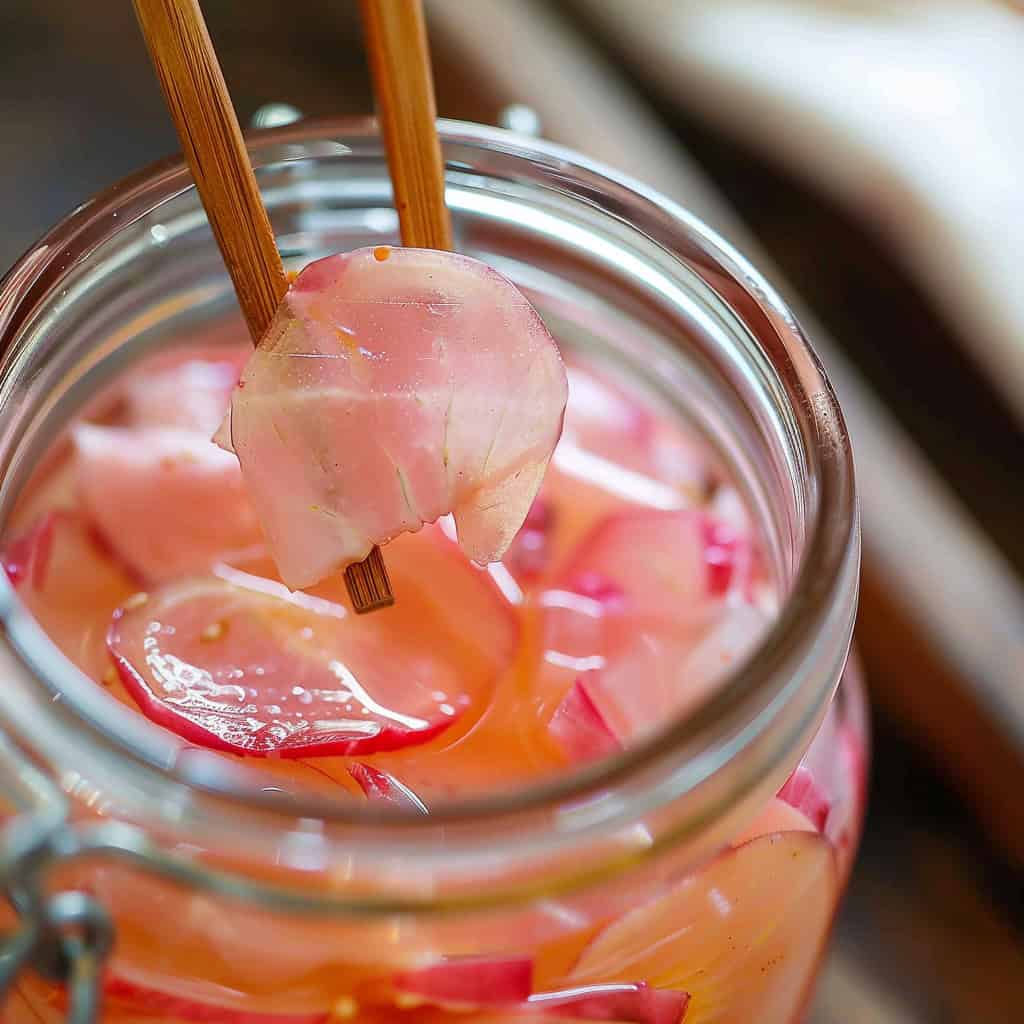
Step 6: Pack the Jar
Take your warm, sterilized jar and begin packing the ginger slices inside. Try to arrange them loosely so that the brine can circulate easily between the layers.
Slowly pour the hot pickling liquid over the ginger, making sure every slice is fully submerged.
You may want to use a clean spoon or chopstick to gently press the slices down and release any trapped air bubbles.
Ensuring that all the ginger is covered is key – anything sticking out of the liquid could dry out or spoil.
Step 7: Seal and Chill
Once the jar is filled, wipe the rim with a clean paper towel to remove any drips, then seal it tightly with its lid. Leave the jar on the counter for about 30 minutes to cool to room temperature.
After that, transfer it straight to the refrigerator. While the ginger is technically ready to eat as soon as it’s chilled, the flavors will be much better if you let the jar sit for at least 24 hours.
During that time, the vinegar and sugar soak into the slices, softening the ginger’s heat and developing that signature balance of sweet, tangy, and spicy.
How to Store Your Pickled Ginger (and How Long It Lasts)
Because this recipe isn’t processed for shelf stability, always store in the refrigerator.
- Flavor develops after 24 hours.
- Use within 2–8 weeks for best quality.
- Always use clean utensils to avoid introducing bacteria.
- Discard immediately if:
- Liquid turns cloudy
- Off smells develop
- Mold or unusual growth appears
While some sources suggest longer storage, NCHFP emphasizes erring on the side of caution with refrigerator pickles. Treat this as a short-term condiment, not a pantry staple.
For other homemade goods, these canned food storage tips can help you keep everything fresh and safe.
Why It May or May Not Turn Pink

Young ginger, especially with pinkish tips, may naturally turn a blush pink after pickling.
This happens as plant pigments react with vinegar. If yours doesn’t, don’t worry – it’s likely older ginger. The flavor remains the same.
Commercial versions that appear hot pink usually use artificial coloring or beet juice. Homemade gari has a softer, more natural look.
Delicious Uses for Gari at Home
Gari is best known as a sushi side, but it’s versatile:
- With sushi – Cleanse your palate between bites.
- With fried foods – Cuts through oiliness in tempura, fried chicken, or pork cutlets.
- In stir-fries – Add a handful near the end of cooking for brightness.
- With rice or noodles – Provides a tangy counterpoint.
- Straight from the jar – A refreshing, zesty snack.
Once you keep a jar in your fridge, you’ll find endless ways to use it.
Make a Batch and Enjoy It Fresh from the Fridge
With only a handful of ingredients and a little bit of care, you can create a jar of pickled ginger that will brighten your meals for weeks.
Unlike shelf-stable canned pickles, gari is a short-term refrigerator pickle, which means it’s quick to make and ready to enjoy almost right away.
Once you’ve made your first batch, you’ll probably find yourself coming back to it often.
It’s a versatile, refreshing condiment to keep on hand – whether you’re planning sushi night, adding brightness to a noodle bowl, or just reaching into the fridge for a quick, zingy snack.
Frequently Asked Questions
1. Can I use regular (mature) ginger instead of young ginger?
Yes, but expect tougher texture, stronger flavor, and no pink color. Still delicious – just different.
2. How long does homemade pickled ginger last?
Refrigerated, about 2–8 weeks. Discard at any sign of spoilage.
3. Why didn’t my pickled ginger turn pink?
Only very young ginger with pink tips naturally does. The lack of pink doesn’t affect taste.
4. Can I can pickled ginger for shelf storage?
No – this recipe has not been tested for safe water bath canning. Stick to refrigeration.
5. Is there a substitute for rice vinegar?
Yes, but make sure it’s at least 5% acidity. Apple cider or white wine vinegar work, though the flavor will differ.
Except for the ginger slices you did not provide amounts of other ingredients. ??
What specific part? We provide the ingredient list above. Here it is below:
200 grams young ginger (smooth, pale skin with pink tips if possible)
1 teaspoon fine sea salt (for salting the ginger)
½ cup rice vinegar (120 ml)
¼ cup caster sugar (50 grams)
3 tablespoons filtered water (45 ml)
Boiling water (just enough to cover the ginger during blanching)