Lilies are one of the most reliable and elegant flowers you can grow in a home garden.
Their tall stems and bold, trumpet-shaped blooms bring color, height, and fragrance to flower beds from early summer through fall.
But growing lilies successfully takes more than just putting bulbs in the ground.
To keep your lilies healthy and blooming year after year, you need to give attention to the soil, planting site, bulb handling, and seasonal care.
In this article, you'll learn everything you need to know – from choosing the right varieties and planting correctly to maintaining strong bulbs and extending bloom time.
Whether you're a beginner or an experienced gardener, these methods will help your lilies thrive season after season.
Choosing the Right Lily Varieties for Your Climate and Garden Goals

Before planting, it’s important to choose lily varieties that match your growing conditions and garden needs. Lilies come in many types, and each has different bloom times, sizes, and care requirements.
Understand the Main Lily Types
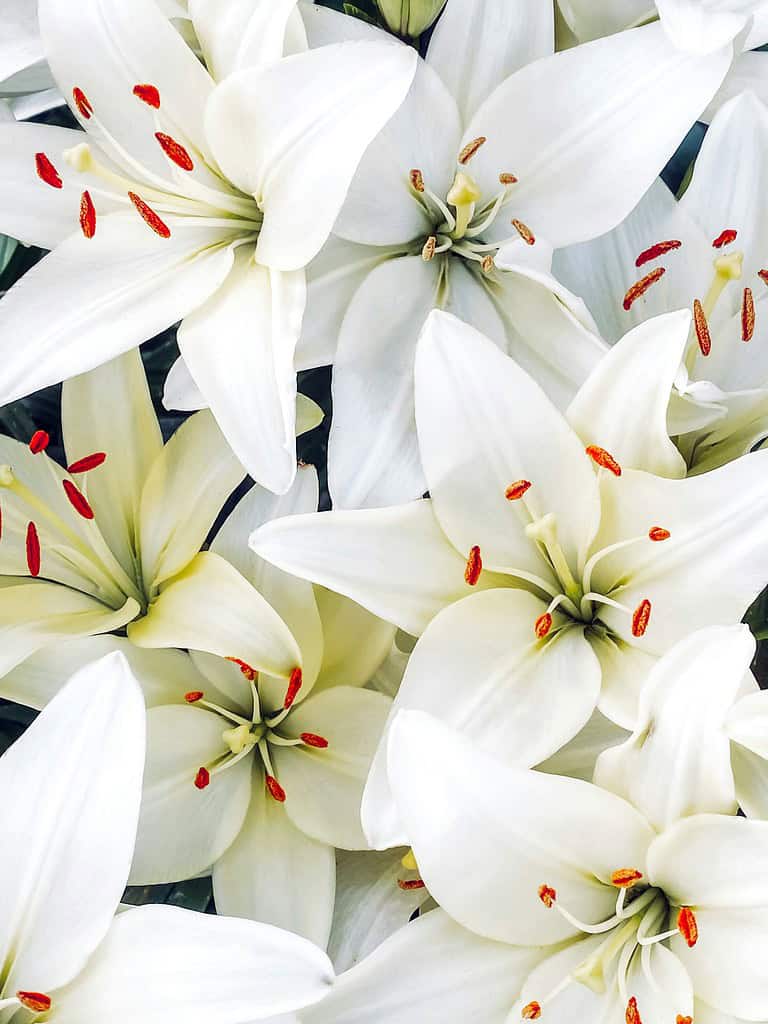
- Asiatic Lilies: These bloom early in the summer. They are the easiest to grow, very hardy, and come in many bright colors. They don’t have much scent, but they multiply quickly and are ideal for beginners.
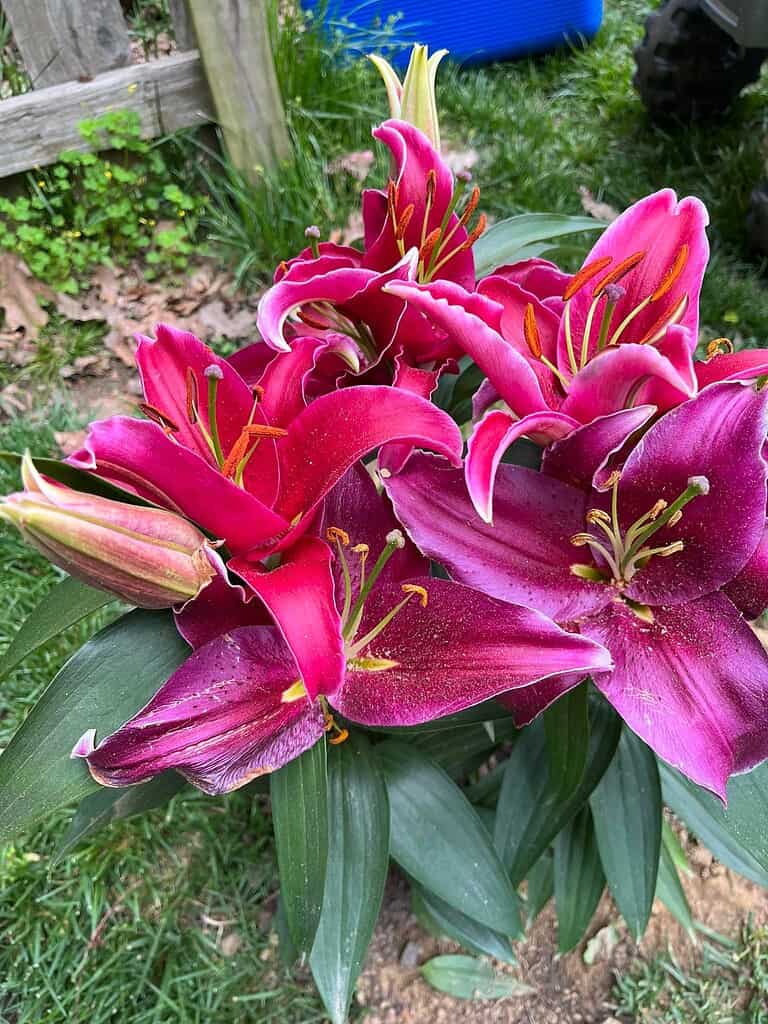
- Oriental Lilies: These bloom later in the season, often mid to late summer. They have large, fragrant flowers and do well in slightly acidic soil. Oriental lilies may need staking because of their height and heavy blooms.
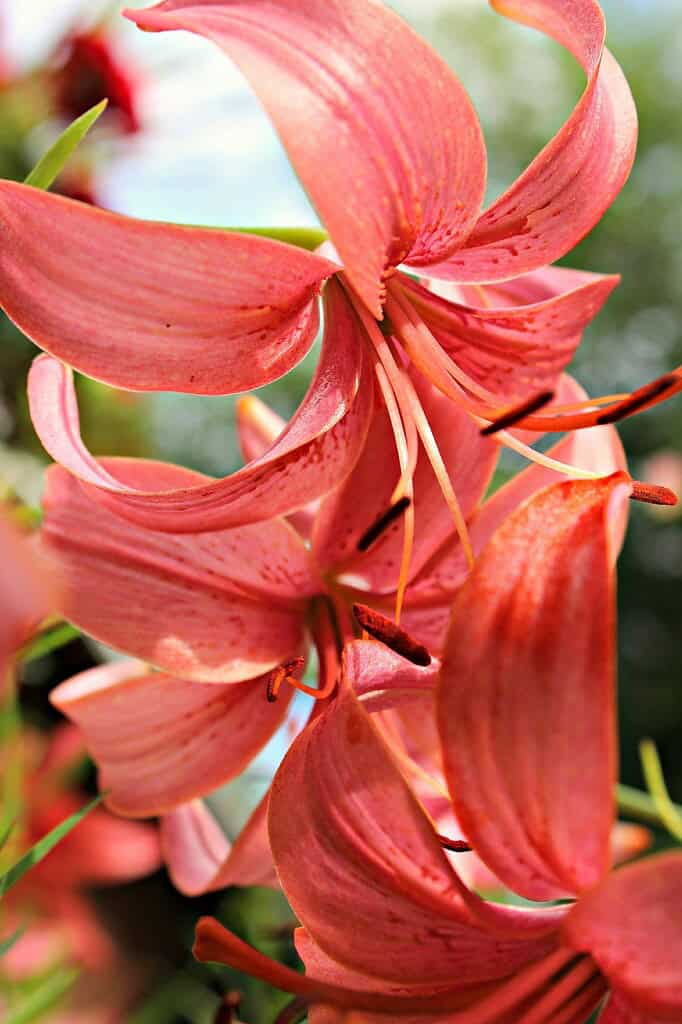
- Trumpet Lilies: Known for their large, trumpet-shaped flowers and strong fragrance. They prefer full sun and well-drained soil. These can grow quite tall and often bloom midsummer.
- Martagon Lilies: These have downward-facing blooms and prefer partial shade. They’re slow to establish but good for woodland or dappled light areas.
- LA and OT Hybrids: LA (Longiflorum-Asiatic) and OT (Oriental-Trumpet) hybrids offer better disease resistance, stronger stems, and extended bloom times. These are often chosen by those who want structure and reliability.
Match the Bloom Time to Your Garden Plan
Lilies can provide continuous color if you plant varieties with different bloom times:
- Early season: Asiatic
- Mid season: Trumpet, LA hybrids
- Late season: Oriental, OT hybrids
This staggered approach avoids a short-lived flower display and keeps your garden productive for longer.
Consider Your Climate
Most lilies are hardy in USDA zones 4–9. However, Oriental lilies and some hybrids may struggle in hot, humid climates or wet winter soil.
In colder regions (zones 3–4), mulch deeply in winter, especially if you’re growing less hardy types like Trumpets or Orientals.
Read related post: How to Grow and Care for Cyclamen Flowers | Easy Growing Guide
When and Where to Plant Lilies for Best Results
Planting lilies at the right time and in the right location sets the foundation for healthy growth and reliable blooms.
Timing affects how well the bulbs establish, while location influences flowering, stem strength, and overall bulb longevity.
Best Time to Plant Lily Bulbs
- Fall Planting (Preferred): In most regions, fall is the best time to plant lilies. Aim to get them in the ground 3 to 4 weeks before the first hard frost. This allows time for the bulbs to root before the soil freezes.
- Spring Planting (Optional): Lilies can also be planted in early spring, as soon as the soil is workable. However, spring-planted bulbs may bloom a bit later than usual in their first year.
Important: Lily bulbs are perishable and lack a protective outer layer. Plant them immediately after purchase to prevent drying out or damage.
Choosing the Best Planting Location
Lilies need a location that meets a few essential conditions:
Sunlight: Lilies thrive in full sun, which means at least 6 to 8 hours of direct sunlight daily. Without enough sun, they stretch toward the light, producing weak, floppy stems.
Drainage: Good drainage is non-negotiable. Bulbs left in soggy or compacted soil will rot. For natural drainage:
- Plant on a sloped area or use raised beds if your garden has heavy clay or poor drainage.
- Avoid low-lying spots where water collects.
Air Circulation: Choose a location with decent airflow to help prevent fungal diseases, especially in humid regions.
Wind Protection: Tall lilies can bend or snap in strong winds. Plant near a fence, hedge, or other support to shield them from wind without blocking sunlight.
Extra Tips for Planting Site Success
If growing in dry climates, choose a location that allows you to mulch effectively. A good mulch layer helps retain moisture and protects bulbs in winter.
In cooler zones, avoid planting close to sidewalks or driveways where snow shoveling or salt runoff might damage the bulbs.
The Best Way to Prepare Soil for Lilies
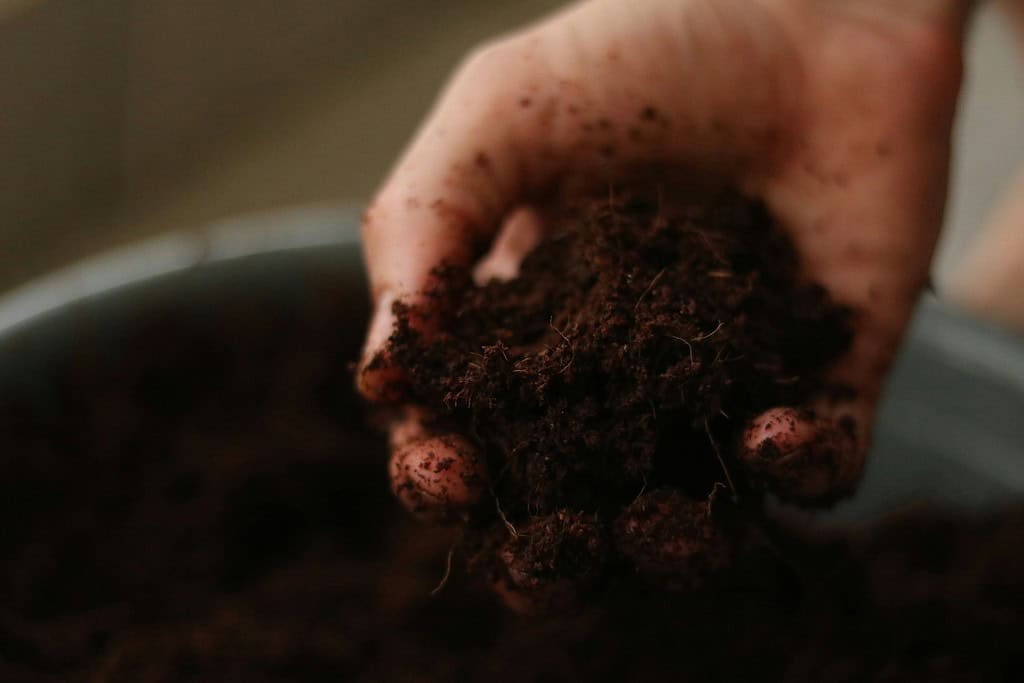
Lilies grow best in soil that is well-draining, nutrient-rich, and slightly acidic to neutral.
Since they remain in place for several years, preparing the soil properly from the beginning gives the bulbs a strong foundation to bloom repeatedly without decline.
Start with Good Drainage
Lily bulbs rot easily in wet soil. Before anything else, make sure your soil drains well:
- Avoid areas where water pools after rain.
- If you have heavy clay soil, amend it with coarse sand, compost, or plant in raised beds.
- For best results, aim for a loose, crumbly texture down to about 12 inches deep.
Adjust the Soil pH
Lilies prefer a pH between 6.0 and 6.5. If your soil is too alkaline:
- Add elemental sulfur or pine bark fines to lower the pH gradually.
- A basic soil test kit can help determine if adjustment is needed.
Add Organic Matter During Planting
When you plant lily bulbs, mix in organic material like:
- Shredded fall leaves
- Well-rotted compost
- Aged leaf mold
These additions improve structure, feed soil life, and help retain moisture without causing sogginess.
Feed the Soil Annually
Since lilies are perennials, soil fertility declines over time if not replenished. To maintain long-term health:
- Add a layer of compost or aged manure each spring or fall.
- This natural feeding method supports both foliage and flower production.
Use the Right Fertilizer
Lilies benefit most from organic fertilizers high in potassium, especially during active growth.
Apply every two weeks from early shoot emergence until about five to six weeks after blooming. Look for organic blends labeled for flowering plants or bulbs.
Read related post: 15 Best Natural Fertilizers for Vegetable Gardens!
Mulch for Moisture and Temperature Balance
- After planting, add 2–3 inches of mulch to help the soil retain moisture and stay cool in hot weather.
- In colder climates, apply mulch in late fall to insulate the bulbs over winter.
Avoid using thick layers of mulch directly against the lily stems to prevent fungal issues.
How to Plant Lily Bulbs the Right Way
Once your soil is prepared and your site is ready, planting lily bulbs is a simple but important process.
Doing it correctly helps the plant establish strong roots and grow with stability through the seasons. Follow these steps to plant each bulb the right way.
Step 1: Dig a Hole 6 to 8 Inches Deep
Using a hand trowel or bulb planter, dig a hole approximately 6 to 8 inches deep.
This measurement should be from the base of the bulb to the soil surface, not from the surface down to the top of the bulb.
Planting too shallow can leave the bulb exposed to temperature fluctuations, while planting too deep in heavy soil can lead to rot. In loose, sandy soil, aim for the full 8 inches.
In heavier clay soils, staying closer to 6 inches is safer.
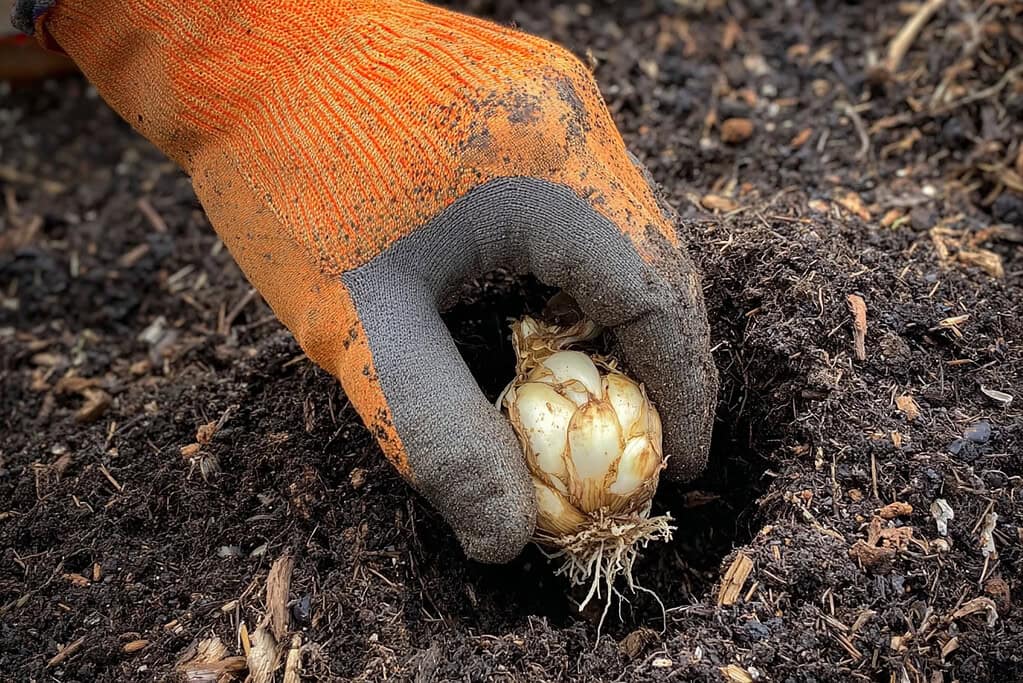
Step 2: Place the Bulb Pointed Side Up
Examine the bulb to find its pointed end – this is where the stem will emerge.
Place the bulb into the hole with the pointed side facing upward and the flatter side facing down.
If the bulb is accidentally planted upside-down, the shoot may struggle to reach the surface, leading to a weak or distorted plant.
Step 3: Ensure Roots Face Downward
If your bulb has visible roots, gently spread them downward so they make contact with the bottom of the hole.
This encourages the bulb to anchor properly and start taking up nutrients once watering begins.
If the roots are tangled or bent, carefully loosen them with your fingers, being cautious not to break or snap them in the process.
Step 4: Space Bulbs 8 to 12 Inches Apart
If you are planting more than one lily bulb, leave 8 to 12 inches of space between each one. This spacing prevents overcrowding, allows for good air movement, and gives each plant room to grow.
Lilies look best when planted in small groups, so planting them in natural-looking clusters rather than in straight rows often gives a fuller, more balanced appearance in the garden.
Step 5: Backfill the Hole with Loose Soil
Once the bulb is in position, refill the hole using the same loosened soil you removed earlier. Cover the bulb completely so the soil is level with the surrounding area.
Use your hand to gently firm the soil just enough to eliminate any large air pockets.
The goal is to stabilize the bulb while still allowing the roots to expand easily through the soil.
How to Water Lilies Based on Their Growth Cycle
Each stage of the lily’s life requires a different level of moisture management.
During Early Growth (Spring to Early Summer)
When shoots first emerge, the plant is putting energy into developing strong roots and tall stems. During this period, the soil should be kept evenly moist but never soggy.
Water when the top two inches of soil feel dry. In most climates, this means watering deeply once or twice a week, depending on rainfall and soil drainage.
Water directly at the base of the plant to avoid wetting the leaves, which can lead to fungal issues. Avoid shallow, frequent watering – this encourages surface roots and weakens the plant's overall structure.
During Bloom
As flower buds appear and open, continue to keep the soil consistently moist. This helps support full flower formation and prevents stress that can cause buds to drop before opening.
The plant is still actively taking up water during this phase, so don’t reduce watering just yet.
If you’re growing lilies in containers, they may need to be watered more often since pots dry out faster than ground soil.
After Bloom
Once the flowers fade, the plant begins shifting energy back into the bulb. At this stage, watering can be reduced gradually.
You can stop regular watering completely about two weeks after the flowers have finished, especially if there’s occasional rainfall. The remaining foliage will begin to yellow and die back naturally.
This drying process is necessary – it signals that the plant is done feeding the bulb for the year.
Avoid watering once the leaves begin to turn yellow. Wet soil during this phase can cause the dormant bulb to rot.
Fall-Planted Bulbs
If you're planting bulbs in the fall, water them thoroughly right after planting. This initial watering is important, especially in cold regions.
Moist soil provides insulation, helps eliminate air pockets, and promotes root establishment before winter dormancy. After that, no additional watering is needed unless the fall season is unusually dry.
Read related post: How to Water Plants Indoors
Feeding Lilies Throughout the Growing Season

Lily bulbs depend on strong foliage to recharge themselves each year, and that process requires consistent feeding during the active growing months.
Fertilizer doesn’t just help the flowers look better in the current season – it directly supports the bulb’s strength for future blooms.
Knowing when and what to feed makes a real difference in how well your lilies return and perform year after year.
Start Feeding When Growth Begins
Begin feeding your lilies as soon as the shoots emerge from the ground in spring.
This is when the plant starts building its stems and foliage, both of which are needed to support blooms and replenish the bulb.
Choose an organic fertilizer that is high in potassium, which helps build strong cell walls and supports flower and bulb development.
Avoid fertilizers high in nitrogen alone, which encourage too much leafy growth and can make stems floppy.
Look for options labeled for blooming plants or bulbs – fish emulsion, seaweed extract, or granular organic mixes with balanced NPK ratios that lean toward higher potassium (the “K”) are good choices.
Continue Feeding Every Two Weeks
Apply fertilizer every two weeks throughout the active growing season. Regular feeding supports flower bud development and helps the plant store energy in the bulb after flowering.
Liquid or water-soluble options are easiest to apply at this frequency, but you can also side-dress with slow-release organic fertilizers once a month if you prefer lower maintenance.
If using a liquid feed, apply it at the base of the plant and avoid wetting the leaves, especially in humid weather.
Stop Feeding About Five to Six Weeks After Bloom
Once your lilies have finished blooming, continue feeding for another five to six weeks.
This is the critical period when the remaining green foliage is still working to photosynthesize and recharge the bulb for next season.
After this period, stop fertilizing completely.
The plant will begin to yellow and die back naturally. There’s no benefit to feeding a lily once its foliage has started to decline – the bulb is no longer actively storing energy.
Supporting Tall Lily Stems Without Causing Damage
Many lily varieties, especially Oriental, Trumpet, and some hybrids, grow tall and produce large, heavy blooms.
Without support, the stems can bend, lean, or even snap under their own weight – especially in wind or after rain.
Staking is often necessary, but it must be done carefully to avoid injuring the plant or damaging the bulb underground.
When to Stake Lilies
Staking is best done early in the growing season, ideally when the stem is about 12 to 18 inches tall and before buds form.
Waiting too long can make it harder to guide the stem without stressing or damaging it.
If you’ve planted a variety known for tall growth or have lilies in a windy or exposed area, assume staking will be needed and prepare in advance.
How to Stake Without Damaging the Bulb
When inserting a stake, the most important rule is to keep it several inches away from the base of the plant.
Inserting a stake too close can pierce or bruise the bulb, which sits directly beneath the soil and is sensitive to any physical disruption.
Choose a sturdy, weather-resistant stake that is tall enough to support the mature height of the plant. For most lilies, this means a stake that is at least 3 to 4 feet tall.
Push the stake into the soil 2 to 4 inches away from the stem, angling slightly if needed to avoid the bulb area. Drive it deep enough to stay secure, but avoid excessive force.
Attaching the Stem Safely
Use soft garden ties, twine, or fabric strips to secure the stem to the stake. Avoid wire, string, or anything that could cut into the stem as it grows.
Tie the stem loosely in a figure-eight pattern, with one loop around the stake and the other around the stem. This allows for movement in wind without putting strain on the plant.
As the plant grows taller, you may need to add another tie point higher up the stake for added support – especially once the flower buds begin to form.
How to Deadhead and Maintain Lilies After Bloom
Once lilies finish blooming, their job above ground isn’t over.
The plant still needs time to send energy back into the bulb to fuel next year’s growth.
What you do – or don’t do – after flowering has a direct effect on the bulb’s strength and ability to produce blooms again.
Remove Only the Spent Flowers
After the blooms begin to fade, use clean garden scissors or pruners to cut off the flower heads, a process known as deadheading.
This prevents the plant from producing seed pods, which drain energy that should instead go back into the bulb.
When deadheading, cut just below the flower – not the stem. Removing too much green tissue reduces the plant’s ability to photosynthesize and store energy.
Leave the Stem and Foliage Intact
Do not cut back the stem after blooming. It might look like the show is over, but the stem and leaves are still actively feeding the bulb through photosynthesis.
Removing them early will weaken the bulb and reduce next year’s flower count or stop blooming altogether.
Leave the stem and foliage in place until it turns completely yellow and dry, which may take until late fall. Only then is it safe to cut the stem down to the soil level.
Looking for more gardening tips? Check out our guide on how to prune fruit trees for practical, step-by-step advice.
Keep the Area Clean
During this phase, avoid overwatering and keep the area around the base of the plant free from fallen petals or debris. This helps prevent fungal issues during the bulb’s recovery period.
Regular maintenance during this time is simple but important – don’t rush the process, and let the plant finish its natural cycle.
Cutting Lilies for Vases Without Weakening the Plant
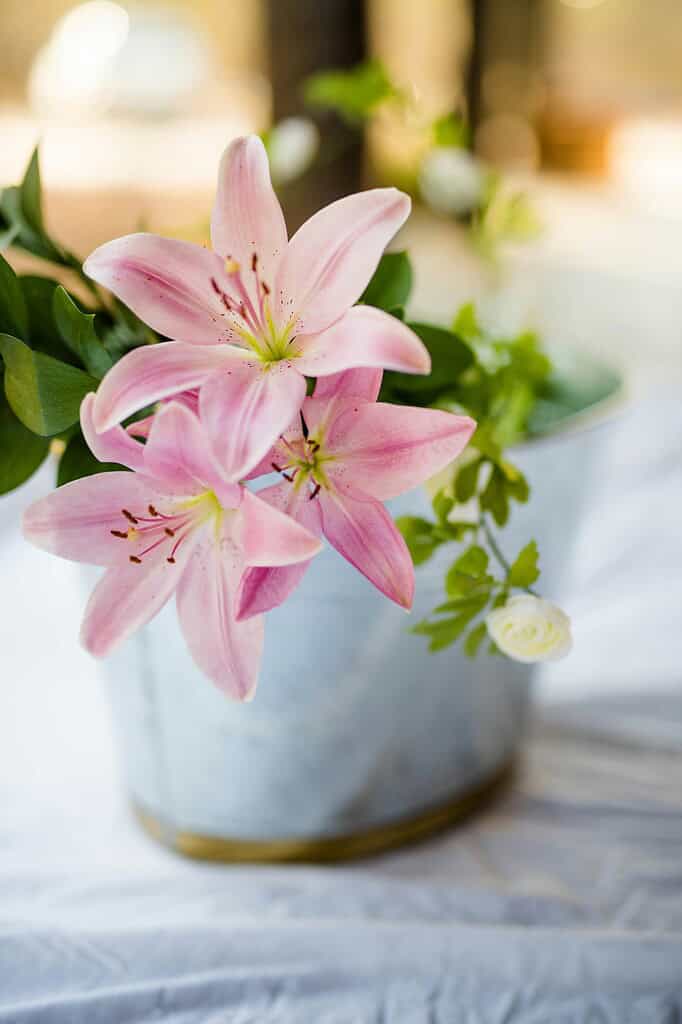
Lilies make excellent cut flowers, but harvesting them the wrong way can damage the plant’s ability to bloom again the next year.
Since each lily stem carries most of the plant’s leaves, taking too much of it for a vase leaves the bulb with little to no support.
If you're planning to cut lilies for indoor use, there’s a specific way to do it that protects both the flower and the plant.
Cut Only When the First Bud Begins to Open
To get the longest vase life, wait until the first flower on the stem has just started to open.
At this stage, the remaining buds are developed enough to open after being cut. Cutting earlier can result in unopened buds that fail to bloom.
Use sharp, clean pruners to avoid bruising or tearing the stem, which can allow disease to enter.
Leave at Least Half the Plant Intact
When you cut a lily for a vase, always leave at least half of the stem and its foliage in the ground.
The leaves that remain are essential for feeding the bulb through photosynthesis. The more foliage you leave behind, the better your chances of healthy blooms the following year.
Cut the stem just above a set of healthy leaves, and never cut it all the way down to the soil line.
Grow Extra Bulbs for Cutting
If you want to enjoy large arrangements indoors without affecting your garden display, the best solution is to plant additional lilies specifically for cutting.
These can be grown in a separate bed or tucked into open garden space where aesthetics are less important.
This approach ensures your main garden plants remain strong and come back year after year, while also giving you a steady supply of stems for fresh bouquets.
Read related post: Stop Ruining Your Roses! Learn How to Prune Them the Right Way Today
Dividing and Replanting Lilies Every Few Years
Lilies are long-lived perennials, but over time, the bulbs multiply underground and become overcrowded.
When this happens, flower size and stem strength may decline, and fewer blooms appear. To keep lilies thriving, they should be divided and replanted every three to five years.
When to Divide Lilies
The best time to divide lilies is in the fall, after the foliage has fully yellowed and died back.
At this point, the plant is dormant, and the bulbs are no longer actively growing. Dividing at this time gives the replanted bulbs time to settle over winter and prepare for spring growth.
In warmer climates, division can also be done in early spring, just as new growth is starting, but before stems elongate.
How to Dig and Separate Lily Bulbs
Start by loosening the soil around the base of the plant using a garden fork or spade.
Lift the entire clump carefully from the ground to avoid damaging the bulbs. Once out of the soil, shake or gently wash off any remaining dirt so you can clearly see the structure.
You’ll notice several bulbs clustered together – some will be larger mature bulbs, while others may be small offsets. Gently pull the bulbs apart by hand, keeping as many roots attached as possible.
If bulbs resist separation, wiggle them loose rather than forcing them apart with tools.
Discard any soft, rotted, or unhealthy bulbs. Set aside the healthiest and firmest ones for replanting.
Replant with Fresh Compost
Before returning bulbs to the ground, refresh the planting hole with a generous handful of well-aged compost. This boosts soil fertility and gives the bulbs a strong start in their new spot.
Replant the bulbs at the same depth as new bulbs – about 6 to 8 inches deep – and space them properly to avoid overcrowding in the years to come.
For more tips on composting techniques, check out the Berkeley method of composting to make nutrient-rich soil at home.
Share and Expand
Dividing lilies doesn’t just improve plant health – it’s also a great way to multiply your garden stock or share with neighbors.
If you end up with more bulbs than you need, you can pot extras or trade varieties with other gardeners.
Keep Your Lilies Blooming Year After Year
Growing lilies successfully isn’t just about getting them to flower once – it’s about building strong bulbs, protecting them over time, and keeping your planting plan working year after year.
By choosing the right varieties, planting them properly, feeding and watering with care, and giving them room to grow and recover, you set your lilies up to come back stronger each season.
Whether you're growing for color, fragrance, or cut flowers, everything comes down to supporting the health of the bulb beneath the surface.
Pay attention to each part of the growing cycle, and the results will show above ground for years to come.
Have any questions or tips from your own experience? Comment down below and join the conversation.
FAQs
1. Can I grow lilies in pots or containers?
Yes, lilies can be grown in containers, but the pot must be at least 12 to 14 inches deep to accommodate the bulb and root system. Use a well-draining mix (potting soil with added sand or perlite), and choose compact varieties such as Asiatic or dwarf Oriental lilies. Make sure the container gets full sun and doesn’t dry out completely.
2. What should I do if my lilies flop over every year?
If lilies are leaning or falling over, it’s often due to insufficient sun, overfertilization with nitrogen, or weak staking. Ensure they get at least 6–8 hours of direct sunlight. Use low-nitrogen, high-potassium fertilizer. Stake earlier in the season when stems are still flexible, and position stakes several inches from the bulb.
3. Can I plant lily bulbs in summer?
Lily bulbs are best planted in fall or early spring. Summer planting is not recommended unless you're planting pre-chilled bulbs or potted lilies being moved into the ground. Bulbs planted in summer may not have enough time to root before dormancy and could rot in warm soil.
4. How can I protect lilies from pests like beetles or slugs?
For lily beetles, hand-picking is effective if caught early. You can also use neem oil or insecticidal soap. For slugs, use diatomaceous earth, crushed eggshells, or shallow dishes of beer as traps. Inspect plants regularly and remove debris where pests hide.
5. Do lilies need to be dug up in winter?
In most climates (zones 4–9), lilies do not need to be dug up. They are hardy and overwinter in the ground. However, in areas with poor drainage or extremely wet winters, lifting the bulbs and storing them in a cool, dry place can prevent rot. Always apply mulch after fall planting for added protection in colder zones.