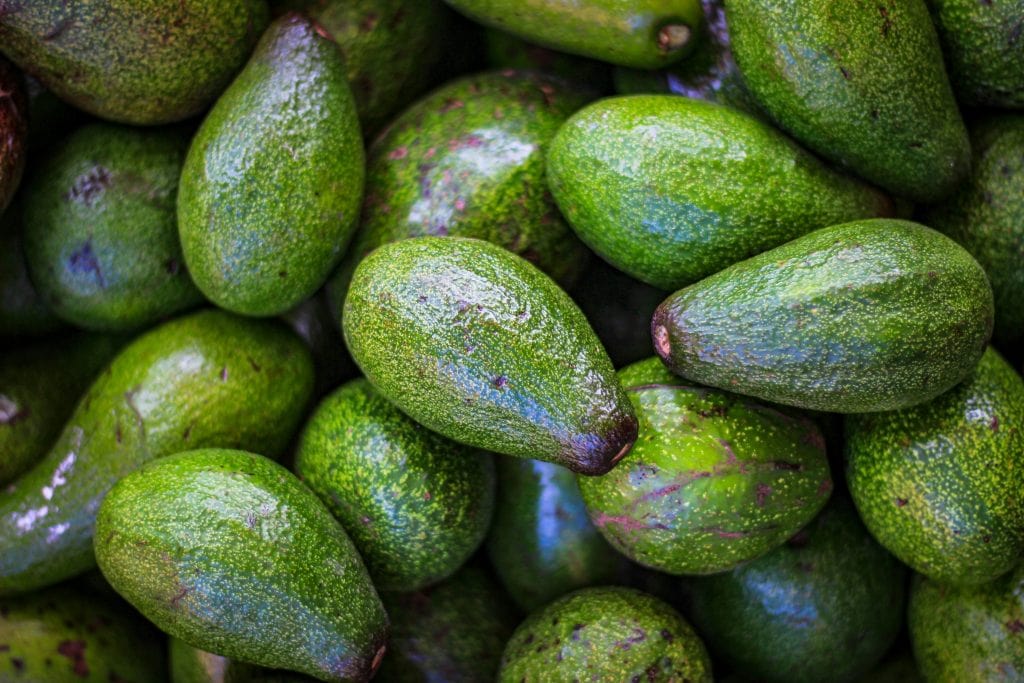
So, you’ve just eaten an avocado and now you’re holding the seed, wondering what to do next.
What do you actually do with it? Can you really grow a tree from this little thing? Short answer: yes. Long answer? Let’s dig in.
Growing an avocado from seed is slow. Messy. But also weirdly satisfying. It's not just about getting a free plant – though that’s part of it. It’s about the process.
In this article, I'll walk you through every part of the process – from seed to sprout to soil. We’ll talk about peeling (should you?), watering (how much is too much?), and all the tricks that actually make a difference.
Quick Overview of Avocado Plant
| Feature | Details |
|---|---|
| Common Name | Avocado |
| Scientific Name | Persea americana |
| Plant Family | Lauraceae |
| Native To | Central and South America (Mexico, Guatemala, etc.) |
| Type | Evergreen tree |
| Sun Requirements | Full sun (at least 6–8 hours daily) |
| Soil Type | Well-draining, loamy, sandy soil |
| pH Range | 6.0–6.5 |
| Water Needs | Moderate; allow soil to dry slightly between waterings |
| Mature Size | 30–40 feet tall (can be pruned smaller) |
| Uses | Culinary (fruit), oil, skincare |
| Fun Fact | Avocados are technically berries! |
Choosing Your Avocado Seed
Not all avocado seeds are worth the effort. Some just… don’t sprout. So your first win here is picking a good one.
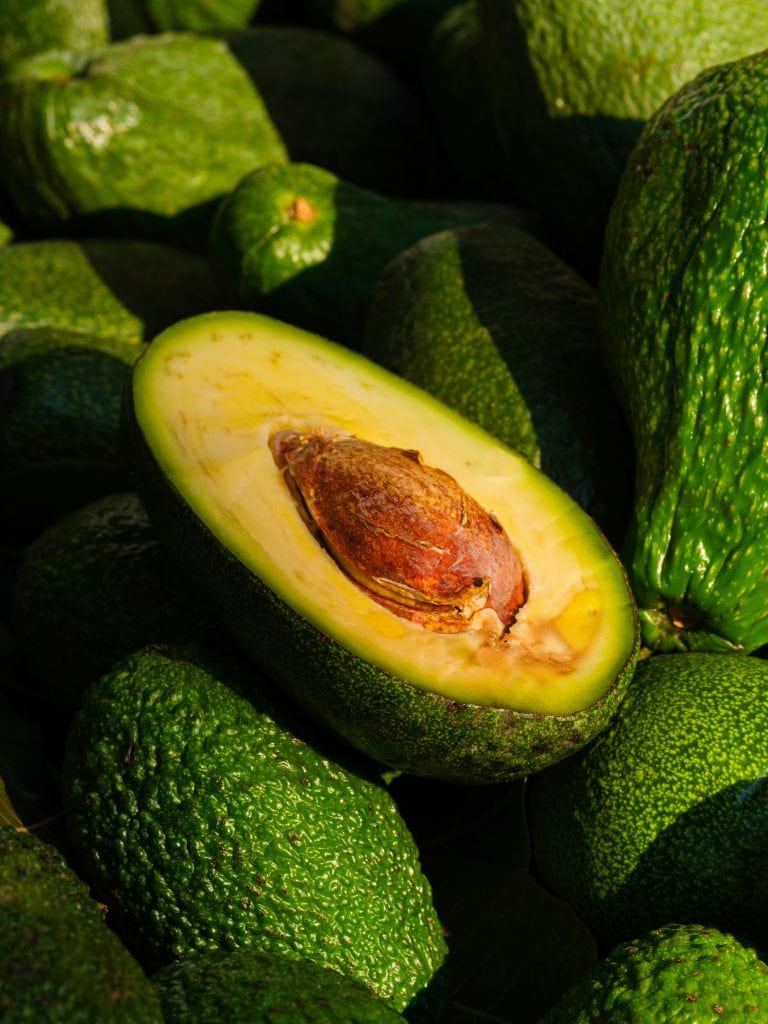
Start with a ripe, healthy avocado – the kind that gives a little when you press it, not the overripe mushy one you forgot in the fridge.
Once you cut it open, scoop out the seed and rinse off any remaining fruit.
Try Multiple Seeds for Better Odds
Try more than one seed. Germination isn’t a guarantee – some seeds just sit there, doing absolutely nothing.
Trying two or three increases your chances of success (and spares you the existential dread of watching a single stubborn pit for weeks).
Peel the Seed (Optional, But Helpful)
Now, here’s something a lot of people skip: peeling the seed.
That papery brown skin? You don’t have to remove it, but peeling it can make things happen faster – and cleaner. Especially if you're using the water method, because once that skin starts to rot, things get… funky.
Soak the seed in warm water for a few hours, then gently peel. Don’t stress if some of the veiny stuff underneath clings on. Totally normal.
Timing-wise, there's no strict season for sprouting avocado seeds indoors – but starting in spring or early summer can give your plant a nice boost from the extra warmth and light.
Germination Methods
There are three solid ways to get that stubborn seed to crack open and start growing. They all work – some faster, some cleaner, some just more fun to watch.
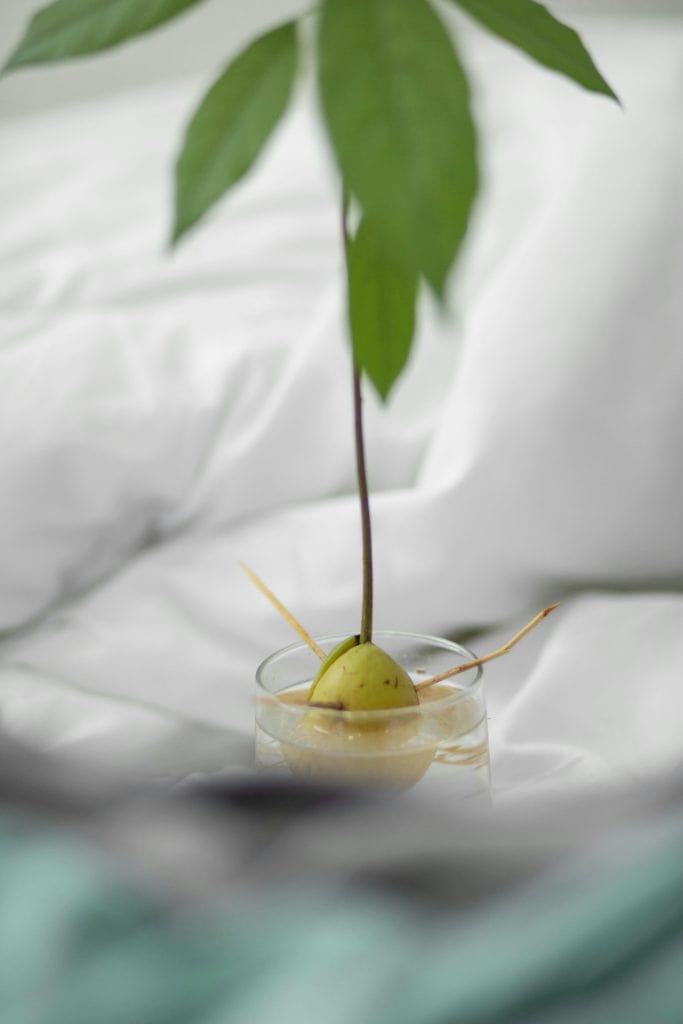
1. Classic Water Suspension (Toothpick Method)
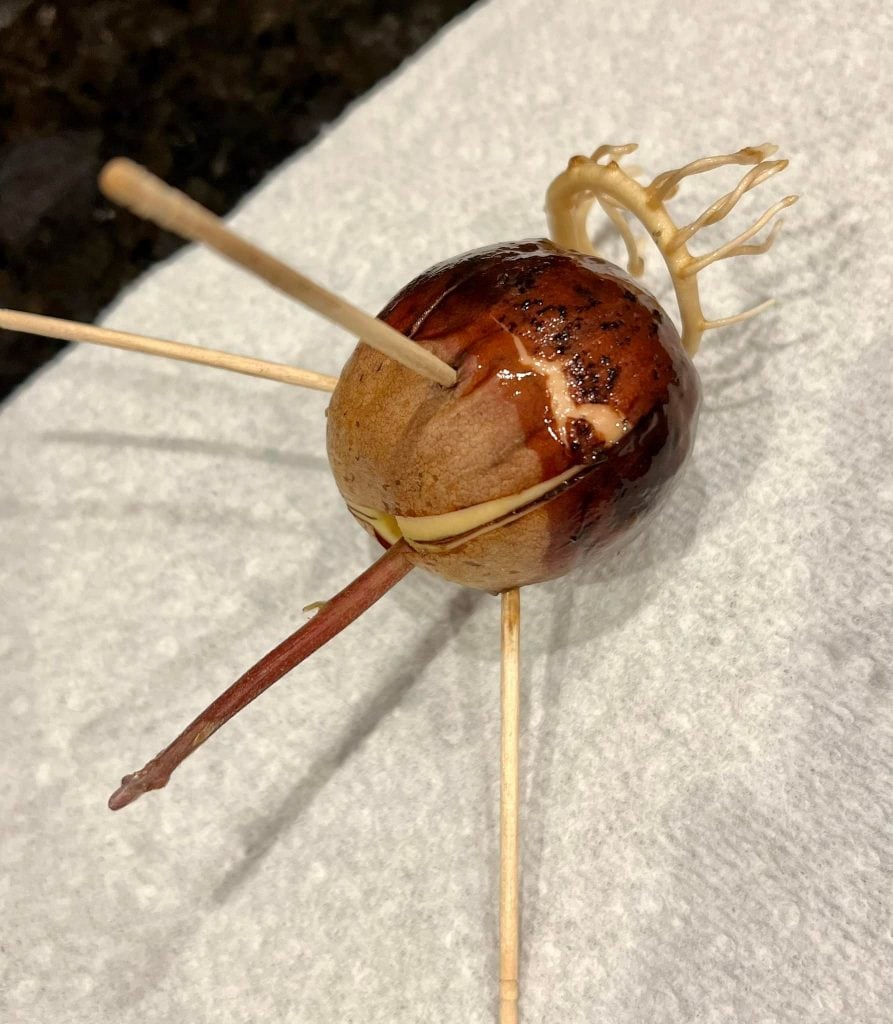
This is the method everyone’s seen at least once – three toothpicks jabbed into the seed, balanced over a glass of water. It looks cool, sure. But it’s not just about aesthetics.
Push the toothpicks in at a slight downward angle, spaced evenly around the seed’s midsection. You want about the bottom inch submerged – that’s the end that’ll sprout roots (flat side down, always).
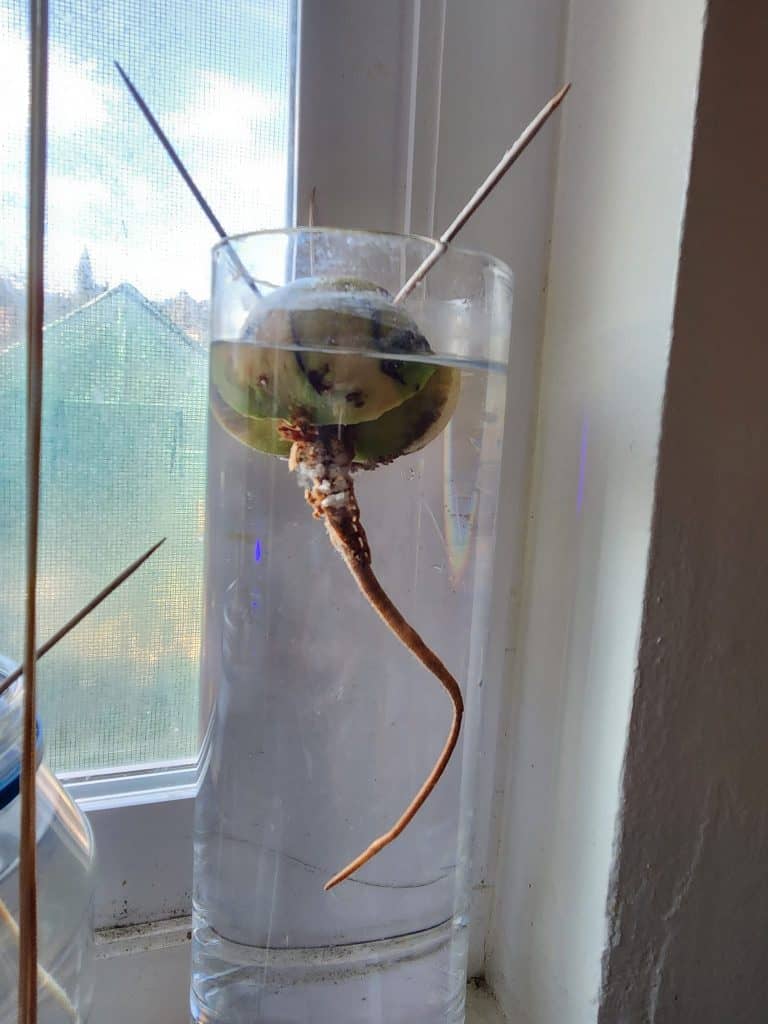
Keep the glass in a warm, bright place, but not in direct sunlight. And yes, change the water regularly. Don’t just top it off. Fully swap it out every week, or even every few days if it starts to look cloudy or gross.
2. Wet Cloth in a Sealed Container
This method? Way underrated. Wrap the seed in a damp paper towel (peeled or not, your choice), then place it in a plastic container or zip bag.
Seal it up and stick it somewhere warm. A dark cupboard works fine.
Check it once a week. Keep the towel moist, not dripping. If mold starts forming, swap the towel out. You’ll likely see a crack before you’d see one with the toothpick setup.
Once the root hits about 1 inch long, you can either move it to soil or shift to the water method if you want to watch it grow.
3. Using a Narrow-Necked Vessel
This one’s for the no-toothpick crowd. Just grab a narrow-necked bottle or small jar and rest the seed over the opening.
Same principle as the toothpick method (bottom in water, top exposed) but no poking required. It’s neater and kind of stylish.
Just make sure the seed doesn’t fall all the way in (ask me how I know). And again – change that water completely, not just a little splash here and there.
Caring for the Seed During Germination
Now that your seed is set up, it’s mostly a waiting game. But not a passive one. There are a few things you do need to watch for to make sure all that effort doesn’t go to waste.
Placement matters.
Keep your seed warm (but not hot) and give it access to indirect light. A sunny windowsill that doesn’t get blasted all day works well.
Too much sun can overheat the water or dry out your paper towel. Not enough warmth? You might be waiting forever.
Check for progress but not obsessively.
Once a week is enough. You’re looking for a crack along the seed’s bottom (the flat side). That’s the root breaking through.
Sometimes it takes a couple of weeks. Sometimes over a month. If it’s been six weeks and absolutely nothing’s happening – no crack, no change – you might have a dud.
Watch out for mold.
Especially with the wet cloth method. If you spot fuzzy white stuff or an off smell, unwrap the seed, rinse it gently, swap the towel, and try again. A bit of discoloration isn’t a deal-breaker. Fuzzy funk? Toss it or start fresh.
Oh – and don’t mess with it too much. It’s tempting to keep peeling or poking, but that’s a good way to damage a seed that was almost ready to grow.
Transferring the Germinated Seed to Soil
Eventually, your seed will sprout a root and maybe even a stubby stem on top. Congrats! Now comes the part where most people accidentally snap something important. Let’s avoid that.
When is it ready?
If the root is about an inch long (or more), and the top has started to sprout, it's ready for soil. That could be anywhere from 2 to 8 weeks after starting, depending on method and conditions.
Handle with care.
Avocado taproots are fragile. Weirdly brittle. One wrong move and snap – start over. So be gentle.
If you're moving from water to soil, scoop the root out with your fingers or a spoon. No tugging. And whatever you do, don’t grab the root directly.
Plant it halfway.
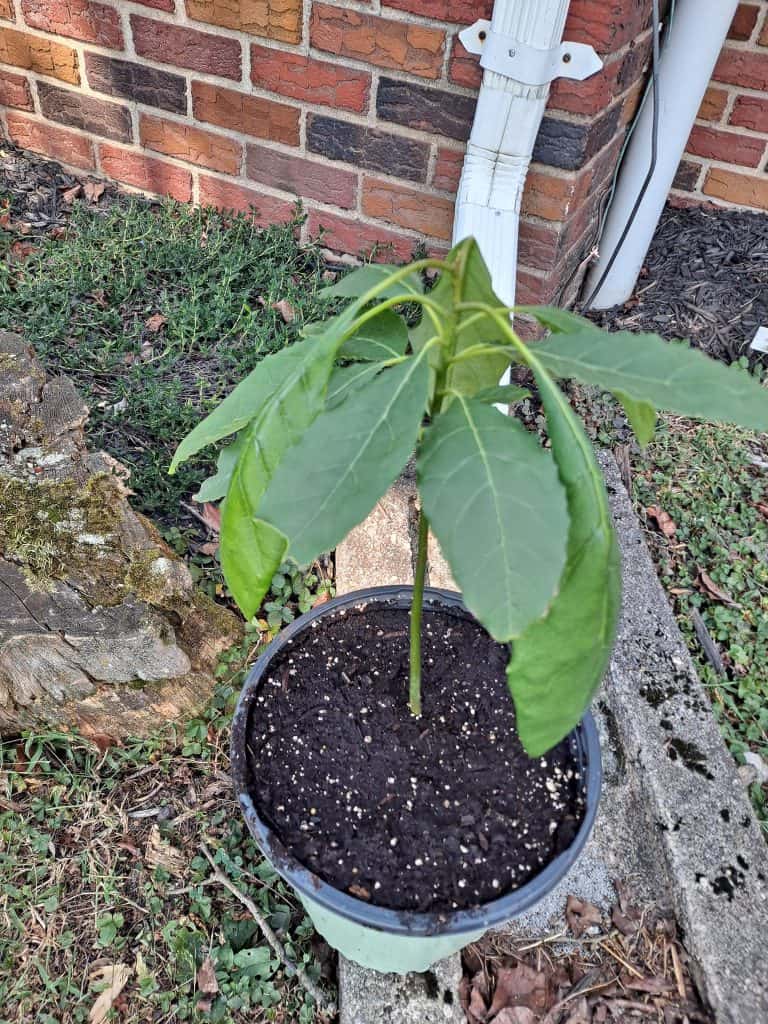
Burying the entire seed is a rookie mistake. Leave the top half exposed – about an inch sticking out of the soil. This helps prevent rot and lets you see how it's doing.
Use a small pot with drainage holes and fill it with light, well-draining soil. A bit of compost mixed in doesn’t hurt.
If the root is long, use a pencil or chopstick to make a little trench and lower it in without bending or forcing anything.
You’ve gotten it this far. Don’t rush this part.
Potting Tips for Strong Early Growth

At this stage, it’s less about keeping the seed alive and more about setting your plant up to thrive. And how you pot it makes a bigger difference than you'd think.
Soil should drain.
Avocados hate soggy feet. Use a loose, well-draining potting mix – something with perlite or sand mixed in. You can even add a bit of fresh compost if it’s the growing season (spring to early fall). But avoid heavy, dense soil that clumps and stays wet.
Gravel or pebbles? Yes, please.
If you’re starting your seed in soil right away – or transplanting from water – drop a layer of gravel or small pebbles into the bottom of the pot.
It creates a buffer so water doesn’t pool at the roots. No swampy mess. Your avocado will thank you.
Don’t size up too early.
It’s tempting to throw the seed into a big pot and let it grow into it. But too much soil holds too much water.
Use a small pot at first – 4 to 6 inches wide – and repot as the roots fill it out. Think of it like upgrading shoes for a growing kid.
Top stays out.
Can’t say it enough: leave the top half of the seed exposed. It still needs airflow and light, and burying the whole thing increases the risk of rot. Plus, watching it grow is half the fun.
Alternative Potting for Larger Root Systems
Sometimes – especially with the wet cloth method – you’ll end up with a seed that has an impressive root before you're ready to pot it. Long, twisty, delicate.
Here’s how to do it without snapping that gorgeous taproot in half.
Dry soil trick.
Hold the seed above the pot at the height you want it (remember – half out of the soil), and gently fill in around the dangling root with dry potting mix. Keep going until the seed is snug and the root is surrounded.
Then water deeply. Like, until it runs out the drainage holes. The dry soil will settle gently around the root instead of clumping hard like wet soil might. It’s slower, but safer.
This method is a lifesaver for big roots or when you're nervous about transplanting. Yes, it’s a little awkward to hold the seed steady while you fill the pot, but it’s worth it for a smooth start.
Watering Your Avocado Plant Properly
Watering seems simple. You pour water on the plant, and that’s that. Right? Not with avocados.
These plants are picky. Too much water, and the roots start to rot. Too little, and the leaves curl and crisp up. The trick? Deep, infrequent watering.
No daily sprinkles.
That’s the fastest way to stress your plant. Instead, water thoroughly until it runs out the bottom of the pot. Then leave it alone.
Let the top inch of soil dry out completely before you water again. Poke your finger in there if you’re unsure.
This deep watering technique doesn’t just hydrate better – it also helps flush out salts and minerals that build up in the soil over time. Sprinkling a little every day? All that buildup stays put, and your plant suffers.
Signs you’re doing it wrong:
- Mushy stem or soggy soil? You’re overdoing it.
- Dry, droopy leaves? Probably underwatered or roots got damaged during transplant.
- Weird white crust on the soil surface? That’s mineral buildup. Time for a flush.
Get this balance right, and you’re already ahead of most first-time growers.
Supporting Healthy Growth Indoors
Once your avocado seed turns into an actual plant, the fun really starts. But growing it indoors isn’t just about light and water. It’s about knowing when to feed it, how to control its shape, and how to avoid growing a 6-foot stick with three leaves on top (it happens).
Fertilizing and Feeding
Avocados are hungry during the growing season – roughly spring through early fall. You don’t need anything fancy.
A bit of fresh compost added to the top of the soil every few weeks does the trick. Or use a balanced, water-soluble fertilizer at half strength once or twice a month.
If you’d rather not fuss with frequent feeding, a slow-release fertilizer can be a good hands-off option – just apply once or twice per season and let it do the work.
Skip the heavy feeding in winter. The plant naturally slows down, and pushing it can do more harm than good.
Pruning and Shaping
This part feels wrong the first time you do it but it really makes a big difference.
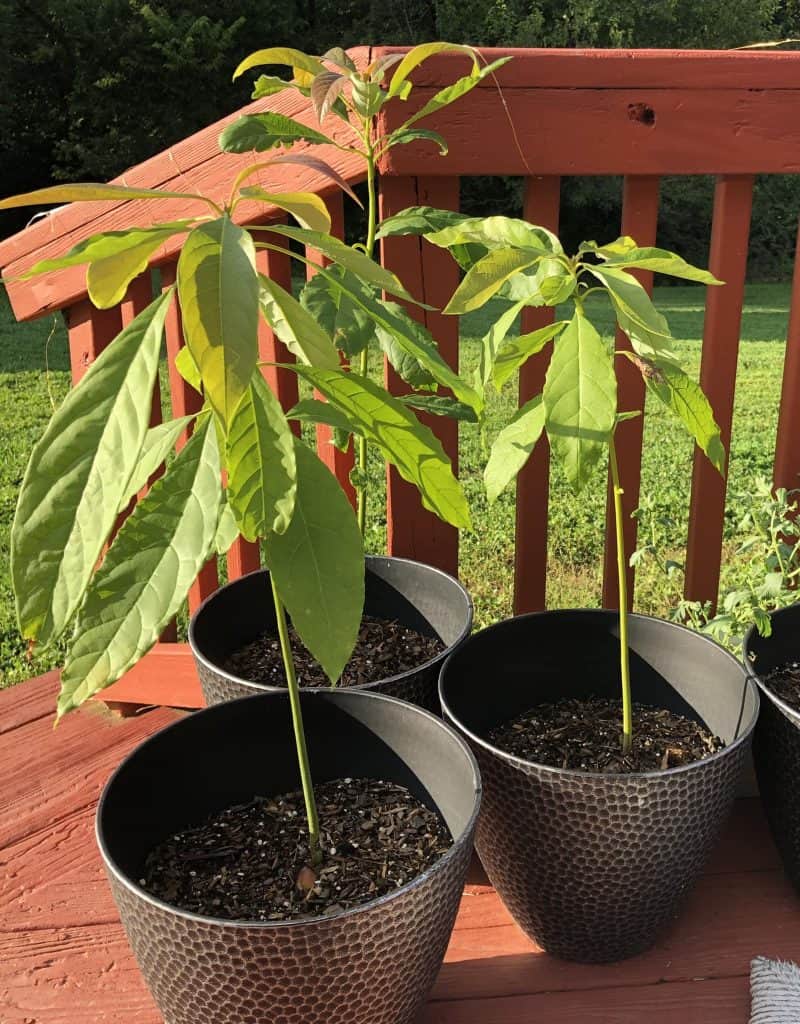
Once your plant gets about 12 inches tall, cut the stem back to around 6 to 8 inches. Yep. Just chop it. It’ll bounce back stronger, and instead of growing tall and spindly, it’ll start branching out.
Later, you can pinch off the newest leaves every time a stem grows another 6 inches or so. This encourages fuller, bushier growth.
If you’re keeping it as a houseplant (which, let’s be honest, most of us are), this kind of pruning keeps it compact and more decorative. You don’t want a ceiling scraper in a pot.
A small, sharp pair of gardening tools like pruning shears or micro snips will make the job quick and clean – no tearing or mangling those tender stems.
Preparing Your Plant for Outdoor Conditions
At some point, you’ll probably wonder – can this little tree live outside? The answer is yes… but only if you ease it in.
Don’t rush it.
You can’t just plop your avocado plant outside and hope for the best.
After growing in a cozy, protected indoor spot, sudden exposure to wind, direct sun, and fluctuating temps can shock the plant. And by “shock,” I mean: burnt leaves, stunted growth, possibly death. Fun stuff.
Hardening off: what it is and how to do it.
Start by setting your plant outside in dappled shade for a couple of hours a day – no wind, no full sun. Bring it back inside. Do this for a few days, then gradually increase the time and sunlight exposure over the course of 1–2 weeks.
By the end of this period, your plant should be able to handle a full day outside without wilting or frying. Then you can leave it out more permanently – weather permitting.
When’s the right time?
Late spring or early summer is ideal. Wait until nighttime temps stay consistently above 50°F (10°C). Avocados hate the cold, especially when they’re young.
Troubleshooting Common Problems
Even with all the right steps, stuff goes sideways sometimes. Here’s what to look for – and what you can (or can’t) do about it.
1. The seed just won’t sprout.
It happens. Some seeds are duds, especially if they were handled roughly or came from underripe fruit. If it’s been over 6–8 weeks with no crack, no root, no anything – it’s probably time to try a new one.
2. Mold on the seed or towel.
Very common with the wet cloth method. Swap in a fresh towel and rinse the seed. If it smells really bad or has black fuzzy spots, toss it. Mild white fuzz? Might still be okay.
Root rot or stem mush.
Usually caused by overwatering or poor drainage. If the bottom of the stem turns black and soft, it's not good news. Cut your losses and try again – with better soil and less water this time.
3. Leaves curling, browning, or dropping.
Could be underwatering. Could be too much direct sun after being indoors too long. Could be salt buildup in the soil.
Backtrack your recent care and adjust one thing at a time. Don’t panic after the first brown leaf – it doesn’t always mean disaster.
4. Long, leggy plant with few leaves.
Classic “too much height, not enough pruning.” Cut it back. Seriously. It’ll feel brutal, but it’ll come back stronger and bushier.
Save your avocado pit, peel it, sprout it in water or soil, and nurture it into a plant.
Growing an avocado from seed isn’t fast. It’s not neat. It’s not always predictable. But it is oddly satisfying and way more fun than tossing that seed in the compost.
From picking the right pit to figuring out how to sprout it (water, towel, or bottle – your call), to planting it up without breaking the roots, this whole process is a slow little adventure.
You’ll mess up something. Everyone does. But you’ll learn as you go, and if you stick with it, you’ll have a real living plant in your home that started with leftovers from your lunch.
Frequently Asked Questions (FAQs)
How long does it take to grow an avocado from seed?
Anywhere from 2 to 8 weeks just to see the first root, depending on the method and conditions. To grow a full plant? Several months. A fruit-bearing tree? If ever, it can take years – and not all indoor-grown plants ever produce fruit.
Why should I peel the avocado seed skin?
Peeling the brown outer layer can speed up sprouting and prevent mold—especially in the water method. It’s optional, but helpful.
Can I plant the seed straight into soil instead of starting in water?
Yes. Just make sure the soil drains well and keep it moist (not soaked). You won’t see the roots grow, though, so it’s a little more mysterious.
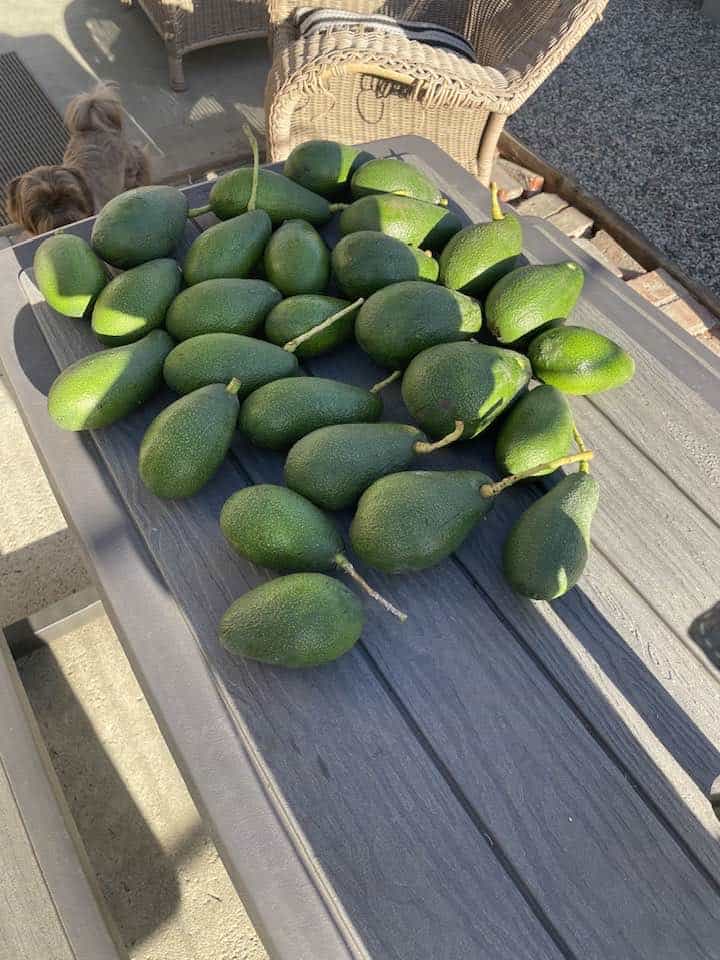
Do avocado plants from seed ever produce fruit?
Sometimes. But it can take 5–13 years, and even then, the fruit quality can be unpredictable. Most people grow them for fun or as houseplants – not for harvest.
What’s the easiest method for beginners to germinate a seed?
The wet paper towel method is reliable and low-mess. Wrap the seed, seal it in a container, keep it warm, and check weekly. Fewer bugs, less fuss.
Ready To Transform Your Garden?

Are you looking for the best way to layout your garden beds? Maybe you're feeling a bit stuck on how to make the most of your space?
We’ve got you covered! Check out our 101+ Garden Bed Layout Ideas for your next raised bed project. This guide is filled with creative and practical ideas that can help you design a garden that fits your style, whether you’re just starting out or have been gardening for years.
Get your copy today and get inspired to bring your gardening dreams to life.