Peonies are one of the most dependable and rewarding perennials you can grow.
With their large, fragrant blooms and long lifespan, they are a favorite in home gardens across many climates.
But growing healthy, flowering peonies year after year takes more than just putting them in the ground and hoping for the best. It requires the right planting technique, timing, and seasonal care.
In this article I'll share exactly how to grow peony flowers successfully – from choosing and planting bare-root peonies to maintaining them through every season.
You'll also learn how to divide established plants, propagate by seed, and harvest blooms at the right time for cutting or storing.
Why Growing Peonies Is Worth the Patience

Peonies don’t offer instant gratification. In most cases, they won’t produce full blooms in the first year, and some may take up to three years to flower reliably.
But once established, a peony plant can live and bloom beautifully for decades without needing to be replaced or heavily maintained.
Unlike many perennials that need dividing every few years, peonies thrive when left undisturbed. Their woody crowns become more productive over time, sending up stronger stems and producing more blooms each spring.
With proper planting depth, good soil preparation, and seasonal care, peonies can provide a consistent show of large, colorful flowers for 50 years or more.
Peonies also have excellent cold tolerance. They require a period of winter chill to set buds, which makes them well-suited to growing zones 3 through 8. In warmer climates like zone 9, they can still thrive with some afternoon shade.
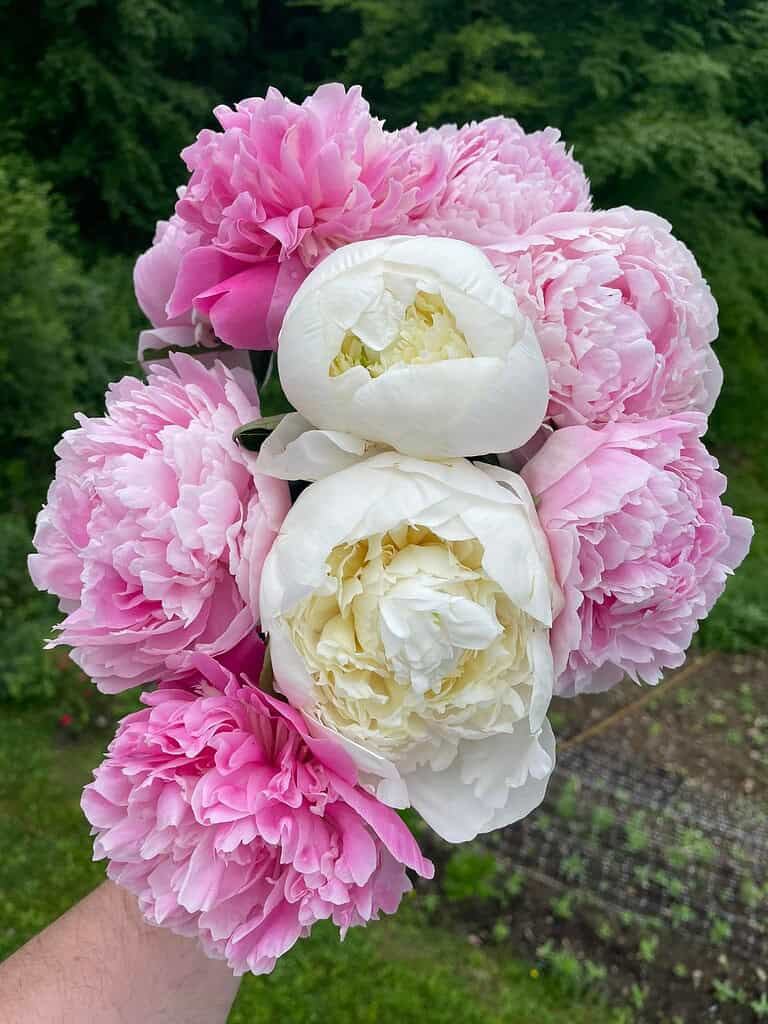
Once in bloom, their flowers make excellent cut stems with long vase life, especially when harvested at the right stage.
For gardeners looking for a plant that gets better with age, peonies offer long-term rewards that far outweigh the initial wait.
If you’re curious about other seasonal favorites, check out our guide on how to grow tulips.
Read related post: How to Grow (and Care) for Carnation Flowers
Step-by-Step Process for Growing Peony Flowers Successfully
Peonies thrive when they’re planted and cared for correctly from the beginning. Follow each step carefully to avoid common mistakes and ensure long-term success.
1. Prepare Soil and Choose the Right Planting Spot
Start by selecting a planting site that gets at least 6 hours of direct sunlight each day.
In warmer zones (8–9), a location with afternoon shade can help prevent heat stress. Peonies prefer well-drained, fertile soil and do not grow well in soggy or compacted conditions.
Loosen the soil to a depth of 12 to 18 inches, and mix in fresh compost, aged leaf mold, or other organic matter to improve both drainage and nutrient content. If your soil is heavy clay, this step is especially important.
Before planting, add a small scoop of mycorrhizae (often called “gardener’s magic dust”) into the planting hole. This beneficial fungus connects to the roots and improves nutrient uptake, water absorption, and overall plant resilience.
2. Plant Peony Roots at the Correct Depth
Planting depth is one of the most important factors in whether your peonies will bloom in the years ahead. Whether you’re planting bare-root or potted peonies, the positioning must be precise.
For bare-root peonies:
- Dig a hole about 12 inches wide and deep.
- Create a small mound of soil in the center of the hole.
- Place the root system over the mound with the reddish buds (called “eyes”) facing upward.
- Adjust the height so the buds sit 1 to 2 inches below the finished soil surface.
- Backfill gently and firm the soil without compacting it.
For potted peonies:
- Ensure the crown of the plant (where stems meet roots) is positioned level with the soil surface, not below it.
- Avoid planting too deep, even by an inch, as it can delay or prevent flowering.
Once positioned, water deeply to help settle the soil and eliminate air pockets
3. Water and Mulch Peonies After Planting
Right after planting, peonies need a deep initial watering to eliminate air pockets and settle the soil around the roots. Use about 1 gallon of water per plant, poured slowly to ensure it soaks in thoroughly.
After watering, apply a 2–3 inch layer of mulch around the base of the plant to help retain moisture, regulate soil temperature, and suppress weeds naturally. Use materials like shredded bark, dry leaves, compost, or leaf mold. Keep the mulch a few inches away from the crown to prevent rot.
In colder regions, you can add a light layer of mulch over the crown for winter protection during the plant’s first year. However, this layer should be removed promptly in early spring as the soil warms and shoots begin to emerge.
Water peonies again only when the soil becomes dry. Overwatering or consistently soggy soil can lead to root rot, so it’s better to let the soil dry slightly between waterings.
4. Disbud Young Peony Plants for Stronger Growth
During their first year, peony plants benefit from disbudding, which means removing the developing flower buds early in the season. This allows the plant to direct all its energy into building a healthy root system and strong foliage rather than producing flowers too soon.
As soon as you see buds forming – typically when they are pea-sized – gently pinch or snip them off. This prevents the plant from expending energy on blooming before it's fully established.
If you notice the buds have already grown to golf ball size, it means most of the plant’s energy has already gone into flower development. In this case, you can allow the blooms to open, especially if you’re eager to see them.
For vigorous first-year plants with multiple stems, you can selectively cut a few short-stemmed blooms while leaving most of the foliage intact. This helps preserve the plant's ability to photosynthesize and continue building root strength.
Disbudding is a one-time task in the first year, but it has long-term benefits: healthier roots, fuller foliage, and better blooming in the seasons ahead.
Read related post: How to Grow Lilies Successfully in Your Garden
5. Install Peony Supports Before They Grow Tall
Peony stems are strong, but once the large blooms start to form, they become top-heavy and prone to drooping or breaking – especially during wind or rain.
To prevent this, install supports early in spring, just as the red shoots start emerging from the soil.
Use metal hoops, grow-through rings, or circular cages designed specifically for peonies or other tall perennials. Place the support around and slightly above the plant’s crown, with the legs firmly anchored into the soil.
As the plant grows, the stems will naturally fill in and grow up through the grid, staying upright and supported without needing to be tied.
Installing supports early is much easier and more effective than trying to corral tall, floppy stems later in the season.
Once peonies have grown to their full height, adding supports can damage foliage or bend stems, which weakens the plant and spoils the shape of the blooms.
6. Weed Carefully and Water During Dry Periods
Peony roots grow close to the surface, so weeding around them must be done with care. Avoid using tools that dig deeply or disturb the soil too aggressively.
Instead, hand-pull weeds or use a hoe gently at a depth of no more than 1 to 2 inches to avoid damaging the root system.
Keeping the area weed-free helps prevent competition for nutrients and moisture, and also reduces the risk of disease by improving airflow around the plant base.
During dry spells, peonies benefit from deep, infrequent watering.
Water when the top few inches of soil feel dry, and be sure to soak the soil to a depth of at least 12 inches. This encourages the roots to grow deeper, making the plant more drought-tolerant over time.
Always water at the base of the plant, not from overhead. Wet foliage can lead to fungal issues, especially in humid conditions.
If rainfall is consistent, additional watering may not be necessary, but monitor soil moisture closely during critical periods – especially when buds are forming, as drought stress can cause them to stall or fail to open.
7. Deadhead Peonies After Flowering
Once peony blooms begin to wilt and fade, it’s important to deadhead them promptly. This means cutting off the spent flowers before they begin forming seed pods.
Allowing the plant to develop seeds drains stored energy from the roots, which can reduce the number and quality of flowers the following spring.
To deadhead peonies:
- Wait until the petals are wilting or have mostly dropped.
- Follow the flower stem down to the first set of full, healthy leaves.
- Use clean, sharp pruners to make a diagonal cut just above those leaves.
Avoid cutting too much foliage – peony leaves are needed to continue photosynthesis through the rest of the growing season.
Keeping most of the foliage intact ensures that the plant can store energy in its roots for next year’s bloom cycle.
Deadheading is not just about appearance; it’s a simple but essential task that helps maintain long-term flower production.
8. Fertilize Peony Plants After Bloom Time
If your soil is rich and was well-amended before planting, peonies may not need regular fertilization.
However, if you notice weak growth, pale leaves, or sparse blooms after a few years, a light feeding after blooming can help restore vigor.
Here’s how to fertilize safely:
- Wait until after the blooms have faded and you’ve completed deadheading.
- Use a mix of well-rotted compost and a balanced fertilizer (such as 10-10-10 or 5-10-5). You can also try a slow-release fertilizer for steady nutrition throughout the season.
- Sprinkle the fertilizer around the drip line of the plant – this is the area just outside the outermost leaves.
- Keep the fertilizer at least 6 inches away from the crown to avoid burning the stems or causing rot.
Water the area thoroughly after applying fertilizer to help it soak into the soil. Avoid over-fertilizing – too much nitrogen can encourage leafy growth at the expense of flowers.
This once-a-year feeding, done correctly, helps keep mature peonies blooming reliably without causing harm to the sensitive crown.
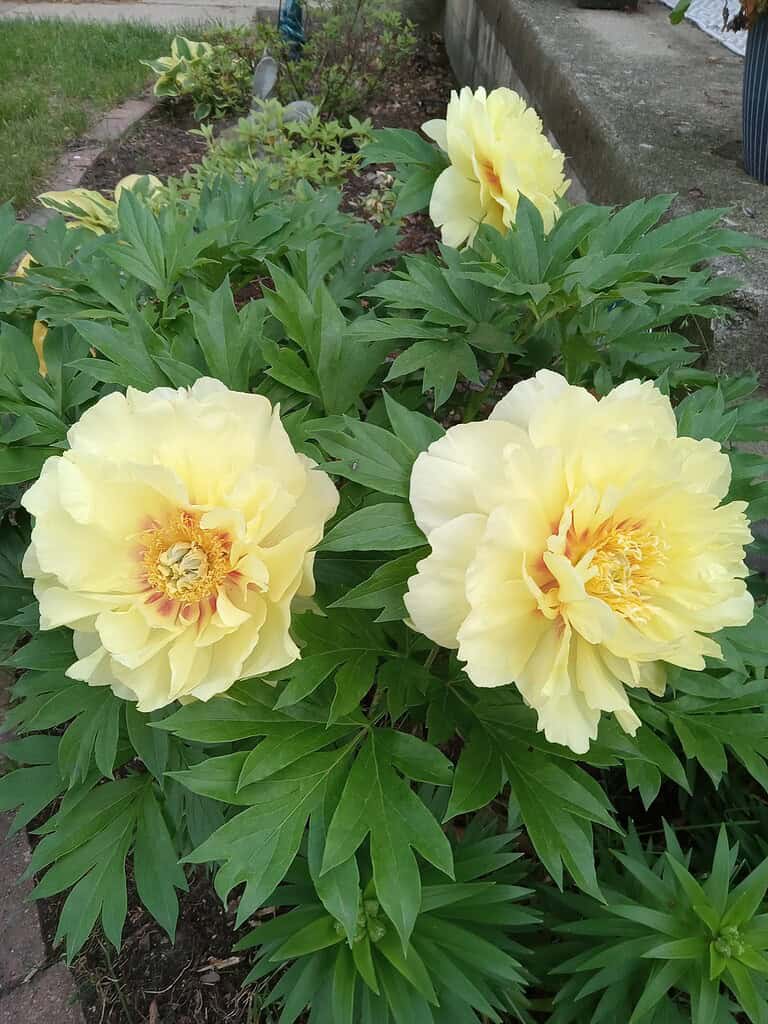
Read related post: 15 Show-Stopping Yellow Flowers for a Sunny Outdoor Space
9. Cut Back Peony Foliage After Frost
As the growing season ends, peony foliage will begin to yellow and die back naturally.
Once your area has experienced a hard frost – when temperatures drop low enough to kill the top growth – it’s time to remove all remaining stems and leaves.
Cutting back peony foliage is an important step in disease prevention. Dead leaves and stems left in place over winter can harbor fungal spores and pests that may affect next year’s growth.
To do it correctly:
- Wait until a hard frost has blackened or fully collapsed the foliage.
- Use clean, sharp pruning shears to cut all stems down to ground level – just above the soil line.
- Do not compost the cut foliage. Instead, bag and dispose of it to avoid spreading disease.
- If you live in a cold climate, you can apply a light layer of mulch over the crown once the ground has frozen. This helps protect the roots during winter, especially in the first year after planting.
Come early spring, remove the mulch promptly as soon as new red shoots begin to emerge.
Cutting back at the right time – and cleaning up properly – helps your peonies start the next season free of disease and ready for another cycle of growth and blooming.
Seasonal Peony Care and Maintenance Tips
Peonies don’t require constant attention, but a few seasonal tasks will keep them thriving for decades.
These care routines help prevent disease, strengthen root systems, and ensure reliable blooms year after year.
How to Prepare Peonies for Winter
Once the foliage has been cut back after frost, peonies enter dormancy. In colder climates (zones 3–6), you can give them extra protection by applying a light mulch layer over the crown area.
- Wait until the ground has fully frozen before mulching to prevent trapping warmth and encouraging rot.
- Use dry materials like straw, shredded leaves, or pine needles, applying a layer about 2–3 inches thick.
- Avoid heavy or wet mulch directly on the crown, especially for established plants.
This winter mulch is most useful for young or newly transplanted peonies. Mature plants are typically hardy enough to withstand deep freezes without extra insulation.
What to Do in Spring for Healthy Peony Growth
As soon as the weather begins to warm and the first red shoots emerge, it’s time to get your peonies ready for the growing season.
- Remove any winter mulch early to prevent moisture buildup around the crown.
- Check for emerging shoots and install supports before they get tall.
- Inspect the soil – if it feels compacted, gently loosen the surface with shallow cultivation (no deeper than 1–2 inches).
- Do not fertilize at this stage. If you plan to feed your peonies, wait until after they bloom.
Spring is also a good time to monitor for early signs of disease or insect activity. Peonies are generally low-maintenance, but catching problems early can prevent larger issues later in the season.
Read related post: How to Plant, Water, and Care for Camellias for Long-Term Growth
How to Transplant Peonies Without Stressing the Plant
Peonies don’t like to be moved often, but if one is struggling, overcrowded, or needs to be relocated, transplanting can be done successfully with the right timing and care.
The key is to reduce stress on the plant by preparing well and working gently.
Transplant Timing: Wait for Fall
The best time to transplant peonies is in the fall, typically from late September to early November, depending on your climate.
Wait until the plant has gone dormant and the foliage has died back naturally after a hard frost. This ensures the plant is not actively growing and gives it time to settle before winter.
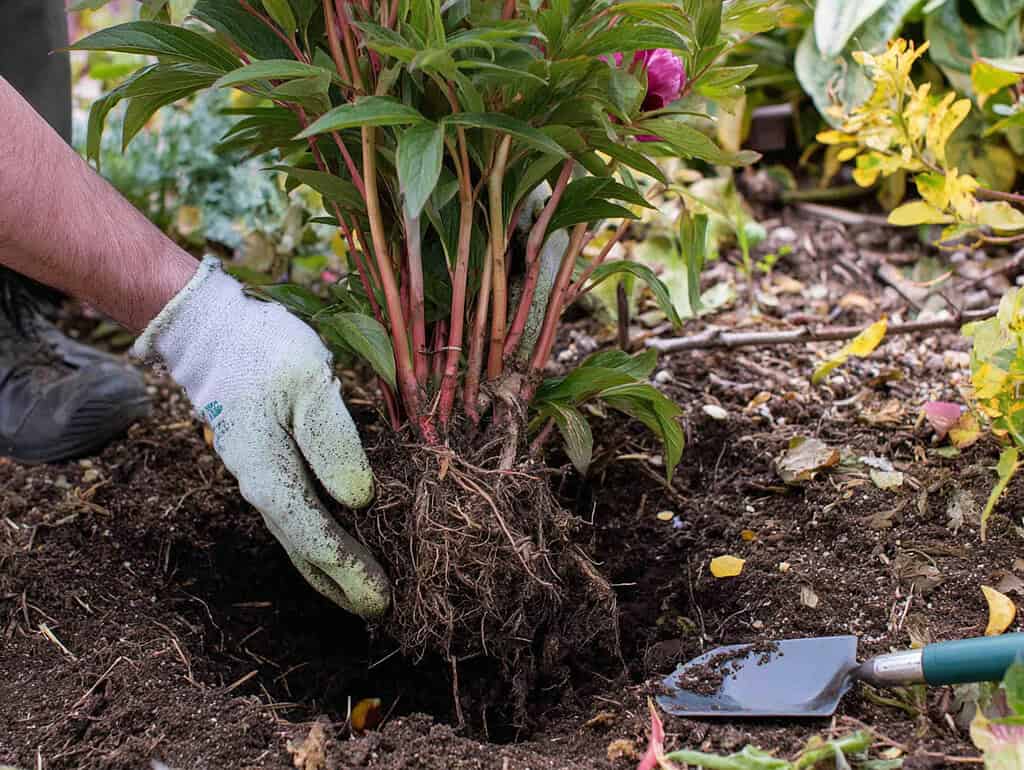
Step-by-Step: How to Transplant Peonies Properly
- Water Ahead of Time
One or two days before transplanting, water the plant deeply with about 1 inch of water. This helps hydrate the roots and makes digging easier. - Cut Back the Foliage
After frost, cut stems down to ground level. This makes the plant easier to handle and reduces moisture loss. - Dig Carefully Around the Root Ball
Using a spade or garden fork, dig in a wide circle around the plant (at least 12 inches out from the crown) to avoid damaging large roots. Dig deep enough to lift the whole root mass. - Lift and Handle Gently
Use both hands to lift the entire plant from underneath. Avoid shaking or pulling, which can tear the roots. - Replant Immediately at the Right Depth
Move the peony to its new location as soon as possible. Plant it so that the eyes (buds) sit 1 to 2 inches below the soil surface, just like with a new planting. Avoid planting too deep. - Water Thoroughly After Planting
Once in place, water deeply to help settle the soil around the roots. Avoid overhead watering and keep the area evenly moist, but not soaked. - Mark the Location
After planting, place a label or marker to identify the transplant site. In spring, shoots may appear more slowly than usual, so it's helpful to know where the plant is.
What to Expect After Transplanting
It’s normal for transplanted peonies to skip blooming the following spring while they reestablish roots. With proper care, they should return to normal flowering within one or two seasons.
Read related post: How to Grow Hibiscus Flowers Easily at Home
Common Peony Growing Mistakes to Avoid

Peonies are hardy and dependable, but certain missteps can prevent them from blooming or even cause long-term setbacks.
Avoiding these common mistakes will save you time and frustration – and help your plants perform their best year after year.
1. Planting Too Deep. This is one of the most frequent reasons peonies fail to bloom. The buds (or “eyes”) on a bare-root peony should be planted no more than 1 to 2 inches below the soil surface. Anything deeper can delay or completely stop flowering, even if the plant grows foliage normally.
2. Letting Bare Roots Dry Out. Bare-root peonies should be planted as soon as possible after you receive them. If they sit out for too long, the roots can dry out, reducing the plant's ability to establish itself in the first year.
3. Skipping Disbudding During the First Year. Allowing first-year plants to bloom can slow down root development. Removing the buds early helps the plant channel its energy into strong root and foliage growth, leading to better performance in the following seasons.
4. Fertilizing Too Close to the Crown. Fertilizer applied too close to the crown can burn new shoots or cause rot. Always spread fertilizer at least 6 inches away from the base of the plant and water it in well.
5. Overwatering or Poor Drainage. Peonies do not like soggy soil. Overwatering or planting in poorly drained locations can lead to root rot and long-term decline. Always check that the planting site drains well after rainfall.
6. Neglecting Fall Cleanup. Leaving dead foliage and stems in place through winter creates an ideal environment for fungal spores and disease. Cut back and remove all plant material after a hard frost to keep the plant healthy.
7. Forgetting to Stake in Time. If you wait until stems are tall to install supports, you risk damaging the plant. Early staking in spring prevents flopping, bending, and breakage – especially after heavy rain or wind.
Peony Growth Timeline: Year-by-Year Expectations
Understanding how peonies develop over time helps set realistic expectations. While they may start slowly, they reward patience with reliable blooms for decades.
Year 1: Root Establishment
In the first year, most of the plant’s energy is directed below the surface. The focus is on developing a strong root system.
You may see a few stems and leaves, and possibly a small bud or two. It’s best to remove any buds that form to encourage stronger root growth.
Above-ground growth will be limited, but this foundation is essential for future performance.
Year 2: Foliage Growth and Light Blooming
By the second year, peonies usually produce more stems and fuller foliage. Some plants may begin to bloom lightly, depending on conditions and care.
While flowering may still be minimal, the plant is steadily gaining strength. Continue with routine care – proper watering, shallow weeding, and light fertilizing after bloom if needed.
Year 3 and Beyond: Full Bloom Production
In the third year, a healthy, well-established peony should begin blooming more reliably. Expect multiple stems and large, fully formed flowers.
From this stage on, peonies typically bloom every spring with minimal care, provided they’re not overcrowded or struggling with poor drainage or disease.
With the right conditions, peonies can bloom beautifully for 50 years or more without needing to be divided.
Set Your Peonies Up for Years of Reliable Blooms
Peonies may take time to establish, but once they do, they become one of the most rewarding and low-maintenance plants in the garden.
Everything from planting depth and soil preparation to seasonal care and fall cleanup plays a role in helping them thrive year after year.
Start with the right setup – shallow planting, good drainage, and compost-rich soil – and stay consistent with early-year care. Avoiding common mistakes like deep planting and late disbudding can save you years of poor performance.
And once your peonies are settled, they’ll reward you with big, fragrant blooms every spring with very little effort.
Have you tried growing peonies in your garden?
Comment below with your experience, questions, or tips – we’d love to hear how it’s going for you!
FAQs
What month should I plant bare-root peonies?
The best time to plant bare-root peonies is in the fall, typically from late September through October, depending on your zone. This allows the roots to settle in before winter dormancy, setting the plant up for spring growth.
Can I move a peony while it's actively growing?
It’s not recommended. Peonies should be transplanted only in the fall, after the foliage has died back. Moving them during the growing season can cause transplant shock and stunt future growth.
Do peonies grow well in raised beds?
Yes, peonies can thrive in raised beds as long as the soil drains well and the crown is planted at the correct depth. Raised beds can also improve drainage in areas with heavy clay soil.
Should I cover peonies during a late spring frost?
If tender shoots have already emerged, a light cover like a sheet or frost cloth can be used temporarily during a late spring frost. Remove the cover in the morning to prevent heat buildup.
How do I know if my peony is getting too much water?
Signs of overwatering include yellowing leaves, drooping stems, and soggy soil. Peonies prefer to dry out slightly between waterings. Ensure soil drains well and water deeply but infrequently.