If you’ve ever had soggy pickled green beans, you know how disappointing that can be.
This recipe follows USDA/NCHFP-tested methods to ensure both safety and crunch.
No fancy tricks required – just a clean vinegar brine, fresh beans, and proper canning. The result: crunchy, tangy, dill-packed green beans that last on the pantry shelf.
If you’re looking to preserve green beans a different way, here’s how to can green beans for long-term storage.
What Are Pickled Green Beans?
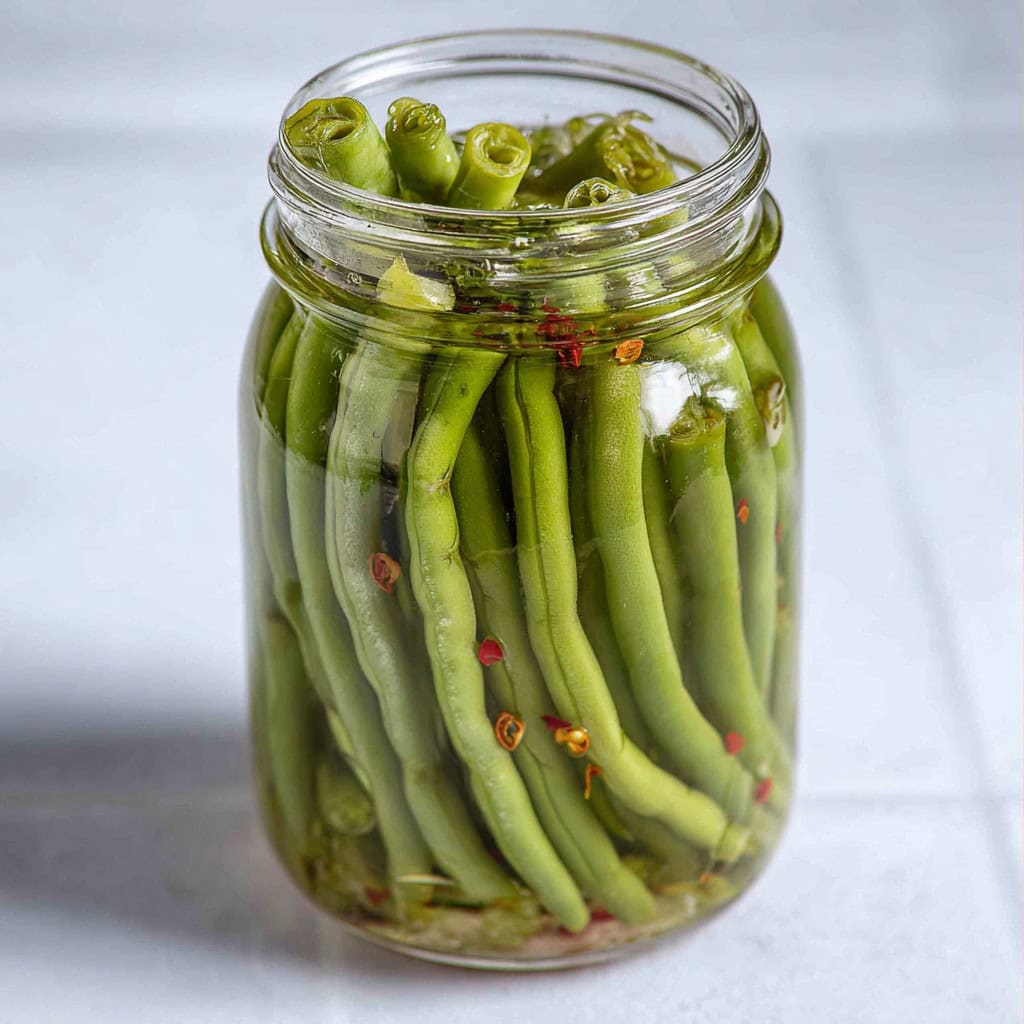
Pickled green beans are simply fresh beans preserved in a vinegar brine.
The vinegar provides the acidity needed for safe water-bath canning. The brine usually includes vinegar, water, salt, and seasonings like garlic, dill, or pepper flakes.
When properly processed, pickled beans keep their crisp texture and tangy bite, ready for snacking, serving, or garnishing drinks.
Love Pickling? This is part of my How to Pickle Everything series! Check out more recipes:
- Quick Pickled Radishes Recipe
- Easy Pickled Beets Recipe
- Homemade Pickled Okra Recipe
- How to Make Pickled Cabbage (Only 20 Minutes!)
- How to Make Pickled Jalapeños at Home
- How to Make Pickled Cucumbers at Home
- Pickled Garlic Recipe
- Easy Pickled Banana Peppers Recipe
- Quick Pickled Carrots Recipe
- How to Make Pickled Asparagus at Home
- How to Make Pickled Ginger (Gari) at Home
- How to Make Pickled Cauliflower
- Homemade Pickled Eggs with Beets
- Easy Pickled Cherry Tomatoes (No Canning Needed)
What You’ll Need to Make Pickled Green Beans
Ingredients
- 2 ½ pounds fresh green beans (young, tender, freshly picked)
- 2 ½ cups distilled white vinegar (5% acidity)
- 2 cups water
- ¼ cup pickling salt (or kosher salt with no additives)
- 6 large sprigs fresh dill
- 6 garlic cloves, peeled (1 per jar)
- ¾ teaspoon red pepper flakes (optional – about ⅛ tsp per jar)
Supplies
- 6 half-pint canning jars with lids and rings
- Boiling-water canner or large stockpot with a rack
- Medium or large saucepan (for brine)
- Jar lifter or tongs
- Ladle and funnel
- Clean towel
7 Easy Steps for Perfectly Crisp Pickled Green Beans
If you’re new to water-bath canning, don’t worry – this recipe keeps things approachable while following USDA/NCHFP safety guidelines.
Each step is explained in detail so you’ll know exactly what to do for crunchy, tangy beans that last up to a year on your pantry shelf.
1. Prepare Jars and Equipment
Wash jars, lids, and bands thoroughly in hot, soapy water, then rinse well. Because this recipe uses a 10-minute processing time, you don’t need to pre-sterilize jars.
Keep jars hot until ready to use by setting them in simmering water in your canner or in a warm oven (around 200°F). Hot jars prevent breakage when filled with boiling brine.
2. Make the Brine
In a medium saucepan, combine the vinegar, water, and pickling salt. If you’d like, you can simmer garlic in the brine for a mild flavor or add garlic directly to each jar later for a stronger taste.
Bring the brine to a rolling boil, stirring to fully dissolve the salt. Keep the brine hot while you prepare the beans – it needs to stay steaming hot when poured into jars.
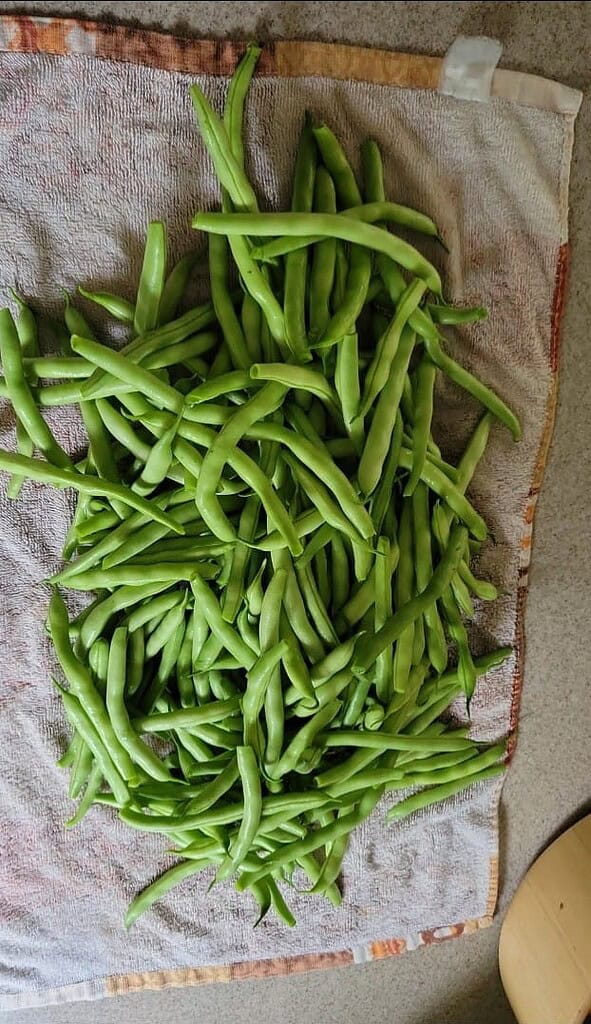
3. Prepare the Beans

Wash green beans under cool running water. Trim off the stem ends and cut each bean so it is about ¼ inch shorter than the jar height – this ensures they fit neatly under the lid.
If you want brighter color and slightly firmer texture, blanch the beans in boiling water for 1 minute, then drain. This step is optional but recommended if beans are older or tougher.
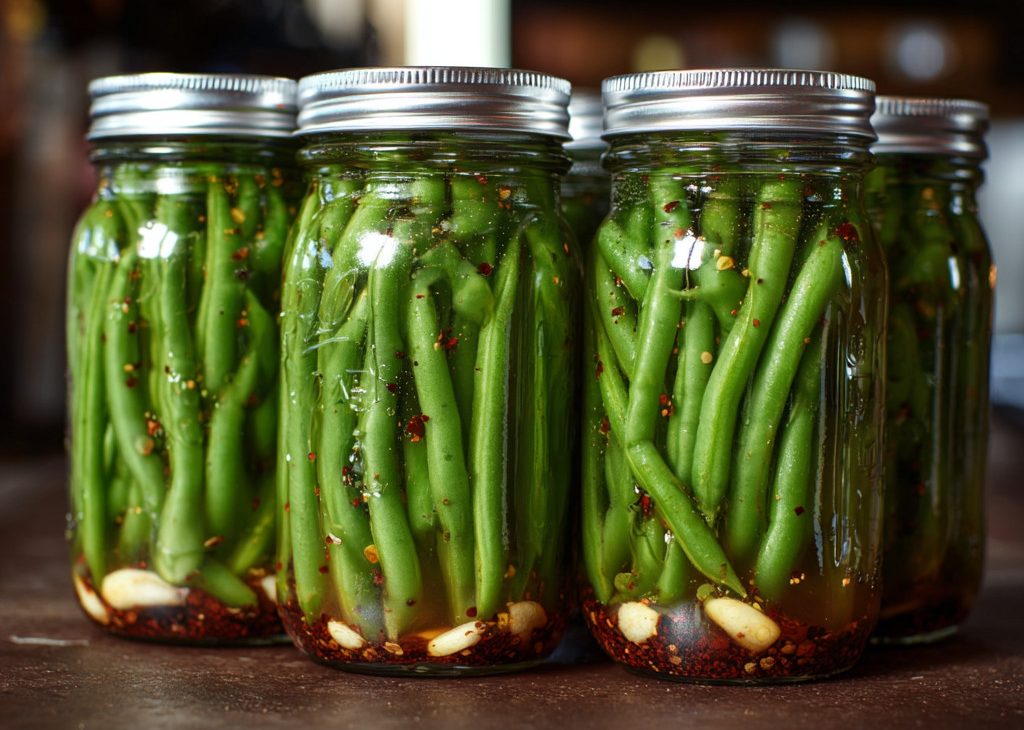
4. Pack the Jars
Working with one jar at a time, place 1 sprig of fresh dill, 1 peeled garlic clove (if not in brine), and ⅛ teaspoon of red pepper flakes (optional) in the bottom.
Pack the beans upright, snugly but without forcing them in. Standing them vertically helps them keep shape and look attractive when finished.
5. Add the Brine
Carefully ladle the hot brine into each jar, covering the beans completely. Leave ¼ inch of headspace at the top – this empty space is essential for proper sealing.
Slide a clean plastic utensil (like a chopstick or spatula) down the inside of the jar to remove trapped air bubbles.
Wipe rims with a damp towel to ensure a clean seal, then place lids and screw bands on until fingertip-tight.
6. Process in Boiling Water
Place jars on a rack inside your boiling-water canner. The jars must be covered with at least 1 inch of water. Return the canner to a rolling boil and start timing once it’s boiling hard.
- 10 minutes at 0–1,000 ft
- 15 minutes at 1,001–6,000 ft
- 20 minutes above 6,000 ft
Maintain a steady, vigorous boil the entire time. Do not reduce to a simmer, as consistent high heat is necessary for food safety.
7. Cool and Check Seals
After processing, turn off the heat and let jars rest in the canner for 5 minutes. Carefully remove with a jar lifter and set on a towel in a draft-free area.
Allow jars to cool undisturbed for 12–24 hours. Once cooled, check seals by pressing the center of each lid – sealed lids stay concave and firm.
Remove bands, wipe jars clean, and label with date before storing.
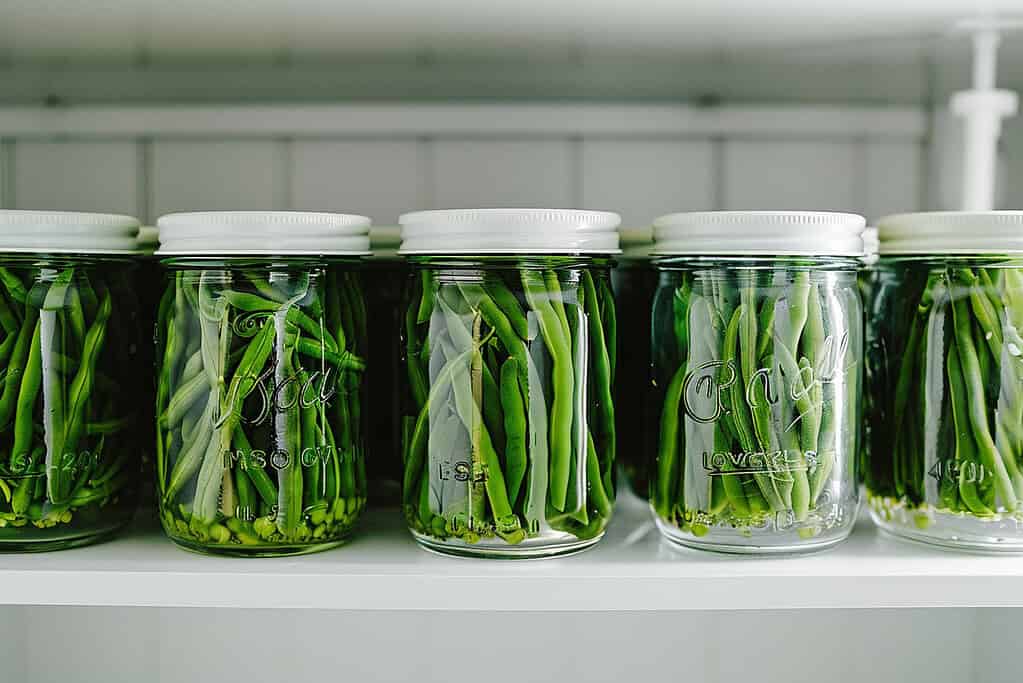
How Long Do Pickled Green Beans Last?
When properly canned and sealed, pickled green beans are safe to store for up to 12 months in a cool, dark pantry.
The vinegar brine, combined with water-bath processing, creates a shelf-stable product that keeps its flavor and crunch for months.
Here’s what you need to know:
Storing Sealed Jars
- Place sealed jars in a pantry, cupboard, or basement away from direct sunlight and high heat.
- Maintain a consistent temperature below 85°F (ideally 50–70°F).
- Beans may soften slightly over time, but they remain safe as long as the seal is intact.
For more on proper storage techniques, check out our best canned food storage tips to ensure your pickled green beans stay fresh and flavorful!
After Opening a Jar
- Once opened, always refrigerate the jar.
- Use clean utensils to remove beans to avoid contamination.
- For best quality, eat within 2–4 weeks, keeping beans fully submerged in the brine.
If a Jar Didn’t Seal
- Any unsealed jars should go straight into the refrigerator.
- Eat within 1 week, since they are not shelf-stable.
How to Tell if Pickled Beans Have Spoiled
Always inspect jars before eating:
- A lid that bulges or pops up when pressed is a sign of spoilage.
- Cloudy brine, slimy beans, or mold on the surface indicate unsafe food.
- A sour, off, or yeasty smell means you should discard the jar immediately.
When in doubt, throw it out. Never taste food that shows signs of spoilage.
Delicious Ways to Enjoy Pickled Green Beans Every Day
Pickled green beans are more than just a way to preserve your garden harvest – they’re a versatile, flavor-packed ingredient that can brighten up meals, snacks, and even drinks.
Here are some of the best ways to enjoy them:
Straight from the Jar
Tangy, crisp, and full of dill flavor, pickled green beans make a satisfying snack all on their own. Keep a jar chilled in the fridge and grab a handful when you’re craving something salty.
On a Charcuterie or Snack Board
Add color and crunch to any meat and cheese board. Pickled green beans pair beautifully with cured meats, sharp cheeses, olives, and crackers, giving your spread a homemade touch.
As a Cocktail Garnish
Pickled beans are a classic garnish for Bloody Marys. Their crisp texture and briny bite stand up well in cocktails, making them a fun alternative to celery sticks or pickles.
Chopped Into Salads
Dice pickled beans into potato salad, pasta salad, or even leafy green salads for extra tang and crunch. They add brightness that balances heavier, creamy dressings.
A Zesty Side Dish
Serve pickled green beans alongside grilled meats, sandwiches, or picnic plates. They cut through rich or fatty foods and work like a homemade pickle to refresh the palate.
Creative Add-Ins
- Wraps & Sandwiches: Slice and tuck them into wraps for a crunchy layer.
- Tuna or Chicken Salad: Stir in chopped beans for a vinegar kick.
- Burgers or Sliders: Use whole beans as a crisp topping.
With so many uses, it’s worth keeping a few jars on hand year-round. Whether you enjoy them as a quick snack or as part of a meal, pickled green beans bring brightness and flavor wherever they go.
8 Common Mistakes to Avoid When Pickling Green Beans

Even though this recipe is simple, a few common errors can cause soft beans, broken seals, or even unsafe jars.
Here’s what to watch for and how to prevent it:
1. Using Overripe or Limp Beans
Pickling works best with young, tender, and freshly picked beans.
If beans are rubbery, wrinkled, or past their prime before canning, they’ll only get softer in the jar. Always start with the best-quality produce.
2. Skipping Proper Jar Preparation
While you don’t need to sterilize jars when processing 10 minutes or longer, you do need to wash jars, lids, and bands thoroughly in hot soapy water.
Using jars with cracks, chips, or rusted lids can lead to sealing failures and spoilage.
3. Incorrect Headspace
Leaving too much or too little space at the top of the jar can affect sealing. Stick with ¼ inch headspace – enough to create a strong vacuum seal and prevent brine overflow during processing.
4. Forgetting to Remove Air Bubbles
Trapped air bubbles can interfere with sealing and leave beans partially uncovered by brine.
Always run a clean utensil (like a plastic spatula or chopstick) down the inside of the jar to release bubbles before sealing.
5. Not Maintaining a Rolling Boil
Your water bath must stay at a steady, rolling boil for the full processing time. Reducing heat to a simmer isn’t safe, as it may not destroy harmful microorganisms or allow jars to seal properly.
6. Ignoring Altitude Adjustments
Processing times vary depending on altitude. If you live above 1,000 feet, add extra minutes to ensure safe preservation. Always follow the tested adjustments.
7. Rushing the Cooling and Sealing Stage
It’s tempting to move or tilt jars right after processing, but jars need to sit undisturbed for 12–24 hours. Moving them too soon can break seals.
Always let them cool on a towel away from drafts.
8. Mislabeling or Forgetting Dates
Homemade pickles are best within a year. Always label jars with the date you processed them, so you know when it’s time to use them up.
Make a Batch of Pickled Green Beans and Enjoy Them All Year
Pickling green beans is one of the easiest (and most rewarding) ways to preserve your garden harvest.
With just a handful of pantry ingredients, a simple brine, and safe water-bath canning, you can stock your shelves with crisp, tangy beans that last for months.
So gather your fresh green beans, fire up your canner, and give this recipe a try. Once you’ve tasted your homemade pickled beans, you’ll wonder why you ever bought them from the store.
Have you tried making pickled green beans before? Or do you have a favorite way to serve them? Share your tips and experiences in the comments below – I’d love to hear from you!
Frequently Asked Questions
Can I use apple cider vinegar instead of white vinegar?
Yes, as long as the apple cider vinegar has 5% acidity. This acidity level is critical for food safety. Do not use homemade vinegar or any product below 5% acidity, as it may not prevent spoilage.
Do I need to sterilize my jars first?
No – because this recipe calls for 10 minutes or more of water-bath processing, pre-sterilizing jars isn’t necessary. Just wash jars, lids, and rings in hot soapy water and rinse well.
What if a jar doesn’t seal properly?
If a lid doesn’t seal, refrigerate that jar immediately and eat within 1 week. Do not store it at room temperature, as it won’t be shelf-stable.
Why aren’t my beans crisp?
Soft beans usually happen when using overripe produce or skipping the blanching option. Start with fresh, firm beans and, if desired, blanch them for 1 minute before canning to help preserve texture.
Can I reduce the salt in this recipe?
No, not if you want to safely can the beans. The tested brine ratio balances vinegar, water, and salt. Cutting back could affect safety and flavor. If you want lower-sodium pickles, look for a tested “low-salt” recipe instead of modifying this one.