If you're stocking up on canned food, whether it's for emergencies, cutting back on store runs, or just keeping meals easy and cheap, you're not alone.
A lot of folks are doing the same – but the trick isn't just buying cans and stacking them in a closet. You’ve got to store them right, use them smart, and know what lasts (and what doesn’t).
If you're also looking to round out your pantry, dehydrated foods for long-term storage can be a great addition alongside your canned goods.
In this article, I'll lay out the best tips for making sure your canned food stays safe, lasts as long as it should, and doesn’t go to waste.
1. Use the “Shopping from Your Pantry” Approach

Instead of letting your canned food sit until there's an emergency, start using it like a regular part of your kitchen. Think of your pantry like a little store you already paid for.
Pull from it when you plan meals and replace what you use. This way, nothing goes to waste, and you’re always stocked up without having to run out and buy a bunch at once.
Many people aim to build a 6-month (or longer) supply as a practical way to stay prepared and reduce last-minute store runs.
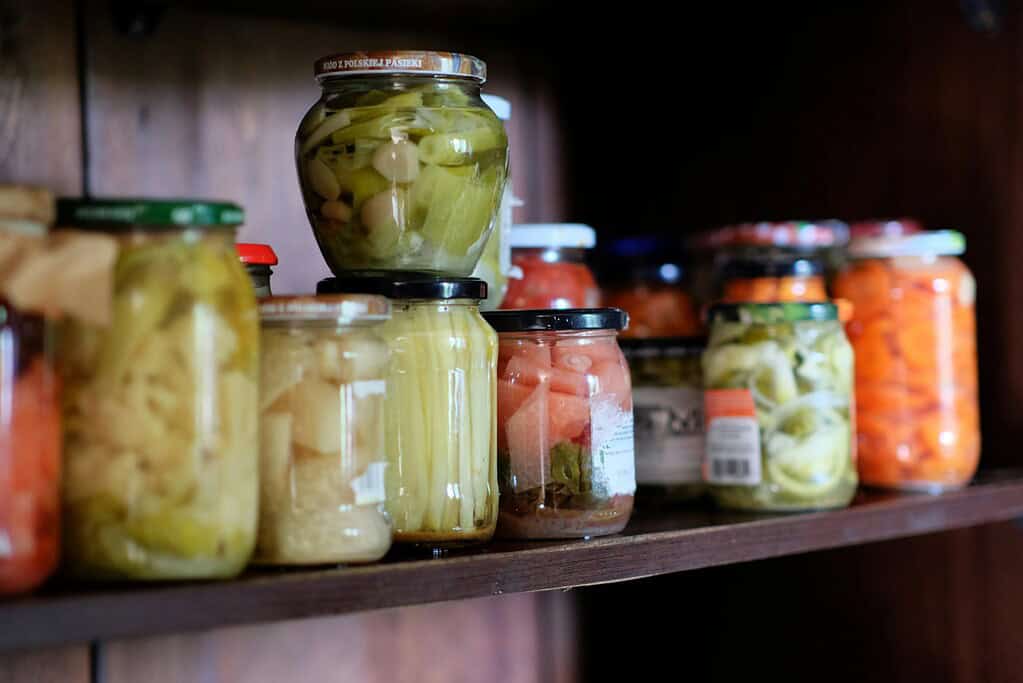
2. Store Cans in a Cool, Consistent Temperature
Heat is one of the quickest ways to ruin canned food, even if the can still looks okay. Try to keep your storage space somewhere between 50°F and 70°F (10°C to 21°C).
A basement or lower cabinet in a temperature-controlled part of the house usually works best. And if you're already storing jars alongside cans, consider rotating in a few mason jar meals – they’re a handy way to make use of shelf-stable ingredients while keeping your stash fresh.
Definitely avoid anywhere that gets over 85°F (29.4°C), like garages or sheds in the summer – canned food can start to go downhill fast in that kind of heat.
3. Avoid Storing in Direct Sunlight or Near Heat Sources
Direct sunlight, hot water pipes, ovens, and even warm closets near furnaces can slowly cook your food right inside the can. It might still be sealed, but the quality breaks down a lot faster.
Keep your storage space dark and away from anything that gives off heat. Think places like under-the-stairs closets, basement shelves, or inside cabinets that stay nice and cool.
4. Protect Cans from Dampness
Even a little bit of moisture can cause metal lids and cans to rust. When that happens, it’s not just ugly – it can break seals and let in bacteria, which makes the food unsafe to eat.
Keep your storage area dry.
Avoid basements that get humid or leak, and don’t store cans right on concrete floors. Use shelves or wooden pallets to keep them off the ground and away from damp corners.
5. Keep a Strict First-In, First-Out (FIFO) Rotation System
This is simple but important: use the oldest cans first. When you bring in new canned goods, put them in the back, and pull the older ones to the front.
That way, you’re always using what you’ve had the longest, and nothing gets pushed to the back and forgotten until it’s expired.
A sharpie and a little time spent marking the tops with the month and year helps a lot.
6. Understand High-Acid Food Shelf Life Limits
Foods like tomatoes, citrus fruits, and pickles don’t last as long because their high acid content wears away at the can’s lining over time.
You’ll get the best quality if you use these types of canned foods within 12 to 18 months. They might not be spoiled after that, but the texture and taste can go downhill – and the risk of the can corroding goes up.
If you’re working with fresh produce instead, these fruit storage ideas can help keep things fresh without relying on cans. Stick to lower-acid options for the longer haul.
7. Store Low-Acid Foods for Longer Durations

Canned foods like corn, green beans, carrots, soups, and stews don’t break down as fast because they’re lower in acid.
When stored right – cool, dry, and dark – these can last three to five years without a problem. That makes them a solid choice for building a longer-term pantry.
Just keep an eye on any cans with dents or rust, since damage can cut the shelf life short. Even if they last longer, it’s still best to rotate them regularly and not just let them sit untouched.
8. Be Selective with Canned Nuts
Canned nuts are tricky for long-term storage. The oils in nuts can turn rancid fast, especially in warm spots. Most only stay good for four to six months, and even less if stored somewhere hot.
If you want to keep them longer, store them in airtight containers in the fridge or freezer.
They’re fine to keep on hand in small amounts, but don’t treat them like your other canned goods when planning long-term storage.
9. Monitor and Label Expiry Dates
It’s easy to lose track of what you have if you’re not labeling things clearly. Mark each can with the month and year of purchase using a marker, either on the lid or label.
That makes it simple to spot what needs to be used up soon. Even though many canned goods last beyond their printed date, quality can go down over time.
Staying organized helps you avoid waste and makes rotation a lot less of a headache.
10. Avoid Freezing Cans or Jars
Freezing doesn’t usually make canned food unsafe, but it can mess with the texture and possibly break the seal.
If a can or jar freezes and then thaws, it might bulge, leak, or let in air – and that’s when bacteria can get in. Try not to store food where the temperature drops below freezing, like in garages or outdoor sheds during winter.
If you have no choice, wrap the jars in newspaper, put them in boxes, and cover with more layers for insulation. It's not perfect, but it can help prevent freezing damage.
11. Test Home-Canned Jar Seals Thoroughly
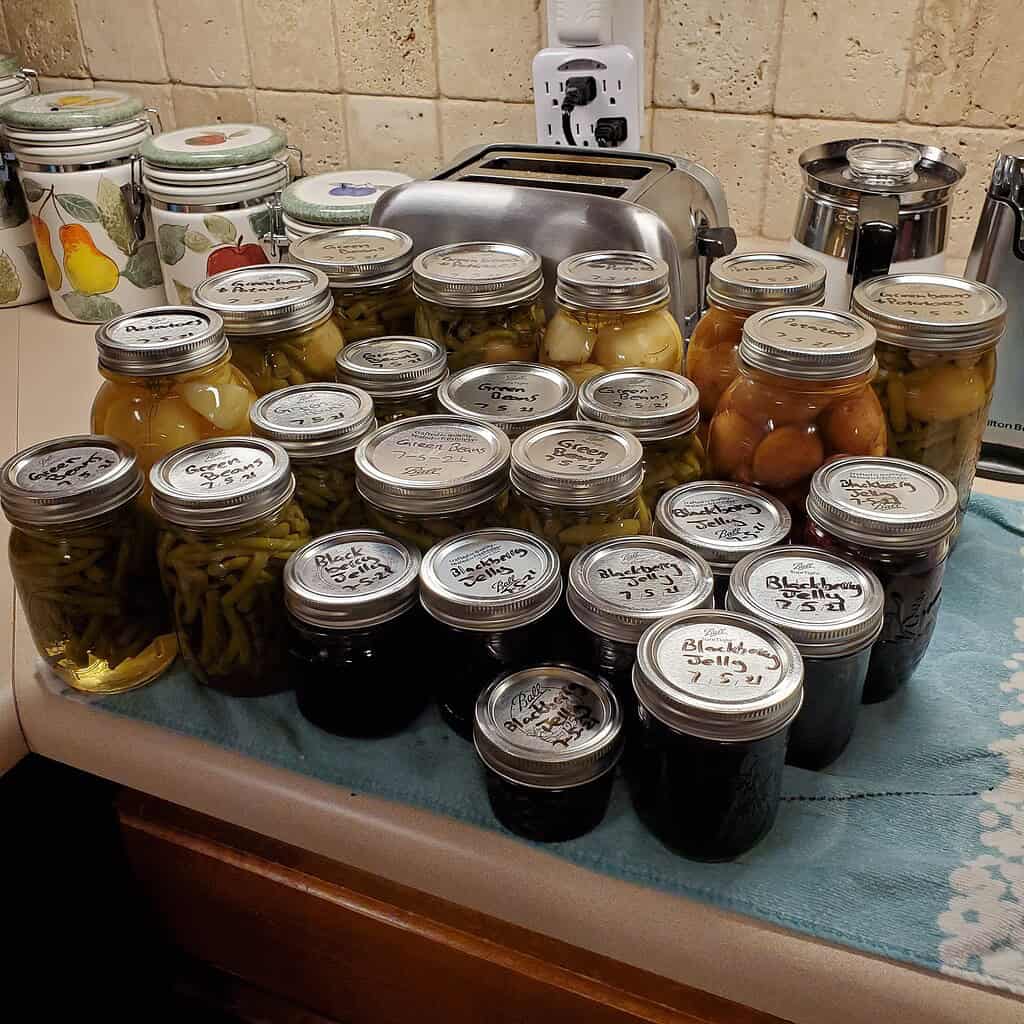
Once jars cool for 12 to 24 hours after canning, it’s important to check the seal. Press the middle of the lid – if it pops up and down, it’s not sealed.
Tap it with a spoon too; a clear ringing sound usually means a good seal, while a dull thud could mean trouble.
Hold the jar at eye level – a properly sealed lid will curve downward slightly in the middle. These simple checks help you catch problems before spoiled food ends up in your pantry.
12. Remove and Clean Ring Bands After Canning
After a jar is sealed, the metal ring isn’t needed anymore – in fact, keeping it on can trap moisture and cause rust. Remove the ring once the jar has cooled and you've confirmed a good seal.
If you're new to canning, especially water bath canning, this is one of those easy-to-miss steps that really pays off over time.
Wash the jar and lid thoroughly to remove any food residue, even if you don’t see any.
Clean and dry the ring band before storing it for reuse. This small step helps keep mold away and makes it easier to spot failed seals later on.
13. Store Home-Canned Jars Without the Ring Bands
Once your home-canned jars are sealed and cleaned, store them without the metal ring bands.
Leaving the rings on can hide a broken seal and trap moisture, which increases the risk of mold or rust. Without the ring, it’s easier to notice if the lid has loosened or popped up over time.
A failed seal means the food is no longer safe to eat, even if it looks okay. Keeping jars band-free during storage is just a safer, cleaner way to go.
14. Stack Jars Carefully – If at All

Home-canned jars can be stacked, but you’ve got to be cautious about it. Too much weight on top of a jar can weaken or break the vacuum seal over time.
If you need to stack, don’t go more than two layers high, and place a sturdy material like cardboard or wood between layers to spread out the pressure.
Avoid stacking directly on lids, especially with uneven weight. When in doubt, use shelves or boxes that hold jars in a single layer.
15. Refrigerate or Freeze Unsealed Jars Immediately
If a home-canned jar didn’t seal properly, you’ve got a short window to still use it safely.
As long as you catch it within 24 hours, you can either refrigerate it and eat it within a week or freeze it for up to a year. Just remember to leave extra headspace (about an inch) before freezing to avoid breakage.
Don’t store unsealed jars in the pantry – they’re no different than any opened food. Acting quickly keeps food from going to waste and keeps your family safe.
16. Reprocess Jars Only If Guidelines Are Followed
Reprocessing unsealed home-canned jars is possible, but only under strict conditions.
You have to catch the problem within 24 hours, and the original batch must have been done using a research-tested, up-to-date recipe.
If that's the case, you’ll need to empty the jar, bring the contents back to a boil, put them into a clean jar with a new lid, and process it again using the correct method. It’s not ideal – the food quality usually drops after the second round. But if done properly, it’s still safe.
17. Know When Not to Reprocess
If you didn’t use a tested recipe the first time around, don’t try to save the batch – even if some jars sealed. Those jars might look fine, but without proper processing, they could be unsafe to eat, sealed or not.
In that case, the best thing you can do is throw them out. It’s a waste, yes – but it’s not worth risking food poisoning. Canning safely means knowing when to cut your losses.
18. Never Taste Food from a Jar with Spoilage Signs
It only takes a small taste to make you seriously sick if something’s gone wrong. If a lid is bulging, the seal is broken, or you see leaks, bubbling, or mold, don’t even think about tasting it.
The same goes if it smells off or spurts when opened – just throw it out. Botulism, especially from low-acid foods, doesn’t always show clear signs but can still be deadly. When in doubt, toss it out.
19. Recognize Spoiled Food Signs Immediately
Knowing what to look for can save you from eating something dangerous. Bulging lids, leaking jars, or strange smells are all big red flags.
You might also see streaks of dried food coming from under the lid, bubbles rising in the jar, or cotton-like mold growing on the surface.
With cans, check for deep dents along seams, especially at the top or bottom – those spots are more likely to leak. Always check before opening, and if something looks off, don’t take the risk.
20. Use a Boiling Detox Method for Suspect Low-Acid Foods
Low-acid foods (like meats, beans, or even tomatoes) can grow botulism bacteria without showing much sign. If a jar or can looks suspicious but is still sealed, it should be treated like it's toxic.
You can detox it by placing the unopened container in a large pot, covering it with water, boiling for 30 minutes, then throwing it away.
This neutralizes any toxins so no one gets hurt during disposal. Don’t skip this step if the food seems questionable.
21. Wear Gloves When Handling Spoiled Foods

You don’t want spoiled food – especially stuff that might contain botulism – getting on your skin or under your fingernails. Always wear disposable rubber or heavy-duty plastic gloves when handling suspect jars or cans.
If anything leaks, avoid touching it with bare hands or spreading it around. Clean up carefully, and throw away gloves when you’re done. It’s a small step that makes a big difference in staying safe.
22. Discard Spoiled Food and Containers Safely
When it comes to spoiled canned food, don’t just toss it in the trash like regular garbage. Sealed, bulging cans or suspect jars should be bagged tightly and thrown away in a place where kids, pets, or wildlife can’t get to them.
If the container is leaking or already opened, detoxify it first by boiling it (see Tip #20).
Once it's cooled, throw away the food, the jar or can, and the lid – don’t try to save any part of it. It's better to lose a few jars than to risk serious illness.
23. Sanitize Surfaces with a Bleach Solution
Any area or tool that touches spoiled food needs to be disinfected properly. Use a mix of 1 part unscented bleach to 5 parts clean water, and let it sit on surfaces for 30 minutes before wiping.
This includes countertops, can openers, sinks, and even clothing if anything splashed.
After cleaning, rinse everything well and throw away sponges or rags used for cleanup. This keeps harmful bacteria from spreading to the rest of your kitchen.
24. Prioritize Healthier Commercial Canned Options
Not all canned foods are created equal – some are packed with sodium, sugar, and preservatives that aren’t great for regular meals. Look for low-sodium soups, beans, and vegetables, or options labeled “no salt added.”
Choose canned fruits packed in water or natural juice instead of syrup.
When buying canned fish, go for those packed in water, not oil, to keep fat and calories lower. Stocking the healthier versions means your long-term pantry is ready without sacrificing nutrition.
25. Limit Processed Canned Meals and Desserts
Canned pasta dishes, meat-based meals, and sugary desserts might be convenient, but they usually don’t store as well and aren’t the healthiest options.
They’re often full of salt, preservatives, and artificial additives. These kinds of products also tend to have shorter shelf lives, especially once opened or exposed to heat.
Instead of stocking up on these, keep your pantry full of simple ingredients like canned beans, plain vegetables, and basic proteins things you can build meals from. You’ll get better nutrition and longer storage value this way.
Turn These Tips Into a Reliable Storage Routine
Storing canned food right isn’t complicated – it just takes consistency and a little attention to detail. Keep your storage area cool, dry, and organized.
Rotate often, watch for spoilage, and stay picky about what you put in your pantry. Home-canned or store-bought, every item needs to be checked, labeled, and used wisely.
These habits don’t just keep your food safe – they also save you money and make sure your pantry is something you can count on when you need it.
FAQs
1. How long does canned food really last in storage?
Low-acid foods like vegetables, meats, and beans can last up to 5 years if stored properly. High-acid foods like tomatoes and citrus are best used within 1–2 years.
2. What temperature should I store canned food at?
The ideal range is 50°F to 70°F (10°C to 21°C). Avoid anywhere that gets above 85°F or below freezing.
3. Can I store canned food in my garage or attic?
Only if the temperature stays steady and within the safe range year-round. Otherwise, the risk of heat damage or freezing makes it a bad choice.
4. What’s the best way to organize and rotate canned goods?
Use the first-in, first-out method: new items in the back, older ones up front. Label the tops with dates to keep things simple.
5. Are dented or rusted cans safe to eat from?
If the dents are deep, especially along the seams, or if there’s rust near the lid, it’s best to toss them. Those could be signs of a compromised seal.