Watermelons take up space. Like… a lot of space.
Left to do their thing, these vines will spread out like a lazy cat on a hot driveway – easily covering 15 feet or more. Most folks with tiny yards (or no yard at all) figure that growing them just isn’t in the cards.
But you can absolutely grow watermelons in a small space even in something as compact as a 4×4 raised bed or a patio planter. The trick? Grow them up, not out.
In this article, I'll walk you through the entire process – from choosing the right variety to building a trellis strong enough to hold actual melons (yes, they’re heavier than you think).
We’ll talk soil depth, vine training, fruit slings, watering quirks, harvest signs, and all the little things no one tells you until you’ve already made the mistake.
Let’s get into it. You’re about to see just how much watermelon you can grow in the space of a kiddie pool.
Why Grow Watermelons on a Trellis?

Watermelons aren't known for being polite garden guests. They sprawl. They hog space. If you let them, they'll take over every square inch you give them – and then some.
So why mess with trellises? Because they solve a whole bunch of space problems in one go.
Compact Growing for Small Gardens and Patios
The big advantage here is obvious: you can grow full-sized melons in places you’d never think possible – like a 4×4 raised bed, a small patio, or even a balcony.
Instead of spreading across the yard, the vines climb upward. The fruit hangs from the frame. The ground stays open for you to walk, plant, or sit with a cup of coffee while your watermelons do their thing overhead.
It’s not just theory, either.
One grower harvested 105 pounds of watermelon and 40 pounds of squash from a 50-square-foot bed – all thanks to vertical growing. That’s almost absurd efficiency for such a small space.
Managing Wild Vines Without Chaos
Vine control becomes way easier.
When you grow watermelons on the ground, you’re constantly stepping over vines, losing fruit under leaves, and wondering which part of the plant goes where.
With a trellis, everything is lifted and visible. You can train the vines in the direction you want, tie them up, and keep track of fruit without digging through a jungle.
Plus, less contact with the soil means fewer problems with rot and pests lurking in the mulch.
More Light = Better Growth
Here’s something people forget: when your vines climb, they get more consistent sunlight exposure.
Each leaf has better access to the sun, especially when your trellis is placed to catch full mid-day rays. This can boost overall growth and potentially improve fruit set and sweetness.
Choosing the Right Location
You don’t need a farm. But you do need to pick your spot carefully. Where you place your watermelon trellis can make or break your harvest.
Sunlight: The More, the Better
Watermelons love full sun. Like, at least 8 hours a day kind of love.
But can they survive with less? Surprisingly, yes – some gardeners have had success with only 6 hours of sunlight, though they’ll admit the yields aren’t quite the same.
You’ll probably get fewer fruits, and the vines may be slower to take off. If that’s your situation, aim for afternoon sun, which tends to be stronger and longer-lasting.
Heat and Airflow
These plants thrive in the heat – but there’s a catch.
When temperatures hover above 90–95°F, pollination can suffer. Pollen becomes nonviable, blossoms don’t set fruit, and your baby melons may shrivel up before they really get going.
If your summers are brutal, position the trellis where it gets a breeze, or close to something that offers a bit of shade in late afternoon.
Also – don't crowd it. Watermelon vines need airflow. Squeezing them into a shady corner behind other plants? Not great.
Growing on Concrete, Patios, and Tight Spaces
Here’s where things get creative.
No garden bed? No problem. A trellis can work on patios, balconies, or even concrete. You can:
- Set up a large container or fabric grow bag with deep soil
- Position the trellis right up against a chainlink fence or wall-mounted lattice
- Anchor a homemade frame into heavy planters or bricks
Just make sure you have something strong to tie the vines to – because once those melons start forming, they’re not light.
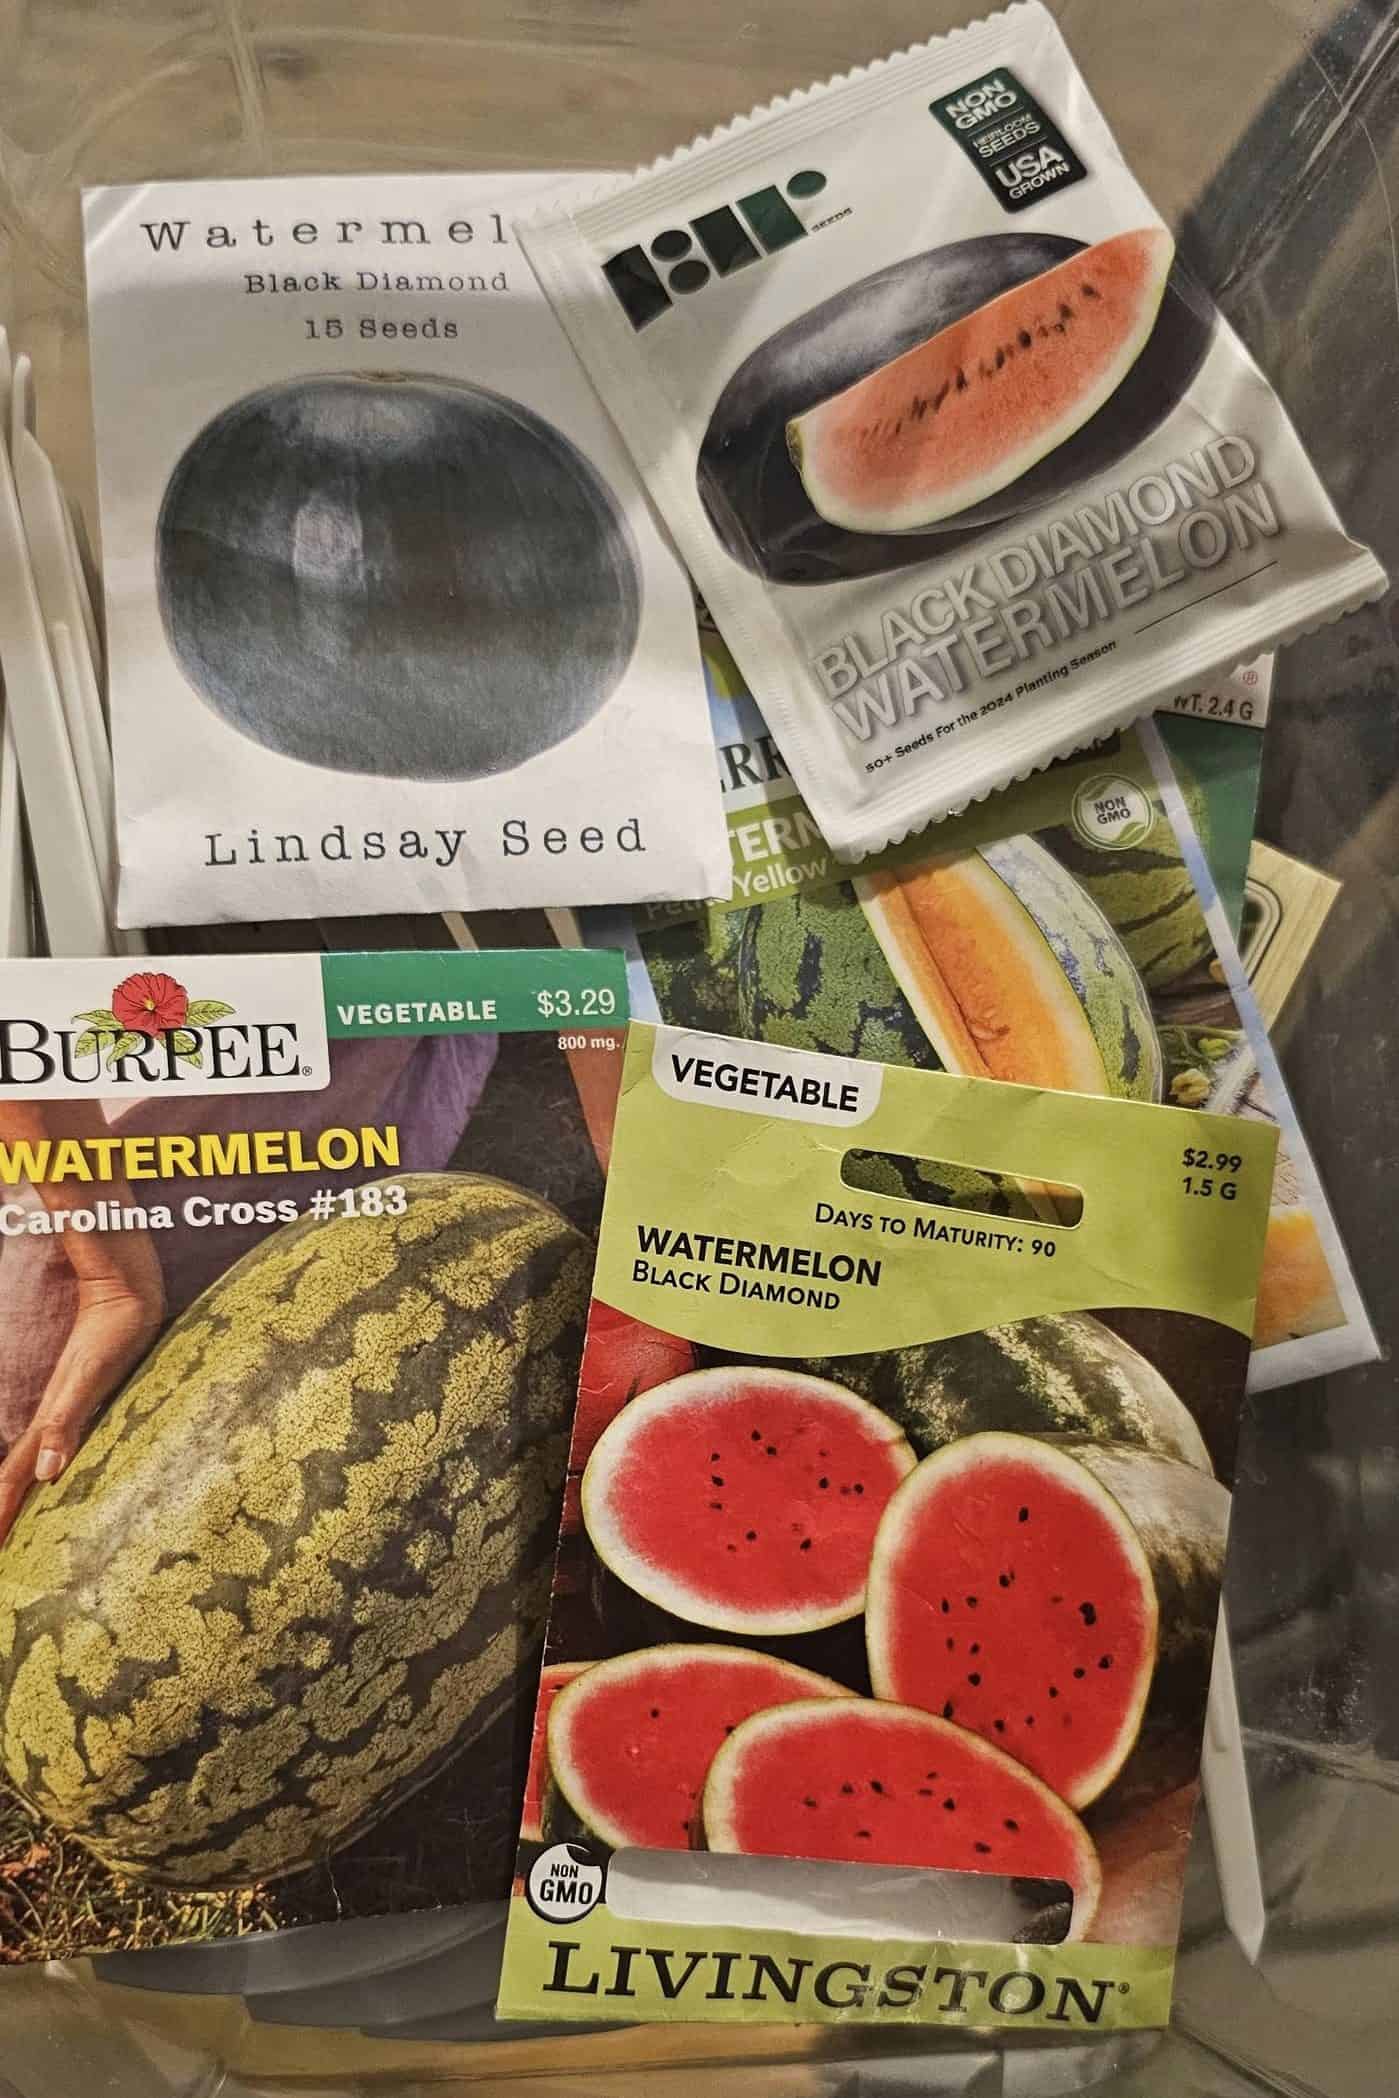
Selecting a Suitable Watermelon Variety

Not all watermelons are built for trellising. Some just get too big, too heavy, or take too long to mature. Picking the right variety makes everything easier – training the vines, supporting the fruit, and actually getting a harvest before the season ends.
Look for Small to Mid-Size Varieties
You're looking for the ones often called “icebox” watermelons. These are the kinds that don’t need a wheelbarrow to move. They're compact, fast-growing, and still taste like summer in a bite.
A few that work especially well:
- Sugar Baby: 6–12 pounds, round shape, deep red flesh. Classic. Also one of the most commonly trellised varieties.
- Blacktail Mountain: around 10 pounds, dark green skin, good cold and heat tolerance. Reliable even in tricky weather.
Anything over 15 pounds gets risky unless you want to build slings out of seatbelts.
Match Your Variety to Your Climate
Not all watermelons handle cool mornings or scorching highs the same way.
If you’ve got a short growing season, choose something that matures quickly – say, 70 to 80 days. Blacktail Mountain is solid for those borderline zones where summer shows up late and leaves early.
On the flip side, if you're dealing with desert heat, look for something that can hold up in the sun without frying its blossoms before fruit can set.
Plan for Size and Timing
Even small varieties need time. Some will start looking ripe around 70 days, but many need a bit more especially if you're not planting in peak soil warmth.
Keep in mind: trellised melons may ripen a little faster due to better sun exposure. But don’t rush it. Let them fully mature so you're not slicing into a beautiful melon that tastes like cucumber.
Building and Placing Your Trellis
This is where things get real. Because watermelon vines aren’t delicate. And the fruit? Definitely not lightweight. If your trellis isn’t strong, you’ll know it when everything comes crashing down in late July.
Size and Dimensions That Work
A trellis that’s about 4 feet wide and 6 to 7 feet tall gives the vines plenty of room to stretch without getting out of hand.
That size also fits nicely behind a raised bed or large container. You’ll usually be supporting 20–30 pounds of fruit per plant – sometimes more – so height is great, but strength is non-negotiable.
What to Build It From
Sturdy is the goal here. A few tried-and-true setups:
- Half a livestock panel attached to two t-posts
- A wood frame with welded wire fencing stapled on tight
- Chainlink fence (if you already have one nearby – why not use it?)
The livestock panel method is a favorite because it’s cheap, tough, and surprisingly easy to set up. Just set it on the ground, attach with zip ties or wire, and let the vines do their thing.
Placement Tips That Make a Difference
Position trellises on the north and south sides of your bed – not east to west. Why? Because as the sun moves, a north-south setup allows for even light exposure on both sides of the vines. If you go east-west, one trellis could throw shade on the other. Literally.
If you’re setting up near a wall, you’ve got two good options:
- Put the trellis just a few inches from the wall so melons grow in front
- Or leave enough space behind it so you can get back there to harvest
And yeah – melons can get stuck if they grow behind a cattle panel. Don’t ask how we know.
What About Height?
Most melons end up growing within 4 feet of the ground, even if the vines reach higher. So technically, you don’t need an 8-foot tower unless you’re going big.
Five-foot t-posts work for most setups. If your trellis is taller, consider a step stool – or just cut it down to a more manageable height.
Preparing the Soil and Bed
This part often gets rushed, but it’s one of the biggest game-changers.
Watermelons are hungry and thirsty – and their roots love to stretch deep. Shallow, compacted, nutrient-poor soil will keep your vines weak and your fruit tiny.
How Deep is “Deep Enough”?
If you can swing it, shoot for 18 inches of soil depth. That gives the roots plenty of room to expand, tap into moisture, and build a strong foundation.
Shallow soil (like 6 inches) can work, but you’ll be watering constantly and yields may suffer.
Skip the Weed Barrier
Seriously – don’t put landscape fabric or plastic under your raised bed.
It keeps the roots from reaching into the lower layers of soil where the moisture is. Let them go deep. You’ll get more vigorous plants and might not need to water as often.
Raised Bed or Container?
Both work. But there’s a trade-off.
Raised beds are ideal – they drain well, hold deep soil, and keep everything tidy. Containers are fine too, as long as they’re big enough.
Think 20 gallons or more. And keep in mind: container-grown melons will often end up smaller, just because there’s less root space.
How Many Plants is Too Many?
It’s tempting to cram in as many seedlings as possible. But the truth is, there’s a limit to what your space can support – no matter how many vines you plant.
Stick to one plant per 4 square feet if possible. Two plants per 4×4 bed is solid. Four if you’ve got deep, high-quality soil and two trellises.
More plants doesn’t always mean more melons. Sometimes it just means more struggle.
Planting Watermelon Seeds
Starting strong makes everything easier down the line. And for trellised watermelons, how you plant matters more than you might think.
Direct Seed vs. Transplant? Go With Seeds
You can buy watermelon starts from the nursery, but unless you’re really pressed for time, direct seeding is the better bet.
Why? Because watermelons grow deep taproots, and transplanting often messes that up. Plants grown from seed in place tend to be sturdier, more drought-tolerant, and just generally happier.
Timing Your Planting
Wait until your soil is warm – at least 70°F. If it’s too cold, seeds will just sulk. Late spring or early summer is usually the sweet spot, depending on your zone.
In cooler climates, black plastic or clear row covers can help warm the soil faster, just don’t forget to remove them before things overheat.
Spacing Matters
It’s easy to assume more plants = more fruit. But watermelons are greedy. If they don’t have room, they won’t perform.
Stick with:
- 1 plant per 4 square feet if growing in raised beds
- 1 plant per large container (20 gallons or more)
- Up to 4 plants in a 4×4 bed if soil is deep and fertile, and you’re using 2 trellises
More than that, and they’ll start to compete for nutrients, water, and light—meaning fewer melons, not more.
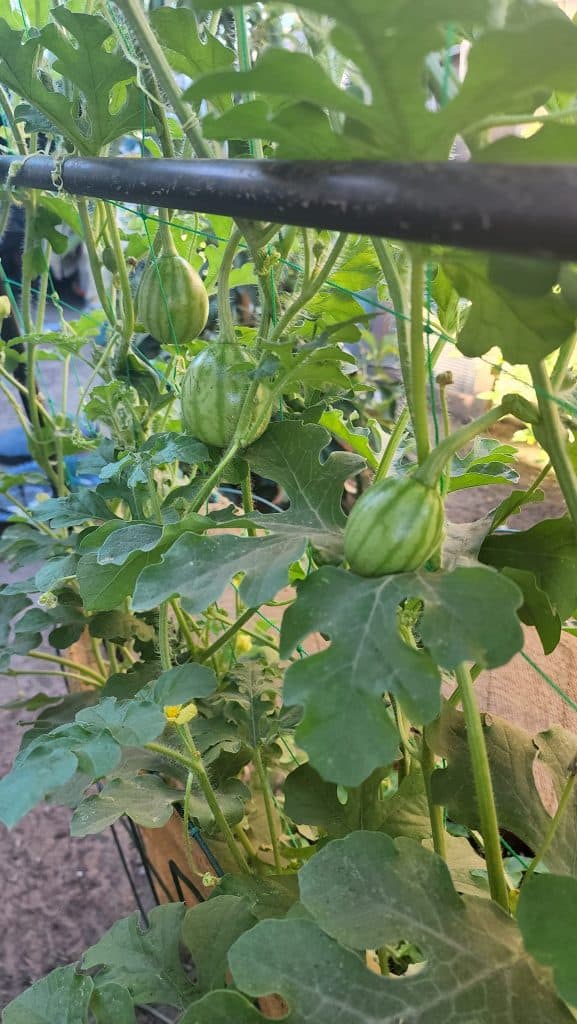
Training Watermelon Vines to Climb

Watermelon vines aren’t natural climbers. They don’t magically head up your trellis like beans or cucumbers. Left alone, they’ll just flop around near the base.
You’ve got to help them climb. Actively.
Guiding the Vines
Once the vines are about a foot or two long, start gently directing them toward the trellis. Lay them against the structure, then loosely tie them in place.
A simple figure-8 loop works best. Use soft ties (twine, strips of fabric, velcro plant tape), and secure each tie just below a leaf or branch. Keep it snug enough to hold, but loose enough so it doesn’t strangle the stem as it grows.
Do this regularly. Watermelon vines grow fast – sometimes a foot or more per week. A little weekly maintenance keeps things from turning into a tangled mess.
Don’t Rely on Tendrils Alone
Sure, watermelons have tendrils, but they’re not reliable. Especially in wind, or once the fruit starts developing. The weight pulls everything downward. Without proper support, vines can snap, twist, or just slide off the trellis completely.
So tie. Then re-tie. Then tie again. It’s a routine you’ll get used to quickly.
Managing Growth Without Over-Pruning

Watermelons grow like they’re on a mission. New shoots pop out at nearly every leaf node, vines stretch in all directions, and the whole thing can get out of hand in a hurry.
So should you prune them? Well… not exactly.
This Isn’t Squash
Unlike squash or tomatoes, where aggressive pruning is normal, watermelon vines do better when they have room to sprawl (even if it’s up a trellis). Too much pruning can actually reduce your harvest.
Instead of cutting everything back, focus on managing the growth.
Keep the Main Vines and Key Side Shoots
Start by identifying your main vines – the thickest ones with the most growth. Train those vertically. Then, keep any side shoots that you can comfortably fit on the trellis without creating a tangled mess.
Side shoots can absolutely produce fruit. If you’ve got space, let them climb too. If they’re heading into chaos, trim them back before they get out of control. Think of it like guiding, not hacking.
What to Remove (If Anything)
If a vine is heading toward the ground, wrapping itself around another plant, or shading other vines – you can snip it. But keep it minimal. The goal is to keep air and light flowing, not to force the plant into submission.
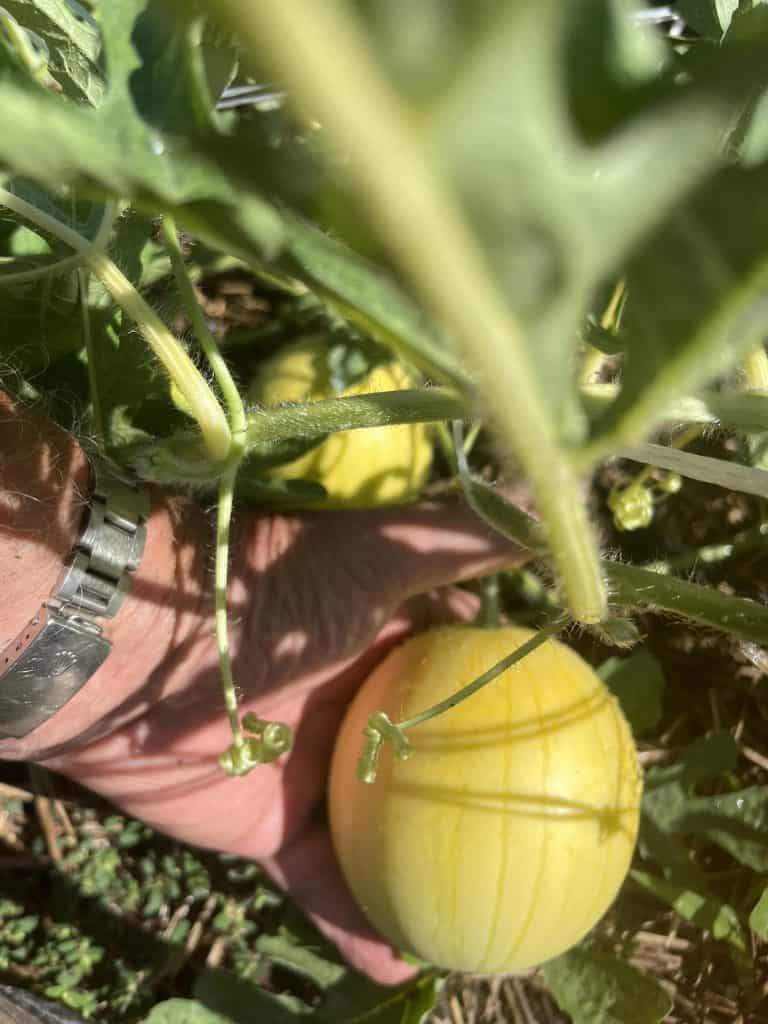
Supporting the Fruit with Slings

So your first watermelon sets. It’s adorable. Then a week goes by, and it’s suddenly the size of a cantaloupe. Then a small pumpkin. And it’s still hanging from a vine.
That’s when you realize: gravity is not your friend.
Why Slings Are a Must
Watermelon stems aren’t built to hold heavy fruit mid-air. Without support, the melon’s weight can snap the vine – usually right when you were starting to brag about how big it was getting.
Slings take the weight off the plant and cradle the fruit like a hammock. They’re simple, but they make all the difference.
Materials That Actually Work
You don’t need anything fancy. Use what you’ve got. Some of the best sling options:
- Mesh onion bags
- Bird netting
- Old T-shirts
- Nylon stockings (cut and tied with space to stretch)
The material should be stretchy but strong, able to cradle the fruit without digging into it. Avoid anything that holds water or molds easily.
When to Sling Them
Don’t wait too long. Once the melons hit about softball size – roughly 4 to 5 inches wide – it’s time. That’s when their weight starts to stress the vine. Getting a sling in early avoids damage later.
How to Tie Them
Tie the bottom of the sling closed (like a sack), then tie the ends to the trellis above the fruit.
Make sure there’s room for the melon to expand. If the sling is too tight, it can split. If it sags too much, the pressure shifts right back to the stem.
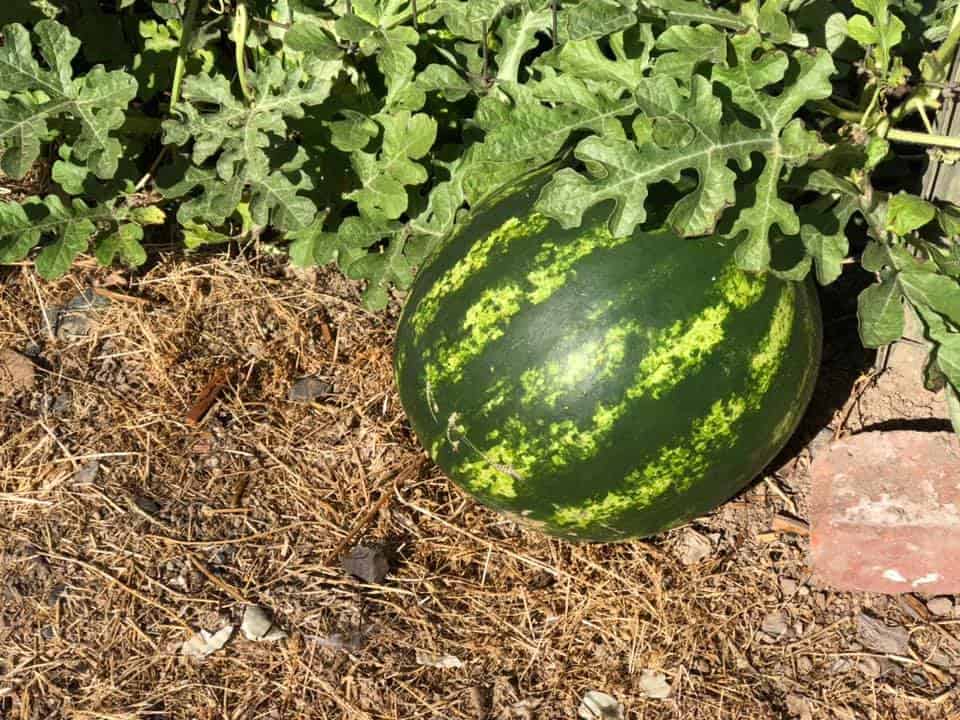
One quick tip: if you’ve got a melon growing low and it’s almost touching the ground, skip the sling and just set a brick under it for support. No need to hang it up if it’s already resting safely.
Watering Techniques for Trellised Plants
Watermelons are thirsty. But trellised watermelons? Even thirstier.
Once you lift the vines off the ground, they’re more exposed to wind and sun, which means they lose moisture faster.
That’s not a problem if you stay ahead of it – but if you miss a few days in a heatwave, things can go south quick.
Deep, Infrequent Watering Is Best
Aim to water deeply once or twice a week during dry weather. That means soaking the soil to a depth of 6 to 12 inches.
Shallow watering doesn’t cut it—especially with deeper root systems. Deep watering encourages roots to grow down, where the soil stays moist longer.
If your soil is deep and loose (like 18 inches), this method works great. But if you're growing in shallow beds or containers, you may need to water daily, especially in hot weather.
Mulch Makes a Big Difference
Covering the soil with mulch helps keep moisture from evaporating. It also keeps the soil temperature more stable, which the roots appreciate.
Straw, shredded leaves, or untreated grass clippings all work. Just keep the mulch a couple inches away from the plant stems so you don’t invite rot.
Watch for Signs of Stress
Wilting in the afternoon doesn’t always mean drought – watermelons can droop a little in the heat and bounce back by evening. But if they’re limp in the morning, too? Time to water.
Also watch for fruit cracking, dry edges on leaves, or yellowing – all of which can mean inconsistent watering.
Fertilizing for Maximum Growth
Watermelons aren’t shy about their needs. They grow fast, put out big vines, and make heavy fruit. To do that, they pull a ton of nutrients from the soil.
If your soil is rich and deep, you’re off to a good start. But if you’re growing in containers or marginal beds, you’ll need to give them a boost.
How Often to Fertilize
In raised beds with decent soil, a slow-release organic fertilizer mixed in before planting can carry you most of the way. Still, a few light feedings during the season can help.
In containers? Plan on fertilizing every 2 to 4 weeks. Watering leaches nutrients from the soil, and container roots don’t have anywhere else to look for more.
What Kind of Fertilizer?
Use a balanced formula – something like 10-10-10 or similar. Many liquid organic options are high in nitrogen but skimp on phosphorus and potassium, which are just as important.
Some gardeners swear by starting the season with a high-phosphorus fertilizer to get those roots really established. That can make a noticeable difference in how well the plant copes with heat and how efficiently it moves water.
Just don’t go overboard. Too much nitrogen = lots of leaves, not much fruit.
How and When to Harvest Watermelons
Picking a watermelon too early is a letdown. You wait weeks, get excited, slice it open and it tastes like soggy cucumber. Not ideal.
The trick is knowing when it's actually ripe. There’s no dramatic color change or satisfying snap like with some fruits. But there are signs. Subtle ones.
The Tendril Test
Look at the curly tendril closest to where the melon attaches to the vine.
When that tendril dries up and turns brown, it’s usually a good sign the melon is ready. Not the second tendril down – not the leaf stem. The one right at the base of the fruit stem.
If it’s still green, wait.
If it’s dry and crispy? Time to grab your knife.
For Sugar Baby Varieties: Wait Even Longer
This one’s a bit unique. Gardeners who grow Sugar Baby watermelons often say they taste best if you wait an extra 7 to 10 days after the tendril dries up.
It’s hard. You’ll be tempted. But if you’re growing this variety and want that deep red sweetness, the patience usually pays off.
Other Clues
- The ground spot (the part resting against something) often turns yellow or creamy.
- The skin becomes dull, not shiny.
- When you thump it, the sound goes from sharp to more of a low thud. (Not the most scientific, but it works for some.)
Once you’ve picked it, that’s it. Watermelons don’t ripen off the vine. So better a few days late than too early.
Troubleshooting Common Issues

Watermelons are drama queens. They’ll throw fits if the weather’s too hot, if the bees don’t show up, or if the soil isn’t just right. Here’s what might go wrong and what you can do about it.
1. Melons Shriveling or Dropping Off
This usually points to a pollination problem, especially when it’s hot. When temps hit the mid-90s and above, pollen can die before it does its job. Result? Fruit sets… then fails.
If bees are scarce or conditions are rough, try hand-pollinating. Take a male flower, peel the petals back, and dab the center onto a female flower (the one with the tiny fruit behind it).
Sometimes, though, the plant just decides it has enough fruit. When that happens, it’ll drop anything extra. It’s not you. It’s the vine doing triage.
2. Sunburn on the Fruit
Watermelons on trellises get a ton of sun especially the tops of the fruit. In really hot, bright weather, the skin can get bleached or cracked from sunburn.
Use a bit of shade cloth during peak afternoon heat, or let some leaves hang over the fruit if possible. A little cover goes a long way.
3. Vines “Strangling” Themselves
Every now and then, tendrils wrap around leaves or parts of the same plant, pulling tight.
Looks weird, but usually doesn’t cause real damage. If you notice a leaf starting to yellow or shrivel from it, go ahead and clip the tendril.
Otherwise, it’s just a watermelon being a watermelon.
4. Tiny Fruit, Even When It’s Healthy
If you’re growing in a container or a shallow bed, the fruit may stay small. That’s normal. Less root space = less capacity to feed big melons.
You can still get tasty ones – they just might be single-serve.
5. Yellowing or Stunted Growth
Could be a nutrient issue. Could be root stress. Could be too much water, or not enough. Start with the basics:
- Is your soil deep and draining well?
- Are you watering consistently?
- Have you fertilized?
If all that checks out and things still look off, it might be time to refresh your soil—or just try a new variety next season.
Start small, grow smart, and watch your melons soar!
You don’t need a massive yard – or even a yard at all – to grow real, juicy watermelons. With a solid trellis, good soil, a few smart techniques, and a bit of patience, you can pull 10-pound melons out of a raised bed or patio pot like it’s no big deal.
The key is in the details:
- Choose the right variety.
- Build a trellis that won’t collapse halfway through summer.
- Train your vines, sling your fruit, water deep, and feed them when they need it.
That’s the whole system. It’s low to the ground in footprint, but high in payoff. And once you slice open your first melon that you grew in four square feet of soil – well, it’s hard to go back.
Frequently Asked Questions (FAQs)
Can I grow watermelon vertically in a container on my balcony?
Yes, if the container is large enough – around 20 gallons or more – and the trellis is strong and tall. Use compact varieties like Sugar Baby and make sure to fertilize regularly since nutrients leach out faster in containers.
What kind of trellis is strong enough to hold watermelons?
A livestock panel attached to t-posts is one of the strongest and most affordable options. Wood frames with welded wire also work well. Just make sure the structure can handle at least 30 pounds of fruit.
How do I know when a watermelon on a trellis is ready to pick?
Check the tendril closest to the fruit stem. If it’s dry and brown, the melon is likely ripe. For Sugar Baby, wait another 7–10 days after the tendril dries for peak sweetness.
Why are my small melons falling off the vine?
Usually a sign of poor pollination – often caused by extreme heat or a lack of pollinators. It can also happen if the plant has already set as many melons as it can support and drops the extras.
What’s the best way to tie watermelon vines without damaging them?
Use a loose figure-8 loop with soft ties like twine, fabric strips, or velcro plant tape. Tie below a leaf joint and leave space for the stem to grow without restriction.
Ready To Transform Your Garden?

Are you looking for the best way to layout your garden beds? Maybe you're feeling a bit stuck on how to make the most of your space?
We’ve got you covered! Check out our 101+ Garden Bed Layout Ideas for your next raised bed project. This guide is filled with creative and practical ideas that can help you design a garden that fits your style, whether you’re just starting out or have been gardening for years.
Get your copy today and get inspired to bring your gardening dreams to life.