A chicken run is more than just a fenced area, it’s where your flock spends most of its time scratching, dust bathing, and staying safe from predators.
If you're getting ready to build one, there are a few things you’ll want to get right from the start. Poor planning can lead to muddy messes, predator problems, and extra costs down the line.
In this article, I'll give 10 practical, field-tested tips that can save you time, money, and frustration – especially if you live in a colder or rural area.
Before you grab your tools or materials, make sure you’re not missing any of these key details.
What to Think About Before Setting Up a Chicken Run
Before you sink a post or cut any lumber, it’s important to think through a few basic but often overlooked details.
These early decisions will shape how well your chicken run works in the long run – and whether you’ll end up rebuilding parts of it later.
How Many Chickens Will You Keep?
The size of your run depends on your flock.
Chickens need at least 10 square feet of run space per bird, but more is always better especially in colder climates where they’ll be stuck inside for long stretches.
If you think you might add more birds later (and many people do), plan for a larger run from the beginning.
What’s the Weather Like in Your Area?
If you live in a rainy or snowy area, you’ll need a design that keeps water out and chickens dry.
In hot regions, providing shade and airflow will be a bigger priority. Your climate affects everything from roofing to flooring choices.
Are Predators a Problem?
If raccoons, foxes, or neighborhood dogs are nearby, you’ll need stronger materials and tighter construction. The more predators you expect, the more secure your run needs to be.
Fixed or Mobile Run?
A fixed run is anchored to the ground and easier to predator-proof, especially in winter.
A mobile run (chicken tractor) is lighter and lets you move chickens to fresh grass, but it’s harder to secure and not ideal for long, harsh winters.
What Materials and Tools Will You Need?
Make a simple list before you start. Materials often include lumber, wire (hardware cloth and/or chicken wire), roofing panels, screws, latches, posts, and concrete or bricks.
You’ll also need basic tools: drill, saw, level, post hole digger, and wire cutters.
Budget: Where to Spend and Where to Save
Spend more on:
- Predator-proofing (hardware cloth, solid latches)
- Roofing (to avoid mud and moisture issues)
- Posts (for stability, especially in snow or frost-prone areas)
Save on:
- Reusing materials like wood scraps or secondhand panels
- Using chicken wire in upper sections
- Buying a pre-made screen door and modifying it
10 Practical Tips for Building a Chicken Run That Lasts
If you want it to stay secure, clean, and functional throughout the year – especially in harsh weather – you’ll want to get a few key things right from the start.
These 10 tips cover what matters most, from space planning to predator protection.
1. Go Bigger Than You Think You Need

For most backyard flocks, a common rule is 10 square feet of run space per chicken, but this is the minimum.
If you live in a cold climate where snow might cover the ground for months, your chickens won’t want (or be able) to leave the run. In that case, aim for at least 15 square feet per bird.
For example, if you’re planning on 6 chickens, a run size of 6 ft x 15 ft (90 sq ft) should be the bare minimum in snowy areas. If you have space, bump that up to 8 ft x 16 ft (128 sq ft) or larger.
Also, design your run to match standard lumber dimensions like 8 ft, 10 ft, or 12 ft lengths. For instance, building a 10 ft x 12 ft run means you can use 10-ft and 12-ft boards with fewer cuts and less waste. This helps avoid piecing together shorter boards or paying extra for custom cuts.
And remember: many people start with a small flock and expand within the first year, so giving yourself room to grow will save you the trouble of rebuilding later.
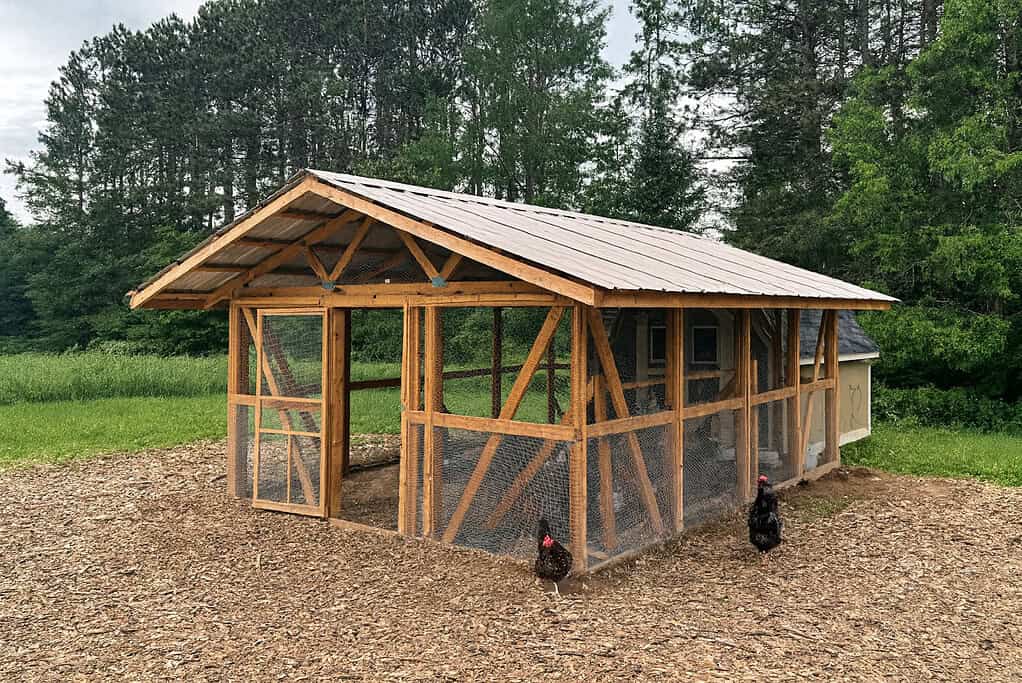
2. Build a Roof to Handle Weather

If you get regular rain or snow, skipping the roof will create ongoing problems. Snow builds up quickly in winter and can make the run unusable for weeks.
In wet seasons, bare dirt turns into mud, and that mud mixes with spilled feed and droppings – creating a soggy, smelly mess that attracts flies and rodents.
A sturdy roof not only protects your run but is also one of the simple steps to winterize your chicken coop.
Use clear corrugated polycarbonate panels if you want to let light through while keeping rain out. These are lightweight, UV-resistant, and commonly sold in 8-foot lengths. A basic sloped roof frame made with 2x4s spaced 24 inches apart works well.
For heavy snow areas, reduce spacing to 16 inches on center for more support, and consider a steeper pitch (at least 4:12) so snow doesn’t collect.
A roof also keeps certain zones dry – ideal for placing feed, grit, or creating a dust bath with a mix of dry soil, sand, and wood ash. Dry corners mean fewer parasites and cleaner eggs.
3. Use Hardware Cloth Where It Matters Most
Predators like raccoons, foxes, and dogs are a constant threat, especially at night.
While chicken wire is commonly used, it’s only effective for keeping chickens in – not predators out. Raccoons can reach through chicken wire and grab birds, and foxes can chew or push through it.
The best defense is ½-inch hardware cloth made of galvanized welded wire. It’s rigid and small-meshed, which keeps out even snakes and weasels.
But it’s expensive (around $1.50 to $2.00 per square foot) so to cut costs, use it strategically:
- Install hardware cloth around the bottom 3 feet of the run’s sides.
- Use cheaper 1-inch chicken wire or welded wire fencing above that height, where predators are less likely to attack.
- Make sure to overlap the wires by at least 6 inches where the two types meet and secure with heavy-duty fencing staples or self-tapping screws and washers every 8–12 inches.
This hybrid approach provides strong protection without doubling your material costs.
4. Save Time with a Pre-Made Screen Door
Building a solid door frame from scratch takes time and extra materials, and it often requires more carpentry skill than the rest of the run.
A faster option is to use a pre-made wooden screen door, which typically costs around $40–$60 at hardware stores.
Choose a door with a solid wooden frame – not hollow-core or vinyl.
Once purchased:
- Remove the screen using a utility knife and pry bar.
- Replace it with ½-inch hardware cloth, attached with washers and screws or crown staples.
- If the door is too tall for your run, cut it down from the top, then reattach the top frame using wood glue and two pocket screws or a metal bracket.
To mount it securely:
- Install two heavy-duty hinges and a barrel bolt or hasp latch at the top – well out of reach of raccoons.
- Reinforce the frame with a diagonal brace if it flexes, and add a stop strip on the inside so the door can't be pushed inward.
This approach saves time, improves durability, and often costs less than buying all new lumber for a custom-built door.
For an even easier setup, you might consider an amazon automatic chicken coop door.
Read related post: Chickcozy vs. Amazon Automatic Chicken Coop Doors (Which One Should You Choose?)
5. Paint Hardware Cloth Black for a Cleaner Look
While hardware cloth is the best option for security, it can make your run look like a cage, especially if you're using a lot of it.
If aesthetics matter – especially in a backyard or visible area – painting it black makes a big difference.
Use a matte black spray paint designed for metal, such as Rust-Oleum or Krylon, which costs about $6–$8 per can. One can typically covers about 10–12 square feet, depending on the mesh size.
Paint the hardware cloth before you install it – lay it flat on a tarp or cardboard, then spray both sides and edges for full coverage. Allow it to dry for at least 24 hours.
Once painted, the black finish makes the mesh almost disappear visually, especially from a distance.
It also reduces glare and gives your chicken run a cleaner, more finished appearance that blends better with wood framing and landscaping.
6. Stop Digging Predators with Buried Wire and Bricks
Foxes, coyotes, and even dogs will dig under a run if they sense chickens inside. To block them, you need a solid underground barrier – just fencing above ground isn’t enough.
Use ½-inch hardware cloth or 16-gauge welded wire and bury it at least 6 inches deep, with an additional 6–8 inches bent outward in an “L” shape to create a horizontal apron.
This makes digging much harder, even for persistent predators. In areas with loose or sandy soil, go 9–12 inches deep for added protection.
You can also set the entire run frame on concrete pavers or bricks, which helps:
- Prevent digging
- Keep the bottom wood frame off the ground (reducing rot)
- Create a level, solid perimeter
Secure the buried wire to the bottom of the frame using fencing staples or screws and washers, and overlap any seams by at least 6 inches.
This layered defense greatly reduces the chance of a predator tunneling inside.
For more tips, check out how to predator-proof your coop. This layered defense greatly reduces the chance of a predator tunneling inside.
7. Mount Latches High and Reinforce the Door Frame

Raccoons are strong and clever – they can unlatch simple gate hardware, especially if it’s placed low or easy to reach. Foxes and stray dogs may also push or twist weak doors to gain access.
To keep the door secure, focus on both latch placement and frame strength.
- Mount your main latch at least 4 to 5 feet high on the outside of the door. This keeps it out of reach of raccoons, who can stand on their back legs and manipulate low latches.
- Use a two-step latch system, like a hasp with a carabiner or spring clip, or a lockable barrel bolt.
- Add an interior door stop (jam strip) to block the door from swinging inward. Use a scrap of 1×2 lumber screwed to the inside frame.
- Reinforce all four corners of the door frame with corner braces or diagonal supports. This prevents flexing, which predators can exploit to push gaps open.
- Use galvanized or stainless steel hardware, especially if your run is exposed to rain or snow. Galvanized bolts, screws, and hinges resist rust and last longer outdoors.
A properly secured door won’t twist, sag, or open under pressure – key for keeping persistent predators out.
Read related post: Small-Animal Housing Kits for Urban Homesteads: Coops, Hutches & Cages
8. Protect Posts from Frost Heave
If you live in a region where the ground freezes in winter, frost heave can slowly push wooden posts upward over time, warping your run frame or breaking concrete footings.
To reduce this risk, you need to shield the posts and set them properly.
- Brush the bottom 30 inches of each post with oil-based exterior varnish or wood preservative (like TWP or Penofin). This helps seal the wood grain and reduce moisture absorption.
- Dig post holes to at least the frost line in your area – typically 24–48 inches deep, depending on local climate.
- For fixed runs, set the posts in gravel or dry concrete, not just dirt. Gravel provides drainage, while dry-set concrete (mixed in the hole) is less likely to trap water than pre-mixed slurry.
- Allow concrete to cure fully before attaching any framing – at least 24–48 hours depending on temperature and humidity.
These steps help your posts stay in place through winter without warping the structure or causing long-term damage.
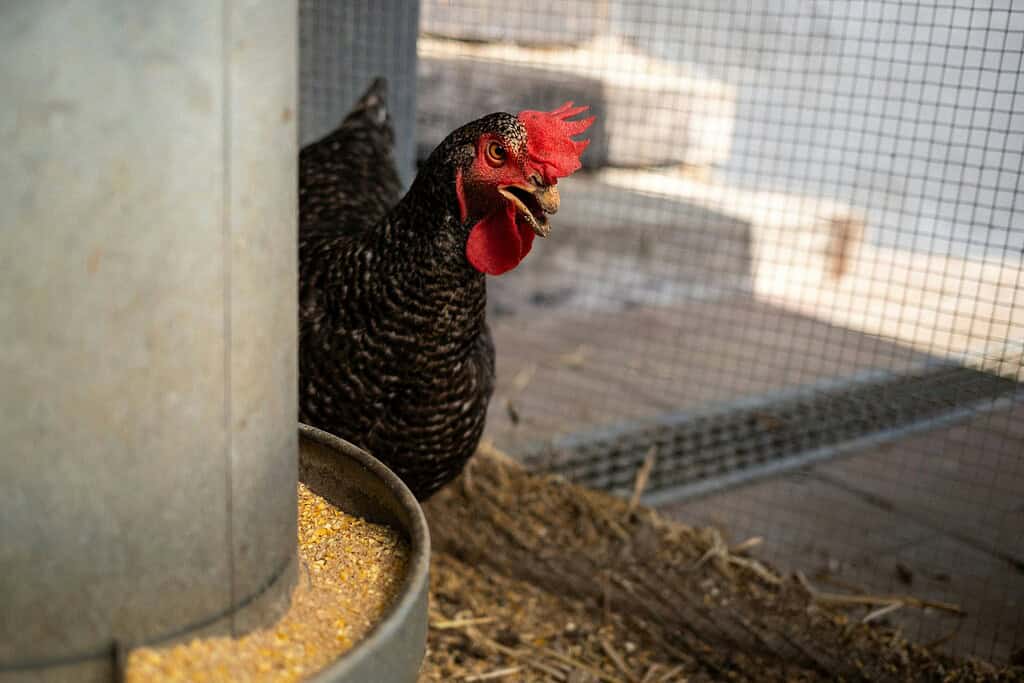
9. Keep Feed and Water in the Run, Not the Coop
It might seem convenient to keep feed and water inside the coop, especially in bad weather but doing so creates more problems than it solves.
Feed inside the coop increases moisture, mess, and smell. It also attracts pests like rats, mice, and possums, which can chew through wood or insulation to get inside.
Instead, place all daily-use items – feeders, waterers, grit, oyster shell, and supplements – outside in the run, under a covered section if possible. Here’s why it works better:
- It encourages chickens to leave the coop earlier in the day, which keeps the coop cleaner and less crowded.
- It allows for better airflow around food and water, helping to keep things dry and reducing mold or bacteria growth.
- It gives you more room inside the coop, especially in smaller setups.
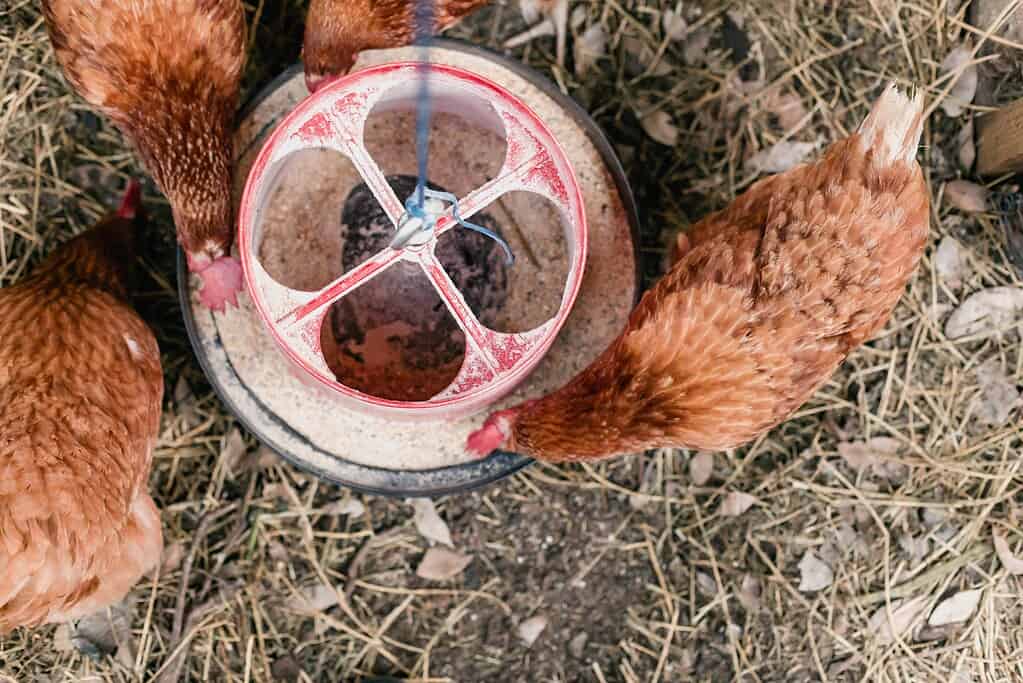
Use hanging feeders or treadle-style feeders under the roofed area of the run to protect feed from rain. For more ideas, check out DIY chicken feeder ideas.
For water, use a covered gravity waterer in warm months and heated bowls in the winter (more on that next).
10. Add Roosting Bars and Heated Water for Comfort
Your chickens will spend a lot of time in the run, so make it comfortable and useful even in cold weather. Two simple additions can make a big difference: roosting bars and heated water bowls.
Roosting Bars:

- Install 1.5″ to 2″ wide wooden bars about 18 inches off the ground under the covered section of the run.
- Space them at least 12 inches apart, and leave 8–10 inches of roost space per bird.
- Roosts give chickens a spot to perch off wet or frozen ground, especially on sunny winter days when they want to be outside but need to stay warm.
Heated Water Bowls:

- In freezing temperatures, traditional waterers can ice over within hours. Heated dog bowls with a built-in thermostat are a reliable fix.
- Choose models with a thermostat-controlled heating element (only runs when temps drop), which uses less electricity.
- Position the bowl under the roof and on a raised wooden platform to keep out dirt and bedding.
- Plug it into a GFCI outlet for safety, and avoid using extension cords unless they are rated for outdoor, cold-weather use.
These two additions help maintain access to fresh water and provide comfort during harsh weather, both of which improve your flock’s health and activity.
Optional but Helpful Add-Ons
Once you’ve got the essentials in place, there are a few extras that can make your chicken run more comfortable, easier to maintain, and better suited to your climate.
These aren’t required, but they can go a long way toward keeping your flock happy especially during extreme weather or long days confined to the run.
Roosting Bars for Daytime Use
Roosting isn’t just for nighttime.
Chickens like to perch throughout the day, especially when the ground is cold, wet, or snowy. Adding a few extra roosts inside the run gives them a place to get off the ground and stay warm or dry.
- Use 2×2 or 2×4 boards with the wider side facing up for better footing.
- Mount the bars 18–24 inches off the ground, ideally in a covered area of the run.
- Secure them to wooden posts or run framing with screws or heavy-duty brackets.
- Avoid metal bars – they conduct cold and can cause frostbite.
Roosting bars also add variety and stimulation, which helps prevent boredom in confined birds.
Heated Water Bowls for Winter
When temperatures drop below freezing, waterers need special attention. Chickens won’t eat if they can’t drink, and checking for frozen water multiple times a day can be a hassle.
A heated dog bowl is one of the most reliable and affordable solutions:
- Look for a 1.5- to 5-quart bowl with a built-in thermostat that activates below 35°F (1.7°C).
- Plug it into a weatherproof outlet using a cord rated for outdoor winter use.
- Place the bowl on a brick or wood platform to keep it level and away from ground moisture.
- Clean regularly to avoid algae or dirt buildup.
This setup ensures your chickens always have access to water, even during deep freezes, and cuts down on daily maintenance.
Plan Your Chicken Run Right the First Time
A well-built chicken run keeps your flock safe, dry, and active year-round.
By sizing it properly, using durable materials, and protecting against common problems like predators and frost heave, you avoid having to redo parts later.
Whether you’re starting from scratch or upgrading an old setup, the tips in this guide help you build a run that actually works – season after season.
Have your own chicken run tips, mistakes, or lessons learned? Comment down below – we’d love to hear what’s worked for you.
FAQs
How tall should a chicken run be?
For easy access and cleaning, the run should be at least 6 feet tall if you plan to walk inside. If it’s smaller, 3–4 feet may work for a crawl-in design, but it makes maintenance harder. Tall runs also let you hang feeders and add full-size doors.
What should I use for the floor of the chicken run?
If your run is fixed, the best floor is bare soil topped with coarse sand or wood chips. Sand drains well and is easy to rake clean. Avoid concrete or gravel unless drainage is a major issue. For mobile runs, grass works, but it wears out fast.
How do I keep flies out of the chicken run?
Flies thrive in wet manure and spilled feed. Keep the run dry by using a roof, cleaning regularly, and adding dry carbon materials like straw or pine shavings. You can also hang fly traps or use diatomaceous earth in trouble spots.
How can I make the run easier to clean?
Design for access: include a full-size door, keep at least one side clear of obstacles, and use materials that hold up to hosing or raking. Cover the run floor with construction-grade sand or coarse wood chips for easier scooping.
Can I attach the run directly to the coop?
Yes, and it’s a good idea. Attaching the run directly to the coop with a secure pop door lets chickens come and go easily while reducing your daily chores. Just make sure the transition area is tight and reinforced to keep predators out.