Root cellars are one of the oldest and most practical ways to store food without electricity.
They’ve been used for centuries to keep fruits, vegetables, and other perishables cool and fresh during the months when nothing grows.
Whether you live off-grid, garden seasonally, or just want a backup to modern refrigeration, a root cellar can give you a steady place to store your harvest safely and naturally.
In this article, I'll cover 10 root cellar ideas, each suited for different climates, land types, and storage needs.
From traditional underground cellars to simple surface-level methods, you'll find options that are affordable, effective, and easy to set up.
10 Root Cellar Options You Can Build Yourself
There’s no single way to build a root cellar. Depending on your land, climate, budget, and storage needs, some methods might work better for you than others.
The good news is that there are plenty of options – some are permanent underground spaces, others are simple, temporary setups.
Below are 10 practical ideas you can try, each offering a different approach to storing food without electricity.
1. In-Ground Root Cellar

An in-ground root cellar is what most people think of when they hear the term. This is a space dug deep into the ground, either on a hillside or in a flat area with good drainage.
It’s one of the best ways to take advantage of the earth’s natural cooling ability.
Once the cellar is dug out, you’ll usually build up walls with materials like cinder blocks, concrete, or even stone to help with structure and insulation.
A simple roof made of wood or concrete, topped with soil, helps hold in the cool temperature.
What makes this kind of cellar work so well is the consistent temperature and humidity the earth provides.
Even when it’s hot outside in summer or freezing in winter, the inside of the cellar tends to stay around the same range.
You’ll need to add some form of ventilation (like a couple of PVC pipes or small vents) so air can move in and out. This helps prevent moisture buildup and mold.
If you have the space, decent soil, and don’t mind doing some digging, this kind of root cellar can give you a large, reliable area for long-term food storage.
2. Earthbag Root Cellar

An earthbag root cellar uses bags filled with soil, sand, or a mix of natural materials to build the walls of your cellar.
These bags are stacked like bricks, with barbed wire or rebar between them for added strength. This method is especially useful if you're working with a tight budget or want to use materials that are easy to get locally.
The key to this method is the thermal mass. The packed earth holds onto cool temperatures and helps keep the inside of the cellar stable, even when it’s hot or cold outside.
Once the bags are stacked and shaped into walls, they’re usually plastered with a mud or lime mixture to protect them from moisture.
Earthbag cellars work well in dry climates or anywhere you want to build a solid, well-insulated structure using mostly natural materials.
As long as you take care of drainage and add ventilation, it can be just as effective as concrete or wood, and it’s a lot more sustainable.
3. Strawbale Root Cellar

A strawbale root cellar uses tightly packed straw bales to form the walls of your storage space.
Straw is a great natural insulator, so this kind of cellar is good for places where temperature swings are a concern. The bales help trap cool air inside and keep warm air out, which makes for steady conditions year-round.
To build one, you’ll need a solid foundation to keep moisture from the ground out. Then, you stack the straw bales to make the walls and add a waterproof roof to protect the inside from rain and snow.
It's important to cover the outside of the straw with a breathable plaster or coating so it doesn’t break down over time. You’ll also need to include air vents, just like with other cellars, to keep air flowing.
One reason people like this option is that straw is widely available and renewable.
If you’re looking for a more natural, eco-friendly way to store your food, and you live in a place where straw is easy to get, this could be a smart solution.
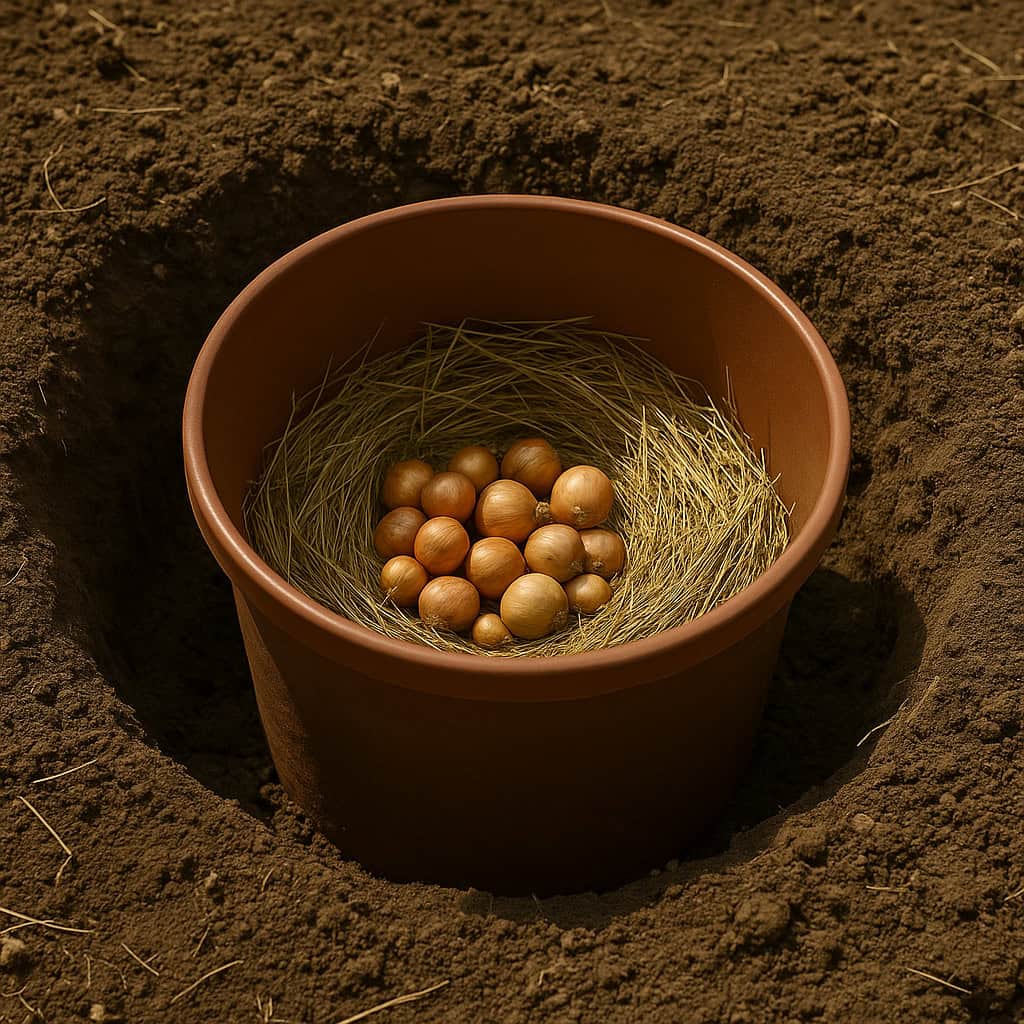
4. Storage Clamp

A storage clamp is one of the simplest ways to store root vegetables without building anything permanent.
It’s a method that’s been used for centuries, especially for storing things like potatoes, turnips, and beets through the winter. Instead of digging out a full cellar, you create a mound or pit on level ground.
Here’s how it works: You lay down a thick bed of straw right on the ground, add a pile of vegetables, and then cover the top with more straw and a layer of soil or a tarp to protect it.
The straw acts like insulation, keeping the cold from getting in too fast and helping the vegetables stay fresh and firm. As long as the ground drains well and you don’t have pooling water, this method can keep crops good for months.
Storage clamps work best when temperatures stay cold but not freezing.
If you’re looking for a no-frills way to store root crops, especially in fall and winter, this method is hard to beat for simplicity and cost.
5. Zeer Pot (Clay Pot Cooler)
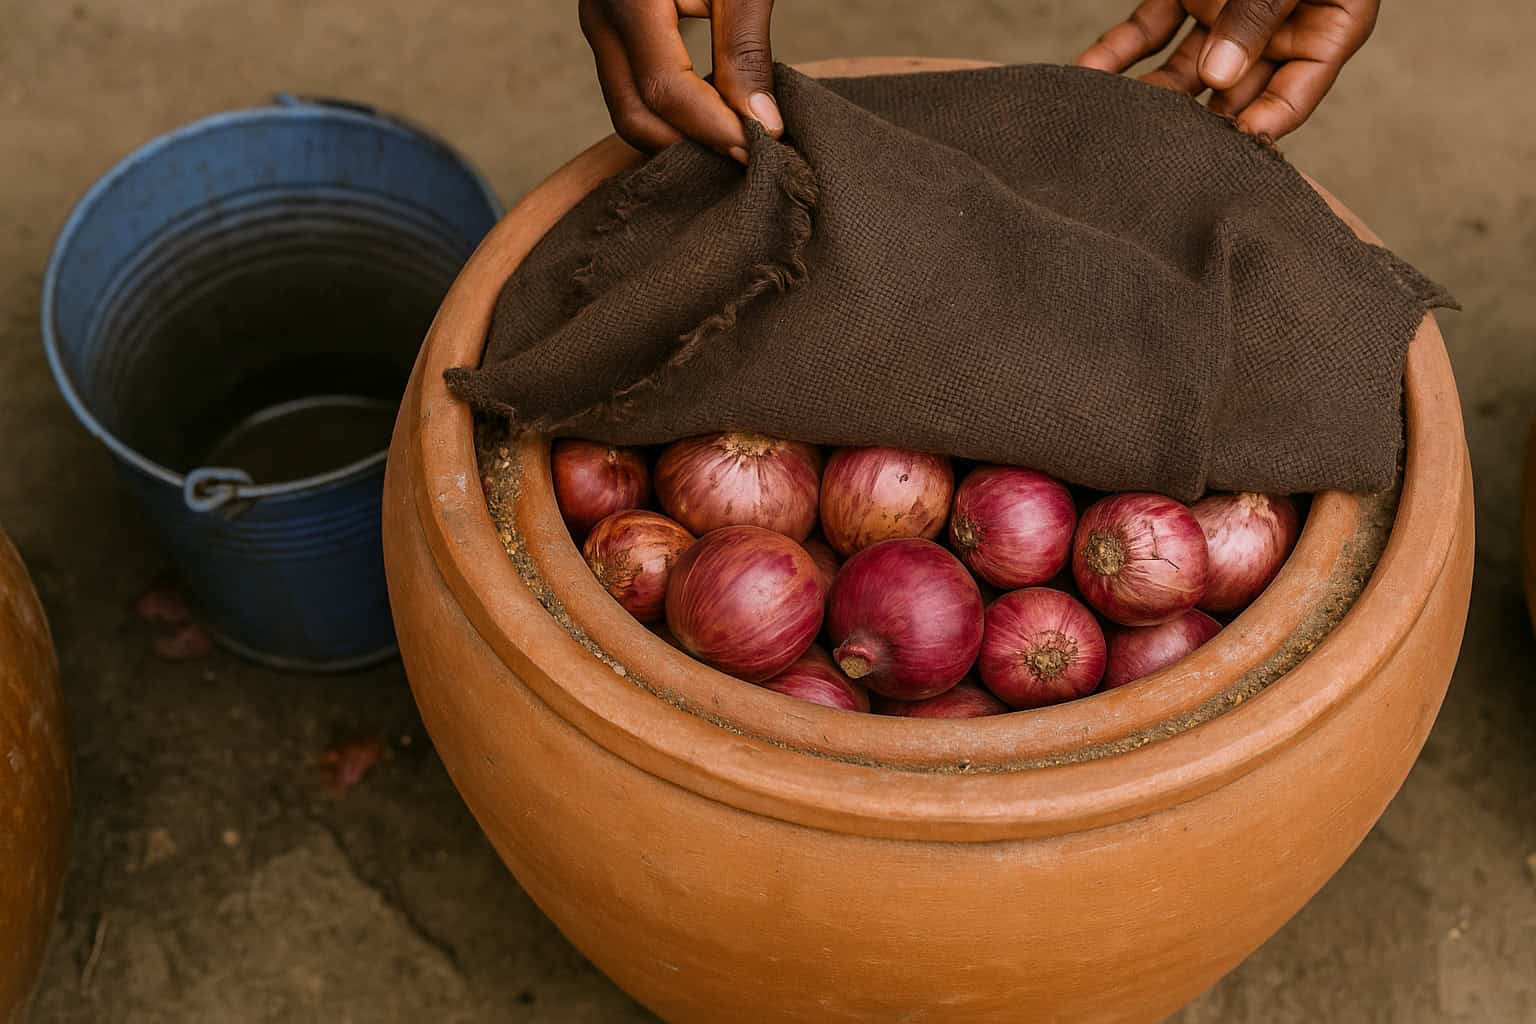
A zeer pot is a small, low-tech cooling system that works well in dry and hot areas. It’s made using two clay pots, one slightly smaller than the other, with a layer of wet sand in between them.
The larger pot holds the sand, while the smaller one sits inside and holds the food. As the water in the sand evaporates, it pulls heat away from the inner pot, keeping the contents cool.
This method won’t cool your food as much as a refrigerator, but it can make a big difference in extending freshness. It works best in places with low humidity, where evaporation happens faster.
You’ll need to keep the sand damp for the cooler to keep working, so it does take a bit of upkeep.
The zeer pot is a great option if you only need to store a small amount of food and don’t have access to electricity or much space. It’s simple to make and doesn’t require digging or building (just the right materials and a shaded spot).
6. Container Cellar (Buckets, Trash Cans, Barrels)
If you want something small and easy to build, a container cellar could be the right fit. This idea involves burying containers like 5-gallon buckets, plastic trash cans, or metal barrels into the ground.
Once buried, the earth helps keep the container cool, and the insulation you add inside helps protect your food from temperature changes.
To get started, dig a hole deep enough to fit the container with the lid just below or at ground level. It’s important to drill small holes in the bottom if there’s any chance of water pooling.
Around the outside, you can pack in straw, hay, or sawdust for added insulation. If you’re using something like a trash can, you can even add a small piece of PVC pipe through the lid to allow some air exchange.
This setup works well for storing root vegetables, and it's also good if you're dealing with limited space or just want a short-term solution.
7. Buried Old Freezer or Refrigerator
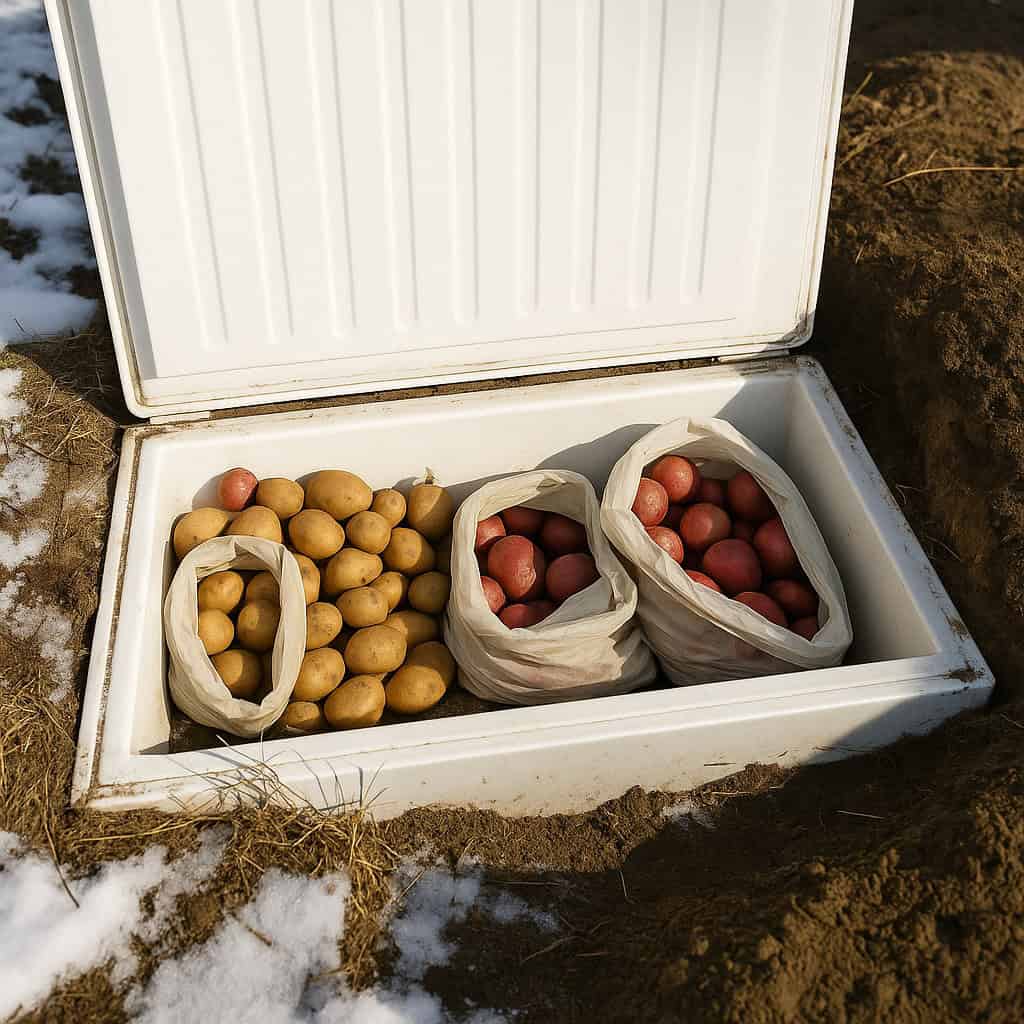
An old non-working freezer or fridge can still be useful. Instead of tossing it, you can bury it and use it as a root cellar.
These appliances are already insulated, so when they’re surrounded by soil, they hold a cool, stable temperature inside. That makes them a convenient storage space for root crops and other produce.
Before burying it, make sure the drainage is sorted out. You’ll want to drill holes in the bottom so water can escape.
You should also add a way for air to flow in and out (PVC pipes or small vents can do the trick). The door should seal well enough to keep pests out, but you might still want to weigh it down or latch it to make sure animals can’t open it.
This method gives you a ready-made storage unit without needing to build from scratch. It’s a good way to reuse something that would otherwise go to waste and can be a long-lasting solution if it’s installed the right way.
8. Pallet Root Cellar

If you can get your hands on some used pallets, you’ve got the makings of a small root cellar.
Pallets are often free or cheap, and their slatted structure gives you a good starting point for building walls and supports underground.
This method takes a bit more effort than burying a container, but it gives you a larger and more flexible space to work with.
To build a pallet root cellar, you’ll need to dig a hole big enough to fit your structure and allow you to move around inside. Then, you use the pallets to line the sides of the hole.
You’ll likely need to reinforce the inside with plastic sheeting or plywood to keep soil and moisture out. Adding a roof made from wood, metal, or even more pallets (then covering it with soil) helps keep the temperature steady.
This option works best for people who want to build a simple, low-cost cellar without using concrete or heavy materials. It takes some prep and a bit of carpentry, but it’s very doable with basic tools.
9. Cellar Under the Porch or Deck

The area under your porch or deck might not look like much, but it can be a handy spot for food storage (especially if it's shaded and gets little direct sunlight).
Since it’s already protected from the elements and usually stays cooler than the rest of the yard, you can turn it into a seasonal root cellar with just a few tweaks.
To use this space, you’ll want to enclose a section with wood or other materials to keep out animals and add insulation where needed.
Storing your food in sealed buckets, bins, or barrels helps keep it safe from pests and moisture. If the space is large enough, you can add a small hatch or door to make it easier to access.
This method is especially useful for people with limited yard space or who want to keep things simple. It doesn’t take much to set up, and it makes use of a spot you might not otherwise be using.
10. Seasonal Cellars (Garages, Attics, Outbuildings)

Sometimes, the best place to store food is one you already have. Spaces like garages, sheds, attics, or even back rooms can be turned into seasonal cellars when temperatures outside are cold enough.
These areas are usually dark and stay cooler than the main part of the house, especially in winter.
To make these places more effective, you might need to add some insulation or block off airflow from warmer parts of the house. Storing food in insulated boxes, coolers, or heavy-duty bins helps keep temperatures steady.
This type of cellar works best for short-term storage during the colder months when outside temperatures help cool the space naturally.
While these aren’t true root cellars, they can serve the same purpose for part of the year – especially if you're storing a small harvest or don’t have the time or space to build something more permanent.
Pick one root cellar idea that suits your space and try it this season – you might be surprised how well it works.

There’s no one-size-fits-all root cellar. What works best for you depends on your climate, your space, your budget, and how much food you want to store.
Some people can dig out a full in-ground cellar, while others might do just fine with a buried trash can or a pile of straw over a garden bed.
What matters most is finding a setup that fits your needs and keeps your food cool, dark, and well-ventilated.
Whether you live in a rural area with lots of land or you're working with a small backyard or shed, there’s likely a method on this list you can try.
Many of these ideas are simple, affordable, and rely on materials you might already have on hand. With a little planning and effort, you can store food for months without ever plugging in a fridge.
Frequently Asked Questions (FAQs)
Curious about how root cellars work or what you can store in them? Here are some quick answers to help you get started.
What foods store best in a root cellar?
Root cellars are ideal for firm vegetables and fruits that don’t need refrigeration but still benefit from a cool, dark place. These include potatoes, carrots, beets, turnips, onions, garlic, winter squash, apples, and cabbage. Some people also use root cellars for canned goods or homemade ferments.
How do I control humidity and airflow inside a root cellar?
Good airflow is key to preventing mold and rot. Most cellars include at least two small vents—one low and one high—to let air circulate. If the air is too dry, a shallow pan of water can raise humidity. If it’s too damp, increasing ventilation or adding a small fan may help.
Can I build a root cellar if my area has a high water table?
It’s possible, but you’ll need to take extra steps to keep water out. Raised or above-ground options like earthbag walls, strawbale structures, or spring houses may work better. Adding gravel and a drain at the base can also help reduce water buildup in dug-out cellars.
What temperature should a root cellar stay at?
Most root crops store best between 32°F and 40°F. For fruits and canned items, slightly warmer temperatures up to 50°F are fine. The main goal is to keep the temperature steady and avoid frequent changes, which can shorten shelf life.
How do I protect my root cellar from pests and animals?
Use tight-sealing containers or bins to keep out mice and insects. For larger cellars, make sure doors or lids are secure and consider using hardware cloth or fencing to block off entry points. Regular checks will help you catch problems early.
Ready To Transform Your Garden?

Are you looking for the best way to layout your garden beds? Maybe you're feeling a bit stuck on how to make the most of your space?
We’ve got you covered! Check out our 101+ Garden Bed Layout Ideas for your next raised bed project. This guide is filled with creative and practical ideas that can help you design a garden that fits your style, whether you’re just starting out or have been gardening for years.
Get your copy today and get inspired to bring your gardening dreams to life.