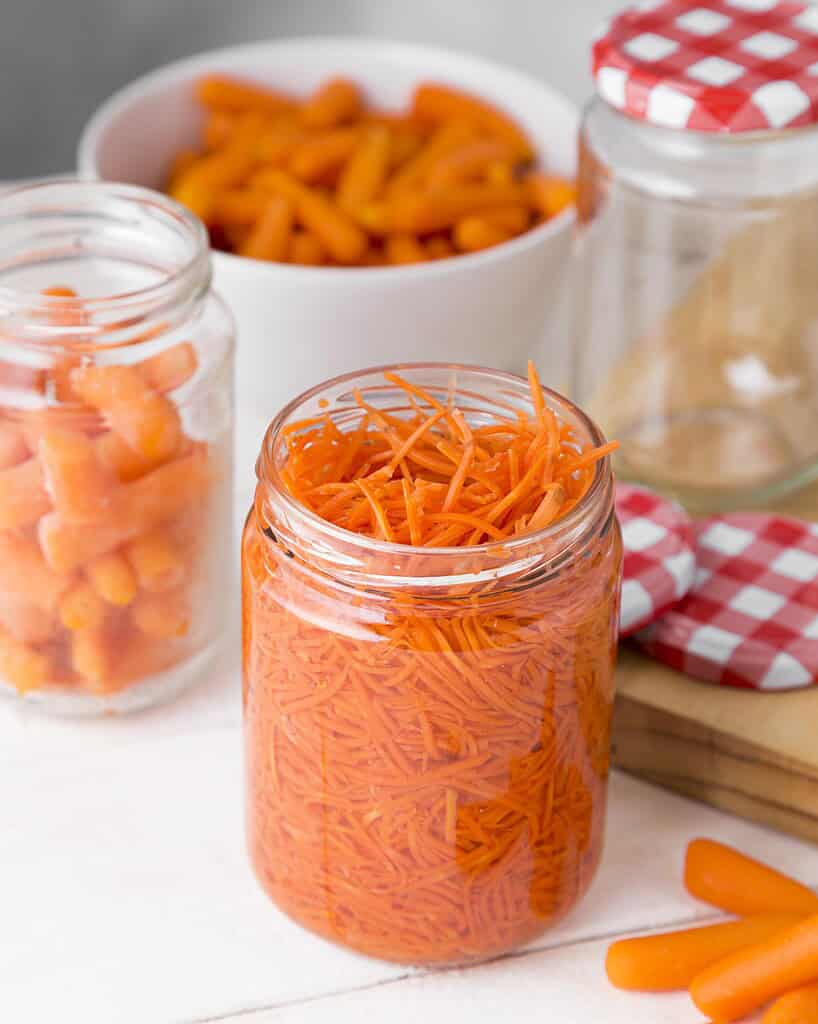
Canned pickled carrots are crisp, tangy, and a little sweet – perfect for adding brightness to salads, sandwiches, charcuterie boards, or even enjoying straight from the jar.
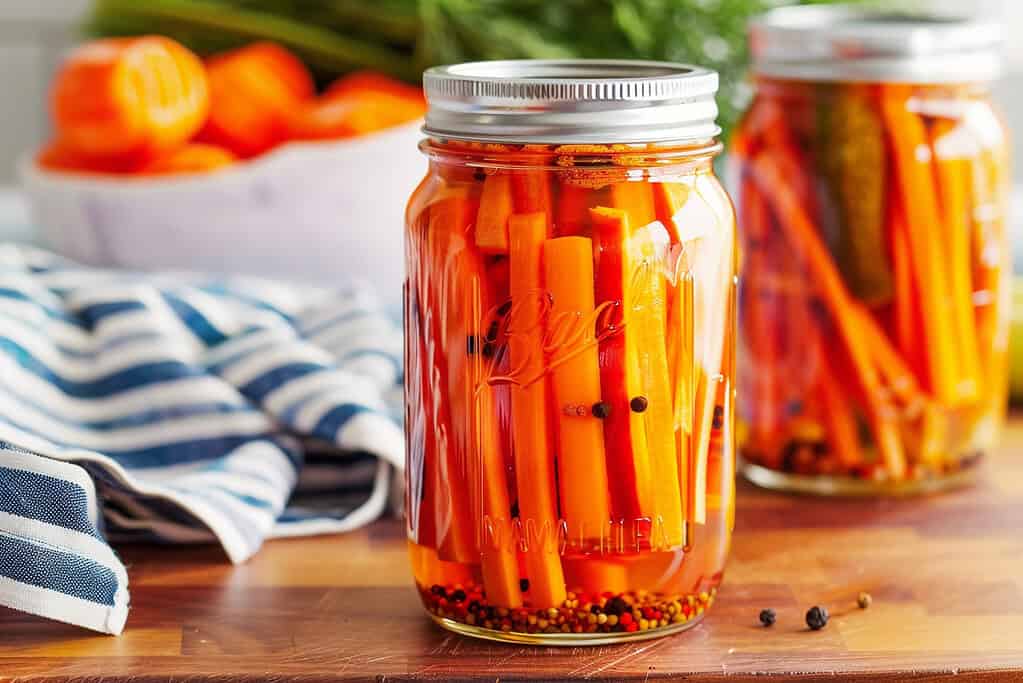
Unlike quick refrigerator pickles, these are processed and sealed so they can be stored right in your pantry for months, ready whenever you need them.
Canning takes a little more time than a simple fridge pickle, but the reward is long-lasting jars of vibrant, flavorful carrots you can enjoy all year.
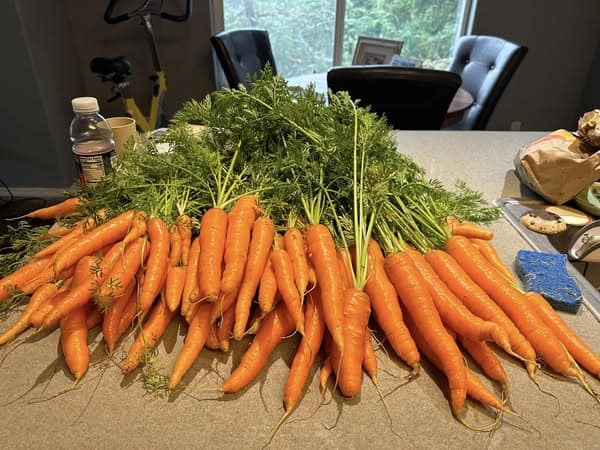
Whether you’re preserving a bumper crop from the garden or stocking your shelves with homemade staples, canned pickled carrots are a practical and delicious way to make the most of your harvest.
If you’re new to the process, check out this guide on canning for beginners to get started with confidence.
What Are Pickled Carrots?

Pickled carrots are fresh carrots preserved in a tangy vinegar brine, often flavored with sugar, salt, and spices.
The vinegar provides the acidity needed for safe preservation, while the seasonings add depth – anything from sweet and mellow to warm and spicy.
There are two main ways to make pickled carrots:
- Quick (Refrigerator) Pickled Carrots: The carrots are packed in jars, covered with hot vinegar brine, and stored in the refrigerator. They’re ready to eat in just a few days and stay crisp and flavorful for 2–4 weeks.
- Canned Pickled Carrots (NCHFP Method): The carrots are simmered briefly in a vinegar brine, packed into jars with spices, and processed in a boiling-water canner. This tested method creates shelf-stable jars you can safely store in the pantry for 12–18 months. If you’ve ever wondered how to can carrots, this process will feel very familiar.
Both versions are crisp, colorful, and perfect for brightening salads, sandwiches, grain bowls, or snack boards.
But in this recipe, we’re going to focus on the canned version – so you can stock your pantry with safe, long-lasting jars of pickled carrots.
Love Pickling? This is part of my How to Pickle Everything series! Check out more recipes:
- Quick Pickled Radishes Recipe
- Easy Pickled Beets Recipe
- Homemade Pickled Okra Recipe
- How to Make Pickled Cabbage (Only 20 Minutes!)
- How to Make Pickled Jalapeños at Home
- How to Make Pickled Cucumbers at Home
- Pickled Garlic Recipe
- Easy Pickled Banana Peppers Recipe
- How to Make Pickled Asparagus at Home
- How to Make Pickled Ginger (Gari) at Home
- How to Make Pickled Cauliflower
- Crisp Pickled Green Beans Recipe
- Homemade Pickled Eggs with Beets
- Easy Pickled Cherry Tomatoes (No Canning Needed)
Why Make Canned Pickled Carrots?
Canning pickled carrots is about more than just flavor – it’s about convenience, preservation, and peace of mind.
By following the tested method from the National Center for Home Food Preservation (NCHFP), you can safely store jars of tangy, crunchy carrots in your pantry for up to a year or more.
Here are a few reasons to love canned pickled carrots:
- Long-Term Storage: Unlike quick refrigerator pickles that last only a couple of weeks, canned pickled carrots are shelf-stable. This makes them perfect for stocking your pantry with ready-to-eat vegetables.
- Zero Waste: Have a bumper crop of carrots from the garden or a big bag from the market? Canning ensures none go to waste. If you’d like to grow your own, check out this guide on how to grow carrots.
- Convenience: With jars on the shelf, you’ll always have a quick side dish or snack ready to open – no waiting days for the flavors to develop.
- Consistent Quality: The boiling-water canning process locks in freshness and flavor, giving you reliable results you can count on.
- Versatility: Canned pickled carrots add color and crunch to salads, sandwiches, tacos, charcuterie boards, or even as a simple snack straight from the jar.
Canning requires a little more time than quick pickling, but the reward is a shelf full of safe, flavorful jars you can enjoy any time of year.
Ingredients You’ll Need for Pickled Carrots
The ingredients for canned pickled carrots are straightforward and easy to find.
- Carrots – 2¾ pounds peeled (about 3½ pounds as purchased, trimmed and scrubbed)
- White distilled vinegar (5% acidity) – 5½ cups
- Water – 1 cup
- Sugar – 2 cups
- Canning salt – 2 teaspoons (do not substitute with table salt)
- Mustard seed – 8 teaspoons (divide evenly among jars)
- Celery seed – 4 teaspoons (divide evenly among jars)
Yield: About 4 pint-size jars of pickled carrots.
How to Make Pickled Carrots in 7 Steps
This recipe comes directly from the National Center for Home Food Preservation (NCHFP) and is a tested, research-based method for safely canning pickled carrots.
Unlike quick refrigerator pickles, this version is processed in a boiling-water canner, making it shelf-stable for long-term storage. Follow each step carefully for the best flavor and safety.
Step 1: Prep the Carrots

Start with about 3½ pounds of fresh carrots as purchased (around 2¾ pounds once peeled).
Wash them thoroughly under cool running water, scrub well to remove any dirt, and peel to remove the outer layer.
Peeling is important because it helps remove surface bacteria and improves the texture once canned. Cut the carrots into ½-inch slices, keeping them uniform in size.
Consistent pieces will cook and pickle evenly, which gives you the best flavor and texture across every jar.
Step 2: Make the Brine
In a large stainless steel or enamel saucepan, combine:
- 5½ cups distilled white vinegar (5% acidity)
- 1 cup water
- 2 cups sugar
- 2 teaspoons canning salt
Bring this mixture to a boil, stirring to dissolve the sugar and salt.
This brine is the heart of the recipe – it provides the acidity that keeps the carrots safe, while the sugar balances the tang and the salt enhances flavor.
Once boiling, add the sliced carrots and return the mixture to a boil. Reduce the heat and simmer the carrots for about 10 minutes, until they are half-cooked.
This step helps soften the carrots slightly so they absorb flavor better while still keeping their crunch.
Step 3: Prepare the Jars
While the carrots simmer, get your pint jars ready. Wash jars, lids, and bands in hot, soapy water, and rinse well.
Keep jars hot until ready to use by placing them in simmering water or in a warm oven (around 200°F).
Adding hot food to cold jars can cause breakage, so this step prevents temperature shock. Place 2 teaspoons mustard seed and 1 teaspoon celery seed into the bottom of each hot jar.
These spices give the pickles their classic flavor and aroma.
Step 4: Pack the Jars
Using a slotted spoon, carefully pack the hot, half-cooked carrot slices into the prepared jars. Pack them firmly but without crushing, leaving about 1 inch of headspace at the top.
Proper headspace is important – it allows for expansion during processing and ensures that jars seal correctly.
Step 5: Add the Brine
Once the jars are packed with carrots, ladle the hot brine into each jar, fully covering the carrots. Maintain ½ inch of headspace.
This means the liquid should stop about ½ inch from the rim. Use a clean, nonmetallic utensil (such as a bubble remover or plastic spatula) to gently remove air bubbles by sliding it around the inside of the jar.
Air bubbles can interfere with sealing. Adjust liquid if necessary to restore the correct headspace.
Step 6: Seal and Process
Wipe the jar rims with a clean, damp cloth to remove any brine residue – this helps ensure a good seal.
Place the flat lids on the jars, then screw the bands on fingertip-tight (snug, but not overly tight). Process the jars in a boiling-water canner, making sure the water covers the jars by at least 1 inch.
Start timing once the water returns to a full rolling boil. Processing times are:
- 15 minutes at 0–1,000 ft elevation
- 20 minutes at 1,001–6,000 ft elevation
- 25 minutes above 6,000 ft elevation
This step is critical for safety: the heat destroys harmful microorganisms, while the vinegar’s acidity keeps the carrots safely preserved on the shelf.
Step 7: Cool and Store
When the processing time is finished, turn off the heat, remove the canner lid, and let the jars rest in the hot water for 5 minutes before removing them.
This helps prevent siphoning (liquid loss). Carefully lift the jars out with a jar lifter and place them on a towel, undisturbed, for 12–24 hours. Do not retighten lids as they cool.
Once cooled, check the seals – the lids should be concave and not flex when pressed in the center. Label jars with the date, and store in a cool, dark place.
Properly sealed jars are shelf-stable. For best flavor, let the pickled carrots sit for 3–5 days before opening to allow flavors to fully develop.
When Are They Ready?
Pickled carrots need a little time to develop their full flavor. While you can technically open a jar once it has cooled and sealed, it’s best to wait at least 3 to 5 days before tasting.
This short resting period allows the vinegar brine and spices to infuse deeply into the carrots, softening their sharpness and creating a balanced, tangy flavor.
Properly processed and sealed jars are shelf-stable and can be stored in a cool, dark place for up to 12 to 18 months.
Once opened, the jar should be kept in the refrigerator and used within a few weeks.
If at any point the seal is broken, the lid is bulging, or the contents appear cloudy, slimy, or have an off odor, the jar should be discarded. These are clear signs of spoilage.
How to Store Canned Pickled Carrots
Once your jars have been properly processed and sealed, store them in a cool, dark place such as a pantry or cupboard.
Avoid areas with direct sunlight, fluctuating temperatures, or excess humidity. Properly sealed jars will keep for 12 to 18 months.
After opening a jar, transfer it to the refrigerator and use within a few weeks for the best flavor and texture.
Always check for signs of spoilage before eating – if a lid is unsealed, bulging, or if the brine looks cloudy or smells off, it’s safest to discard the jar.
Serving Ideas

Pickled carrots are more versatile than most people think. They bring a tangy crunch that can brighten up almost any meal. Here are some simple ways to use them:
- Sandwiches and Burgers: Add a few sticks to cut through rich meats or sauces.
- Salads: Chop them up for extra crunch and flavor without needing a heavy dressing.
- Charcuterie Boards: Their sharpness pairs well with cheeses, cured meats, and olives.
- Tacos and Wraps: Use them as a topping for a refreshing bite.
- Straight from the Jar: Sometimes they’re best as a quick snack on their own.
Make Your Own Batch Today!
Pickled carrots are one of the easiest (and most rewarding) vegetable pickles to make at home.
With a few pounds of fresh carrots, a simple vinegar brine, and the right spices, you can prepare jars that are both flavorful and shelf-stable.
The process is straightforward: prepare the carrots, simmer them briefly in brine, pack into jars with spices, and process in a boiling-water canner.
The reward? A vibrant, crunchy pickle that’s ready to enjoy in just a few days – but will last for up to a year on the shelf.
Once you taste the difference of homemade, store-bought versions simply won’t compare.
Frequently Asked Questions
Can I reuse the brine for another batch of carrots?
No. Each batch needs fresh brine to ensure the correct balance of vinegar, sugar, and salt for safe preservation. Reusing brine may lower the acidity and compromise both safety and flavor.
Can I reduce the sugar in this recipe?
Not in this version. The ratio of vinegar, water, sugar, and salt is tested for safety. If you prefer a less sweet pickle, use a tested low-sugar canning recipe instead of altering this one.
Can I add other vegetables to the jars with the carrots?
It’s best not to. Mixing different vegetables changes acidity levels and may make the recipe unsafe for canning. If you’d like to pickle other vegetables, look for a tested recipe specifically designed for them.
What type of jars are best for canning?
Use standard pint-size Mason jars with two-piece canning lids (flat lid + screw band). These are designed to withstand the heat of boiling-water canning and ensure a proper seal.
How long will canned pickled carrots last?
Properly processed and sealed jars are shelf-stable for 12 to 18 months when stored in a cool, dark place. Once opened, refrigerate the jar and use within a few weeks.