Camellias are evergreen flowering plants known for their glossy leaves and vibrant blooms.
With the right conditions, they can thrive for decades and grow into large, elegant trees. But to get them to bloom well and stay healthy, they need specific care from the start.
In this article, I'll cover everything you need to know – where to plant them, how to keep their roots healthy, what kind of mulch and feeding they need, how to prevent problems, and even how to grow more camellias from cuttings.
If you're looking for a clear, natural approach to growing camellias that will keep them blooming year after year, you'll find it here.
And they’re not the only ones worth planting. You can pair them with gorgeous long-blooming perennials to keep color flowing through every season.
What Are Camellias?

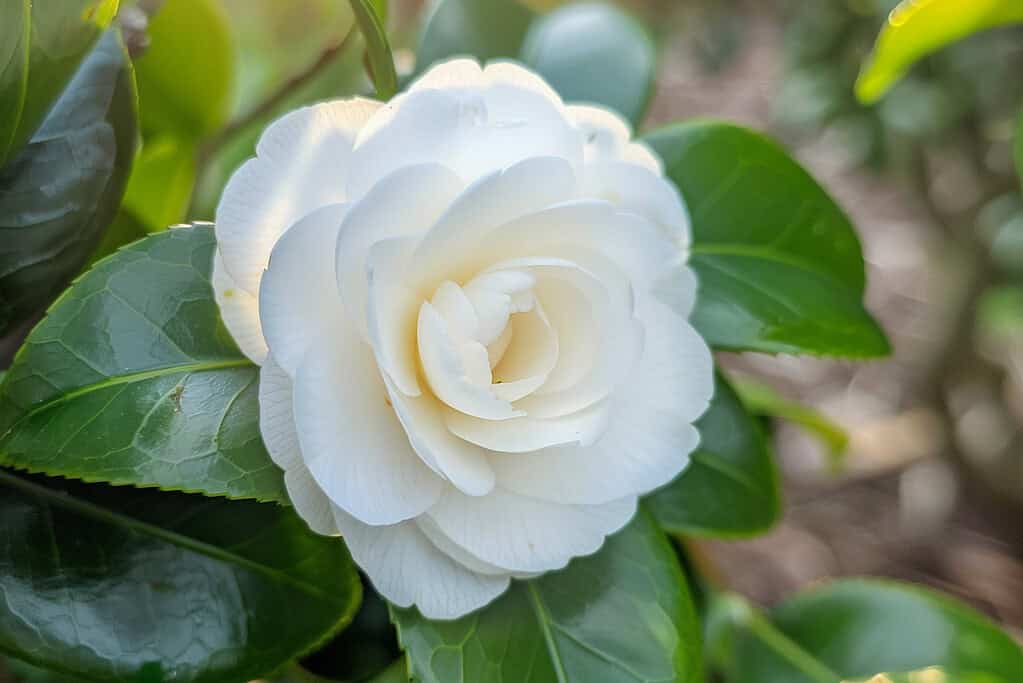
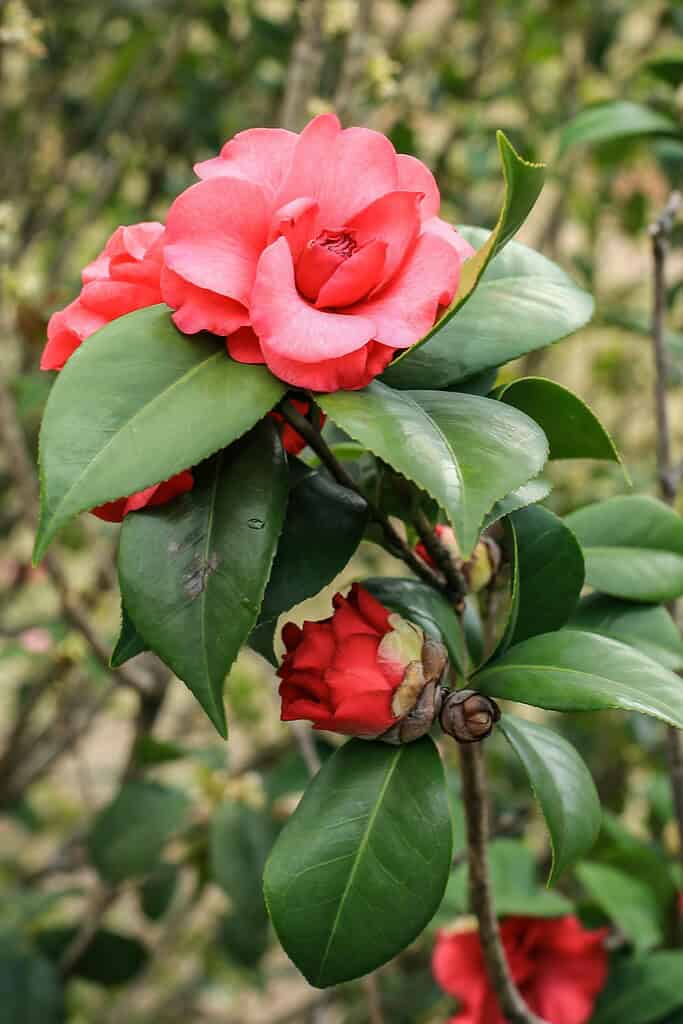
Camellias are known for their beautiful, rose-like flowers and dense, glossy foliage.
They’ve been cultivated for centuries in countries like China and Japan, where they grow naturally under the canopy of taller trees.
In traditional gardens, they’re appreciated for their ability to bring color to the landscape during cooler months when few other plants are blooming.
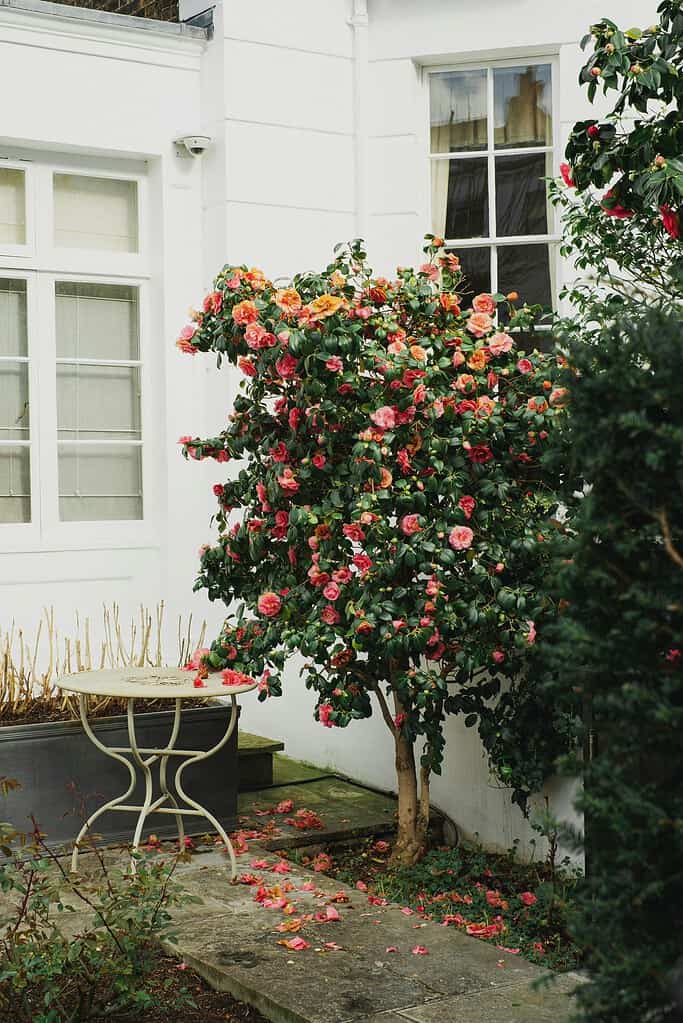
Beyond their ornamental value, camellias are long-lived and grow slowly into well-shaped, tree-like forms. When given the right space and care, they can stand on their own as statement plants.
Many gardeners use them as living screens, foundation plantings, or focal points in shady parts of the garden.
Their ability to thrive with minimal pruning and their tolerance for filtered light make them especially valuable in woodland-style or natural gardens.
If you enjoy plants that brighten the garden in the colder months, you might also like learning how to grow and care for hellebores, another winter favorite.
| Feature | Details |
|---|---|
| Botanical Name | Camellia japonica, Camellia sasanqua, and others |
| Plant Type | Evergreen flowering shrub/tree |
| Mature Size | 10–25 feet tall and wide (depending on variety and care) |
| Bloom Time | Fall to early spring (varies by species) |
| Flower Colors | White, pink, red, variegated |
| Light Requirements | Partial shade; avoid direct early morning or hot afternoon sun |
| Soil Needs | Well-drained, slightly acidic, rich in organic matter |
| Watering Needs | Regular, deep watering; do not let roots sit in water |
| Fertilizer | Optional; use compost or blood and bone in spring and fall |
| USDA Hardiness Zones | Typically zones 7–9 (some varieties can tolerate zone 6) |
| Lifespan | Can live for 50–100+ years with proper care |
Choosing the Right Spot to Plant Camellias
Where you plant a camellia makes a big difference in how well it grows and blooms.
In their native environments, camellias grow under taller trees that provide dappled light and protection from harsh weather.
To get the same results in your garden, it helps to copy those natural conditions.
Best Light Conditions for Camellias
Camellias need light to form flower buds, but not too much direct sun. A location that offers morning or filtered sunlight works best.
Too much afternoon sun, especially in summer, can scorch the leaves and stress the plant.
If the flowers are exposed to early morning sun while still wet with dew, they may burn or turn brown quickly – so avoid planting where the morning sun hits them directly.
Look for areas with dappled light or bright shade, similar to what you’d find under tall pines or oak trees.
If you’re also interested in similar delicate flowers that thrive in shade, you might enjoy growing stunning cyclamens.
Protecting Camellias from Wind and Heat
Harsh winds can damage flower buds and dry out the plant. Camellias do better in areas with protection from cold, dry winds, especially during the blooming season.
You can plant them near a fence, wall, or evergreen hedge that blocks wind without cutting off light.
Also, avoid placing them in narrow passages or wind tunnels where air can whip through and cause stress.
Ideal Garden Placement
The best spots are usually north-facing or east-facing areas that receive gentle morning light but are shaded from hot afternoon sun.
You can also plant camellias on the shady side of buildings or under taller, shallow-rooted trees that won’t compete for moisture.
Make sure the space allows for good airflow around the plant while still offering some protection.
Avoid spots that stay soggy or are heavily compacted – camellias need soil that drains well and doesn’t stay wet.
How to Plant Camellias in 7 Steps

Once you’ve chosen a good location, planting your camellia the right way is key to helping it settle in and grow strong.
Follow these steps carefully to avoid common mistakes like root rot, stunted growth, or poor flowering.
Step 1: Prepare the Soil
Loosen the soil in an area twice as wide as the rootball and about 12–15 inches deep. Mix in organic matter like compost, pine bark fines, or leaf mold to improve drainage and structure.
The soil should be loose, slightly acidic, and able to drain well. If the soil is heavy or clay-like, avoid peat moss and instead focus on chunky organic materials that won't compact.
If you’d like to make your own rich compost quickly, you can try the Berkeley method of composting, which produces usable compost in just a few weeks.
Step 2: Check the Rootball
Remove the camellia from its pot and inspect the roots.
If the plant is potbound (roots circling tightly around the edge), make 2–3 vertical cuts down the sides of the rootball with a sharp knife – about ½ inch deep.
This helps the roots grow outward into the surrounding soil.
Step 3: Set the Plant Above Soil Level
Place the camellia in the hole so that the top of the rootball sits 2 to 4 inches above the surrounding soil. This is important.
Do not bury the rootball flush or below ground level – planting too deep can cause rot where the stem meets the roots.
Step 4: Backfill the Hole Properly
Gently fill in the hole with your prepared soil mix, building it up to the edge of the raised rootball.
The final shape should look like a gentle slope up to the base of the plant, not a flat or sunken surface. Press the soil down lightly as you go to remove large air pockets, but don’t compact it.
Step 5: Water Slowly and Deeply
Once planted, water the area thoroughly to help the soil settle around the roots. Let the water soak in slowly.
Continue to water deeply once or twice a week for the first few months, depending on weather and soil type.
Step 6: Add Mulch (But Keep It Off the Trunk)
Apply a 2–3 inch layer of mulch around the base of the plant using pine straw, bark, or leaf mold.
Keep the mulch at least 1 inch away from the trunk to prevent moisture buildup against the stem.
For more inspiration on what to use, see these simple garden mulch ideas that can work across different types of plants.
Step 7: Leave Room to Grow
If planting more than one camellia, leave at least 15 feet between plants or nearby structures. This allows space for mature growth and ensures good airflow around the plant.
Watering and Mulching Tips for Camellias
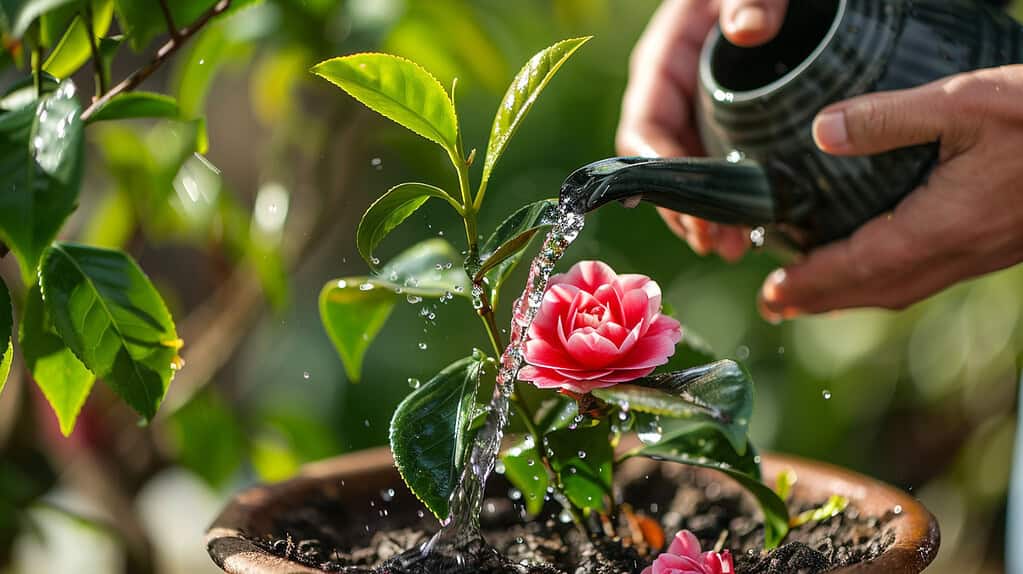
Camellias need consistent moisture to stay healthy, especially when young or newly planted. At the same time, their roots cannot tolerate standing water.
Proper watering and mulching help keep soil conditions just right – moist but well-drained, cool but not soggy.
How Often to Water Camellias
For the first few months after planting, camellias should be watered deeply once or twice a week, depending on rainfall and soil type.
It’s better to water thoroughly and less often, rather than giving shallow, frequent waterings. The goal is to encourage the roots to grow deeper.
Once established, camellias become more drought-tolerant but still need regular water during dry spells, hot summer months, and during bud formation.
Avoid letting the soil fully dry out, especially during active growth or blooming periods.
What to Watch For
Signs of overwatering include yellowing leaves, root rot, or a sour smell in the soil.
On the other hand, underwatered camellias may have wilting or dry, crispy leaf edges.
Check the soil moisture by inserting your finger a few inches deep – if it’s dry at that level, it’s time to water.
Choosing the Right Mulch
Mulch helps hold moisture in the soil, regulate temperature, and suppress weeds. The best mulches for camellias are:
- Pine straw
- Shredded bark
- Leaf mold
- Aged compost
These materials slowly break down, improving soil structure over time.
How to Mulch Camellias Properly
Apply mulch in a 2–3 inch layer around the plant, extending as far out as the canopy or more. However, keep mulch at least 1 inch away from the trunk.
Piling mulch against the base of the plant (often called a “mulch volcano”) traps moisture and can lead to stem rot.
As Celeste Richard of the American Camellia Society advises: “Mulch out, not up.”
Reapply fresh mulch each year, ideally in early spring or early fall, and remove any rotting or compacted material.
Feeding Camellias Naturally
Camellias don’t need heavy or frequent feeding to thrive – especially if they’re planted in rich, healthy soil. In fact, overfeeding can do more harm than good.
The best approach is slow, natural nutrition timed carefully to support healthy growth and flowering.
When to Feed Camellias
The ideal times to feed camellias are in early spring (just as new growth begins) and again in early fall. These windows align with the plant’s natural growth cycle.
Avoid feeding after July, as this can trigger late-season growth that interferes with bud development and may cause the plant to drop its flower buds before they open.
What to Use Instead of Synthetic Fertilizers
If the soil is already healthy and well-prepared, there’s usually no need for synthetic fertilizers. Instead, use:
- Old manure (well-rotted)
- Compost
- Leaf mold
These break down slowly and feed the soil as well as the plant. One application per year, spread as a top-dressing or mixed lightly into the top layer of soil, is usually enough.
For a more consistent option, you can also try organic slow-release fertilizers, which provide steady nutrition without the harsh effects of synthetics.
Using Blood and Bone for Extra Support
For a gentle, natural boost, you can sprinkle blood and bone meal on top of the mulch in early spring and again in early fall. This adds slow-release nutrients without overfeeding.
Always water it in well after applying.
Signs of Overfeeding to Watch For
Too much fertilizer, especially synthetic ones, can cause:
- Excessive leafy growth with fewer blooms
- Burned leaf edges
- Bud drop
- Soil imbalances that harm root health
If any of these appear, stop feeding and focus on restoring balance with organic matter and mulch.
How to Protect Camellias from Pests and Diseases
Camellias are fairly low-maintenance once established, but they’re not immune to problems. Pests and diseases can weaken the plant and ruin blooms if not handled properly.
A natural, proactive approach works best – avoiding chemicals when possible and focusing on prevention and cleanup.
Common Pests and Natural Controls
Most camellia pests can be handled without synthetic sprays. The most common issues include:
- Scale insects
- Aphids
- Spider mites
These pests often show up on the undersides of leaves or along stems. Signs include sticky residue, yellowing leaves, or stunted growth.
For control, spray the plant with neem oil, making sure to coat all surfaces, especially underneath the leaves. Repeat applications may be needed every 7–14 days during infestations.
Also, keep your camellias healthy with proper spacing, airflow, and watering – stressed plants are more vulnerable to pests.
For broader tips that apply to vegetables, flowers, and ornamentals alike, check out these effective pest control solutions.
Dealing with Camellia Petal Blight
Camellia petal blight is a fungal disease that causes brown, mushy flowers, often with no warning. It spreads quickly and can ruin an entire bloom cycle if not managed.
To prevent and control petal blight:
- Remove spent or infected flowers immediately – both from the plant and the ground.
- Do not compost these flowers. Dispose of them in the trash to avoid spreading spores.
- Replace old mulch with fresh material, especially if infections have occurred in past seasons. The fungus can survive in mulch and soil.
- Improve airflow around the plant and avoid overhead watering.
There’s no cure for petal blight once it starts, so prevention and cleanup are the only reliable methods.
General Tips for Disease Prevention
- Avoid watering late in the day or wetting the leaves unnecessarily.
- Clean up fallen leaves and flowers regularly.
- Maintain good air circulation by allowing enough space between plants.
- Keep mulch refreshed and never let it build up against the trunk.
Propagating Camellias Successfully
Camellias can be propagated from cuttings, but they root slowly and require patience. Success depends on timing, technique, and the right environment.
This method is especially useful if you want to grow more camellias from a favorite plant without buying new ones.
Best Time to Take Cuttings
The most reliable time to take camellia cuttings is in mid to late summer, when the new growth has started to firm up. These are known as semi-ripe cuttings – not too soft and not fully woody.
Avoid taking cuttings from weak or flowering branches. Look for healthy, non-flowering stems with several sets of leaves.
How to Prepare Camellia Cuttings
- Cut a 4–6 inch section from the tip of a healthy stem.
- Remove the lower leaves, leaving 2–3 sets at the top.
- Wound the cutting by stripping away a small 5/8-inch section of bark near the base. This exposes the inner tissue where roots are more likely to form.
- Dip the wounded end into a rooting hormone powder or gel to improve rooting success.
Planting and Rooting Conditions
- Use a small pot or tray filled with a well-draining propagation mix, such as equal parts perlite and peat or coarse sand and composted bark.
- Insert the cutting so that at least one node (leaf joint) is buried.
- Water lightly, then cover the pot with a clear plastic bag or humidity dome to maintain moisture without soaking the soil.
- Place the pot in a warm, bright spot with indirect light – not in direct sun.
- Keep the rooting mix moist but not wet.
Camellias root slowly. It can take 2–3 months or more for roots to develop, so check gently and avoid disturbing the cutting too soon.
Aftercare and Transplanting
Once roots form and new growth appears, transplant the cutting into a small pot with regular potting soil (or a best potting soil mix that supports healthy root development).
Grow it on for several months before moving it outdoors. Harden off gradually to prevent shock.
Designing Your Garden with Camellias

Camellias aren’t short-term bedding plants – they’re slow-growing, long-lived, and can become major features in a garden if given the right space.
Proper planning from the start helps them grow into their natural shape without constant pruning or relocation.
Think of Camellias as Trees, Not Shrubs
Although often sold as small shrubs, camellias are technically small evergreen trees. Mature camellias can reach 10 to 25 feet tall and wide, depending on the variety and growing conditions.
Treating them like perennials that need frequent trimming leads to unnecessary stress on the plant.
Instead of trying to control their size, it’s better to plan for it – choose a planting location where the camellia can grow freely over the years without being crowded or blocked, and consider pairing them with other beautiful shade loving perennials for a layered, natural look.
How Much Space Do Camellias Need?
To prevent issues with airflow, root competition, and over-shading, give each camellia at least 15 feet of space in all directions. This allows:
- Proper light exposure
- Good air circulation to reduce fungal problems
- Enough room for natural growth without shaping or pruning
Avoid planting them too close to walls, fences, or walkways, where they’ll eventually outgrow the space and require cutting back.
Using Camellias in Garden Design
Camellias are versatile in landscape design. Here are a few natural, low-maintenance ways to incorporate them:
- Specimen plants: Let them stand alone in open areas as a focal point.
- Woodland borders: Plant under tall trees in dappled shade to mimic natural growing conditions.
- Informal hedges: When spaced properly, camellias can be used for privacy screening or soft borders without heavy pruning.
- Foundation plantings: Just make sure there’s enough room from the building for full-sized growth.
Keep in mind that camellias bloom in fall, winter, or early spring depending on the type – so placing them where you’ll see them during those seasons adds more value.
Enjoying Camellias Indoors
Camellias are not just beautiful in the garden – they can also be brought indoors to brighten up your home during the cooler months.
With their bold, structured blooms, camellias work well as natural decorations without the need for complicated arrangements.
How to Harvest Camellia Blooms
The best time to pick camellia flowers is early in the morning, when the blooms are fully opened but still fresh.
Use clean, sharp scissors or pruners to cut the flower at the base of the stem or just beneath the bloom. Avoid touching the petals too much, as they bruise easily.
If you plan to bring in multiple blooms, place them in a shallow container of cool water right away to keep them hydrated while you arrange them indoors.
Floating Camellias in Water
One of the simplest and most elegant ways to display camellias is by floating them in a shallow bowl of water.
Choose a bowl with a flat base and fill it just enough to keep the flowers resting on the surface.
Tips for best results:
- Use freshly opened blooms that are free from damage.
- Change the water daily to keep it clear and prevent odors.
- Display the bowl in a cool, shaded indoor spot away from heating vents or direct sun.
This method keeps the flowers fresh for several days and highlights their shape and color with no extra styling required.
How Long Do Cut Camellias Last Indoors?
Unlike some cut flowers, camellias don’t last long in vases with stems.
When floated in water, they usually stay fresh for 2 to 4 days, depending on room temperature and bloom condition at the time of harvest.
Replace blooms as needed to keep the display looking clean and full.
Grow Stronger Camellias by Starting with the Right Care
Camellias may grow slowly, but when given the right foundation, they become long-lasting, low-maintenance plants that reward you year after year.
From choosing a shaded, wind-protected spot to planting above soil level and feeding only when needed, every step plays a role in their long-term success.
Instead of forcing them to adapt to harsh conditions or heavy intervention, a natural approach works best – good soil, steady moisture, and room to grow.
With that, camellias can thrive for generations with minimal input.
Have experience growing camellias or planning to start? Comment down below with your tips or questions – we’d love to hear from you.
Frequently Asked Questions
How long does it take for a camellia to bloom after planting?
Most camellias take 1 to 2 years to start blooming after planting, depending on the variety and age of the plant. Grafted or older plants may bloom sooner than younger ones grown from cuttings.
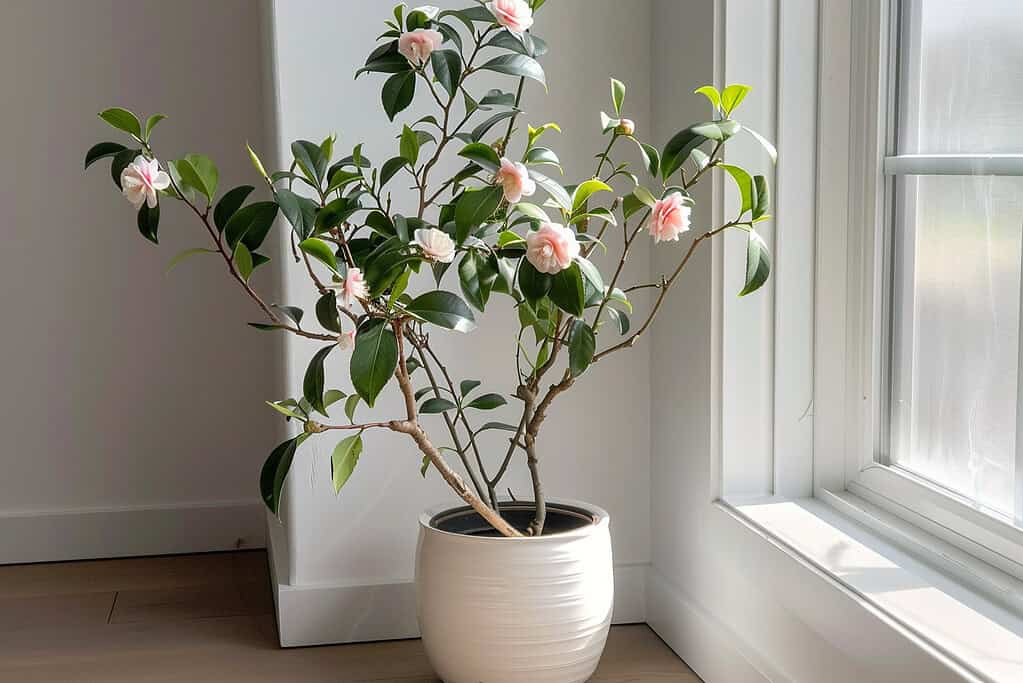
Can camellias grow in pots long term?
Yes, but they’ll need larger containers over time and consistent care. Choose a pot that’s at least 18 inches wide, use well-draining acidic soil, and repot every few years to prevent root binding.
Should I prune my camellia after it flowers?
Light pruning can be done immediately after flowering to shape the plant or remove dead wood. Avoid heavy pruning unless necessary, and never prune late in the season, as this can remove next year’s flower buds.
Why are the edges of my camellia leaves turning brown?
Brown edges usually signal inconsistent watering, root stress, or too much sun exposure. Make sure the plant is mulched properly, protected from direct sun, and watered deeply without keeping the soil soggy.
Can I grow camellias indoors?
Camellias are not well-suited as full-time indoor plants. They need cooler temperatures, bright filtered light, and humid conditions, which are hard to maintain indoors. It's better to grow them outdoors and bring in cut flowers instead.
Ready To Transform Your Garden?

Are you looking for the best way to layout your garden beds? Maybe you're feeling a bit stuck on how to make the most of your space?
We’ve got you covered! Check out our 101+ Garden Bed Layout Ideas for your next raised bed project. This guide is filled with creative and practical ideas that can help you design a garden that fits your style, whether you’re just starting out or have been gardening for years.
Get your copy today and get inspired to bring your gardening dreams to life.