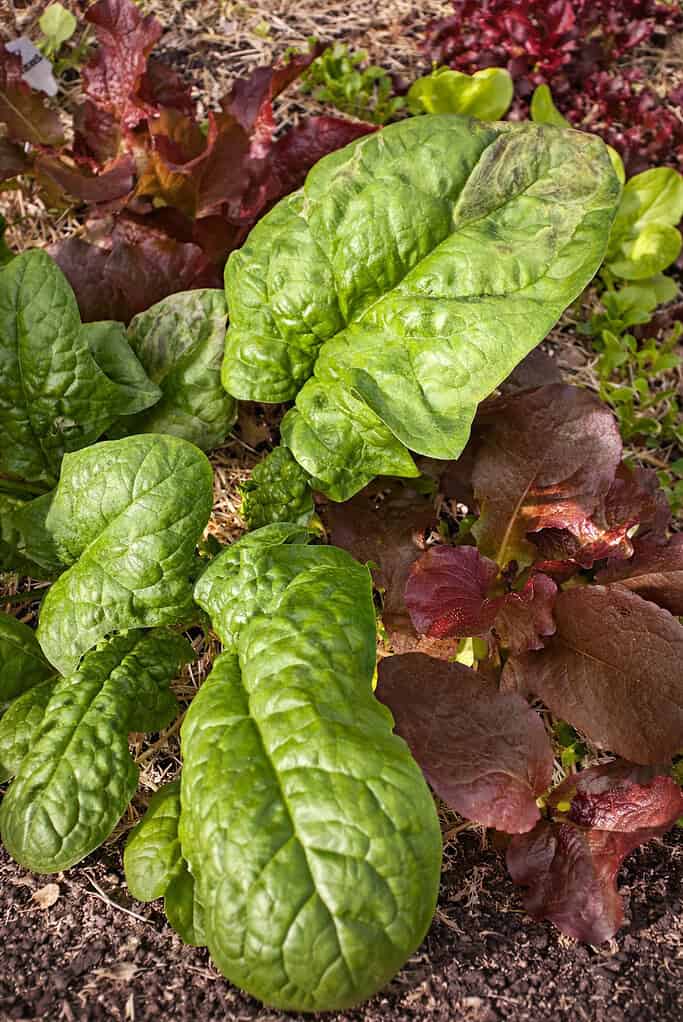
Spinach (Spinacia oleracea) is a nutritious, fast-growing leafy green that’s perfect for beginner gardeners.
In the mild weather of spring and fall, spinach grows quickly and produces an abundance of tender leaves.
If you’ve ever wondered how to grow spinach at home, this beginner-friendly guide will walk you through everything – from when and where to plant in the U.S., to how to grow spinach from seed, essential spinach growing tips, and even container gardening.
By the end, you’ll be ready to start growing your own fresh spinach and enjoying delicious homegrown greens.
Let’s dig in!
When to Plant Spinach
Spinach is a cool-season crop, which means it thrives in the chill of spring and fall rather than the heat of summer.
In most U.S. regions, plan to plant spinach as soon as the soil is workable in early spring – often 4 to 6 weeks before your last expected frost date.
Spinach seeds can germinate in cool soil (around 45°F or 7°C), and young plants tolerate light frosts easily.
For example, in many mid-Atlantic and northern states (zones 5-6), this might mean planting seeds in mid to late March. In warmer areas like the southern U.S. (zones 8-9), you could start as early as February.
Because summer heat will cause spinach to bolt (send up a flower stalk) and turn bitter, it’s best to stop planting once daytime temperatures regularly exceed ~75–80°F.
Instead, you can switch to heat-tolerant greens or wait for cooler weather. For a fall crop, sow spinach seeds 6 to 8 weeks before the first expected fall frost in your area. In many regions, that means planting in late summer (August or early September) for a fall harvest.
As days shorten and temperatures drop, fall-planted spinach will thrive and can often be harvested well into late autumn. In fact, spinach is very cold-hardy – established plants can survive temps down into the low 20s °F with some protection.
In milder winter climates (e.g. USDA zone 8 and above), you can even overwinter spinach by planting in fall and protecting it with mulch or row covers, yielding a very early spring harvest.
Pro Tip: For a continuous supply of spinach leaves, succession plant by sowing a fresh batch of seeds every 10-14 days in the spring.
This staggered planting will ensure new spinach is always coming up before the last batch starts to bolt. In the fall, you can do the same until it becomes too cold.
How to Choose the Right Spot and Soil for Spinach
Choosing a good growing site will set your spinach up for success.
Spinach grows best in full sun during the cool seasons, but it will tolerate partial shade (around 4-6 hours of light) especially as the weather warms.
In late spring, a bit of afternoon shade can help keep the plants cooler and delay bolting.
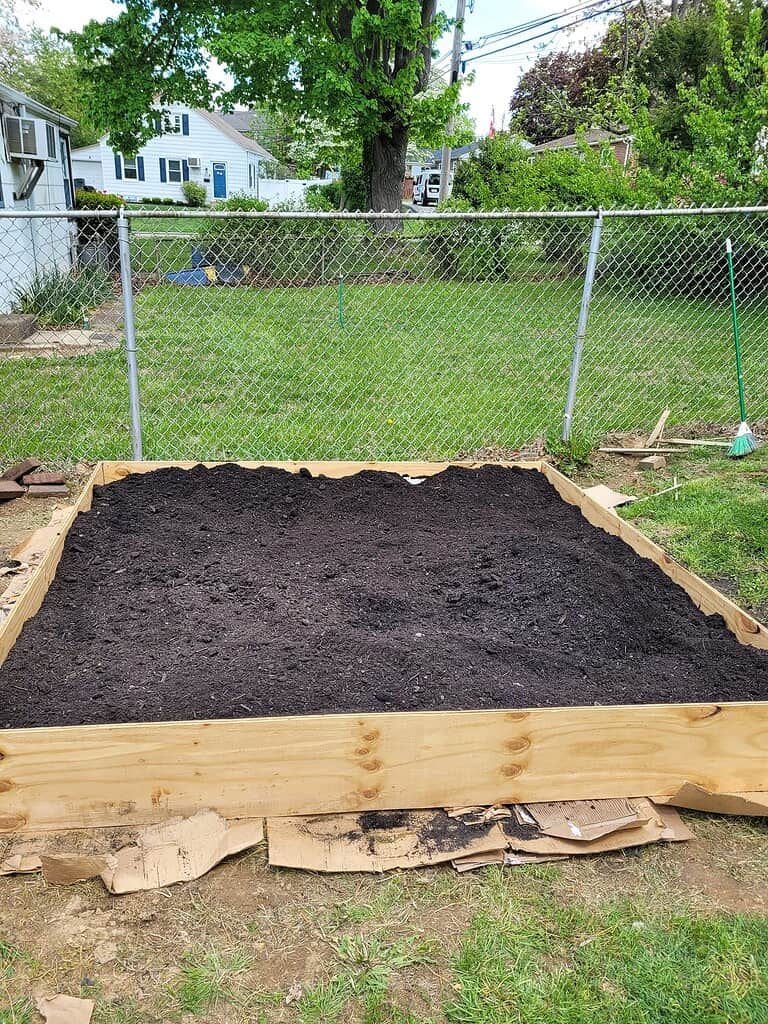
Soil is important for spinach because it’s a relatively heavy feeder that enjoys rich nutrients. Prepare a fertile, well-drained soil that’s high in organic matter.
Loamy or sandy-loam soils that drain well are ideal, since spinach does not like waterlogged roots. Before planting, improve your soil by mixing in a few inches of compost or aged manure – this boosts fertility and helps retain moisture.
Spinach prefers a soil pH in the neutral range, roughly pH 6.0 to 7.0, for optimal growth. If your soil tends to be acidic, adding lime based on a simple soil test can help bring the pH up.
Also, make sure the planting bed is free of weeds and rocks and that the soil is loose to about 6-8 inches deep.
Spinach has fairly shallow roots, so it doesn’t need extremely deep soil, but loosening helps those roots expand easily. Good soil prep will ensure your spinach seedlings can take off quickly.
How to Grow Spinach from Seed (Step-by-Step)

Growing spinach at home is easiest when you start it from seed, directly sown in your garden or container.
Choose quality seeds from trusted seed companies to ensure good germination and healthy plants.
Follow these beginner-friendly steps to plant your spinach:
1. Prepare the Planting Area
Rake and loosen the soil in your garden bed or container. Remove any weeds, sticks, or clumps. Work in compost before planting to provide nutrients (spinach loves rich soil).
Aim for a fine, crumbly soil texture so small spinach seeds can make good contact with the soil.
2. Sow the Spinach Seeds
Plant spinach seeds about ½ inch deep in the soil. You can plant in traditional rows or simply scatter seeds in a wide band – whatever you prefer.
If planting in rows, place seeds roughly 2-3 inches apart in the row. If you scatter-sow, try to distribute seeds evenly and not too crowded (you’ll thin them later).
Cover the seeds loosely with soil and pat down gently.
Tip: Spinach seeds germinate in about 5-10 days under ideal conditions. For faster germination, some gardeners soak spinach seeds in water for a few hours before planting (this is optional but can help soften the seed coat).
3. Water Thoroughly and Maintain Moisture
After sowing, give the area a good watering. Keep the soil consistently moist (but not waterlogged) during the germination period.
Check daily – if the top inch of soil starts to dry out, gently water again. Consistent moisture is key for spinach; if seeds dry out, they may fail to sprout.
Using a fine spray nozzle or watering can helps avoid washing the seeds away. In 1-2 weeks, you should see little spinach seedlings emerging.
4. Thin the Seedlings
Once your spinach seedlings have a couple of true leaves, it’s time to thin them. Thin to about 3-6 inches apart to give each plant room to grow to maturity.
You can simply snip or pinch off the extra seedlings at soil level. (If you sowed in neat rows, remove every other plant; if broadcast, thin spacing evenly.)
Don’t skip thinning! Crowded spinach will compete for light and nutrients, leading to smaller, less healthy plants.
The good news is the thinnings (tiny baby spinach plants) are edible – toss them in a salad for a nutritious microgreen treat.
Following these steps sets the stage for a healthy spinach patch. After thinning, you’ll be left with robust little spinach plants properly spaced and ready to grow.
Now it’s all about caring for them until harvest.
Easy Tips for Spinach

Once your spinach is up and growing, a bit of care will go a long way toward a bountiful harvest.
Here are key growing tips for spinach:
Watering
Keep your spinach well-watered with consistent moisture. Aim to give about 1 to 1.5 inches of water per week, adjusting for rainfall.
Spinach has fairly shallow roots and needs regular water, especially in warm or windy weather. Don’t let the soil dry out completely, as drought stress can cause leaves to become tough or bitter.
At the same time, avoid waterlogging; ensure your soil drains excess water. Water deeply and evenly – a soaker hose or drip irrigation can be helpful to maintain consistent soil moisture.
Mulching around the plants with straw or compost can also conserve moisture and keep the soil cool.
Fertilizing
Spinach is a heavy feeder of nutrients, particularly nitrogen, which fuels all that leafy growth. If you prepared the soil with compost, that may be enough for a cycle of spinach.
Otherwise, consider side-dressing with a balanced fertilizer or additional compost about 3-4 weeks after planting (or once plants have grown a few inches tall).
An easy organic approach is to water with fish emulsion or compost tea every couple of weeks.
If using granular fertilizer, apply a tablespoon or two of a nitrogen-rich formula (like 10-5-5) per 10 feet of row alongside the plants and water it in.
Feeding regularly (but lightly) encourages rapid, tender leaf production.
Warning: Avoid over-fertilizing or using too much high-nitrogen fertilizer at once, as this can cause excess leafiness prone to pests or tip burn. Slow and steady feeding is best.
Weeding and Mulching
Keep the spinach bed weed-free, especially when plants are small. Weeds steal nutrients and can harbor pests.
Gently hand-pull or shallowly cultivate weeds (spinach roots are shallow, so don’t hoe too deep near plants).
Applying a mulch layer (like straw, leaves, or grass clippings) between rows or around plants will suppress weeds and also help maintain soil moisture.
As a bonus, mulch can keep the soil temperature a bit cooler as spring warms up.
Temperature and Bolting
Spinach grows best in the 35°F to 75°F range and really prefers the cooler end of that spectrum. When the days become long and hot, spinach will quickly bolt (send up a seed stalk).
Bolting is natural, but you can delay it slightly by keeping plants well-watered and harvesting leaves frequently.
Once you notice a thick stalk forming or the center leaves elongating, the plant is beginning to bolt – at that point, it’s best to pick all remaining leaves because they will soon turn bitter.
Plan your planting schedule to avoid the hottest part of summer, as discussed in the “When to Plant” section, since even the best care can’t stop spinach from bolting in intense heat and long daylight.
By following these care tips – consistent watering, occasional feeding, and good garden upkeep – your spinach will reward you with fast growth and lush foliage.
Healthy spinach plants that grow without stress (no drought or nutrient starvation) will taste sweeter and have tender leaves, making your salads and sautés that much better!
How to Deal with Spinach Pests and Problems
Even though spinach is relatively easy to grow, you may encounter a few pests or issues in your garden. Here are some common spinach problems and how to handle them:
Leafminers
Leafminer insects are one of the most frequent spinach pests.
The adult is a small fly that lays eggs on the leaves; the hatched larvae tunnel through the leaf, creating telltale white squiggly trails. If you see those mines, remove and destroy the affected leaves.
To prevent leafminers, consider using floating row covers over your spinach beds right after planting – this fabric barrier will exclude the adult flies from laying eggs on your plants.
Row covers have the added benefit of speeding up growth and protecting from other insects.
Aphids and Other Insects
Aphids (tiny green or black sap-sucking bugs) sometimes cluster on spinach leaves or stems, causing curling or yellowing leaves.
You might also occasionally see flea beetles (tiny black beetles that chew little holes in leaves) or spider mites.
For these pests, organic controls work well: spray them off with a strong water jet, or apply insecticidal soap or neem oil to the leaves if infestations persist.
Learn more about how to get rid of aphids naturally for safe, eco-friendly methods.
Encouraging ladybugs and other beneficial insects in your garden will naturally keep aphid populations in check.
Slugs and Snails
In cool, damp conditions, slugs or snails may chew holes in your spinach leaves, especially at night. Look for slime trails as a clue.
Hand-pick these pests in the evening or morning (a flashlight and a pair of gloves work great).
You can also use iron phosphate-based slug bait around the perimeter of the bed, or lay down a barrier like crushed eggshells that pests don’t enjoy crawling over.
Downy Mildew
This is a fungal disease that shows up in cool, moist weather – you might notice yellow patches on the top of leaves and a grayish-purple fuzz underneath.
Downy mildew is common in spinach, especially in fall plantings during rainy spells.
To manage it, ensure good air circulation (don’t plant seedlings too densely), avoid overhead watering in the evening, and remove any infected leaves promptly.
Some modern spinach varieties are bred for mildew resistance, which can be a boon if you’ve had issues in the past.
White Rust
Another disease of spinach, white rust causes white blisters or spots on leaves. It’s less common in home gardens but can occur in wet, humid conditions.
The control measures are similar: remove infected foliage and avoid moisture sitting on leaves for long periods.
Crop rotation (not planting spinach or related greens in the same spot each season) can also help reduce disease carryover in the soil.
…
Most of the time, spinach grows problem-free, especially in the cooler weather it loves.
By planting at the right time and using simple preventative steps – like row covers for pests and proper spacing for airflow – you’ll minimize these issues.
Keep an eye on your spinach patch, and you’ll catch any problems early when they’re easiest to manage.
Growing Spinach in Containers

One great thing about spinach is that you don’t need a big garden to grow it – it does very well in containers, too.
If you’re short on garden space or want the convenience of a patio salad garden, here are some quick tips for growing spinach in pots:
Choose a Sufficiently Deep Pot
Spinach has a modest root system, but for best results use a container that’s at least 6-8 inches deep.
For full-sized spinach plants, a 10-12 inch deep pot will accommodate their roots and allow mature growth. The pot should also be 12+ inches in diameter if you want to grow several plants.
Ensure the container has drainage holes so excess water can escape – good drainage is crucial to prevent root rot.
- Soil for Containers: Don’t use garden soil in pots. Instead, fill your container with a quality potting mix blended with some compost. A mix of about 2/3 general potting soil and 1/3 compost works well. This provides a fertile, well-draining medium that still holds moisture. Before planting, you can also mix in a slow-release organic fertilizer (following the product’s directions) to feed the spinach over time.
- Planting and Spacing: You can sow spinach seeds directly in the pot. Scatter a pinch of seeds and cover with ½ inch of soil. For baby spinach leaves, you can plant seeds closer (1-2 inches apart) and harvest leaves young. For larger plants, thin the seedlings to 3-4 inches apart so they have room to grow. A medium-sized bowl or window box can host several spinach plants; just avoid overcrowding in small containers.
- Watering Containers: Containers dry out faster than in-ground gardens, so check your spinach pots frequently. Keep the soil evenly moist. On warm or windy days, you might need to water daily. Self-watering planters or placing a tray under the pot can help maintain moisture, but be sure the roots aren’t sitting in standing water. Consistent watering is key because container spinach will bolt quickly if it experiences drought stress.
- Light and Temperature: Place your spinach container where it gets good sunlight (at least 4-6 hours/day). A cool patio or balcony that gets morning sun and a bit of afternoon shade is perfect, as it keeps plants from overheating. In hot climates, you might even grow spinach pots in the fall or winter outdoors. If it’s spring and still frosty, you can move pots into a garage or cover them on freezing nights – then set them back out during the day. This mobility is an advantage of container gardening!
Growing spinach in containers is rewarding – you can step outside your kitchen and snip a few fresh leaves anytime.
Just remember that potted plants depend on you for water and food more than garden plants, so stay on top of care.
Other than that, spinach’s compact size and quick growth make it an excellent choice for container gardening.
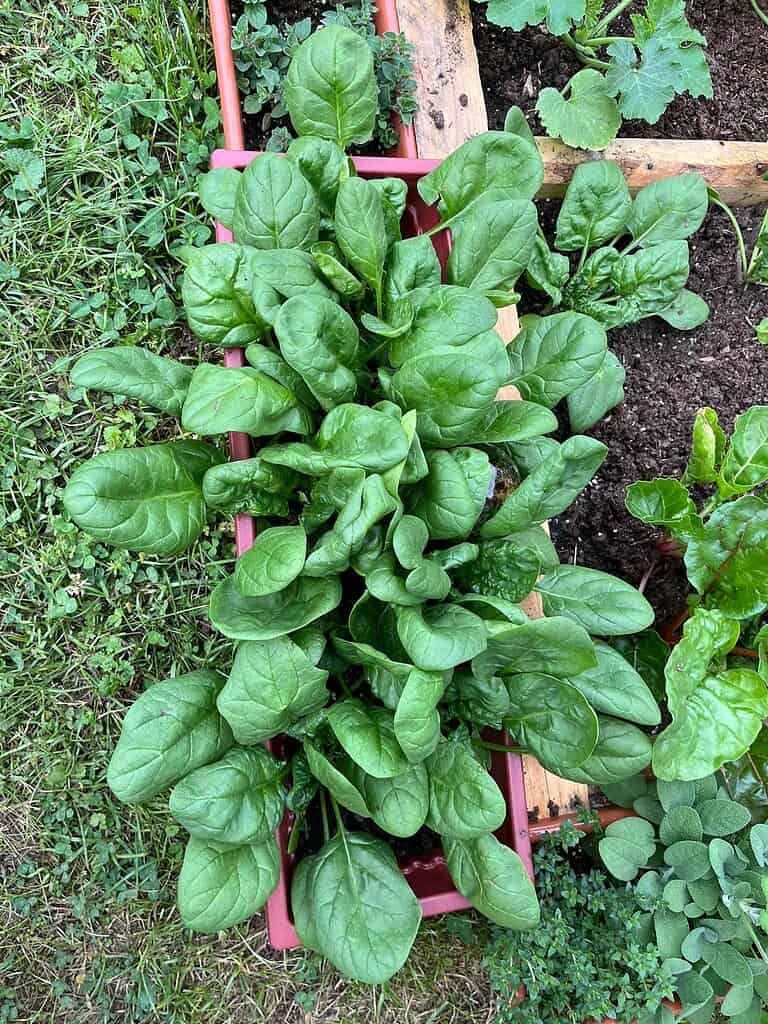
Harvesting and Enjoying Your Spinach

The best part of growing spinach at home is harvesting those nutritious greens for your table.
Spinach grows rapidly, so you might start harvesting baby leaves as soon as 4 weeks after planting, depending on conditions and variety.
Most spinach varieties reach a good harvestable size in 6-8 weeks (about 40-50 days) from seeding.
Here’s how to harvest for peak yield and plant health:
Cut-and-Come-Again
For a prolonged harvest, pick outer leaves first and let the inner leaves continue growing. Using scissors or just pinching with your fingers, snip off the larger outer leaves near the base of the plant.
Make sure to leave the center of the plant intact. This method allows the spinach plant to keep producing new leaves from the crown. You can revisit each plant week after week, harvesting more outer leaves as they size up.
Regular harvesting actually encourages new growth and can delay bolting slightly, because it prevents the plant from maturing too fast.
Whole-Plant Harvest
If you want a batch of spinach all at once (or if plants are about to bolt), you can harvest the entire plant. Wait until the plant has a nice rosette of leaves (at least 6-8 decent-sized leaves).
Then cut the stem at the base, about an inch above the soil. This is often done for “baby spinach” sold in stores – a whole crop is sown and then cut when leaves are young.
In your garden, pulling up the whole plant isn’t necessary unless it’s end-of-season. Keep in mind, once you cut a spinach plant completely (especially if it has started flowering), it won’t regrow another full set of leaves. So use this method when you’re ready to finish that plant.
Harvest spinach in the cool of the morning if possible – leaves will be crisp and well-hydrated. After picking, rinse the leaves to remove any soil or garden critters.
Fresh spinach can be stored in the refrigerator for about a week (wrap in a damp paper towel and place in a loosely closed bag).
For longer storage, spinach can last 2-3 weeks in very cold, humid conditions near 32°F – though in a typical fridge, quality for fresh eating is best within about 7-10 days. Excess spinach can also be blanched and frozen for later use.
…
Now comes the fun part: enjoy your homegrown spinach! Toss the tender young leaves into salads, blend them into smoothies, or sauté them with a bit of garlic for a nutritious side dish.
You’ll definitely taste the difference in freshness. And knowing that you grew this superfood right at home makes it even more rewarding.
Start Growing Spinach at Home Today!
Learning how to grow spinach at home is a simple and rewarding journey.
With these tips on when to plant, proper soil preparation, seed-sowing, and care, you’re well on your way to harvesting your own lush bunches of spinach.
Remember, spinach is one of the easiest greens for beginners – it grows fast, doesn’t require fancy techniques, and thrives in small spaces.
Whether you have a big backyard or just a few containers on the patio, you can grow fresh spinach at home and enjoy farm-to-table greens in a matter of weeks.
So why not give it a try this season? Head to your local garden center or seed supplier, pick up some spinach seeds, and get planting!
Are you excited to grow spinach, or have tips of your own to share? Let us know in the comments below. Ask questions, share your spinach-growing experiences, and join the community of home gardeners helping each other out.
Good luck, and enjoy your spinach harvest!
FAQs
Can spinach grow in the summer heat of July/August?
Spinach prefers cool weather and struggles in hot mid-summer, often bolting and turning bitter. In hot regions, try partial shade and extra water, or grow heat-tolerant greens like New Zealand or Malabar spinach. For true spinach, plant in late summer for a fall harvest.
How long does it take to grow spinach from seed to harvest?
Baby leaves can be harvested in about 4 weeks, while full-sized leaves take 6–8 weeks. Timing depends on variety and temperature. Stagger plantings every couple of weeks for a continuous harvest.
Will spinach regrow after cutting the leaves?
Yes, if you harvest outer leaves and leave the center intact. This “cut-and-come-again” method allows 2–3 harvests before the plant bolts. Cutting the whole plant or after bolting stops regrowth.
Can I grow spinach indoors (e.g., on a windowsill)?
Yes, with cool temperatures and plenty of light (4–6 hours of sun or 12–14 hours under grow lights). Use a container at least 6 inches deep with good potting mix. Baby spinach or microgreens grow best indoors.
Should I soak spinach seeds before planting to help them sprout?
Soaking seeds for 6–8 hours can speed germination slightly, but it’s optional. Spinach also sprouts well when planted directly in moist soil at 45–70°F.
Planting Guides for This Article
Get exact planting dates, frost schedules, and growing tips for your zone: