Most people don’t think of ginger as something you grow. You buy it – shriveled, tough-skinned, maybe sprouting a bit – from the grocery store shelf. And that’s the end of it.
But ginger is incredibly easy to grow. Especially if you like big flavors, low-maintenance plants, and the satisfaction of harvesting a chunk of root that looks like something from a jungle garden.
You don’t need a greenhouse. You don’t need tropical weather. You just need a little patience, a warm corner, and a rhizome with ambition.
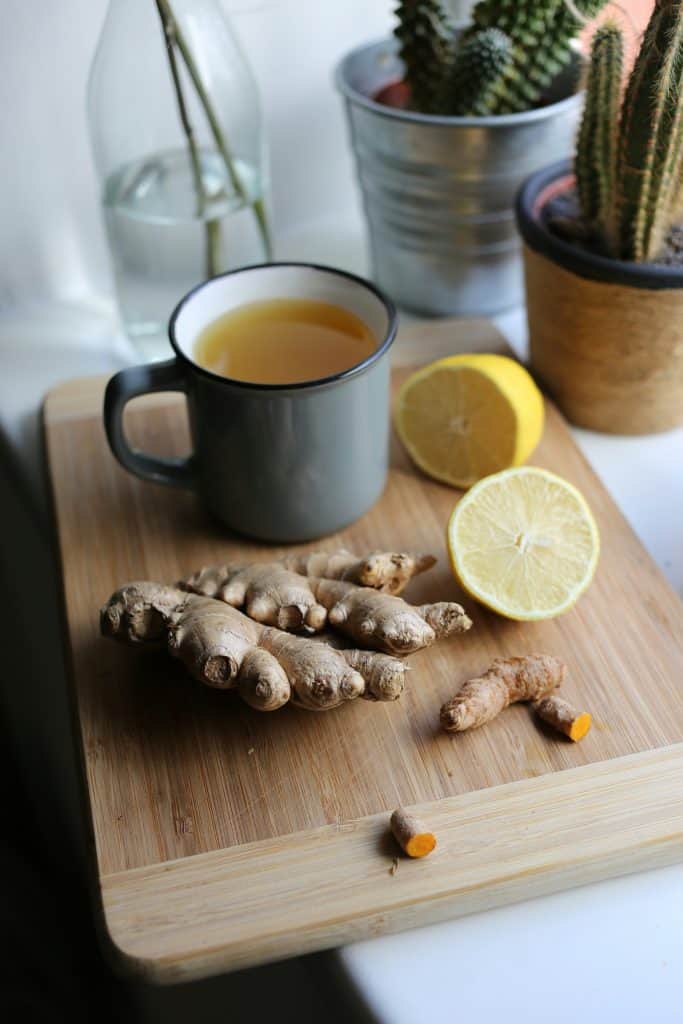
Homegrown ginger is different. It’s tender. Aromatic. You can even use the leaves (yes, really) in teas, stir-fries, and remedies that go way beyond old wives’ tales.
In this article, I’ll walk through everything (and I do mean everything) you need to know to grow ginger successfully, whether you’ve got a sunny windowsill or a shady backyard.
Quick Overview of Ginger Plant

| Feature | Details |
|---|---|
| Common Name | Ginger |
| Scientific Name | Zingiber officinale |
| Plant Family | Zingiberaceae |
| Native To | Southeast Asia |
| Type | Herbaceous perennial |
| Sun Requirements | Partial shade to filtered sunlight |
| Soil Type | Loose, well-draining, rich, loamy soil |
| pH Range | 5.5–6.5 |
| Water Needs | Keep moist but not waterlogged |
| Mature Size | 2–4 feet tall |
| Uses | Culinary spice, tea, herbal medicine, skincare |
| Fun Fact | Ginger is a rhizome, not a root, and can be regrown from a grocery store piece! |
Why Grow Ginger at Home?
The ginger you buy at the store is usually… fine. It’s usable. It’ll give your stir-fry a little kick and your tea some warmth.
But homegrown ginger is a whole different category.
The first thing you notice is the skin. It’s so thin you barely need a peeler – just a rub with your thumb or the edge of a spoon and it’s ready.
No waste. No carving away half the rhizome trying to get the tough outer layer off. And the flavor? Sharper. Brighter.
There's this fresh heat that makes you realize how flat and tired store-bought ginger can be. That alone makes it worth growing. But there’s more.
It's Not Just the Rhizome
Most people don’t realize the leaves are useful too.
They’ve got this mild gingery essence – not as intense as the root, but lovely in a slow-steeped tea or tossed into a pan at the last minute with some greens and sesame oil.
You can dry them, blend them into salves, even chop them up fresh for a little zing in cold dishes. It's one of those “why didn’t I do this sooner?” situations.
Medicinal Value That's Actually Backed by History (and Science)
Ginger has been used in Asian medicine for thousands of years. Not hyperbole – literally over 4,000 years. Mostly for nausea, digestion, and aches. Modern studies? They actually back a lot of it up.
Compounds called gingerols are what give ginger its bite – and also its anti-inflammatory, pain-relieving, and anti-nausea effects.
So yes, it tastes good. But it also does things. If you’ve ever reached for ginger tea during a stomach ache, you already know.
No Fancy Setup Required
You don’t need a greenhouse or perfect tropical conditions. A pot on the patio. A patch of garden in dappled shade. Even a sunny windowsill (with a bit of humidity help) can work. Ginger is surprisingly low-maintenance once you get it going.
And once you do – you’ll never look at the wrinkled grocery store knobs the same way again.
Choosing and Preparing Ginger for Planting
You don’t need fancy seed catalogs or exotic suppliers to start growing ginger – though you can go that route if you want. Most people start with something far more accessible: a chunk of ginger from the grocery store.
But hold up – not all ginger is equal when it comes to planting. Here's what to look for and how to get it ready to grow.
Where to Get Ginger Rhizomes
You’ve got two main options:
- Garden centers or seed suppliers: These will sell ginger specifically meant for planting. It’s clean, usually untreated, and often comes pre-sprouted or certified organic.
- Organic grocery store ginger: Totally fair game. Just make sure it’s organic or at least untreated because conventional ginger is often coated in sprout inhibitors to extend shelf life (which is exactly what you don’t want when you’re trying to make it grow).
Not sure if yours is treated? Soak it in water for 24 hours. This can help reduce whatever’s on the surface and increase your chances of sprouting.
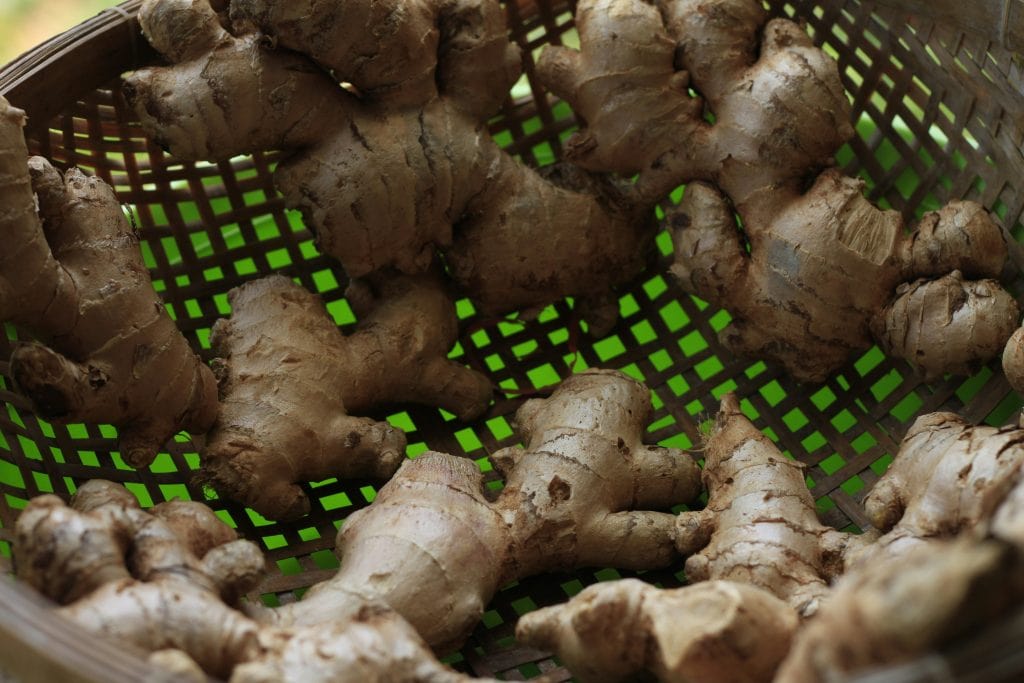
What to Look For in a Rhizome
Go for ginger that’s:
- Firm, not shriveled
- Plump and healthy-looking
- Covered in little “eyes” or buds – they look like tiny horns or nubs at the end of each section
Those buds are where new growth will come from. No buds = no plant.
How to Cut and Prepare Rhizomes
You don’t need to plant the whole chunk. In fact, it’s better not to.
Cut or break your rhizome into smaller pieces – each one should be about the size of a thumb, with at least one healthy bud (two or three is even better).
This gives you multiple plants from one piece and lets each one grow strong on its own.
Now here’s a tip a lot of new growers miss: let the cut pieces sit out overnight. Just leave them on the counter, uncovered, for about 24 hours.
The ends will dry out and “callus” over – basically forming a protective skin. This helps prevent rot once you put them in soil.
Bigger Pieces = Bigger Plants
Technically, you can plant smaller bits – even a single-bud piece will grow. But larger chunks (2–3 inches with multiple nodules) tend to sprout faster and produce a more vigorous plant. More leaf growth above means more rhizome development below.
So if you’ve got a big healthy piece of ginger, don’t be shy – plant it like you mean it.
Starting Ginger Indoors (Pre-Sprouting)
If you live somewhere warm year-round, you can skip this step and just plant straight into the ground when it’s warm enough. But for the rest of us – with short summers or cooler spring temps – pre-sprouting indoors gives you a serious head start.
It’s easy.
When to Start
Late winter. Think February or early March – long before you’d normally be planting anything outside. The goal is to get your ginger sprouting before the soil outdoors is even ready.
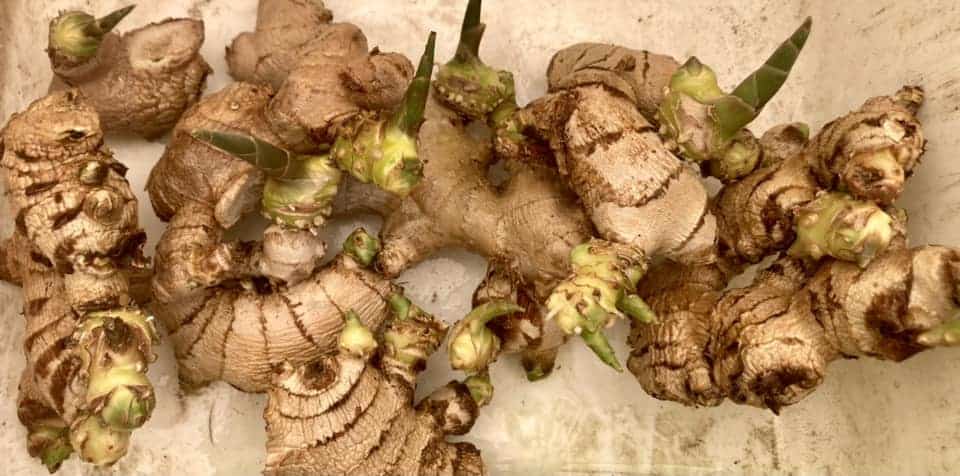
How to Pre-Sprout Ginger Rhizomes
Here’s the basic process:
- Pick your rhizomes: Use the prepped pieces you cut and callused earlier — the ones with 1–3 healthy eyes.
- Choose a shallow container or tray: Something that drains. You’re not planting deep here — just setting up the environment.
- Add moist compost or seed-starting mix: Light, loose, and damp — not soggy. You're making a cozy bed.
- Nestle the rhizomes in: Lay them eye-up, then cover with about 1–2 inches of compost. Don’t bury them deep.
- Warm it up: This part matters. Ginger loves heat. Set the tray on a heat mat or keep it somewhere consistently warm – around 75–85°F (24–29°C) is ideal.
Now wait – usually about 2 to 4 weeks. You’ll start to see green shoots poking up, and possibly some root development underneath.
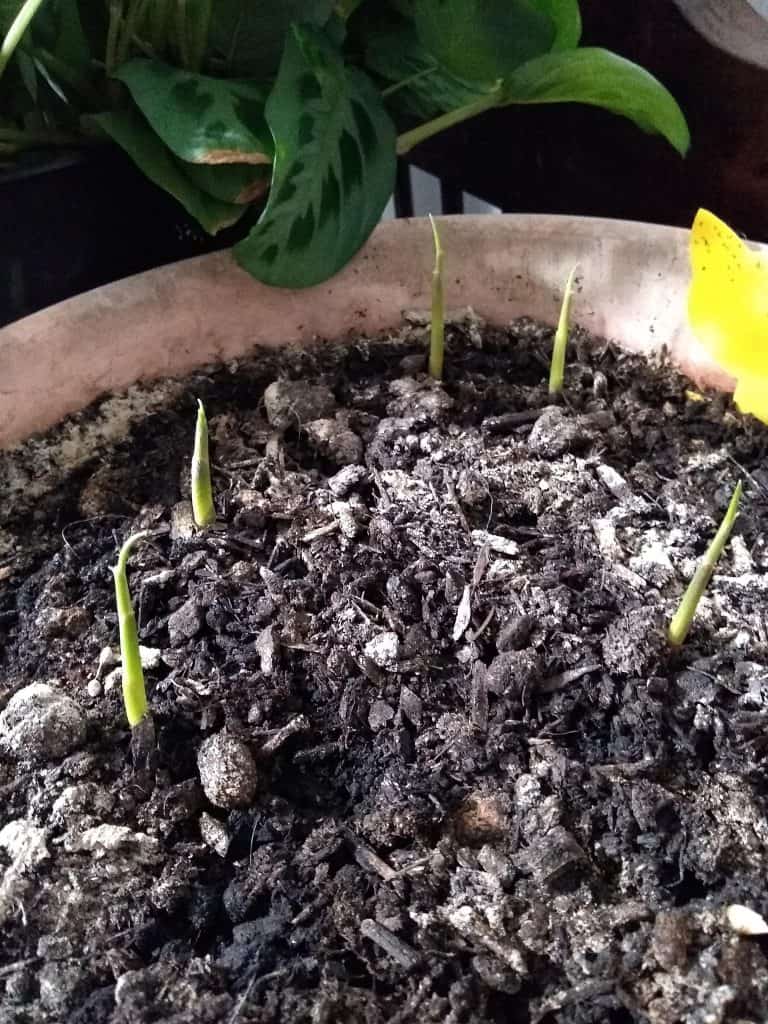
What to Do After Sprouts Appear
Move your tray under grow lights (or near a super bright window). Keep the soil moist – again, not soggy – and let those young plants get stronger.
If you started in small containers, you can pot them up to larger ones as needed. Or, once the weather warms up outside and the danger of frost has passed, you can transplant them directly into the garden or bigger pots.
Why It’s Worth It
Ginger takes months to mature – so the earlier you start, the more likely you’ll get a decent harvest before cool weather returns.
Pre-sprouting doesn’t just give you a time advantage; it gives your plants a stronger foundation and a smoother transition to outdoor growing.
And let’s be real – seeing those first green shoots pop up in the dead of winter? It feels good. Like proof that growing season is on its way.
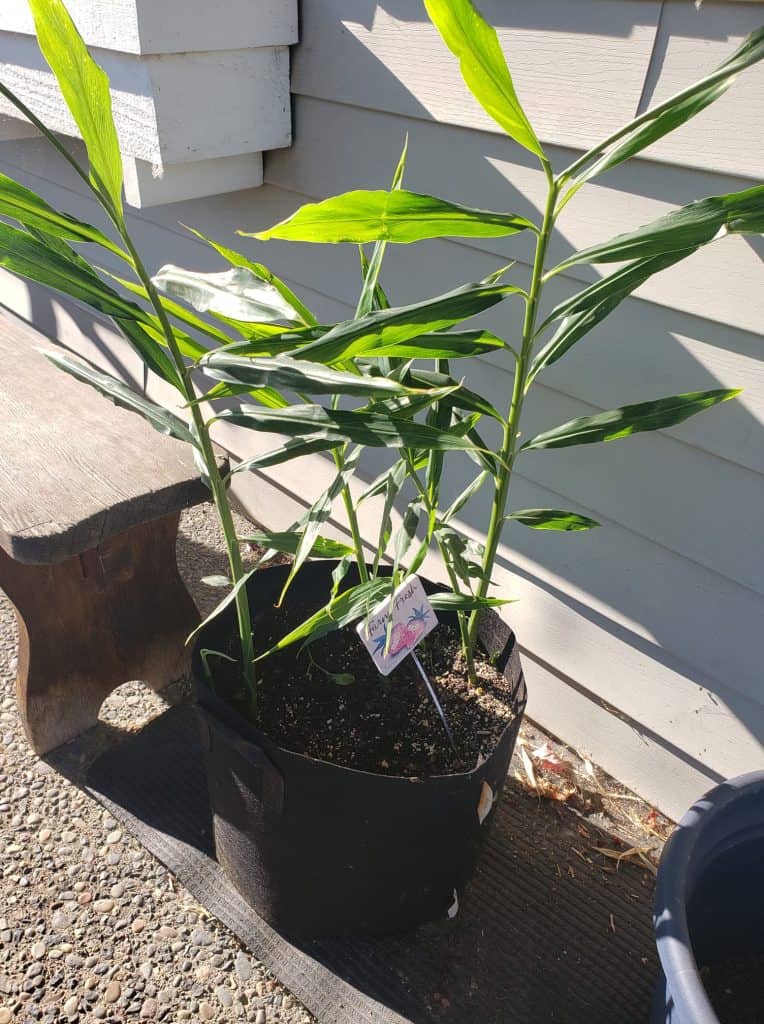
Planting Ginger Outdoors or in Containers
Once your ginger is sprouted (or if you're planting fresh rhizomes directly), it's time to move them into their long-term home.
Whether that’s a garden bed or a pot on your porch depends on your space but either way, the method’s nearly the same.
What ginger really needs is room to spread horizontally, warm soil, and a consistent environment.
When to Plant Outside
Wait until the soil is warm – consistently above 60°F (15°C) – and there’s zero chance of frost.
This might be April in a warm zone, or June in cooler areas. Ginger doesn’t like cold feet. Plant too early and it just sits there. Or worse, rots.
If you're using pre-sprouted starts, transplant them once the nights are reliably warm.
Soil Setup: Rich, Loose, and Draining
Ginger hates wet feet but it also hates being dry. So aim for moist, spongy soil that drains well but holds some water. Think: compost-heavy, loose loam.
If your soil is heavy clay? You’ll want to amend it with compost and sand or just grow in containers instead.
Planting Depth and Spacing
- For pre-sprouted rhizomes: Bury the original rhizome 2 to 3 inches deep, making sure the green shoot stays above the soil.
- For unsprouted pieces: Go shallower. Plant 1 to 2 inches deep, bud-side up. You can always hill soil around the base later as the plant grows.
- Spacing: In garden beds, leave at least 8 inches between pieces. These guys like to spread.
Container Growing? Go Wide, Not Deep
This part’s key: ginger grows sideways. So don’t waste effort on a narrow, deep pot. Instead, go with something at least 12 inches across for one plant, or 18 inches wide if you want more yield.
The pot should be at least 12 inches deep (to hold soil and retain moisture), but it’s the horizontal space that matters most.
Use a mix of:
- Compost
- Coco coir or peat
- Perlite or sand (for drainage)
And make sure there’s a drainage hole — ginger in soggy soil = rotting mess.
The First Few Weeks
Keep the soil consistently moist, and don’t let it dry out. Ginger doesn’t like drama – it prefers stable conditions. If it’s in full sun and you see the leaves start to curl or scorch, consider moving it to part shade or giving it some afternoon protection.
Creating Ideal Growing Conditions
Ginger isn’t high-maintenance, but it does have its preferences. Once you understand what makes it comfortable, growing it becomes almost effortless.
Filtered Light, Not Blazing Sun
Ginger naturally grows in the shaded underlayer of forests. That tells you everything you need to know about its light needs.
It prefers filtered sunlight or part shade. A spot with morning sun and afternoon shade is ideal, especially in warmer climates.
Yes, it can handle full sun but in hot areas, the leaves are likely to scorch, curl, or fade. If you're growing ginger in the garden, tucking it behind taller plants like tomatoes works well.
Indoors, placing it near a bright but indirect window gives it the calm lighting it craves.
Warm, Stable Temperatures
Ginger likes heat, plain and simple. It thrives when daytime temps are somewhere between 70–90°F (21–32°C).
If nights start dipping below 55°F (13°C), it’s time to think about either delaying outdoor planting or transitioning your pots indoors. Cold soil is a quick way to stall growth or worse, trigger rot.
Moist, Humid Conditions
This is where a lot of growers miss the mark. Ginger loves humidity. Outdoors, it usually gets what it needs from the air especially if it’s surrounded by other plants. Indoors, it may need some help.
One simple trick is to set the container on a humidity tray – a shallow dish filled with water and pebbles. As the water evaporates, it creates a moist microclimate around the plant.
Light misting once in a while doesn’t hurt either, especially during dry spells or when the heat is blasting indoors.
Consistent Moisture, Not Soggy Soil
Ginger wants steady access to moisture but not to be waterlogged. The goal is soil that stays damp like a wrung-out sponge.
Let the top inch of soil dry out before watering again, and never let water sit pooled at the base of the pot. Soggy conditions are a quick route to rot.
If you're growing outdoors in rainy conditions, make sure your soil drains well. A raised bed or amended soil with compost and sand can help keep things balanced.
Mulch Helps Keep Everything in Check
Once your ginger plant is about a foot tall, it’s time to add a thin layer of mulch. This keeps the soil cool, helps retain moisture, and slows down weed growth – all without interfering with the ginger’s shallow rhizomes.
Use whatever you’ve got: straw, shredded leaves, pine needles. Just don’t pile it on too thick.
Feeding and Supporting Growth
Once your ginger plant is in the ground (or in its pot), it doesn’t just sit there. It starts building underground energy – slowly at first, then picking up speed as long as it has what it needs.
And what it needs, more than anything, is nutrient-rich soil and consistent feeding.
Ginger Is a Heavy Feeder
This plant works hard below the surface, producing thick rhizomes over the course of several months. That takes resources. If the soil runs low on nutrients halfway through the season, growth stalls.
The best way to keep ginger happy? Start with compost-rich soil and keep building on that. If you're planting in containers, mix in compost right from the beginning.
A blend of compost, coco coir or peat, and something gritty like sand or perlite works great. It holds moisture but drains well – exactly what ginger likes.
Organic Fertilizers Work Best
Every few weeks, you’ll want to top things up with a light feeding. Ginger responds really well to organic liquid fertilizers, especially ones that mimic the nutrient-rich environments it evolved in.
Liquid seaweed, fish emulsion, or diluted worm castings are all solid choices. They’re gentle, slow-releasing, and packed with micronutrients.
You don’t need to go heavy – just a light feed every 3–4 weeks keeps things moving along nicely.
You can also scratch in a little extra compost around the base as the season goes on. Ginger doesn’t mind a little surface boost now and then.
Encouraging More Rhizomes with Hilling
Here’s a cool trick that not everyone knows: you can “hill” ginger, just like potatoes.
As the plant grows and you start to see new pinkish rhizomes peeking up near the base, mound some extra compost or loose soil around them.
This encourages those fresh growth points to expand underground instead of being exposed to the air. It's not mandatory, but it often results in a larger harvest.
Just keep the mounded soil light and airy – ginger doesn’t want to be smothered.
Support the Tops, Watch the Bottoms
As ginger gets taller, the leafy stalks can become a bit top-heavy, especially in containers or windy spots. If they start leaning, a few bamboo sticks or a soft plant tie can help keep them upright.
It’s not always necessary, but it keeps things tidy and helps prevent accidental breakage.
Meanwhile, keep an eye on the soil surface. If it’s looking dry and crusty, water. If it’s getting too compacted, lightly fluff it or add a little fresh compost. Ginger does best in loose, breathing soil – even months into the season.
Healthy ginger doesn’t shoot up overnight, but with regular feeding and a little attention to structure, it just keeps going – quietly stacking up rhizomes under the surface, one fat joint at a time.
Caring for Ginger Plants
Once ginger is settled and growing, you don’t have to fuss over it constantly.
But like any long-season plant, it pays to stay observant. The better you care for it, the more it gives back – in flavor, in size, in overall plant health.
Watering: Keep It Consistent
Ginger likes things steady. That means regular watering – enough to keep the soil moist but never soggy.
Letting it dry out too much stresses the plant, especially when it's actively growing. On the flip side, waterlogged soil can cause rot, particularly around the rhizome.
A good rhythm is to water when the top inch of soil feels dry. During hot spells or windy days, you may need to water more often.
To make life easier (and avoid the guesswork), drip irrigation kits can help keep moisture levels just right without overdoing it.
And if you’re growing in containers, check them frequently – pots dry out faster than garden beds.
Watch for Pests (They’re Rare, But They Happen)
Most of the time, ginger won’t attract much trouble.
It's not a magnet for pests like some leafy greens are. That said, you might occasionally spot mealybugs, spider mites, or aphids, especially if the plant’s stressed or indoors.
You don’t need to reach for chemicals. A hard spray of cold water from a hose or sprayer usually does the trick. It knocks the bugs off and cools the plant down at the same time.
Repeat every few days if the problem sticks around. In confined indoor spaces, you might want to wipe the leaves down gently or use a natural pest control like insecticidal soap if things get out of hand but that’s rare.
Leaf Support and General Maintenance
Ginger’s leafy stalks are pretty sturdy, but once the plant starts getting tall – especially in a breezy area – the tops might lean or flop a bit.
A loose tie to a small stake is usually enough to keep things upright and growing cleanly.
You don’t need to prune ginger, but it’s a good idea to occasionally clear away dead leaves or spent stalks to keep airflow healthy and prevent mold from forming around the base.
A Quick Note on the Leaves (and Gloves)
Most people handle ginger plants bare-handed without any issue. But now and then, someone reports a burning or stinging sensation after brushing against the leaves.
There’s no firm scientific explanation, but it seems like the plant might have a mild defense compound – maybe something evolved to keep nibblers away.
If you're sensitive or you notice any irritation, just wear gloves. No need to panic – just a small precaution.
All in all, ginger’s pretty self-reliant once it’s going. Keep the soil moist, support it if needed, and check in every so often. It’ll handle the rest quietly underground.
Harvesting and Using Ginger
By the time your ginger plant hits maturity, you've been nurturing it for most of the year.
It's a slow crop, no doubt — but when it's ready, the payoff is massive. Fresh, fragrant, golden ginger that’s nothing like the dry, fibrous stuff from the store.
When to Harvest
Ginger isn’t an all-or-nothing harvest. You can actually pull pieces while the plant is still growing, especially if you’re after “baby ginger” – that’s ginger harvested around the 4- to 6-month mark.
It’s milder in flavor, tender, and completely skinless. Perfect for cooking, smoothies, or grating raw.
But if you want the fully mature stuff, wait 8 to 10 months after planting. The above-ground part of the plant will start to yellow and die back – that’s your sign.
The rhizomes beneath will be thicker, spicier, and more fibrous (in a good way). Ideal for drying, long-term storage, or preserving.
How to Harvest
Start by loosening the soil around the base of the plant. Be gentle.
Ginger rhizomes grow horizontally and fairly shallow, so you don’t need to dig a trench. Just work your hands or a small trowel through the soil and feel for the thickest parts.
Once you’ve unearthed a section, you can cut off what you need and leave the rest in the ground. The plant will keep growing if the season’s still warm – or you can pull the whole thing and start curing it.
If you’re container-growing, the easiest way is to tip the whole pot out onto a tarp and sort through the mix like you're digging for treasure. You’ll be amazed how far those rhizomes have spread.
Using the Rhizome
Freshly harvested ginger doesn’t need peeling. The skin is paper-thin and rubs right off. Use it raw, cooked, juiced, pickled – whatever you like.
If you’re planning to store it, keep the rhizomes in a cool, dark place, or freeze them whole and slice as needed.
You can also dry slices or dehydrate grated ginger for homemade powder. It keeps its punch surprisingly well.
Don’t Forget the Leaves
This part still surprises people: the leaves are usable, too. They’ve got a subtle ginger scent and flavor – not strong like the rhizome, but refreshing and herbal.
Steep them into tea, tuck them into broths, or throw a few into a stir-fry. Some folks even blend the leaves into homemade salves or tinctures for their soothing properties. You don’t need a ton – just a few leaves go a long way.
At this point, you’ve closed the loop. You’ve sprouted, planted, fed, and harvested. And hopefully, you’ve tasted just how different fresh ginger really is.
Overwintering and Dormancy Care
Ginger is a tropical plant. That means it's not built for cold nights, frost, or frozen soil. If you live in a warm climate (zones 9–12), you might be able to leave it in the ground year-round.
But if you’re anywhere with cool autumns or freezing winters? You’ll need a plan to keep it alive until next season.
For Container-Grown Ginger
If your ginger lives in pots – good news. Overwintering it is pretty simple. Once night temps start dropping below 55°F (13°C), bring your pots indoors.
Now here’s the part that throws some people off: ginger goes dormant. It might drop its leaves completely, or the foliage may just look sad and yellow. That’s normal. The plant is resting – not dying.
During this dormancy period, usually late fall through winter, move the pot to a bright windowsill that stays warm but not too dry.
Water just enough to keep the soil barely moist – usually once a month is enough. Don’t feed it. Don’t disturb it. Just let it sit and recharge.
If your indoor air is dry, placing the pot on a tray filled with pebbles and water helps keep humidity around the plant without soaking it.
By early spring, you’ll start to see signs of life – tiny green shoots poking through the soil. That’s your cue to gradually resume regular watering and feeding.
Once it’s warm enough outside, you can move the pot back out and let the growing season begin again.
For In-Ground Ginger
In colder zones, ginger should be dug up before the first frost. You can either harvest everything at once or save a few healthy chunks with buds to replant in spring.
To store for replanting, keep the rhizomes in a cool, dry, dark spot like a pantry or root cellar.
Wrap them in paper towels or keep them in a breathable container (not plastic) to prevent mold. Then follow the same pre-sprouting method when you're ready to start again.
Ginger doesn’t need much during its off-season. A little space, a little warmth, and time to rest. Let it do its thing quietly through winter, and it’ll be ready to grow stronger and faster when the warm months return.
Tuck a sprouted ginger nub into a pot, keep it warm and watered, and you’ll have fresh ginger at your fingertips in no time.
Growing ginger at home isn’t just doable – it’s genuinely rewarding.
From a humble rhizome and a bit of warm soil, you get something fresh, flavorful, and deeply useful. The kind of ingredient that tastes like it was supposed to – vibrant, clean, and alive.
Plus, you’re not just growing food. You’re growing medicine, herbal tea, skincare ingredients, and flavor all in one plant and that’s something store-bought ginger just doesn’t offer.
By now, you’ve got the full picture. From sourcing the right rhizome to tucking it away for winter, every step is on the table.
All that’s left is to try it yourself – one ginger nub, one sprout, one pot at a time.
Frequently Asked Questions (FAQs)
How long does it take to grow ginger at home?
About 8 to 10 months for mature rhizomes. You can harvest baby ginger as early as 4 to 6 months if you prefer a milder flavor and tender texture.
Can I grow ginger from regular grocery store ginger?
Yes – as long as it's organic or hasn’t been treated with sprout inhibitors. Soaking the rhizome for 24 hours can help encourage sprouting if you're unsure.
Why are my ginger leaves turning yellow?
It could be natural dormancy if it’s late in the season. If not, yellowing may point to overwatering, poor drainage, nutrient deficiency, or too much direct sun.
Do I need full sun to grow ginger?
Not at all. Ginger prefers part shade or filtered sunlight. Too much direct, intense sun can actually stress the plant and scorch the leaves.
Can I reuse ginger rhizomes to plant again next year?
Absolutely. Just save healthy pieces with visible buds. Store them in a cool, dry place over winter, and sprout them again in early spring.
Ready To Transform Your Garden?

Are you looking for the best way to layout your garden beds? Maybe you're feeling a bit stuck on how to make the most of your space?
We’ve got you covered! Check out our 101+ Garden Bed Layout Ideas for your next raised bed project. This guide is filled with creative and practical ideas that can help you design a garden that fits your style, whether you’re just starting out or have been gardening for years.
Get your copy today and get inspired to bring your gardening dreams to life.