Beets are a nutrient-packed, cool-season root vegetable that makes easy vegetable gardening look good.
Homegrown beets have a naturally sweet, earthy flavor that truly shines – many gardeners agree that “homegrown beets taste so much better than the roots you find at the store”.
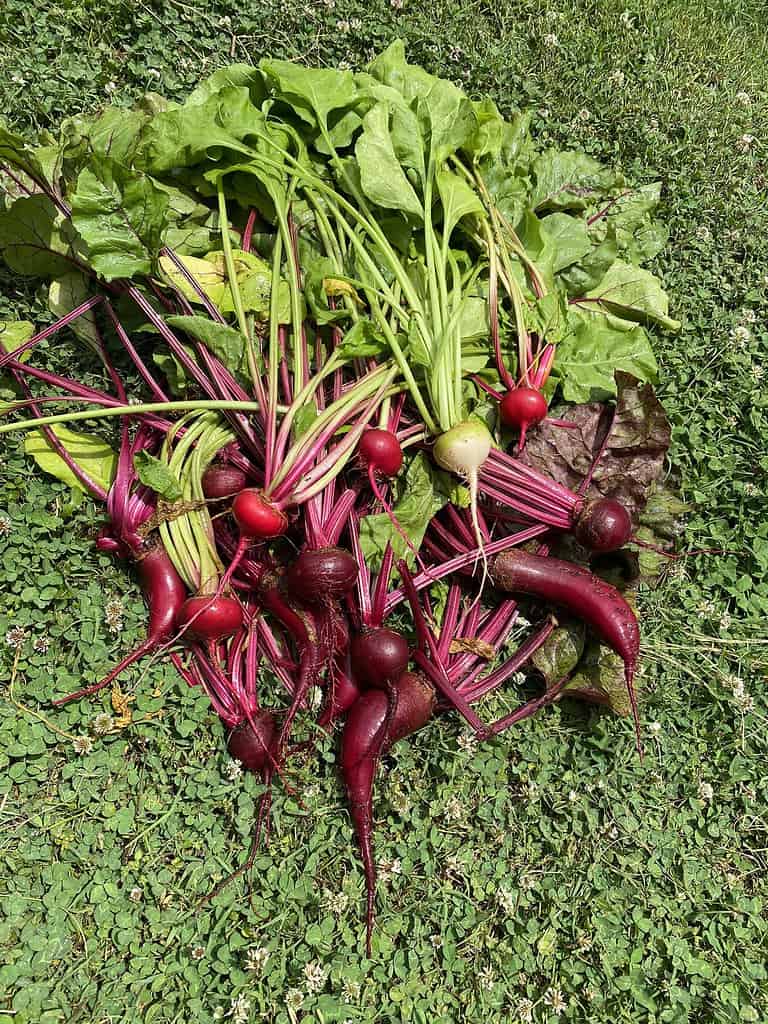
Plus, you get two crops in one: the rounded, colorful bulbs and the tender beet greens (yes, the leafy tops are edible like spinach!). With a little care, even first-timers can pull up a basketful of vibrant beets.
Here’s how to grow beets successfully and get that amazing flavor at home.
Why You’ll Love Growing Beets
- Flavor & Nutrition: Beets have a naturally sweet, earthy taste. When picked fresh, they’re crisp and juicy – far fresher than most store-bought beets. They’re also packed with vitamins (A, C) and antioxidants, and even the greens are nutritious.
- Variety & Color: Beyond the common deep-red beet, you can grow golden, white, or pink-striped (Chioggia) varieties. Golden beets, for example, are sweeter and less earthy than reds, while Chioggia (aka Candy-Stripe) are fun and candy-colored. Experimenting with different types adds beauty to your garden and plate.
- Easy Veggie Gardening: Beets are forgiving and do well in almost any veggie garden or container. They’re cold-hardy (you can plant in early spring or late summer) and mature in about 50–90 days, depending on the variety. As long as you give them loose soil, sun, and regular water, your beet patch will reward you, even if you’re new to gardening.
Beets are easy to grow in a variety of setups!
Choosing the Best Beet Varieties
Picking the right variety can boost flavor. Classic red beets (e.g. “Detroit Dark Red” or “Early Wonder”) are popular for their rich color and betanin antioxidant.
Golden beets (often called “Touchstone Gold” or “Albino”) are sweeter and milder; they turn bright golden when cooked.
Chioggia beets (aka “Candy Stripe” or “Bull’s Eye”) have red-and-white rings inside and a lovely mild flavor.
For container gardening, choose smaller or fast-maturing types (Savvy Gardening suggests ‘Moulin Rouge’ for small roots and ‘Chioggia’ for fun color).
But really, any common beet variety will do – even white or striped roots are delicious.
If your garden is super small or you like microgreens, you can also harvest baby beets when roots are golf-ball sized, then let the remaining ones grow bigger later.
When to Plant Beets
Beets are a cool-season crop. They thrive in cooler weather – ideally when daytime temps are around 55–75°F. Plan two main sowing windows:
- Spring Planting: Sow beet seeds 2–4 weeks before your last frost date. The ground only needs to be workable and slightly moist. Beets tolerate light frost, so even if there’s a late cold snap, young beet seedlings usually survive. In most regions, that means planting in very early spring.
- Fall Planting: You can also sow a second round in mid- to late summer for a fall harvest. Plant in late summer (usually 8–10 weeks before first expected fall frost) so roots mature as temperatures cool. Beets can handle a light freeze (some say to fall back they can survive freezes), but are stressed by heat above ~85°F.
Check your USDA zone and local climate to fine-tune timing. For example, in warmer zones you might grow beets in winter.
In very short-season areas, start the first batch indoors (in pots) to transplant later, or be prepared to mulch and protect late-fall beets from hard freezes.
The goal is cool soil and air during germination and root bulking.
Where to Grow Beets
Beets are versatile about location. They can be grown in garden rows, raised beds, or containers:
In-Ground Beds
Plant beets in a flat or gently raised garden bed with loose soil.
Traditional rows 12–18 inches apart are fine. Raised beds also work great because they drain well and you can optimize the soil mix.
Containers/Grow Bags
Beets do very well in containers or grow bags – perfect for patios, balconies, or small gardens. Use a pot at least 8–12 inches deep so the taproot can expand.
Make sure there are drainage holes, and use a loose, rich potting mix (more on that below).
Containers warm up quickly, so you can plant a bit earlier in spring and harvest later into fall if watered well.
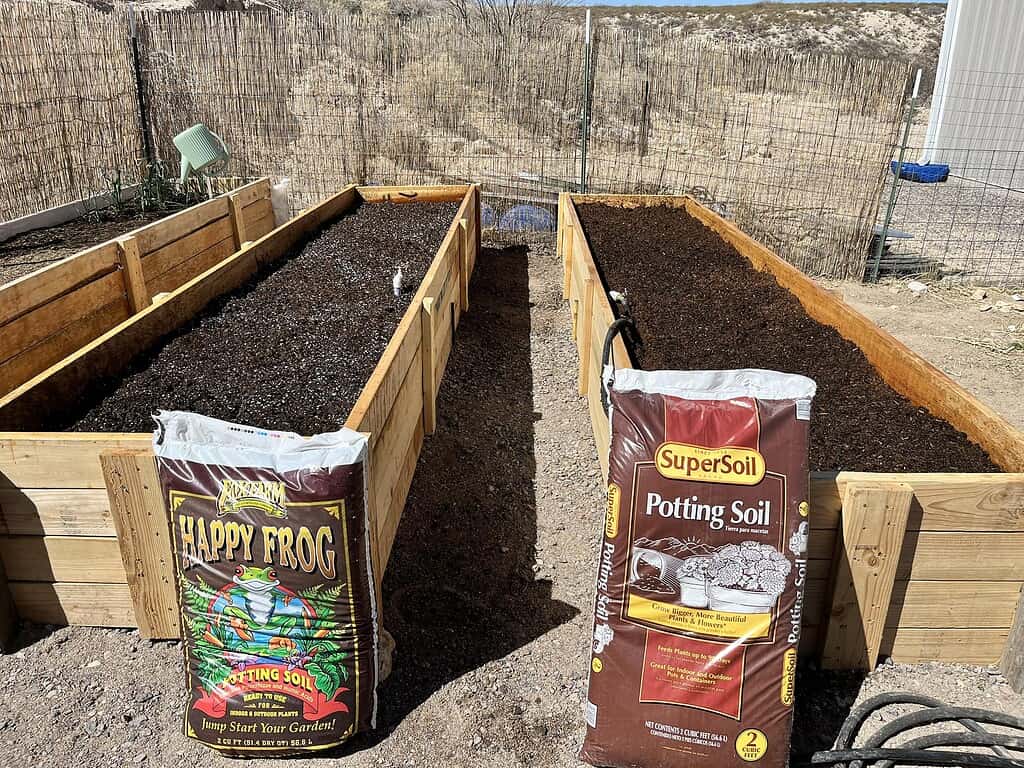
Raised Beds
These combine the benefits of both.
A raised bed gives the depth and drainage you need, plus easy weeding. Beets in raised beds can use very good compost-amended soil from day one.
If you’re setting up a new bed, this guide on how to fill raised garden beds walks through simple soil layers that work well for root crops like beets.
…
Choose a spot with full sun to light shade. At least 6 hours of direct sun per day is ideal.
In shady spots, you’ll get more leafy tops but small roots (the plant needs lots of energy from sun to swell the root).
Avoid areas crowded by tall crops that could shade your beets.
Preparing the Soil
Beets need loose, fertile soil. Good preparation pays off in round, smooth roots:
- Soil Type: Aim for a well-drained loam or sandy loam. Heavy clay can make misshapen or forked beets. If you have clay or sandy soil, amend liberally with compost or well-rotted manure to improve texture and nutrients.
- Depth and pH: Loosen the soil to at least 12 inches deep so roots can grow straight. A neutral pH of 6.0–7.0 is best. If your soil test shows it’s very acidic (<6.0), lime it; if too alkaline, work in peat or acidic compost.
- Nutrients: Beets are root crops, so potassium and phosphorus are important for big bulbs. Mix bone meal or rock phosphate for phosphorus, and wood ash or sulfate of potash for potassium if needed. However, don’t overdo nitrogen – too much N fertilizer drives lush greens and small roots. A balanced 5-10-10 or 10-10-10 fertilizer at planting time is plenty, or simply work in a few inches of compost.
- Weed Cleanup: Beets compete poorly with weeds, so clear the area of weeds, rocks, and debris beforehand. A smooth, rock-free bed helps the roots grow straight.
In containers, use a high-quality potting mix (pH ~6.5) with some compost mixed in. Container mixes are usually neutral and will support beets well.
This avoids heavy soil problems in pots and ensures good drainage.
How to Plant Beets the Right Way
Beets are usually direct-sown from seed.
Here’s a simple planting routine:
1. Lay out your row or mark pots.
If using garden rows, space rows about 12–18 inches apart. In containers, you can plant in a block (see container section).
2. Sow the seeds
Plant beet seeds about ½ inch deep. (Each “seed” is actually a cluster of 4–6 seeds bonded together.)
Space seeds about 1–2 inches apart in the row (seeds themselves can go 1″ apart, but after germination you’ll thin to 2–4″).
If broadcasting in a container, you can sprinkle seeds evenly then thin after sprouting. Lightly cover seeds with soil and gently firm the soil over them.
3. Water gently
Use a light spray or gentle watering can to moisten the seed line.
Keep the soil consistently damp (not waterlogged) until sprouting. Beet seeds usually germinate in 7–14 days; warmth and moisture speed this up.
4. Succession sowing (optional)
For a steady supply, you can plant new beet seeds every 2–3 weeks through the season.
In spring, start 4–6 weeks before your last frost; in fall, sow every few weeks up to 2 months before your first frost.
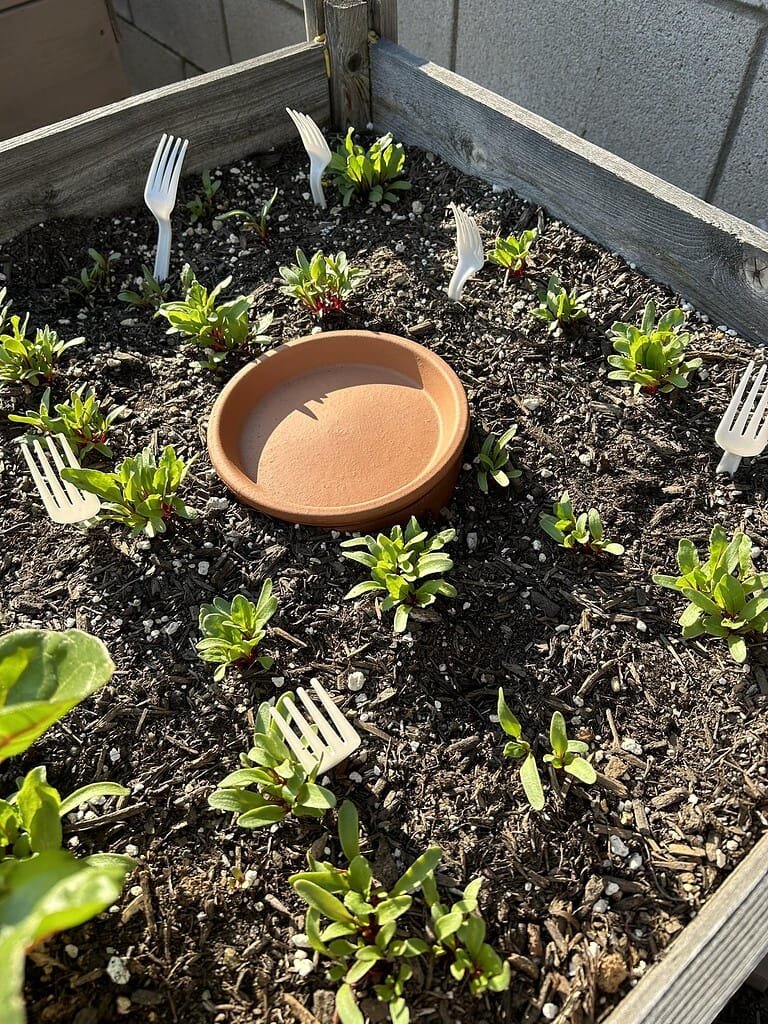
Thinning: Once seedlings have 2–3 true leaves (a few inches tall), thin them to about 3–4 inches apart. Overcrowding leads to skinny roots.
You can gently snip out the extras at soil level or pull the smaller ones; the pulled baby beets (and their greens) are edible and tasty. A final spacing of 3–4″ apart between plants is ideal for 2–3″ roots.
(If you want neat rows without thinning, you could use seed tape or potato chips. A neat trick: press an empty muffin tin into the bed, plant one seed in each indent, then cover. Weeds and spacing become easier.)
Don’t transplant! Beets do not like having their roots disturbed. Plant from seed directly.
Beet seedlings do not handle transplanting very well. Once the roots start forming, disturbing them can slow growth or cause the plant to fail altogether.
If seeds are started indoors, they need to be transplanted very early and handled gently. For most home gardeners, direct sowing beet seeds straight into the soil works best.
Planting beet seeds: sow each about 1/2 inch deep in loose soil. After sprouting, thin seedlings so plants are a few inches apart for good root development.
Watering and Mulching
Beets need steady moisture. Aim for about 1 inch of water per week (from rain or irrigation). The soil should be evenly moist – not soaked, but never fully drying out at any stage.
In particular, inconsistent watering (dry spells followed by heavy water) often leads to split or woody roots. To prevent that:
- Even irrigation: If rain is scant, water with a soaker hose or drip irrigation to give about 1″ per week. Mulching between plants with straw, grass clippings, or shredded leaves helps keep the soil uniformly moist and cool.
- Keep soil barely damp: Gardenary notes “the soil doesn’t need to be soaking, it should be a little moist to the touch” during germination. Letting it dry can delay germination and root growth by days or weeks.
- Mulch lightly: A 1–2 inch layer of organic mulch keeps moisture in, suppresses weeds, and keeps roots cool on hotter days. Just leave a bit of space around the emerging seedlings when applying mulch.
Proper watering pays off: avoid wilting or extreme swings in soil moisture, and your beets will be plump and tender rather than cracked or bitter.
Feeding Your Beets (Fertilizing)
Beets aren’t heavy feeders if your soil is well-prepped, but a little nutrition boost helps form big bulbs:
- At planting: Work a balanced vegetable fertilizer (like 5-10-10 or 10-10-10) or compost into the soil before sowing. This gives a nutrient reservoir. Bone meal (for phosphorus) or wood ash (potassium) can help bulking. Gardenary suggests composting generously because beets “grow best in potassium-rich soil”.
- Avoid excess nitrogen: Too much nitrogen (high-nitrogen lawn fertilizer, for example) will produce lots of leafy greens at the expense of the root. If you notice huge tops and skinny roots, cut back on N.
- Side-dressing: After thinning, you can side-dress with more compost or a light foliar feed (like fish emulsion) to keep growth going, especially if you plan a long harvest window.
In general, well-composted soil can feed beets for the entire season.
Beds filled with rich compost often provide enough nutrients on their own, especially when built using the Berkeley method of composting, which creates fast, nutrient-dense compost.
Keep an eye on plant growth, and if things seem slow, a mild balanced fertilizer midseason can give beets a gentle boost.
Weed and Pest Management
Beets don’t like competition. Keep the rows weed-free. Because beet roots stay shallow (just below the surface), hand-weeding or light hoeing between plants is best.
A weedy bed can crowd young beets and lead to skinny roots.
Using natural methods to prevent weeds, like mulching with straw, shredded leaves, or grass clippings, helps block weed growth while keeping soil moisture steady.
If you have heavy weeds, it’s a smart idea to cover the soil with a board or mulch after planting to prevent crusting and then remove it when seedlings appear.
Watch for these common issues:
- Leaf miners: Tiny white blotches or tunnels in leaves often come from leaf-miner flies. Remove and destroy infested leaves.
- Aphids: Clusters of small aphids may appear; blast them off with water or use insecticidal soap if needed. (Encouraging predatory ladybugs or planting onions nearby can help repel aphids.)
- Slugs and snails: They can eat holes in beet leaves. Pick them off at night or use organic slug traps.
- Leaf spot (Cercospora): This fungus makes small round spots on leaves. Practice crop rotation and avoid overhead watering to minimize it; remove any spotted leaves.
Beet pests are usually minimal, but it’s worth checking plants weekly. Good air circulation (spacing plants well), keeping leaves dry, and rotating crops yearly will keep pest and disease pressure low.
By contrast, beets have a companion advantage: planting garlic or onions nearby can naturally deter common beet pests.
Lettuce planted between rows is a nice “living mulch” – it shades the soil and suppresses weeds without stealing much water.
Harvesting Beets

Harvest time is when all your hard work pays off!
Most beets are ready 50–90 days after planting, depending on variety.
There are two approaches:
- Baby (salad) beets: You can start harvesting tiny 1-inch roots and young greens in just 5–6 weeks for “baby” beets. Snip or gently pull a few when they’re about golf-ball size. This also thins the plants.
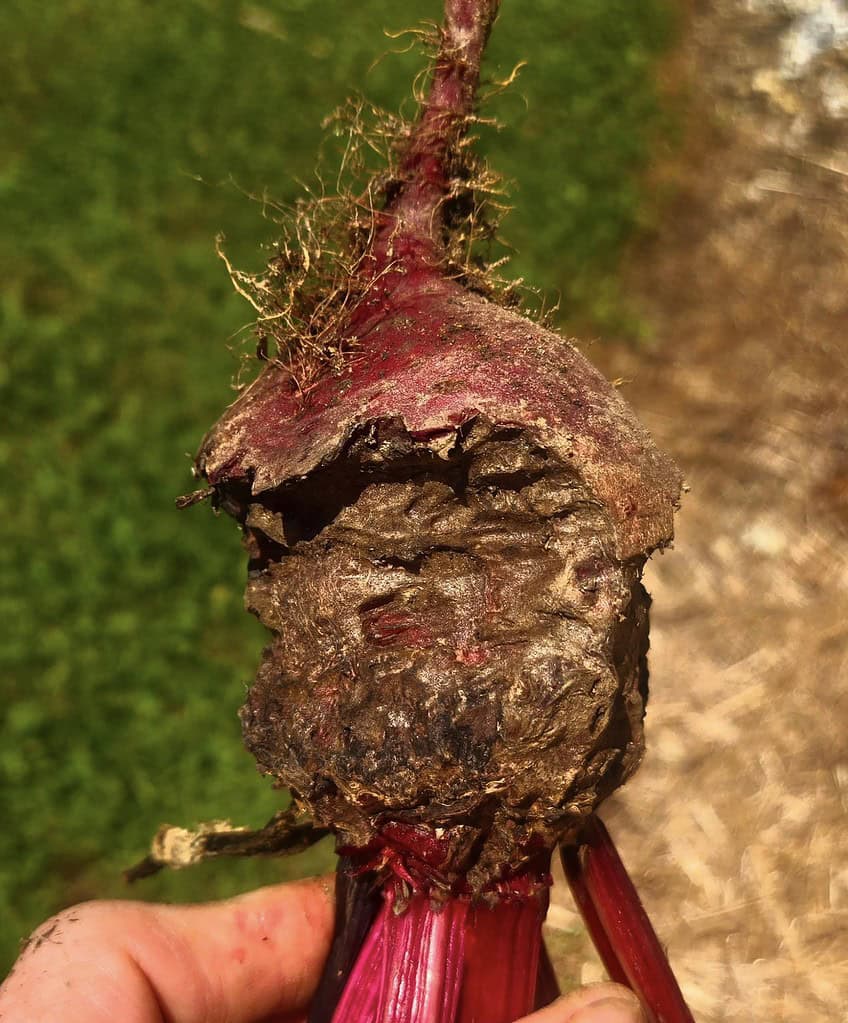
- Full-size beets: For standard roots, watch the soil. Beets are usually ready in about 90 days, when the rounded shoulders of the beet begin to push up through the soil surface and are about 3 inches across.
To check without disturbing the whole bed, gently brush soil away from the top of one or two plants.
If the root shoulder is ~1.5–3 inches wide (or the size you want), it’s harvest time. Roots larger than ~3 inches tend to be tough and woody.
When you harvest:
- Loosen the soil first: Water the bed the night before harvest, or loosen the soil with a trowel around the beet base so the greens won’t snap off.
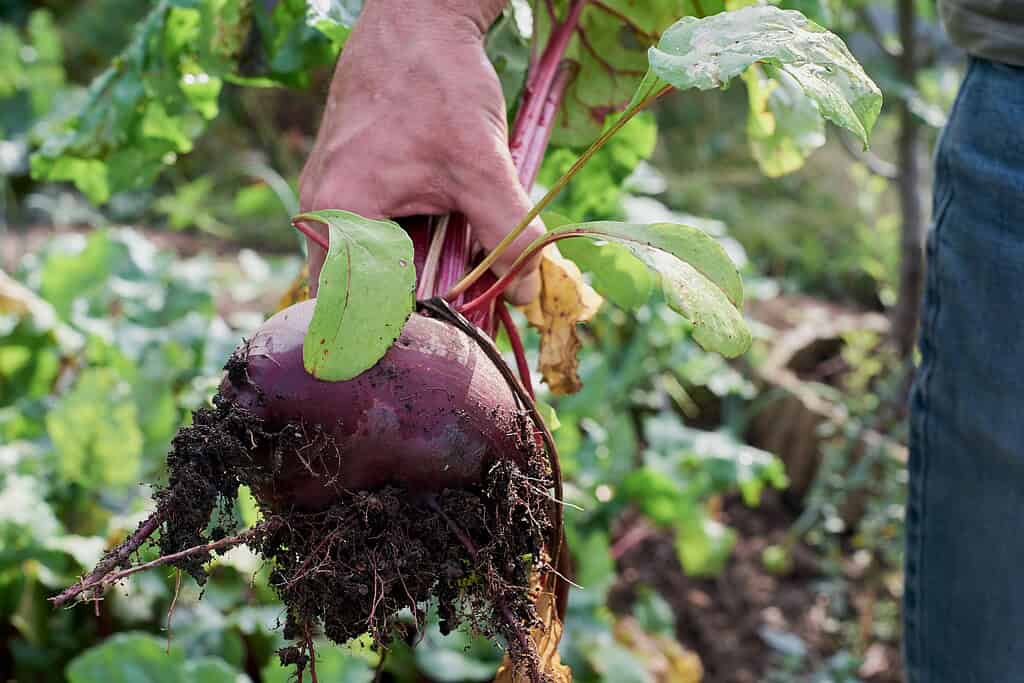
- Pull by the stem: Grasp the stem close to the soil line and gently tug. Lift the whole plant out. Brush off excess dirt.
- Trim the tops: Cut or twist off the green tops, leaving about 1 inch of stem on the beet. (If you cut into the beet bulb itself, you’ll lose some of the bright color during cooking.) The tops are edible – see FAQs below for ideas on using them.
- Store properly: Keep harvested beets cool and moist. Remove the greens promptly (they draw moisture out of the root). You can refrigerate beets in a perforated plastic bag for several weeks, or store them in a root cellar box of sand. They keep best around 32-40°F, high humidity.
Enjoy your beets soon for best flavor (roasting, pickling, or fresh in salads). Roasting in particular brings out their natural sweetness.
Container Gardening for Beets
You can absolutely grow beets in pots or containers – that’s container gardening beets made easy. Follow these tips:
- Choose the right container: A pot at least 8–12 inches deep is needed to accommodate the taproot. It should be wide enough to hold several plants (a 2–5 gallon pot is fine for a few beets). Make sure there are drainage holes. Fabric pots are ideal for moisture control.
- Soil mix: Use a loose, well-draining potting mix (pH ~6.5) with some compost mixed in. Avoid garden soil in pots. Container mixes usually contain everything needed, but a handful of balanced granular fertilizer or compost per cubic foot of mix can feed beets as they grow.
- Light: Place containers where they get at least 4–6 hours of sun per day. Beets handle some light shade, but the more sun the bigger the roots. If your deck/balcony has only filtered light, put them in the sunniest spot.
- Sowing in containers: Sow seeds just like in the ground: ½ inch deep, 1–2 inches apart. Thin to about 3 inches spacing when true leaves emerge.
You could fit several beets in one large pot or use multiple small pots. Succession plant in containers too: drop a few seeds every few weeks for a long season.
If you’re new to staggering plantings, this succession planting chart breaks down when to sow each batch so you can keep harvesting beets over a longer season.
- Watering: Container soil dries out faster than garden soil. Water regularly, often daily in hot weather, to keep soil moist (not soggy). A layer of mulch (straw or leaf mold) can help hold moisture in. Check pots daily.
- Fertilizing: Since container soil can lose nutrients, feed beets every month with a light application of balanced liquid fertilizer or compost tea. If you started with fresh potting mix, extra feeding might not be needed until later in the season.
Beets in containers grow just as well as in the ground and are especially convenient: you can harvest from a container without kneeling, and move pots to extend the season (bring them in if frost threatens). Many urban gardeners love container beets.
Grow Beets and Share Your Success!
By following these steps – choosing the right time and place, giving beets loose fertile soil, thinning carefully, and watering consistently – even first-time gardeners can grow beets that pop with flavor.
Remember, homegrown beets often outclass store varieties in crispness and sweetness.
Whether you have a yard, raised bed, or just a sunny patio, you can enjoy the satisfaction of pulling up these jewel-like roots.
Grab some beet seeds, pick a sunny spot, and see your first green sprouts emerge. We’d love to hear how your beets grow: share your tips or questions below!
Ready to grow your own beets? Dive in, and beet the store-bought beet at its own game!
Frequently Asked Questions
How can I prevent my beet roots from splitting or cracking?
Cracked or split beets are often caused by erratic watering. Beets need consistent moisture – about 1 inch of water per week. If soil dries out and then gets a lot of water all at once, the roots can swell too quickly and split.
To avoid this, water regularly (drip or soaker hoses work well) and mulch around plants to keep soil moisture even. Avoid letting the soil go bone dry or waterlog. With steady moisture, your beets are more likely to grow uniformly and remain smooth.
Are beet greens edible and how do I use them?
Yes! Beet leaves (and tender stems) are perfectly edible and very nutritious. They taste similar to spinach or chard. Simply treat them like any leafy green: trim off the stems and wilt the leaves quickly in a sauté or add to soups and salads.
You can harvest greens throughout the season – this also lets the plant put more energy into the root. Sauté beet greens with garlic and olive oil, blend into pesto, or mix raw young leaves into salads for extra flavor and nutrients.
What pests or diseases should I watch for on beets?
Beets are relatively trouble-free, but a few pests can show up. Look for leaf miners (they make white squiggly lines on leaves) and slugs/snails (they chew holes).
Also check for aphids on the undersides of leaves. For minor leaf miner or aphid problems, remove the affected leaves and encourage beneficial insects (ladybugs, lacewings).
Garlic or onion planted nearby can repel some pests. Root maggots (small white grubs) can attack beets in some regions; crop rotation each year helps avoid this. As for diseases, keep foliage dry to prevent leaf spots (like Cercospora).
If you notice damaged leaves, just prune them off. Overall, most gardeners report few beet pests if you keep beds clean and rotate where you plant each year.
Why do my beet plants have big leafy tops but tiny roots?
This is usually a sign of too much nitrogen or overcrowding. Excess nitrogen fertilizer (or a very rich manure) will make beets grow lush foliage but small bulbs.
Also, if seedlings are not thinned enough, the plants compete for nutrients and produce only pencil-thin roots. To fix this, thin your seedlings to the recommended spacing (3–4 inches apart) and use only a balanced or low-nitrogen fertilizer.
Make sure they still get plenty of sunlight – beets need ~6 hours of sun so leaves can photosynthesize into root growth. By giving each plant enough space and moderating nitrogen, you’ll get rounder, juicier beets rather than just a big leafy top.
What are good companion plants for beets?
Beets benefit from planting next to cool-season leafy veggies and alliums. Good partners include lettuce, spinach, or kale – these shallow-rooted greens can share space since they won’t crowd the beet roots. Lettuce even shades the beet soil and helps suppress weeds.
Onions, chives, garlic and leeks are also excellent companions: their pungent smell repels common beet pests (like aphids). Beans (pole or bush) add nitrogen to the soil, which also helps beets. Avoid planting beets next to Swiss chard or pole beans (they compete for similar nutrients).
Carrots and onions, actually, are often recommended near each other, too. In short, pick cool-season neighbors (greens, alliums, legumes) and keep other beets or chard separate for best results.