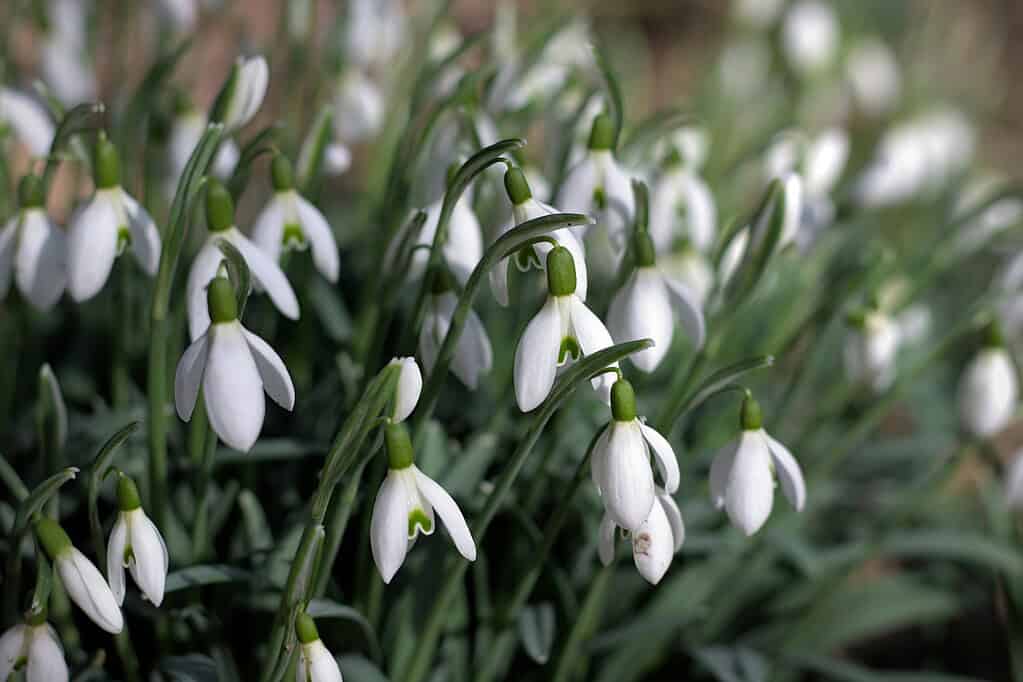
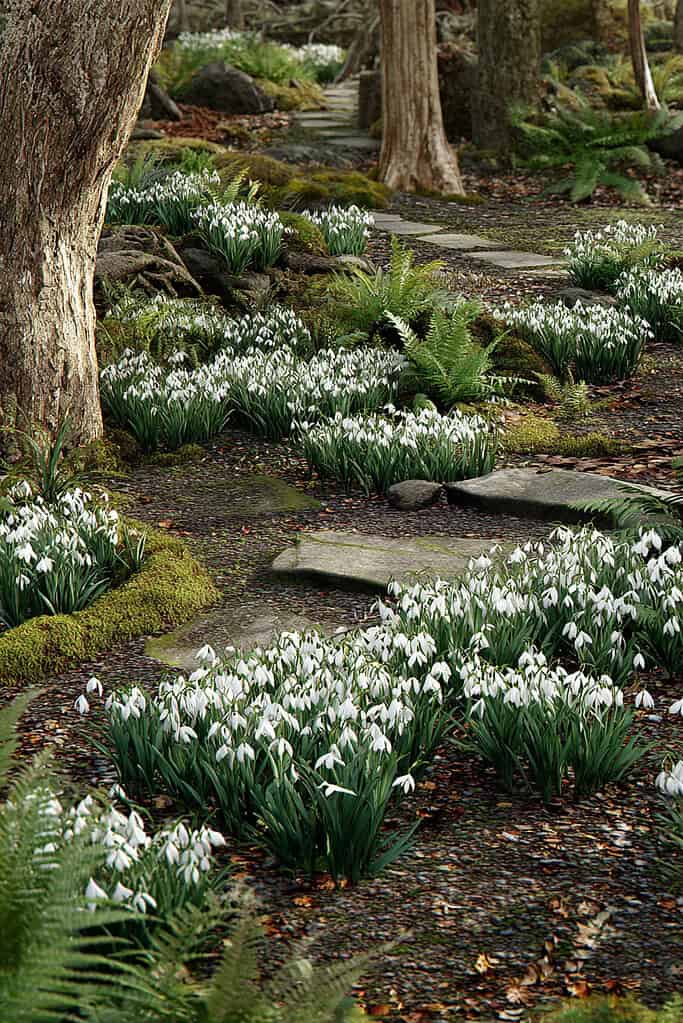
Snowdrop flowers are among the first signs of life after winter, pushing through cold soil to bloom when few other plants do.
Their nodding white flowers and small stature make them ideal for borders, woodland edges, and even under trees that haven’t yet leafed out.
Though they look delicate, snowdrops are tough, low-maintenance bulbs that return year after year with little effort.
In this article, I’ll walk you through how to grow and care for snowdrop flowers in a way that’s simple and reliable.
Understanding Snowdrop Flowers: Growth Cycle, Appearance, and Benefits
Before planting or planning a garden with snowdrops, it’s helpful to understand how they grow and what makes them different from other early bloomers.
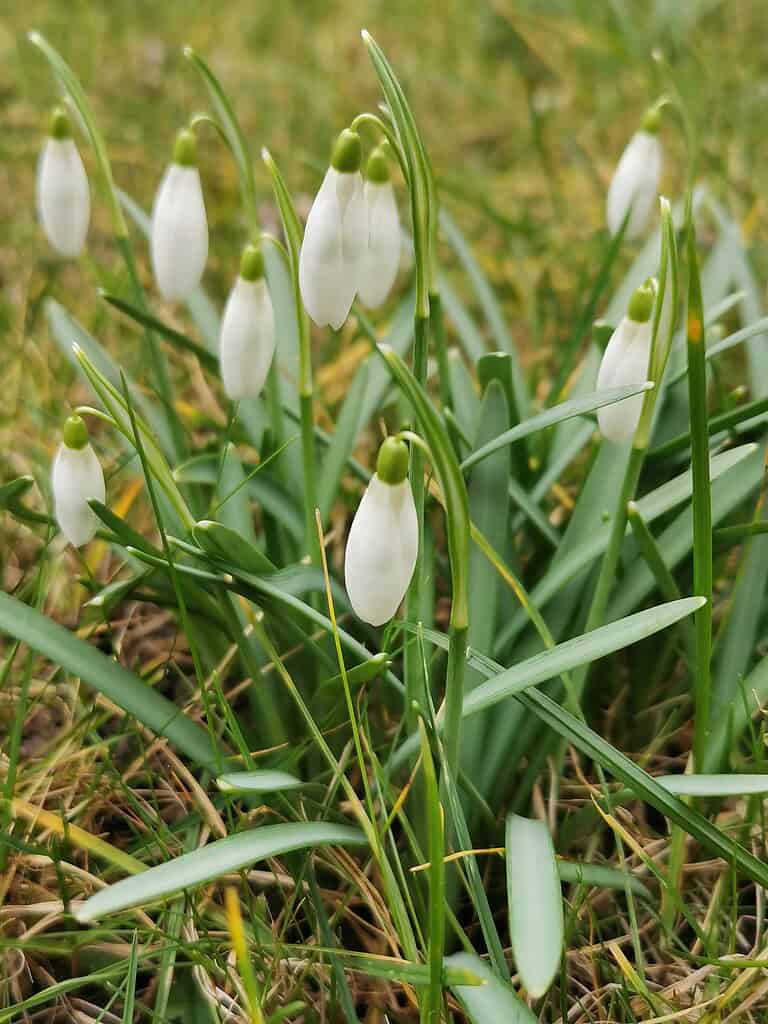
Snowdrops (Galanthus nivalis) are among the earliest flowers to appear in spring, often emerging through snow-covered ground.
Despite their delicate look, they’re resilient bulbs that thrive in a wide range of conditions and require very little upkeep.
Here’s a summary of the key characteristics of snowdrops:
| Common Names | Snowdrops, common snowdrop |
| Botanical Name | Galanthus nivalis |
| Family | Amaryllidaceae |
| Plant Type | Perennial, bulb |
| Mature Size | 4–10 in. tall; 3–6 in. wide |
| Sun Exposure | Full sun to partial shade |
| Soil Type | Loamy, sandy, well-drained |
| Soil pH | Acidic, neutral, or alkaline |
| Bloom Time | Late winter to early spring |
| Flower Color | White |
| Hardiness Zones | USDA Zones 3–7 |
| Native Areas | Asia, Europe |
| Toxicity | Toxic to humans and pets |
If you’d like to see what else brightens up the colder months, here’s our list of tough winter flowers you can grow alongside snowdrops.
Best Location for Planting Snowdrop Bulbs
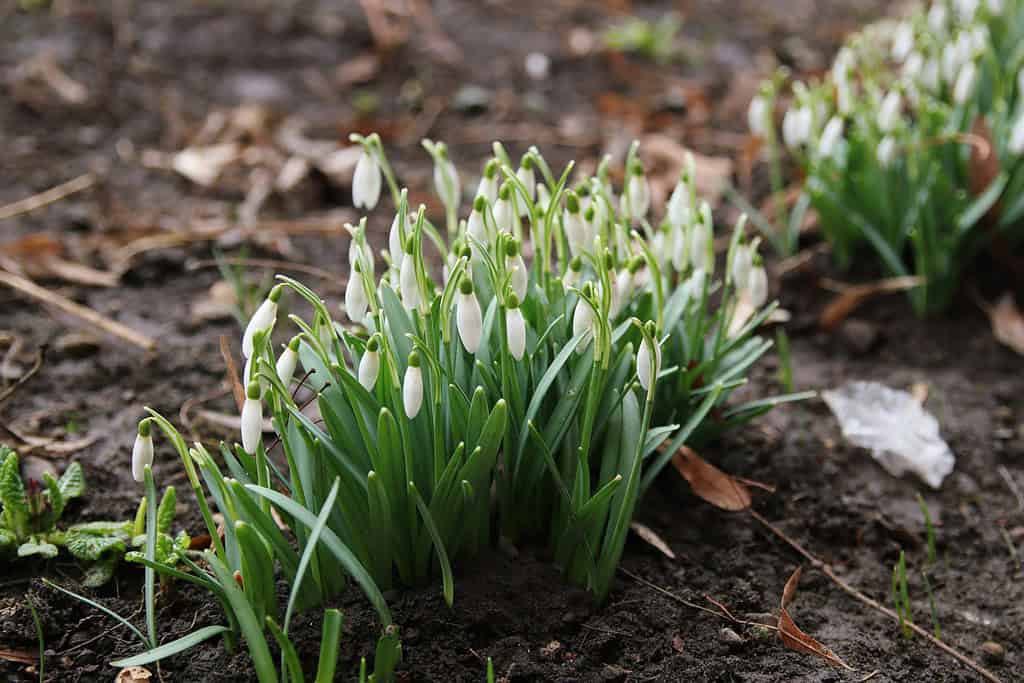
Choosing the right location is one of the most important parts of growing healthy, long-lasting snowdrops.
These early spring bloomers are surprisingly adaptable but thrive best in specific conditions that mimic their natural woodland habitat.
Knowing where to plant them can make the difference between a few scattered flowers and a thriving, self-sustaining patch.
Where to Plant Snowdrops for the Best Results
Snowdrops grow well in areas that receive full sun in late winter and early spring, but they benefit from partial shade later in the season as trees begin to leaf out.
This makes them an ideal choice for planting under deciduous trees like oak or maple.
Since these trees don't cast heavy shade until later in spring, snowdrops get plenty of sunlight while they’re actively growing and blooming.
They also do well along woodland edges, under shrubs, in rock gardens, or even between other early bulbs in flower beds.
Choose locations where soil stays moist in spring but drains well – snowdrops won’t tolerate soggy roots.
Can You Plant Snowdrops Under Trees?
Yes – and it’s one of the most effective ways to use them in the garden. Snowdrops bloom so early that they can complete their growing cycle before the trees above them even begin to leaf out.
This allows them to take advantage of the full sunlight in late winter, even in otherwise shaded areas.
It’s an efficient use of garden space that’s often difficult to fill with other plants. Once the snowdrops go dormant, their space can be shared by shade-loving summer perennials or ground covers.
Soil and Sunlight Requirements for Healthy Snowdrops
- Sun Exposure: Snowdrops prefer full sun to partial shade – as long as they get bright light during their active season (late winter to early spring), they’ll thrive.
- Soil Type: Loose, well-drained soil is ideal. They tolerate loamy or sandy soils but will struggle in clay unless amended.
- Moisture: Snowdrops like moist soil in spring, but it must not stay soggy.
- Drainage Tip: In poorly draining soil, consider planting them on a slope, in raised beds, or amend the planting site with compost or sand.
Improving Soil Drainage for Snowdrop Planting
If your soil is heavy or compacted, improving it before planting is key.
Work organic compost into the top 6–8 inches of soil to boost drainage and nutrient levels. Learn how to compost for beginners to create rich, well-draining soil for your snowdrops.
In clay soils, adding coarse sand or fine gravel can help prevent root rot by allowing excess water to drain away from the bulbs.
How to Plant Snowdrop Bulbs in Your Garden
Planting snowdrops the right way helps them settle into the soil, establish roots before winter, and return reliably each year.
These hardy bulbs are low-maintenance once in the ground, but giving attention to proper planting conditions from the start will lead to stronger blooms and better naturalization.
Step 1: Preparing the Soil and Planting Site
Start by choosing a location that offers good sunlight in late winter and early spring, especially before nearby trees leaf out.
Snowdrops benefit from this early light while they’re actively growing. They also need well-draining soil to prevent bulb rot, which is one of the few things that can harm them.
Clear the area of any weeds, roots, or debris, then loosen the top 6 to 8 inches of soil using a garden fork or shovel. This gives the roots room to grow and improves aeration.
In heavy or clay soil, mix in coarse sand, compost, or leaf mold to improve structure and drainage. Snowdrops can tolerate a range of soil types but will fail in ground that stays wet for long periods.
If the planting site tends to dry out too quickly, especially on slopes or exposed spots, adding organic matter like compost will help the soil retain moisture while still draining well.
You can learn more about the Berkeley method of composting to create rich, moisture-retaining compost efficiently.
Step 2: Handling and Positioning the Bulbs
Snowdrop bulbs dry out faster than other spring bulbs and don’t store well for long periods.
Try to plant them shortly after purchase – don’t wait for weeks. If the bulbs feel soft or shriveled, they may not grow well.
Hold each bulb in your hand and look for its shape: the pointed tip is the top, and the flat, rough base is the root end. Planting them upside-down can delay or weaken growth.
If you're unsure, lay the bulb sideways – most will correct their orientation as they grow, but it's better to plant them correctly from the start.
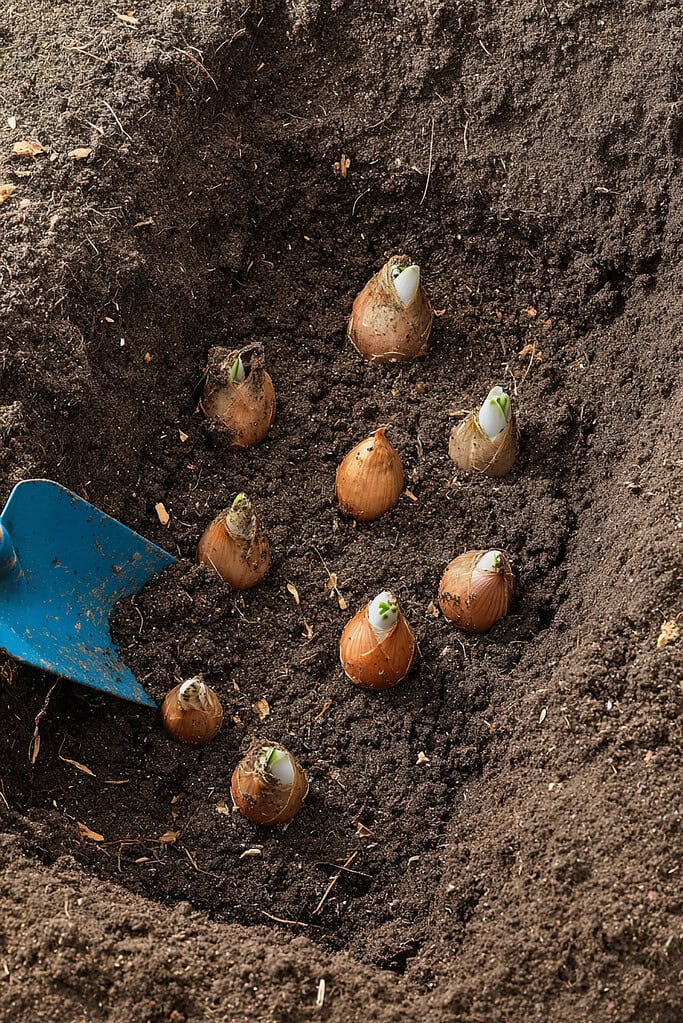
Step 3: Digging and Spacing the Bulbs
Use a small trowel or bulb planter to dig individual holes about 2 to 3 inches deep, or roughly twice the height of the bulb.
This depth protects the bulb from cold and gives enough room for root development.
Plant snowdrop bulbs 2 to 3 inches apart, especially if you're aiming for a natural drift or mass planting. Because each plant is small, spacing them too far apart can make them look sparse.
For a fuller effect, plant them in clusters of 10 to 25 bulbs close together.
Avoid arranging them in straight rows – random groupings look more natural and create a stronger visual impact when they bloom.
Step 4: Covering and Watering the Planting Area
Once bulbs are in place, gently backfill the holes with soil.
Firm the soil lightly with your hand or the back of the trowel, just enough to remove air pockets but not so much that the soil becomes compacted.
Water the area thoroughly after planting. This helps settle the soil around the bulbs and signals them to begin forming roots.
In fall, rain may be enough to keep the soil moist, but if the weather is dry, keep the area lightly watered until the ground freezes.
Moisture during this early period is important, even though no growth will be visible above ground yet.
Step 5: Marking the Location for Future Reference
Once spring is over, snowdrop leaves turn yellow and die back completely, and the bulbs enter dormancy. At that point, there will be no visible sign that anything was ever planted in that spot.
To avoid accidentally digging them up or disturbing them later in the year, place a small plant marker or garden stake in the area as a reminder.
This is especially useful if you’re planning to add new plants nearby or work in the same bed during summer.
Companion Planting with Snowdrops
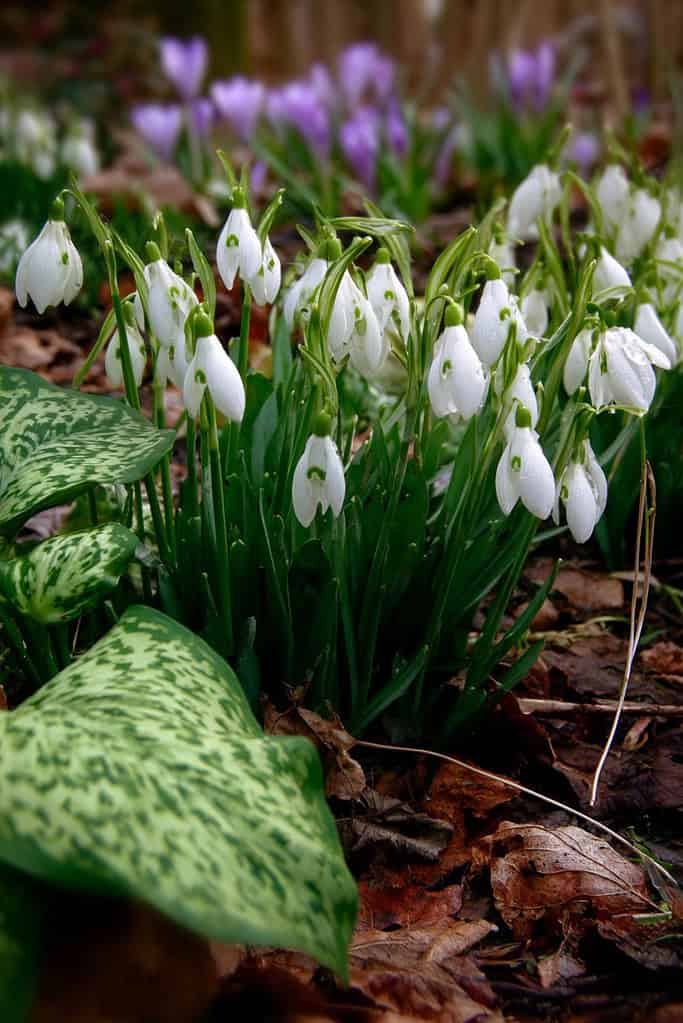
Because of their small size and early bloom time, snowdrops are most effective when paired with the right companions and thoughtfully placed in the landscape.
On their own, they can get lost in the garden, but when combined with other plants or arranged in the right setting, they create a striking, natural-looking display that signals the end of winter.
Best Companion Plants for Snowdrops
Since snowdrops bloom so early – often when little else is flowering – they’re best matched with other early spring bulbs and low-growing evergreen plants.
These companions help fill in the space, extend the blooming season, and provide a visual contrast that highlights the delicate white flowers of snowdrops.
For more tips on pairing plants effectively, check out our expert companion planting guide.
- Winter Aconite (Eranthis hyemalis)
These low, golden-yellow flowers bloom around the same time as snowdrops and create a bright contrast against their white petals. - Glory-of-the-Snow (Chionodoxa)
With star-shaped blue or pink flowers, these bulbs add vibrant color and also naturalize well alongside snowdrops. - Siberian Squill (Scilla siberica)
Produces blue blooms slightly after snowdrops, helping extend interest in the same area through early spring. - ‘Tête-à-Tête’ Daffodils
These miniature daffodils are just the right size to pair with snowdrops and bloom slightly later, creating a layered effect. - Evergreen Ground Covers (e.g., Iberis sempervirens, or candytuft)
These low-growing plants provide structure and greenery before, during, and after snowdrops bloom. Their consistent presence helps avoid empty patches once snowdrop foliage dies back.
These combinations work especially well in woodland-style gardens, under deciduous trees, and along mixed borders.
Creative Landscaping Ideas with Snowdrops
Here are some inspiring ideas to make the most of snowdrops in your landscape:
1. Plant Snowdrops in Naturalistic Drifts
Instead of lining them up in rows, scatter the bulbs in informal groupings and plant where they fall.
This mimics how snowdrops spread in the wild and results in a more relaxed, natural look. Over time, these drifts will expand as the bulbs multiply.
2. Use Snowdrops Under Deciduous Trees
Large trees like oaks, maples, and beeches provide open space and light in winter and early spring before their leaves emerge. This allows snowdrops to get the light they need during active growth, and by the time the trees leaf out, the snowdrops have already gone dormant.
It’s an efficient way to use otherwise shady or bare areas.
3. Border Paths and Walkways
Snowdrops are perfect for planting along the edges of garden paths where their early blooms can be easily seen and appreciated up close.
Their compact height prevents them from flopping into walkways.
4. Tuck Snowdrops into Rock Gardens
Their small stature and early bloom time make snowdrops ideal for rock gardens.
They can be planted between stones or in crevices where other plants may struggle, offering surprise color at the end of winter.
5. Mix with Later-Blooming Plants
Snowdrops fade out by late spring, so pairing them with perennials that leaf out or flower later – like hostas, ferns, or hardy geraniums – can help fill the space once the snowdrops go dormant.
For more inspiration and ideas to create a beautiful, cohesive garden, explore our simple garden design ideas.
Watering and Fertilizing Snowdrop Flowers

Snowdrops are not demanding when it comes to ongoing care, but consistent moisture during key parts of their growth cycle makes a noticeable difference in how well they establish and return.
Fertilizing isn’t always necessary, but in certain soil conditions or container settings, it can help strengthen bulbs for future blooms.
How Much Water Do Snowdrops Need?
Snowdrops are hardy little bulbs, but like any plant, the right amount of water makes all the difference.
Watering needs change throughout the year, depending on whether the bulbs are actively growing or resting.
Here’s how to keep them happy and healthy:
During Active Growth (Late Winter to Spring)
When snowdrops are actively growing and flowering, they need consistently moist soil. This doesn’t mean soggy – just evenly damp.
If the soil dries out too much during this period, especially in dry climates or unusually warm early springs, it can reduce flower production and weaken the bulbs.
- In normal weather, natural rainfall is usually enough.
- In dry or windy conditions, especially during a dry winter or early spring, give snowdrops a light watering once a week to keep the soil evenly moist.
During Dormancy (Late Spring to Fall)
Once the foliage dies back and the bulbs go dormant, they don’t need regular watering. In fact, too much moisture in summer can lead to bulb rot.
If snowdrops are planted in an irrigated area, make sure the soil is well-drained so that water doesn’t pool around the bulbs.
How to Avoid Overwatering
Snowdrop bulbs are sensitive to sitting in waterlogged soil, especially after flowering. Signs of overwatering include:
- Soft or mushy bulbs when dug up
- Poor flowering or sudden disappearance of plants
- Mold growth on the soil surface
To prevent this:
- Water only when the top inch of soil feels dry during the growing season.
- Avoid watering dormant bulbs in summer.
- Improve drainage with compost, coarse sand, or by planting on a slope or raised bed if needed.
Do You Need to Fertilize Snowdrops?
In most garden soils, snowdrops don’t need fertilizer – especially if compost or organic matter has been added during planting.
However, if your soil is nutrient-poor or the snowdrops are growing in containers, a small nutrient boost can help improve flowering and long-term bulb health.
Optional Fertilizing Tips:
- Use a balanced, slow-release fertilizer (e.g., 5-5-5) applied just after flowering, while the foliage is still green.
- Avoid applying fertilizer during dormancy or after foliage has died back.
- In containers, refreshing the potting mix every 2 years is often more beneficial than regular feeding.
Low-Maintenance Snowdrop Care After Blooming
Once snowdrops have bloomed and their short flowering season ends, they enter a period where the foliage remains green for a few more weeks before naturally dying back.
While it may seem like there's nothing more to do at this point, the post-bloom phase is critical for the bulbs to recharge and prepare for the next growing cycle.
Learn what to do (and what to avoid) after blooming, why leaving the foliage alone matters, and how to prevent common mistakes that can weaken or shorten the life of your snowdrop patch.
What to Expect After Snowdrops Finish Blooming
After flowering ends, snowdrops don’t die immediately. Their green, strap-like leaves stay visible for several weeks, continuing to photosynthesize.
During this time, the bulbs below ground are storing energy for next year’s growth and blooms.
This post-bloom window is important. Even though the flowers are gone, the plant is still active and depends on its leaves to remain healthy.
Why You Should Let the Foliage Die Back Naturally
Do not cut, braid, or remove snowdrop leaves prematurely. Allowing them to turn yellow and die back on their own gives the bulbs time to absorb nutrients from the fading foliage.
Leaving the foliage alone:
- Strengthens the bulb for next year’s bloom
- Reduces the need for supplemental feeding
- Supports long-term naturalization and clump formation
If you remove the foliage too early, you interrupt this natural nutrient cycle, which can lead to smaller bulbs and fewer flowers the following spring.
Avoiding Disturbance During Dormancy
By early summer, the foliage disappears completely, and the bulbs enter full dormancy underground. At this point:
- Avoid digging or disturbing the soil in that area.
- Keep a plant marker or stake in place so you remember where they’re planted.
- If you plan to add new plants nearby, work around the marked area to avoid damaging the bulbs.
Do You Need to Deadhead or Prune Snowdrops?
No. Snowdrops require no deadheading, pruning, or cutting back. The flowers fall off naturally, and the plant handles its own cleanup over time.
This makes snowdrops an ideal option for low-maintenance or naturalized gardens where minimal intervention is preferred.
How to Propagate Snowdrops and Encourage Natural Spreading

Snowdrops are known for their ability to naturalize, slowly forming larger patches over time.
While they can spread on their own, gardeners can also speed up the process through intentional propagation.
The most reliable way to do this is by dividing clumps “in the green,” but snowdrops will also multiply through offsets and self-seeding with little effort.
“In the Green” Propagation: Dividing Snowdrop Clumps
The best way to propagate snowdrops is by dividing them immediately after they finish blooming, while the foliage is still green and healthy.
This is often more successful than planting dry bulbs in fall, as the roots are still active and bulbs haven’t dried out.
How to divide snowdrops in the green:
- Wait until flowering ends but before the leaves start turning yellow.
- Use a trowel or spade to lift a clump of snowdrops carefully, keeping as much of the root system and soil intact as possible.
- Gently separate the bulbs by hand, teasing them apart into smaller groups or individual bulbs.
- Replant immediately at the same depth, spacing them a few inches apart.
- Water well after replanting to help the bulbs settle and resume root growth.
This method reduces transplant shock and increases the chance of strong flowering the following spring.
How Snowdrops Spread Naturally Over Time
Once established, snowdrops will multiply on their own through two methods:
- Bulb Offsets: Each bulb produces small bulblets, or offsets, which remain attached until they grow large enough to flower. Over time, this leads to larger clumps.
- Self-Seeding: Snowdrops can also spread by seed. After flowering, the seed pods ripen and drop seeds into the soil. Interestingly, ants help with this process – they collect the seeds and carry them short distances, aiding in slow, natural dispersal.
Both methods are gradual, and while they don’t produce dramatic results in one season, they steadily expand snowdrop patches over several years.
How Long Does It Take for Snowdrops to Naturalize?
Snowdrops are slow to multiply in the beginning. It’s common for newly planted bulbs to take 2 to 4 years before noticeably expanding into larger clumps or drifts.
This slow start can be misleading, but once a patch is established, it tends to grow faster each year.
For gardeners wanting quicker results, dividing clumps every 2–3 years is the most effective way to speed up spreading without harming the plants.
Growing Snowdrop Flowers in Pots or Containers
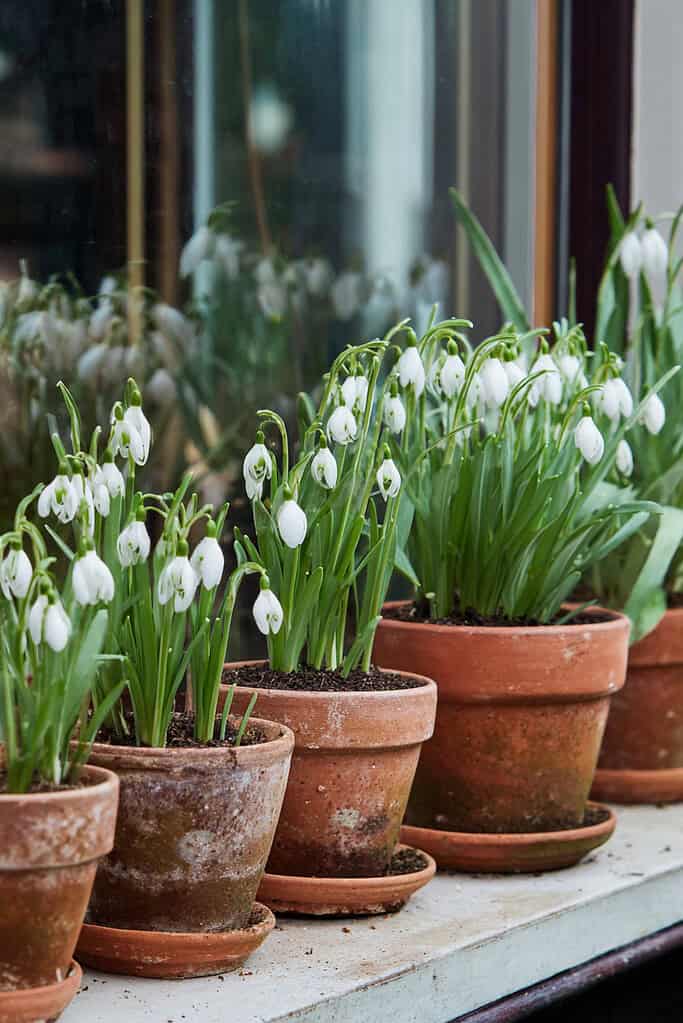
Snowdrops grow just as well in containers as they do in the ground, provided their basic needs are met – drainage, protection from deep freezes, and some seasonal maintenance.
Growing them in pots can be a great option for small gardens, patios, or anyone who wants to enjoy early blooms close to walkways or entryways.
Choosing the Right Container and Soil
Start with a container that has drainage holes. Snowdrops hate wet feet, and excess moisture in a sealed container can rot the bulbs.
- Use a medium-sized pot (8–12 inches deep) if you're planting a small group.
- Choose a well-draining soil mix – ideally a blend of potting mix with added perlite, horticultural sand, or compost to help with drainage and structure.
Planting Snowdrops in Containers
Plant bulbs about 2–3 inches deep and 2 inches apart, grouping them close together for a full effect. Avoid lining them up – clusters will always look better.
You can combine snowdrops with other early spring bulbs like winter aconite or miniature daffodils, as long as they share similar watering needs.
Water the container well after planting and keep the soil lightly moist during the fall while the roots develop.
For tips on choosing containers, arranging plants, and keeping them healthy, see our practical container gardening guide.
Winter Care for Potted Snowdrops
Bulbs in pots are more vulnerable to cold than those in the ground, since the soil in containers freezes more quickly and deeply.
- In mild climates, pots can be left outside in a sheltered, unexposed spot.
- In colder regions, move the container to a cold but protected location like an unheated garage, shed, or cold frame.
- Avoid warm indoor spaces – bulbs still need cold exposure to complete their dormancy cycle.
Check the soil occasionally during winter. If it’s completely dry, water lightly – just enough to keep it from drying out entirely.
Return the pot outside as soon as green shoots begin to emerge, usually in late winter.
Post-Bloom and Long-Term Container Maintenance
After flowering, let the foliage die back naturally. Once it turns yellow, you can trim it off at soil level.
Every 2 to 3 years, it’s best to refresh the potting mix to prevent soil compaction and nutrient depletion.
This is also a good time to lift and divide the bulbs, replanting some into the refreshed container and moving others into the garden if you’d like to expand your patch.
If you skip this, the bulbs may still survive, but blooming may decline as space becomes limited and the soil quality drops.
Protecting Snowdrop Bulbs in Cold Winter Climates

Snowdrops are cold-hardy plants that naturally bloom when temperatures are still low.
However, in areas where winters are especially harsh – zones with deep ground freezing or frequent freeze-thaw cycles – extra protection may be needed to prevent bulb damage and ensure healthy spring growth.
Should You Mulch Snowdrop Bulbs in Winter?
In most climates where snowdrops grow (USDA Zones 3–7), mulching isn’t required every year. However, in areas with very cold winters, adding a layer of mulch can help:
- Prevent bulbs from heaving during freeze-thaw cycles
- Protect against extreme soil temperature drops
- Preserve soil structure around newly planted bulbs
Mulching is especially helpful for:
- Newly planted snowdrop bulbs
- Shallow or raised bed plantings
- Containers that can’t be moved indoors
When and How to Apply Mulch
Apply a 2–3 inch layer of organic mulch after planting in fall, once temperatures have consistently cooled and the ground is close to freezing. Good mulch options include:
- Shredded leaves
- Straw
- Pine needles
- Fine bark mulch
Be sure the mulch is light and breathable to avoid trapping moisture directly against the bulbs, which can increase the risk of rot.
Check out our creative garden mulch ideas to explore different types and uses of mulch in your garden.
When to Remove Mulch in Spring
The most important step in winter mulching is removing it at the right time.
Snowdrops begin to push through the soil in late winter or early spring, depending on the region. If mulch remains in place too long, it can delay their emergence or cause distorted growth.
- Start checking the planting area in late January or early February.
- As soon as you see green tips emerging, gently pull the mulch back from the top of the bulbs.
- Leave some mulch around the area to suppress weeds and retain moisture, but keep it away from the sprouting shoots.
Avoiding Common Cold-Climate Mistakes
- Don’t use heavy mulch like thick bark or wet compost in winter – it can trap moisture and suffocate bulbs.
- Don’t remove mulch too early, especially if heavy frost or snow is still likely.
- Avoid insulating too much – snowdrops need a period of cold dormancy to trigger proper growth and flowering.
With the right balance, a simple mulch layer offers enough insulation to prevent winter damage without interfering with the natural rhythm of snowdrop growth.
Common Snowdrop Problems (and How to Fix Them!)

Snowdrops are low-maintenance bulbs, but like any plant, they can run into problems – especially in their first few years or in challenging soil conditions.
Understanding the most common issues helps prevent disappointment and keeps your snowdrop patch healthy and productive.
Why Aren’t My Snowdrops Blooming?
If your snowdrops come up but don’t produce flowers, it’s usually due to one of these causes:
- Planted Too Deep: Bulbs buried deeper than 3 inches may put up leaves but not have the energy to flower.
- Lack of Light: Snowdrops need good sunlight in late winter and early spring. If planted in year-round shade, flowering will suffer.
- Bulbs Dry or Damaged Before Planting: If dry bulbs were stored too long or handled roughly, they may fail to bloom.
- Immaturity: Newly planted or divided snowdrops sometimes skip blooming their first year but often flower the next season.
Fix: Replant at the proper depth, improve light exposure, and be patient with first-year bulbs.
Why Are My Snowdrops Disappearing?
If snowdrops bloom once and then vanish in future years, consider these factors:
- Bulbs Disturbed During Dormancy: Digging, planting, or even aggressive weeding in summer can damage dormant bulbs.
- Poor Drainage: Standing water during dormancy or winter often leads to bulb rot.
- Rodents (Rare): While uncommon due to their toxicity, some bulbs may still be displaced by digging animals.
Fix: Mark planting spots clearly. Improve soil drainage with compost or sand. Avoid disturbing the area after the foliage dies back.
Rotting Bulbs or Mold Issues
Bulb rot is usually caused by waterlogged soil or poor container drainage. It often goes unnoticed until snowdrops fail to appear in spring.
- Symptoms: Soft, mushy bulbs; mold on the soil surface; foul smell when digging.
Fix: Remove rotted bulbs and replant only in well-drained soil. For containers, ensure there are proper drainage holes and use a free-draining mix.
Sparse or Weak Clumps
Over time, snowdrops can become overcrowded, leading to fewer blooms and smaller flowers.
Fix: Divide clumps every 3–4 years using the “in the green” method. Replant bulbs with space between them and allow room for offsets to grow.
Are Snowdrops Safe Around Pets or Children?
Snowdrops contain toxic compounds that can cause vomiting, diarrhea, or more serious symptoms if eaten by pets or humans.
While they aren’t often disturbed due to their bitter taste, the risk increases in areas where pets dig or children play.
Fix: Avoid planting near pet runs or play areas. Use physical barriers like edging or low fencing if needed.
Start Growing Snowdrops with Confidence
Snowdrops are one of the most reliable and rewarding spring bulbs you can add to your garden.
With their early bloom time, resistance to pests, and low-maintenance habits, they’re a perfect fit for both beginner and experienced gardeners.
Whether you’re planting them under trees, in containers, or along pathways, giving them the right start will ensure years of return blooms and gradual spreading.
Once planted, they mostly take care of themselves – with only occasional dividing and basic winter prep in colder regions.
If you’re looking to add something hardy and beautiful to your garden’s early spring display, snowdrops are well worth the effort.
Have questions about your own snowdrop planting plans or tips to share from your garden? Drop them in the comments below!
FAQs
What should I do if my snowdrops start coming up too early during a winter warm spell?
If your snowdrops begin to emerge during a mid-winter thaw, leave them alone. They are adapted to cold snaps and will pause growth if temperatures drop again. Do not try to insulate them heavily at that point, as it may cause rot.
Can I plant snowdrop seeds instead of bulbs?
Yes, but seed-grown snowdrops take several years (often 4 to 5 seasons) before they mature and flower. They also require specific conditions to germinate. Most gardeners find planting bulbs or dividing clumps more practical.
How can I stop weeds from taking over my snowdrop patch without damaging the bulbs?
Use a light mulch layer after planting to suppress weeds, and hand-weed carefully in spring and summer. Avoid using tools that disturb the soil too deeply, especially while bulbs are dormant.
Can I transplant snowdrops while they’re in bloom?
It’s not ideal. Transplanting while in bloom causes stress and may reduce flowering the following year. If needed, wait until after blooming but while foliage is still green – the “in the green” stage – for best results.
How many years can I leave snowdrops in the same spot without dividing them?
You can leave snowdrops undisturbed for 5–7 years or more, especially if they’re thriving. However, if blooming declines or clumps get crowded, dividing every 3–4 years will help keep them vigorous.
Ready To Transform Your Garden?

Are you looking for the best way to layout your garden beds? Maybe you're feeling a bit stuck on how to make the most of your space?
We’ve got you covered! Check out our 101+ Garden Bed Layout Ideas for your next raised bed project. This guide is filled with creative and practical ideas that can help you design a garden that fits your style, whether you’re just starting out or have been gardening for years.
Get your copy today and get inspired to bring your gardening dreams to life.