Composting is a simple and effective way to turn kitchen scraps and garden waste into rich, healthy soil.
For beginners, it can also help reduce household waste and improve garden productivity. This guide explains everything you need to know about composting.
You’ll learn how composting works, which materials to use, how to set up your compost system, and how to avoid common problems like odors or pests.
Whether you have a large backyard or a small apartment, you’ll find practical composting methods that suit your space and needs.
What is Composting?
Composting is the natural process of breaking down organic materials, such as food scraps and garden waste, into a nutrient-rich soil amendment called compost.
This process relies on microorganisms, fungi, and small invertebrates to decompose the materials over time.
Composting turns what would otherwise be waste into a valuable resource that can improve soil structure, fertility, and moisture retention.
Why Compost?
Composting benefits both the environment and your garden. It reduces the amount of waste sent to landfills, which lowers methane emissions.
For gardeners, compost adds essential nutrients to the soil, encourages healthy root growth, and improves the soil’s ability to hold water. It can also reduce the need for chemical fertilizers and pesticides.
When to Start Composting
Composting can begin at any time of year. However, starting in spring or early summer can be easier because warmer temperatures speed up the decomposition process.
Even if you begin in cooler months, the pile will slowly break down and become active as temperatures rise.
Step 1: Choose Your Composting Method
Choosing the right composting method depends on your available space, how much time you want to invest, and the type of materials you plan to compost. Here are the most common methods suitable for beginners:
Hot Composting

Hot composting is a faster method that produces finished compost in as little as 1 to 3 months during warm weather.
This method requires maintaining the right balance of greens and browns, turning the pile regularly, and monitoring the temperature.
A well-maintained hot compost pile should reach 140-150°F (60-65°C), which helps kill weed seeds and pathogens.
A popular approach to this is the Berkeley method of composting, which can produce compost in as little as 18 days when done correctly.
Cold Composting
Cold composting is the simplest method. You add materials as you have them, and nature takes its course.
This process takes longer—often a year or more—but requires minimal effort. Cold piles usually stay at lower temperatures and may not kill weed seeds or pathogens.
Vermicomposting (Worm Bins)

Vermicomposting uses red worms (red wigglers) to break down materials into nutrient-rich castings. It’s ideal for small spaces or indoor composting. Avoid adding citrus, oily or spicy foods, and meat, as these can harm the worms.
Bokashi Composting
Bokashi composting ferments food scraps, including meat and dairy, in an airtight container using a special bran.
After fermentation, the material can be buried in the garden or added to a regular compost pile.
Once the process is complete, you can bury the material in the garden or add it to your regular compost pile, like those in compost tumblers & bin systems.
This method produces a liquid byproduct that can be used as a plant feed.
In-Ground and Lasagna Composting
In-ground composting involves burying organic materials directly in garden soil.
Lasagna composting layers greens and browns in place, either in a bin or directly in the soil. Both methods are simple and effective for gardeners who prefer low-maintenance solutions.
Indoor and Small-Space Composting
For those with limited space, small bins can be kept under a sink, in a closet, or even in a refrigerator.
Electric composters and 5-gallon bucket systems are also options. Many cities offer curbside or drop-off composting programs for those who prefer not to manage their own compost.
Step 2: Select a Location and Set Up Your Compost System
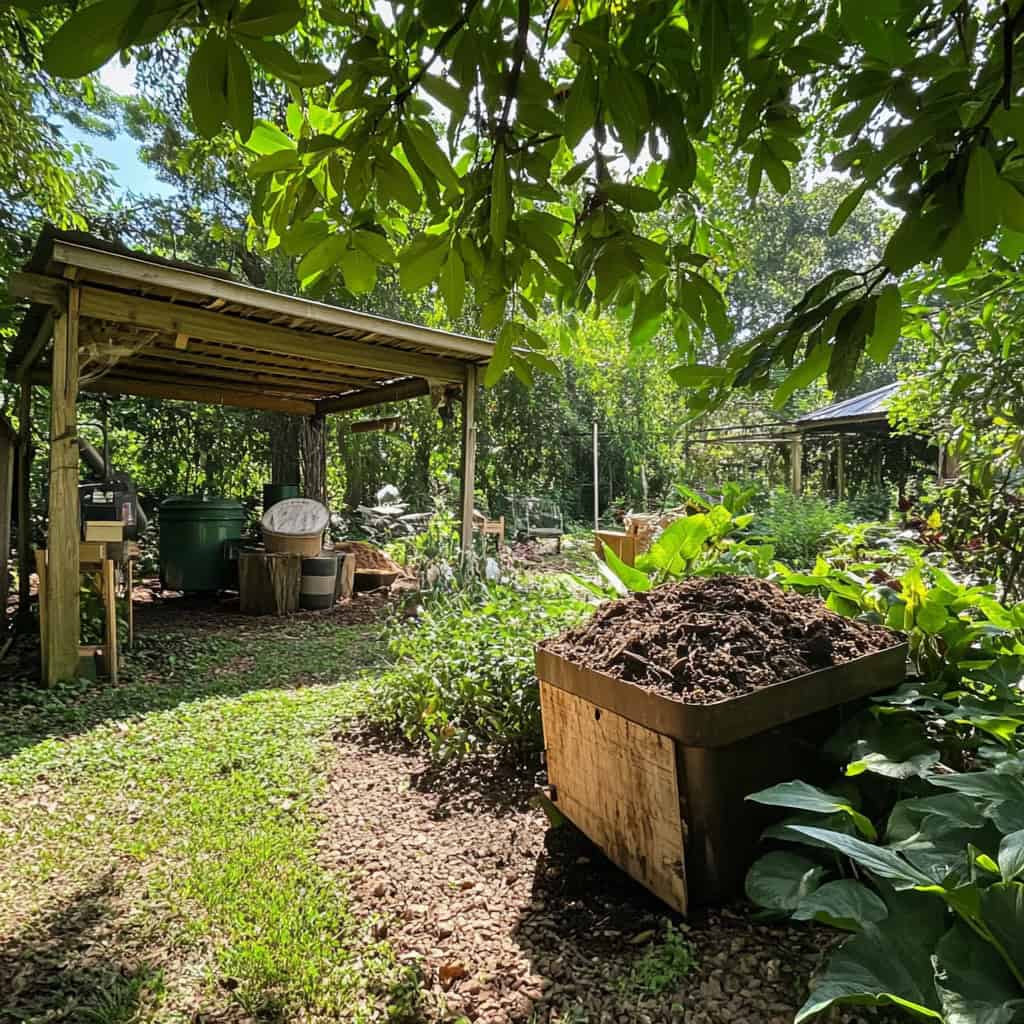
Once you’ve chosen a composting method, the next step is to pick a good location and set up your compost system. The right setup will help materials break down efficiently and make it easier to manage your compost.
Picking the Right Spot
Select a level area with good drainage. If possible, choose a spot with partial shade. Too much sun can dry out the compost, while too much shade can keep it too wet.
Easy access is also important so you can add materials and maintain the pile without difficulty.
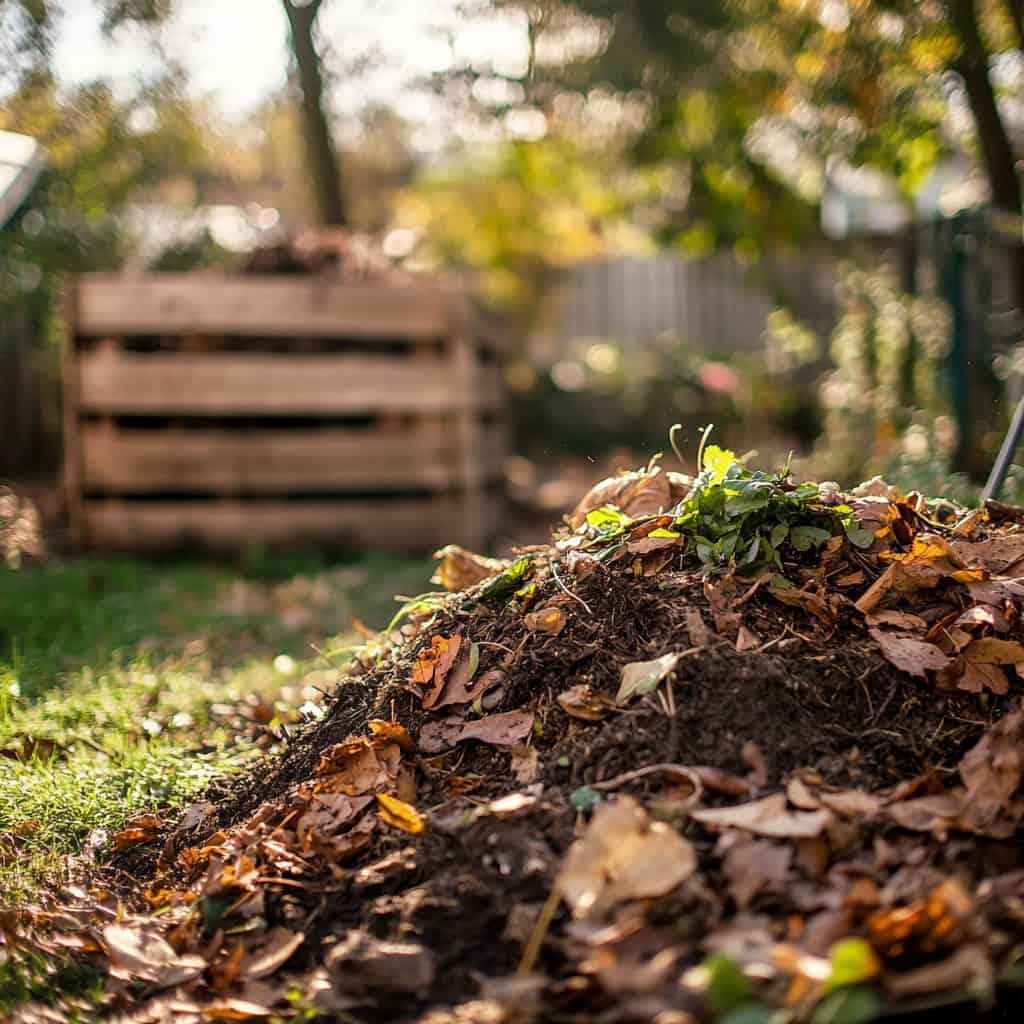
Choosing or Building a Bin/Pile
Depending on the method you chose:
- Hot/Cold Composting: Use a simple bin, a tumbler, or build an open pile.
- Vermicomposting: Use a worm bin designed for indoor or outdoor use.
- Bokashi: Use an airtight bucket or container with a spigot to collect liquid byproduct.
- Small-Space Options: Use small bins, electric composters, or collection buckets.
For homemade bins, you can use wood, wire mesh, or repurposed containers. Open-bottom bins are useful for outdoor composting as they allow contact with soil organisms.
Step 3: Gather and Prepare Materials
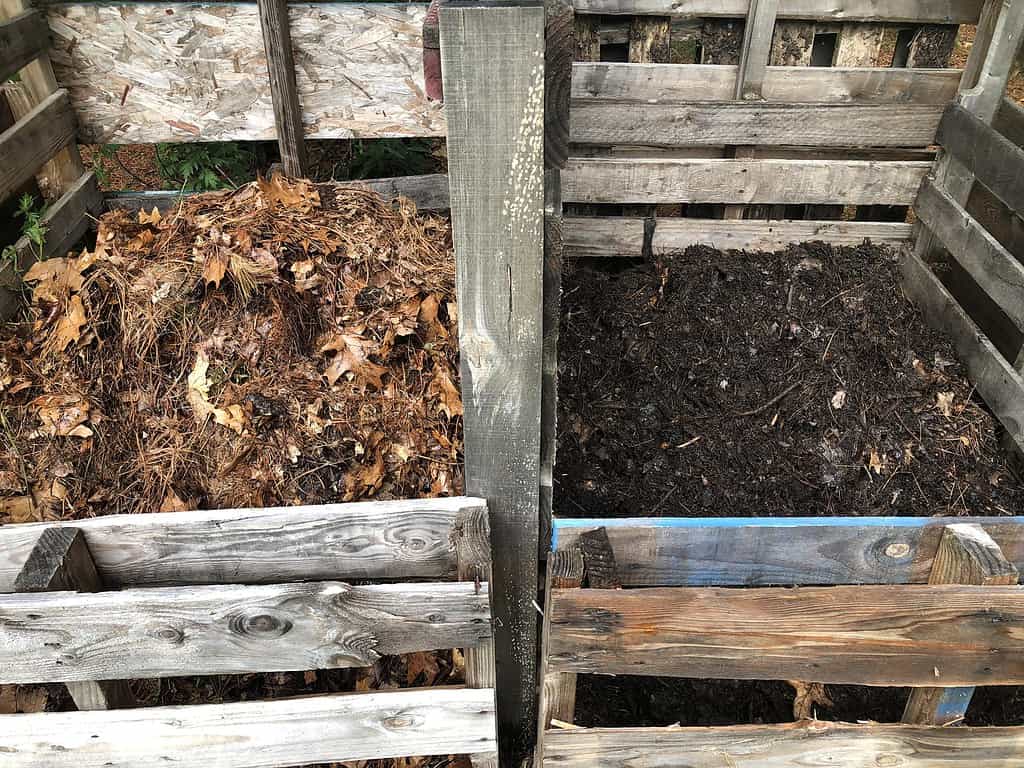
The success of your compost depends largely on the materials you add and how you prepare them. Compostable materials are usually divided into two categories: greens and browns.
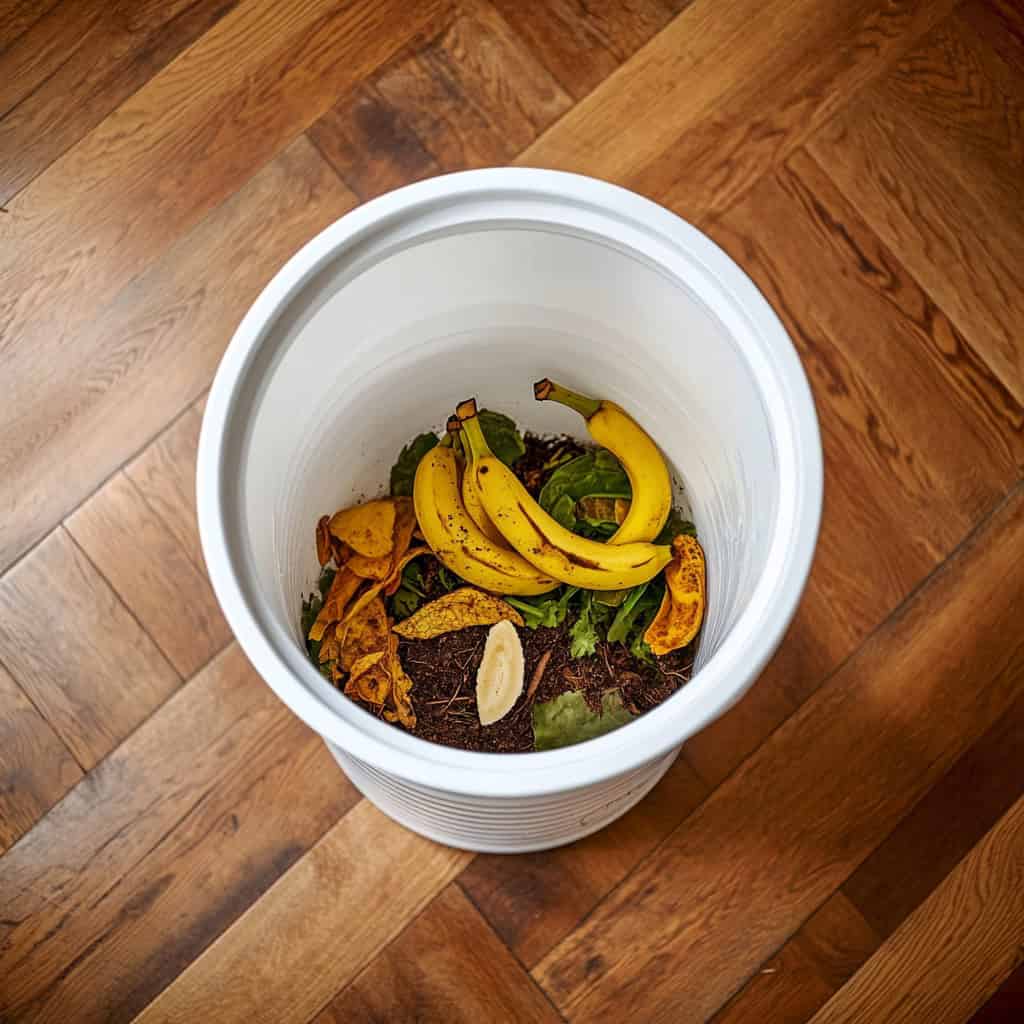
Greens (Nitrogen Materials)
Greens provide nitrogen, which supports the growth and reproduction of composting organisms. Common greens include:
- Fruit and vegetable scraps
- Coffee grounds and filters
- Fresh grass clippings
- Plant trimmings
- Tea bags (ensure they are compostable)
Browns (Carbon Materials)
Browns provide carbon, which supplies energy for decomposers and helps absorb moisture.
- Dry leaves
- Shredded newspaper or plain paper
- Cardboard (avoid glossy finishes)
- Straw or hay
- Small woody prunings
What NOT to Compost
Some materials should never be added to compost as they attract pests, produce odors, or may introduce harmful substances:
- Meat, fish, bones
- Dairy products
- Fats, oils, grease
- Human or pet waste (except certain herbivore manure used cautiously)
- Diseased plants
- Weeds with seeds or aggressive roots
- Treated or painted wood
- Black walnut leaves or nuts
- Charcoal ash or coal
- Glossy paper or most coffee pods
- Baked goods
- Materials possibly treated with persistent herbicides
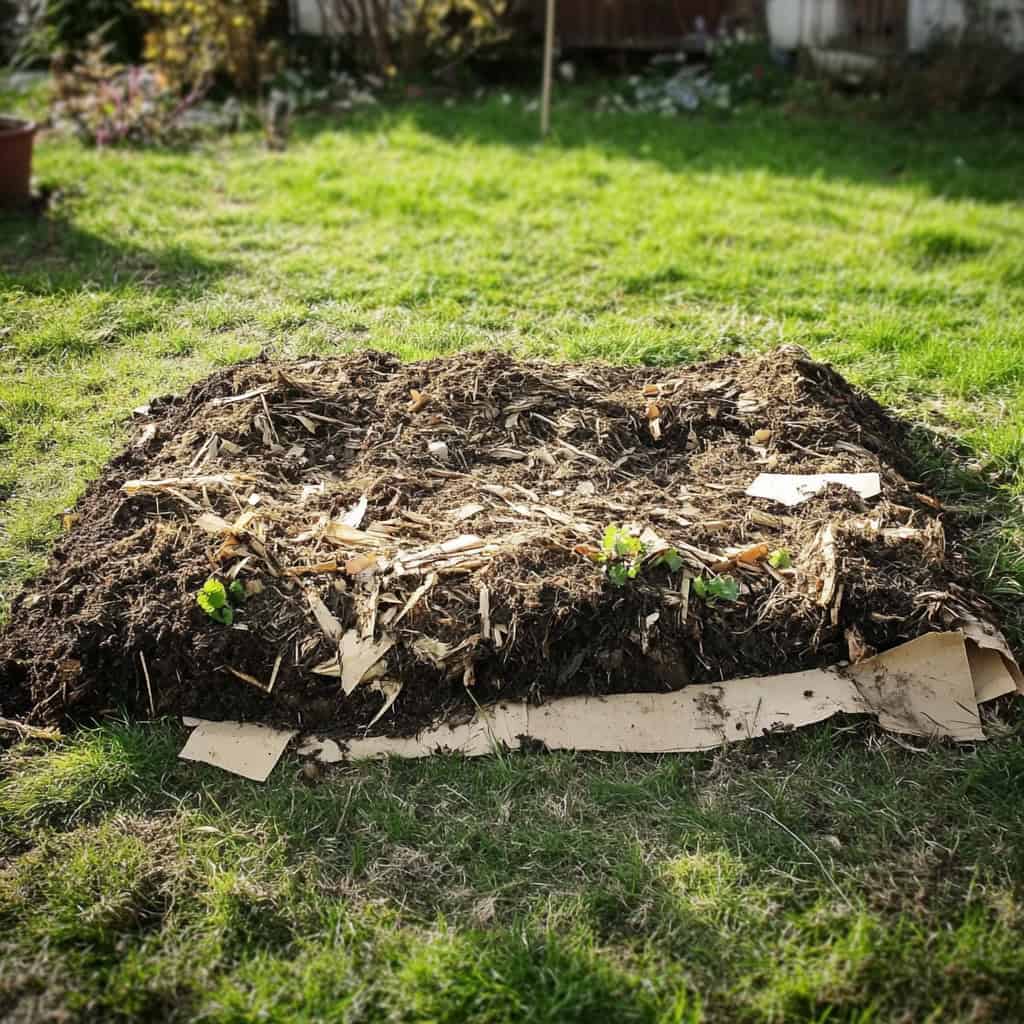
Step 4: Build Your Compost Pile or Bin Layers
Now that you have your materials ready, it’s time to build the compost pile or set up layers in your bin. Proper layering helps maintain the right balance of greens and browns, promotes airflow, and speeds up decomposition.
Preparing Your First Layer
Start your compost pile or bin with a layer of coarse brown material like small branches, twigs, or shredded cardboard.
This helps with air circulation and drainage. On top of this, add alternating layers of greens and browns.
If you’re using hot composting or cold composting, adding a small amount of garden soil introduces beneficial bacteria to kick-start the decomposition process.
How to Layer Greens and Browns (Ratios Explained)
Start with a layer of browns at the bottom for airflow and drainage. Then alternate layers of greens and browns:
- Ideal ratio: Use about 3 to 4 parts browns for every 1 part greens by volume.
- Avoid adding large quantities of one type of material at once to prevent imbalance.
Using the “Lasagna” Method (Optional)
The lasagna method is a simple layering technique:
- Place alternating layers of browns and greens like a lasagna.
- This method is beginner-friendly and helps maintain the right moisture and air balance naturally.
Adding Garden Soil to Introduce Beneficial Microbes
Add a thin layer of garden soil between some of the layers:
- Garden soil introduces bacteria and microbes that help start the decomposition process.
- It can also help the pile heat up faster, especially in hot composting setups.
Step 5: Maintain and Monitor Your Compost
Once your compost pile or bin is built, regular maintenance will keep the decomposition process healthy and efficient.
Turning and Aerating the Pile
To provide oxygen to the microorganisms breaking down the materials, turn or stir your compost regularly.
For hot composting, turning once a week is often enough to maintain airflow and encourage even decomposition. Cold composting requires little to no turning but may take much longer to produce finished compost.
Checking Temperature and Moisture
The internal temperature of the compost pile should ideally reach between 140 and 150°F (60 to 65°C) if you are using hot composting.
Use a compost thermometer to monitor this. The pile should also feel moist, like a damp sponge, but never soggy. If the compost is too dry, add a bit of water as you turn it.
Managing Pests
Rats and rodents dislike movement and disturbance, so occasionally tapping or hitting the sides of the bin can deter them.
Burying fresh food scraps deep in the center of the pile and covering them with brown materials reduces the chance of attracting pests and odors.
To manage flies, especially in warmer months, place a piece of cardboard over the pile after adding new materials.
Identifying and Troubleshooting Problems
If your compost smells bad, it is often a sign of too much moisture, a lack of oxygen, or an imbalance between greens and browns.
Turning the pile and adding dry, brown materials usually solves this problem. If the pile is not heating up, it may need more green materials or moisture.
Adding a small amount of garden soil can also help introduce the bacteria needed to boost decomposition.
Step 6: Speed Up Decomposition (Optional Advanced Tips)

For beginners who want faster results, there are a few techniques that can help speed up the composting process.
Chopping and Shredding Materials
Breaking down materials into smaller pieces increases the surface area for microorganisms to work on.
Chopping fruit scraps, shredding cardboard, and cutting up garden waste can significantly reduce the time needed for decomposition.
Using “Drunken Compost” (With Caution)
Some gardeners use a method called “Drunken compost” by adding beer, soda or sugar, and ammonia to the pile.
These ingredients provide extra nutrients and may accelerate the breakdown process. However, beginners should be cautious with this approach, especially if they prefer to maintain strictly organic compost.
Using beer or wine in moderation without ammonia is a gentler alternative.
Covering with Cardboard to Manage Flies
In warmer weather, flies can become a nuisance. Placing a piece of cardboard over the pile after adding new materials can help control flies and retain moisture in the pile.
Adjusting Green-to-Brown Ratios
If the compost seems slow to break down or smells unpleasant, checking and adjusting the ratio of green to brown materials can make a big difference. Adding more browns will balance excess greens and improve aeration.
Step 7: Know When Your Compost is Ready and How to Use It
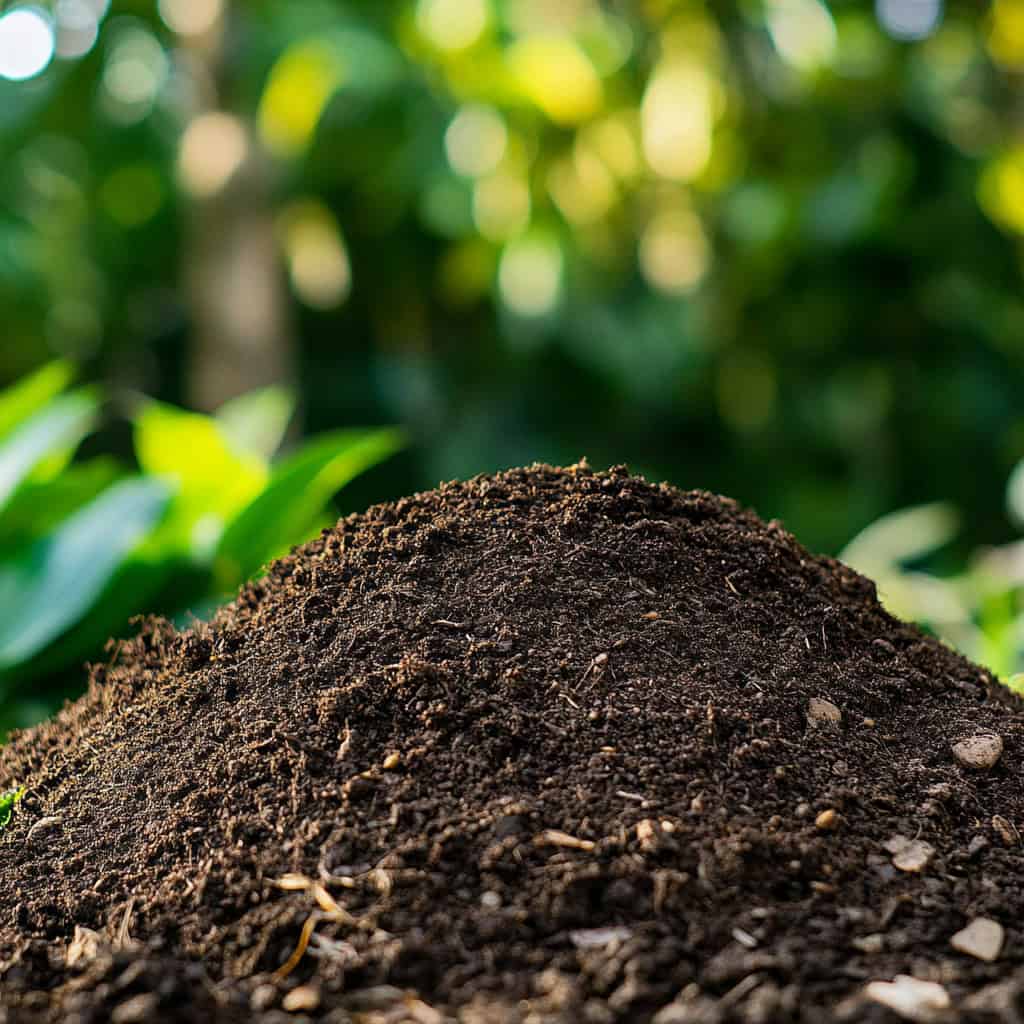
After weeks or months, depending on your composting method, the materials in your pile or bin will break down into dark, crumbly compost. This finished compost has a rich, earthy smell and no recognizable food or garden scraps.
Signs Your Compost is Ready
The compost should have a uniform, soil-like texture. If there are still larger pieces that haven’t decomposed fully, you can sift the compost to separate them out. These larger pieces can be added back into a new compost pile.
Sieving Compost for Specific Uses
For certain uses, such as starting seeds or making potting mixes, sifted compost works best. Sieving removes any remaining coarse materials, resulting in a fine, soft product suitable for delicate seedlings.
Making Compost Tea
Compost tea can be made by soaking finished compost in water for 24 to 48 hours or longer. The resulting liquid can be applied to garden plants as a natural fertilizer that promotes healthy growth.
Adjusting Compost pH
If you plan to use your compost for specific plants, you can adjust its pH.
Adding pine needles or oak leaves can lower the pH for acid-loving plants. For more alkaline compost, you can add brown materials or wood ash. If necessary, lime can also be added at planting time.
Donating Excess Compost
If you have more compost than you can use, consider donating the surplus to neighbors, community gardens, schools, or local farmers’ markets.
Start your composting journey today and turn everyday waste into nutrient-rich soil.

Composting is a practical and rewarding way to recycle kitchen and garden waste while improving the health of your soil.
By understanding the composting process, choosing the right method, and maintaining a balanced pile, even beginners can produce high-quality compost.
With a little attention to materials, moisture, and aeration, you can avoid common problems and create a valuable resource for your garden.
As your skills grow, you can also explore advanced techniques to speed up decomposition and make the most of your composting efforts.
Frequently Asked Questions (FAQs)
What’s the easiest composting method for beginners?
Cold composting is often the easiest method for beginners. It requires minimal effort—just adding materials as they become available and allowing nature to take its course. While it takes longer than other methods, it’s simple and forgiving.
How often should I turn my compost pile?
For hot composting, turning the pile once a week helps maintain airflow and consistent decomposition. Cold composting may not require turning at all, though occasional mixing can help speed up the process.
What should I do if my compost smells bad?
Bad smells usually mean the pile has too much moisture, not enough oxygen, or an imbalance between greens and browns. Turn the pile to add air and mix in dry, brown materials like shredded leaves or cardboard to absorb excess moisture.
Can I compost in cold weather?
Yes, composting can continue through the winter. Decomposition slows down in cold temperatures but resumes when the weather warms up. You can keep adding materials year-round.
How do I balance greens and browns properly?
Aim for a ratio of three to four parts browns for every one part greens by volume. This balance provides the right mix of carbon and nitrogen for efficient decomposition and reduces the chance of odors or pests.
Ready To Transform Your Garden?

Are you looking for the best way to layout your garden beds? Maybe you're feeling a bit stuck on how to make the most of your space?
We’ve got you covered! Check out our 101+ Garden Bed Layout Ideas for your next raised bed project. This guide is filled with creative and practical ideas that can help you design a garden that fits your style, whether you’re just starting out or have been gardening for years.
Get your copy today and get inspired to bring your gardening dreams to life.