A lean-to greenhouse is one of the easiest ways to grow more food or flowers without spending a fortune or taking up too much space.
Since it’s built against an existing wall, it’s great for small yards or homesteads where every square foot counts. You can build one with basic tools and materials, and it’ll help you start plants early, keep them safe from bad weather, and even grow a few crops through the colder months.
In this article , I’ll walk you through everything – from planning the right spot to putting on the roof panels – so you can get your own lean-to greenhouse up and running.
What is a Lean-To Greenhouse?

A lean-to greenhouse is basically a greenhouse that shares one wall with another building like your house, shed, or garage.
Instead of standing alone, it leans against that wall for support. This makes it easier and cheaper to build because you only need to frame three sides instead of four.
One of the biggest perks of a lean-to design is that it saves space, which is handy if you don’t have a big backyard.
It also holds heat better since it’s connected to an existing wall that’s already warm from the sun or from the heat inside the building.
You can tuck one against a south-facing wall, and it’ll catch the most sunlight during the day – perfect for starting seedlings or keeping plants alive when it’s cold outside.
How to Build a Lean-To Greenhouse
With some basic tools, a few affordable materials, and a solid plan, you can put one together that will last for years. Below are the main steps to guide you through the whole process.
1. Planning and Design
Before you start cutting wood or digging holes, it’s worth spending some time planning things out. A little thought upfront can save you headaches later.
Check Permits and Rules. Some places treat greenhouses as temporary structures, but it’s always best to check with your local bylaw office. It only takes a quick call to find out if you need a permit.
Pick the Best Spot. A south-facing wall is ideal because it gets the most sunlight during the day. If you’re a little off from true south, that’s fine. Just make sure there aren’t any tall trees or other buildings blocking the light.
Choose the Right Size. Think about how much space you have and what you’ll be growing. A common size is 10 feet wide by 16 feet long, but you can go smaller, like 8 by 12, if that fits your yard better. If you plan on growing taller plants, make sure the greenhouse is tall enough to give them room.
Decide on Materials
- Framing: 2×4 or 2×6 lumber works well and is easy to cut and screw together. Steel hoops are another option if you want something lighter and more flexible.
- Covering: You can use 5-year UV-treated greenhouse plastic, or you can go with clear corrugated panels like Suntuf® for something more durable.
- Cost: Depending on the size, you can build a lean-to greenhouse for as little as $1 to $1.50 per square foot. A decent-sized one can be built for a few hundred dollars if you shop smart.
Think About Access. Most folks build a door on one end, but if your greenhouse is against a patio wall, you could also install windows on hinges. That way, you can reach in without stepping inside, saving even more space.
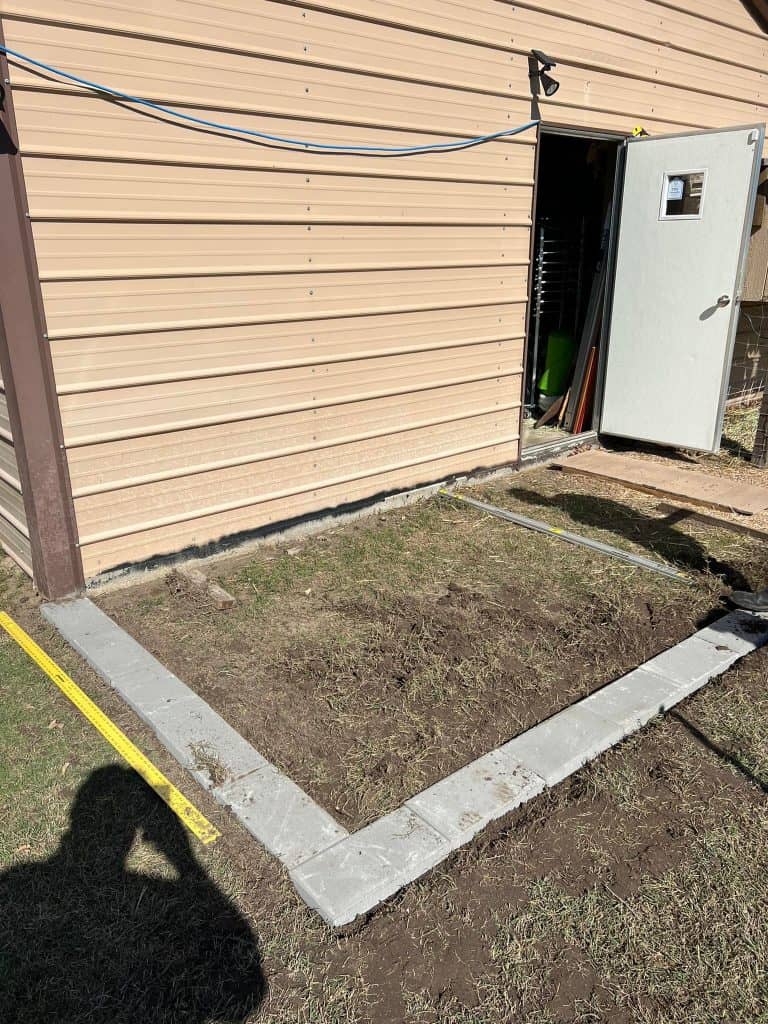
2. Building the Foundation and Base

A solid foundation keeps your greenhouse sturdy and level, even when the ground shifts or gets wet. Here’s how to set it up:
Create a Pier Foundation. Start by digging pier holes. The depth might vary if your ground isn’t level – deeper on the high side, shallower on the low side. Set piers evenly so your base won’t rock or twist later.
Add Stringers and Joists
- Screw short posts into the pier brackets on the low side.
- Connect these posts with pressure-treated 2×6 boards. Make sure everything is level, both front to back and side to side.
- Add rim joists at the ends of the frame to tie everything together.
- Place joists across the frame every 2 feet for extra support.
Install the Flooring. Use strong boards like 2×6 Douglas fir for the floor. Leave small gaps—about 3/8 inch – between boards so water and dirt can fall through. This makes cleaning a lot easier.
Box in the Base (Optional). If you want extra storage for pots, trays, or soil, you can box in the base. Just make sure everything is square and level before moving on to the framing.
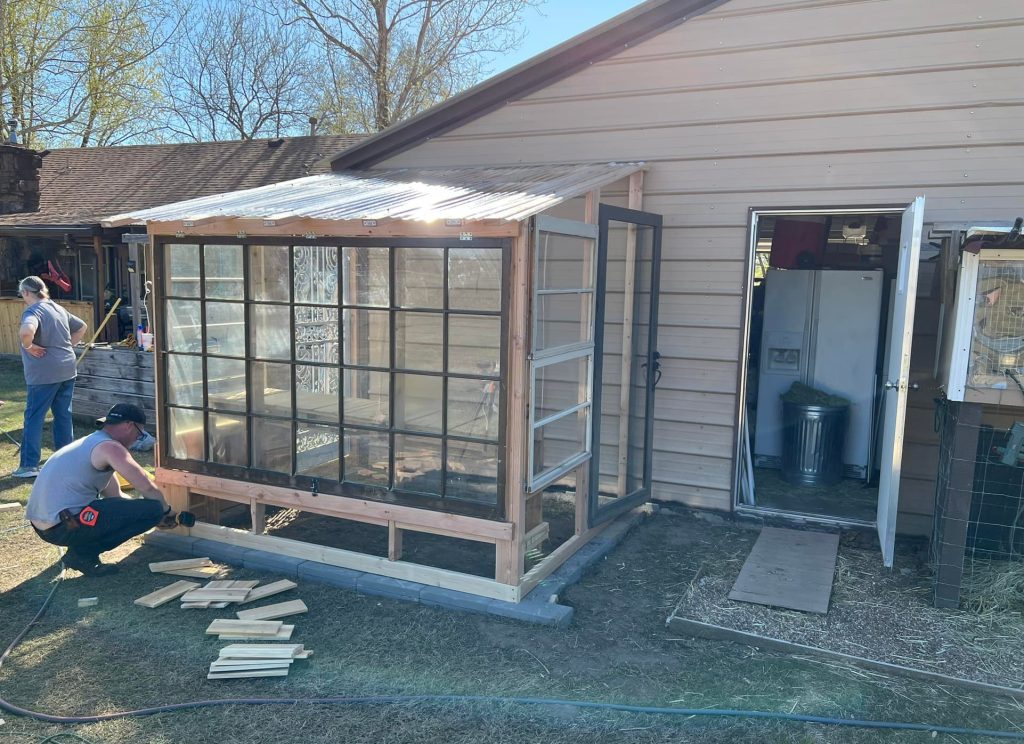
3. Framing the Structure

With the base done, it’s time to build the frame that will hold up your greenhouse. This is where the shape really starts to come together.
Build the Back Wall. Since a lean-to greenhouse rests against an existing building, you’ll need to create a sturdy back frame. Use 2x4s spaced about 2 feet apart.
If you want to protect the wall you’re attaching to, you can sheath this frame with oriented strand board (OSB) and paint it with exterior paint before fastening it to the wall using 3-inch screws.
Frame the Front and Side Walls. Use kiln-dried 2x4s for the front and sides. Space the studs evenly (2 feet apart works well) so it’s strong enough to handle the panels and wind.
Add Door and Window Openings. Plan where your door will go – most folks put it on one end. A standard door opening is about 30 inches wide.
Use a 4×4 or doubled 2×4 header above the door to support the weight. If you want windows, frame those openings now too.
Stain or Seal the Wood. It’s a good idea to stain or paint each piece of wood as you build. This protects it from moisture and sun, and it’s easier to do now rather than later when everything is assembled.
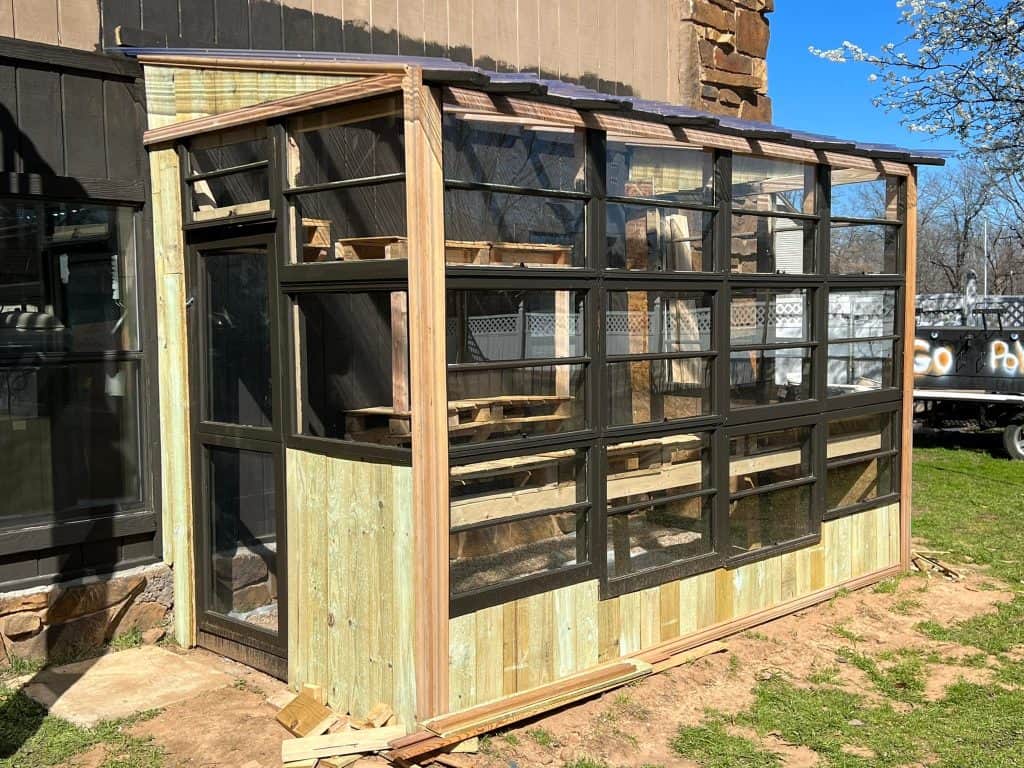
4. Constructing the Roof and Installing Panels
The roof is what keeps the weather out while letting the sunlight in, so it needs to be sturdy and well-sealed.
Attach a Ledger Beam. Start by fastening a ledger beam (a strong horizontal board) to the existing wall at the height you want your roof to start – 11 feet is common for larger greenhouses. Make sure it’s perfectly level.
Choose Rafters or Hoops
- Rafters: If you’re using lumber, cut 2×6 boards for rafters. A low slope, around 15 degrees, works well. Space them about 2 feet apart and secure them with metal brackets.
- Hoops: If you prefer steel hoops, attach them to the ledger beam and the base frame with steel strapping. Hoops are flexible and can handle slightly uneven surfaces.
Add Furring Strips. Lay thin boards (1×3 pine) across the rafters or hoops. These give you a solid surface for attaching the panels and help hold everything tight.
Install the Panels
- Use polycarbonate corrugated panels or UV-treated greenhouse plastic.
- Attach panels with roofing screws that have rubber washers for a watertight seal.
- For best results, screw into every ridge on the roof and in the valleys for vertical sections.
- Use foam ridge caps or strips where the panels meet the frame to block leaks and drafts.
Check for Leaks. If you see any gaps, fill them with wood or extra sealing material right away to keep the inside dry and warm.
5. Interior Setup and Finishing Touches

Once the main structure is built, it’s time to set up the inside so it’s ready for plants and easy to maintain.
Ventilation and Air Circulation. Good airflow is key to keeping plants healthy and preventing overheating.
- Install windows that open or add shutters for natural airflow.
- A small exhaust fan on one end of the greenhouse can pull out hot air, while a door or vent on the other end lets in fresh air.
- For better control, wire the fan to a thermostat so it kicks on when the temperature rises above 80°F.
Shade Cloth. If you live in a hot area, hanging a shade cloth over the roof during the hottest months will protect your plants from scorching.
Workbenches and Shelving. Add sturdy workbenches along the walls using heavy-duty L-brackets and 2×6 boards. A U-shaped bench layout is great for making the most of your space, and you can add a second shelf above for seed trays or tools.
Water and Heating. Run a hose from a nearby outdoor faucet for quick watering. In colder regions, you might need a small electric heater with a thermostat to keep the temperature steady during winter nights.
Monitoring and Pest Control. Hang a thermometer with a humidity gauge to keep track of the conditions inside. Seal any small openings or gaps to keep out pests like chipmunks or insects.
Build Your Lean-To Greenhouse Today
A lean-to greenhouse is one of the simplest and most cost-effective ways to grow plants year-round, even if you don’t have much space.
With a solid plan, basic tools, and affordable materials, you can build a structure that lasts for years and gives you a steady supply of fresh food or flowers.
Start by finding the best wall on your property, gather your materials, and take it step by step. Once it’s built, you’ll have a reliable growing space that pays off season after season.
FAQs
1. What is the best wall orientation for a lean-to greenhouse?
A south-facing wall is ideal because it gets the most sunlight during the day. If you can’t face it due south, being slightly off (like 10 to 15 degrees) is still fine.
2. How much does it cost to build a lean-to greenhouse?
Costs vary based on size and materials. A small, simple lean-to greenhouse can cost around $300–$600 if you use affordable materials like lumber and greenhouse plastic. Larger or more durable builds with polycarbonate panels might run $800 or more.
3. What is the best covering material to use?
UV-treated greenhouse plastic is budget-friendly and works well, but polycarbonate corrugated panels (like Suntuf®) are sturdier, last longer, and offer better insulation.
4. How do I keep the greenhouse warm in winter?
You can add a small electric heater with a thermostat, seal gaps to prevent drafts, and use thermal mass like water barrels or stones to hold heat during cold nights.
5. Do I need a permit to build a lean-to greenhouse?
This depends on local rules. Some areas consider these temporary structures and don’t require permits, but it’s always best to call your local bylaw office and check first.
Ready To Transform Your Garden?

Are you looking for the best way to layout your garden beds? Maybe you're feeling a bit stuck on how to make the most of your space?
We’ve got you covered! Check out our 101+ Garden Bed Layout Ideas for your next raised bed project. This guide is filled with creative and practical ideas that can help you design a garden that fits your style, whether you’re just starting out or have been gardening for years.
Get your copy today and get inspired to bring your gardening dreams to life.