If you've ever dragged a hose across your yard for the fifth time in a week and thought, “there has to be a better way” – yeah, you're not alone.
Drip irrigation is just smart. It delivers water exactly where plants need it (the roots), uses way less than sprinklers, and doesn’t soak your tomatoes' leaves like some kind of high-pressure bath.
But if you don’t set it up right or run it at the right times, you’ll end up with clogs, blowouts, dead plants, or soggy messes. Somehow, this simple system can become a tangle of tubing and confusion real quick.
In this article, I'll walk you through everything – what parts you need, how to use them, when to water, where it works best, and the stuff most people forget (like what happens when it freezes).
Whether you’re growing veggies, fruit trees, or just trying to stop killing your lavender every summer, we’ve got you.
What Is Drip Irrigation (and Why Use It)
Drip irrigation is exactly what it sounds like – a system that lets water drip slowly and directly onto the soil, right where the roots are.
No spraying, no flooding, no wasted water evaporating into the sky. Just a steady trickle that actually does what watering is supposed to do.
It’s not new. Farmers and gardeners have used some version of this method for decades.
But it's gained serious popularity lately, especially among people who grow their own food or manage big gardens with limited water.
If you're thinking of setting one up, we’ve rounded up some of the best drip irrigation kits to make it easier to get started.
So, why choose it?
Because it's efficient. It uses up to 60% less water than overhead systems.
And it’s targeted – meaning it doesn’t water the empty spaces between plants or splash your leaves and fruit (which, by the way, is how a lot of plant diseases get started).
It’s also ridiculously customizable. You can run tubing to a tomato, a shrub, an apple tree – doesn’t matter. Want more water? Add more emitters. Need to water less often? Adjust the schedule. You're in control.
Oh, and the setup is surprisingly simple once you understand the basics.
You don't need a plumbing degree or a bunch of expensive gear. Just a water source, a filter, a pressure regulator, and some tubing. That’s the skeleton. You can build from there.
Drip irrigation makes the most sense in places where:
- Water is scarce
- Plants are spaced irregularly
- You want to stop wasting time with hoses
- You care about plant health (roots over leaves, always)
And honestly, even if you don’t have a huge garden, it still makes sense. Less water. Healthier plants. Fewer weeds. What’s not to like?
Basic Parts of a Drip Irrigation System
Okay, before you start connecting hoses and hoping for the best, you need to know what makes up a drip irrigation system. You don’t need a ton of stuff – but each part matters.
Skip one or get the wrong type, and the whole thing can turn into a leaky disaster.
Let’s break it down:
Filter
Start here. Always. Even if your water looks clean, it’s not. Tiny particles (sand, rust, algae) can clog emitters and ruin the flow.
A 150 mesh filter or finer is the go-to. Mount it right at the water source, before anything else.
It doesn’t just protect the emitters. It also guards the valve and the pressure regulator. Basically, it saves you headaches.
Pressure Regulator
Drip systems don’t like high pressure. If your water supply runs over 40 psi, it’s too much. Connections will blow apart. Tubing will leak. Emitters won’t drip – they’ll squirt.
Install a pressure regulator just after the filter. It keeps the system calm and consistent. If you’re not sure about your pressure, just get one anyway. It’s cheap insurance.
Tubing and Fittings
This is your delivery network. Think of it as the veins of the system. You’ve got:
- Mainline tubing (usually ½ inch)
- ¼-inch distribution tubing
- Connectors, tees, elbows, and end caps to make it all fit
Here’s a tip: make sure all parts are the same size and match your tubing. If they don’t? When the water flows, things pop apart. Annoying.
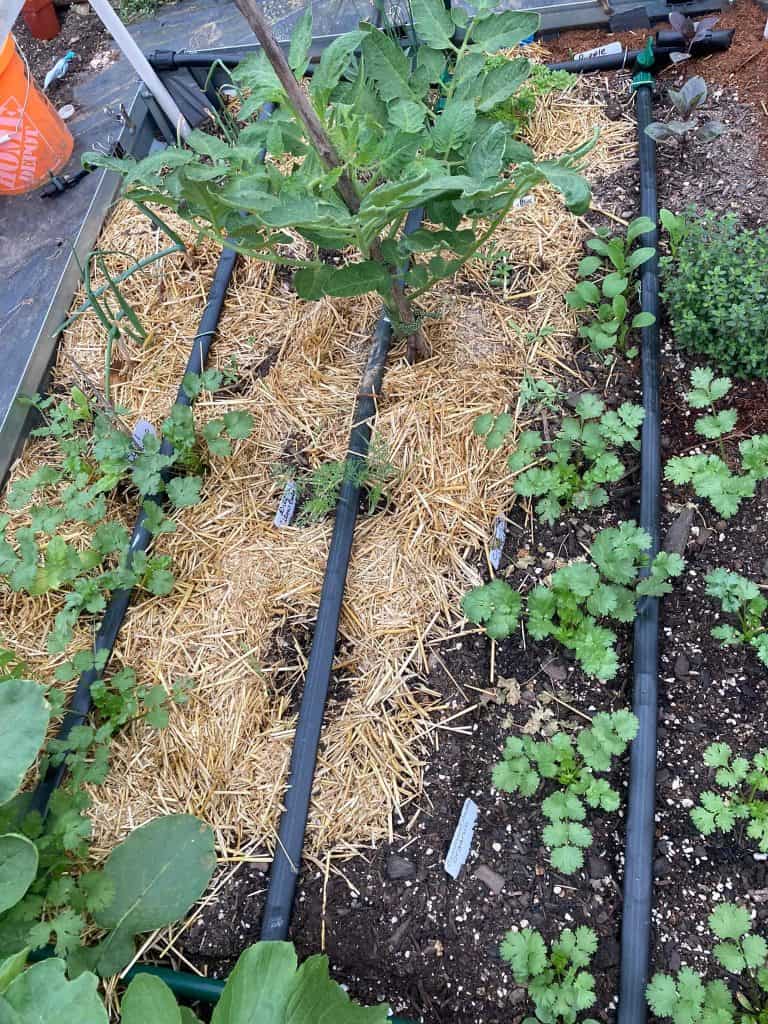
And don’t forget: stake your tubing down. It moves. Wind, pets, your foot – stuff happens. Stakes keep everything where it should be.
Emitters
These are the little pieces that control how much water each plant gets. They come in different flow rates – the most common are 1 gallon per hour (GPH) and ½ GPH. Smaller emitters give more control and tend to waste less water.
You can plug them straight into the tubing near each plant, or run smaller lines with emitters on the ends. For trees and shrubs, aim for two emitters per plant.
Also worth mentioning: micro-misters are a thing. They spray a fine mist instead of dripping – great for shallow-rooted plants or frost protection.
That’s your core setup. Everything else just builds on this. Keep it simple, match your parts, and don’t skip the filter.
How to Set Up a Drip Irrigation System
This part scares people. Tubing lengths, pressure ratings, emitters everywhere… it sounds complicated. But it really isn’t.
Once you’ve got the parts (and now you do), setting it up is mostly about keeping things neat, within limits, and pointed the right way.
Start Close to the Water Source
Keep your mainline and sub-main under 400 feet total from where the water starts. Go beyond that, and pressure starts to drop. Plants at the far end will get barely a trickle – if anything.
Also, each individual run of drip tubing shouldn’t be longer than 200 feet. After that, the water just doesn't travel well. Want to go further? Break it into two separate lines.
Keep It Above Ground (Most of the Time)
Technically, some systems say they can be buried. And they can – but they clog more easily. Plus, buried lines are a buffet for rodents.
If you do decide to bury tubing or cover it with mulch, fine. Just know you’ll need to check it more often. And definitely don’t bury emitters unless the system was specifically designed for it. Most aren’t.
Drip Tape Rules Are Different
Drip tape is a thinner, cheaper alternative – great for straight rows like in vegetable gardens. But here’s the deal: the little water holes along it must face up, especially if you bury it or mulch over it. If you lay it wrong, it won’t work.
Also, it’s more fragile. Not ideal for permanent beds or rough handling.
Secure Everything
Use stakes. A lot of them. Tubing shifts when it heats up in the sun, gets bumped, or even just expands from pressure. Nothing’s worse than finding a line out of place after watering for 2 hours straight.
Stake the mainline, stake the drip tubing, even stake the ends especially the ends.
When and How to Water with Drip Irrigation
This is where most people mess up. Not with the setup – with the timing. Too much water? Roots rot. Too little? Plants dry out. Drip irrigation works best when it runs just enough, at the right times, and for the right kinds of plants.
Water in the Morning
Always pick the morning. Early morning. Not noon, not night. Morning watering reduces evaporation (you’re not feeding the air), and it gives plants time to dry off if there's any overspray or splash.
Evening watering? That’s a fast track to mildew and disease especially in humid areas. It leaves plants damp overnight, which they hate.
How Often Should You Run It?
Drip irrigation isn’t a once-a-week kind of system. It’s meant to run daily – sometimes even twice a day during hot, dry stretches. The water’s slow and precise, so plants get small doses right where they need them.
That said, don’t run it when it rains. Obvious, but worth saying. If you're using a manual system, just skip it. If it’s automatic, consider pausing it or adding a rain sensor.
Manual vs. Automatic
Manual gives you total control and saves water when nature steps in. But it means you have to be around and paying attention.

Automatic timers are super convenient, especially if you’ve got a big area or busy mornings. Just set them right, and adjust as the season changes. Don’t set and forget forever.
Different Plants, Different Needs
- Trees and shrubs? Give them two emitters each, spaced to hit the whole root zone.
- Vegetables or flowers? A single emitter or drip tape per row usually does the job.
- Dense groundcovers or beds? This is where soaker hoses come in handy. They’re not precise, but they’re great for covering a whole patch.
- Shallow-rooted plants or spring frost worries? Use micro-misters. They keep things moist and can even protect buds on chilly nights. Yeah – oddly specific, but it works.
That’s the rhythm: early, daily, just enough. Adjust for the weather, check your flow, and don’t overthink it.
Where to Use Drip Irrigation
You can use drip irrigation pretty much anywhere you're growing something but some places? It just works better. Here’s where this system really shines.
Vegetable Gardens
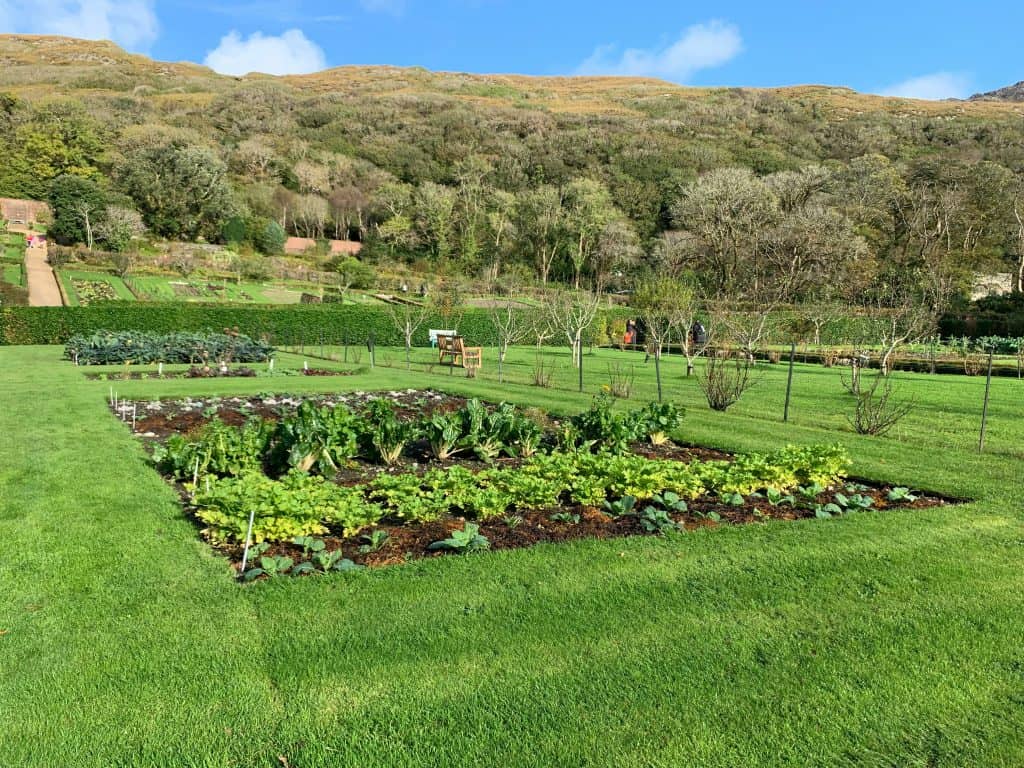
Drip tape is your friend here. Especially in straight, tight rows – tomatoes, beans, carrots, you name it. It keeps water right at the roots without flooding the paths (or your shoes).
You get fewer weeds, and way less disease since the leaves stay dry.
Just keep the runs under 200 feet and make sure those little water holes face up especially if you mulch over the lines.
Trees and Shrubs
Big plants, big roots. That’s the rule. A single emitter won’t cut it. Aim for two emitters per plant, spaced out to cover the root zone evenly.
You’ll probably want tubing with adjustable flow, so you can increase water during dry spells without tearing it all apart.
Also: don’t hug the trunk with the emitters – keep them a few inches out.
Ornamental Beds and Groundcovers
This is where soaker hoses start to make sense. Laying drip lines around every little plant in a flower bed is… exhausting.
Soaker hoses are porous, flexible, and just seep water along their length. Great for dense plantings where everything’s close together.
But don’t use them for stuff that’s spaced far apart. That just wastes water on empty dirt.
Orchards or Frost-Prone Areas
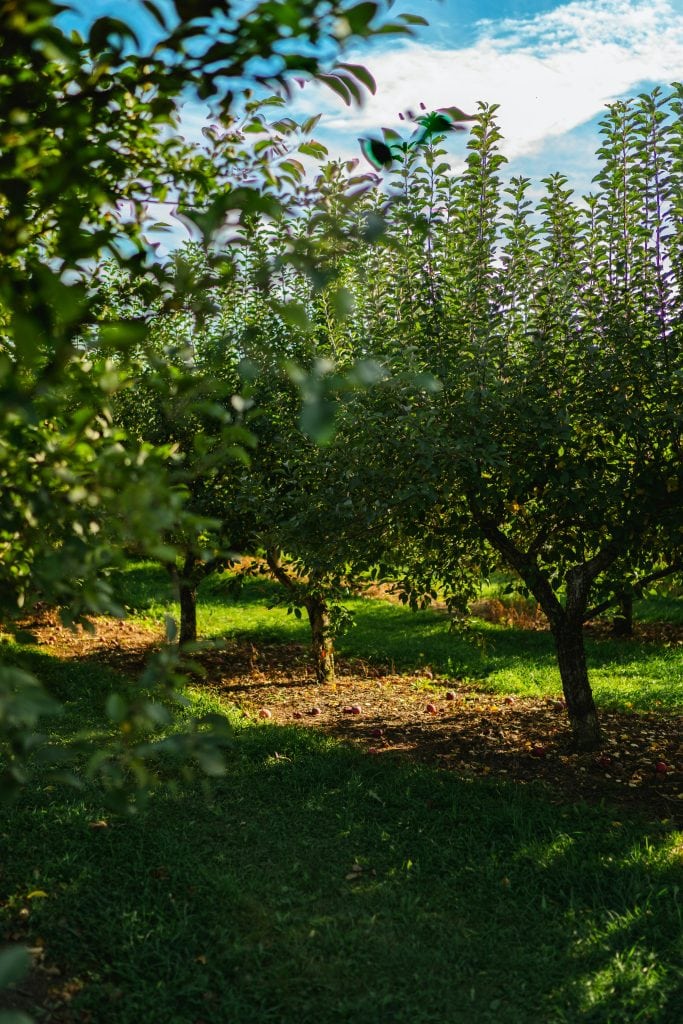
This one surprises people but micro-misters are more than just tiny sprinklers. In orchards or home gardens, they’re often used to mist branches lightly during sudden spring frosts.
It can literally save buds that would otherwise freeze off. Plus, they’re good for shallow-rooted shrubs that need light, steady moisture.
Maintenance and Seasonal Care
Once your system is up and running, it’s easy to forget about it until something breaks. Or worse, until the plants start wilting and you realize it hasn’t been working for two weeks. Avoid that mess with just a little regular upkeep.
Check It Regularly
Not every day. But every week or two, give it a once-over. Look for:
- Emitters that aren’t dripping (they’re probably clogged)
- Tubing that’s popped loose or shifted
- Leaks or strange puddles
If anything seems off, fix it right away. Don’t wait until your cucumbers are begging for help.
Flush the Lines
Once a month, or at least every few weeks, uncap the ends of your tubing and run water through to flush out any sediment or debris. You’d be amazed what builds up – even with a good filter.
Do this more often if your water is hard or if you’re using fertilizer injectors. Things gunk up fast.
End-of-Season Shutdown (Cold Climates)
If you live where things freeze, don’t leave your system in the ground over winter. Water expands when it freezes and that means cracked tubing, ruined emitters, broken fittings. Not worth it.
Here’s what to do:
- Disconnect everything
- Let the water drain out
- Coil the tubing neatly (label it if you're organized or don't, your call)
- Store parts indoors where they won’t freeze
Emitters, in particular, are sensitive. Take them inside. They don’t handle ice well.
Replace as Needed
Parts wear out. Emitters get clogged beyond saving. Filters crack. Fittings loosen. No system lasts forever but the good news is, most of these parts are cheap and easy to swap out.
Don’t overthink it. If something looks bad or isn't working, replace it and move on.
A bit of attention here and there keeps the whole setup running like it should. No surprise floods. No bone-dry tomato beds. Just steady, reliable watering – season after season.
So yeah, this system’s flexible. Just match the method – drip line, tape, soaker, mister – to what you’re growing. Simple.
Get it set up, let it flow, and watch your garden thrive.
Drip irrigation isn’t high-tech. It’s just smart.
It’s the kind of system that quietly does its job in the background – delivering water where it matters, skipping the waste, and letting you focus on growing instead of dragging hoses around.
You’ve now got the whole picture: what it is, why it works, where to use it, how to set it up, when to run it, and what to watch out for.
You know how to avoid clogging, blowing out lines, wasting water, and stressing out your plants. You’ve even got a game plan for shutting it all down when winter hits.
Whether you're growing tomatoes in neat rows, fruit trees in a backyard orchard, or wild-looking beds of native plants – this system fits.
And once it’s in, you’ll probably wonder why you didn’t do it sooner.
Frequently Asked Questions (FAQs)
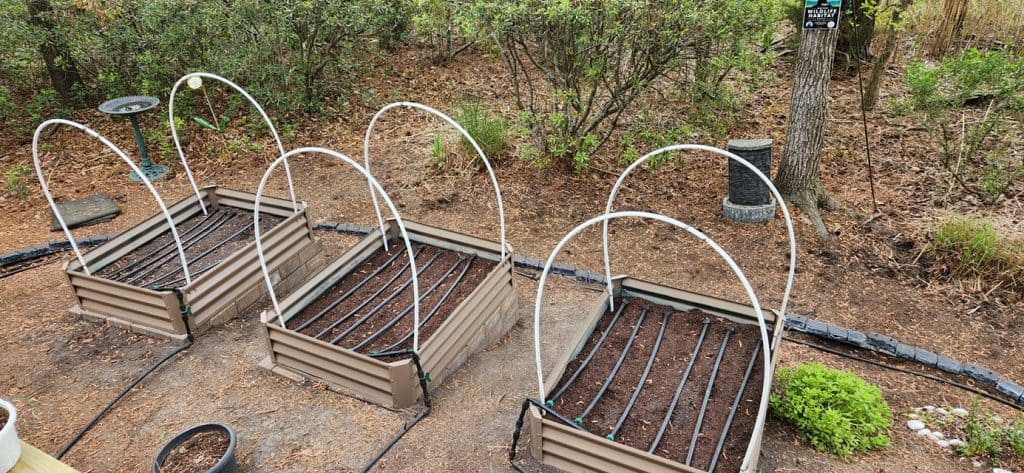
1. Can I use drip irrigation in raised beds?
Yes – and it works great. Run a mainline along the back edge, then use short lines or drip tape across each row. Just make sure the emitters are close enough to reach the root zones. Raised beds dry out faster, so daily watering is usually needed.
2. What’s the max length I can run drip tubing?
Keep any single drip line under 200 feet. The total length from your water source to the end of your furthest line (mainline plus branches) should stay under 400 feet. Go beyond that, and pressure drops fast.
3. Is it okay to leave the system running automatically?
You can but keep an eye on it. Automatic timers are convenient, but they won’t adjust for weather. If it rains and the system still runs, that’s wasted water. At minimum, pair it with a rain sensor or check the soil before watering.
4. How do I clean a clogged emitter?
Pull it off and soak it in vinegar or flush it with water. If it’s still blocked, just replace it – most emitters are cheap and not worth fighting with. Also: make sure you’re using a good filter at the water source to prevent this in the first place.
5. Can drip irrigation run off a rain barrel?
Sometimes. But gravity alone often isn’t enough pressure to push water through emitters. You’ll need to either raise the barrel several feet or add a low-pressure pump designed for drip systems. And yes – you still need a filter.
Ready To Transform Your Garden?

Are you looking for the best way to layout your garden beds? Maybe you're feeling a bit stuck on how to make the most of your space?
We’ve got you covered! Check out our 101+ Garden Bed Layout Ideas for your next raised bed project. This guide is filled with creative and practical ideas that can help you design a garden that fits your style, whether you’re just starting out or have been gardening for years.
Get your copy today and get inspired to bring your gardening dreams to life.