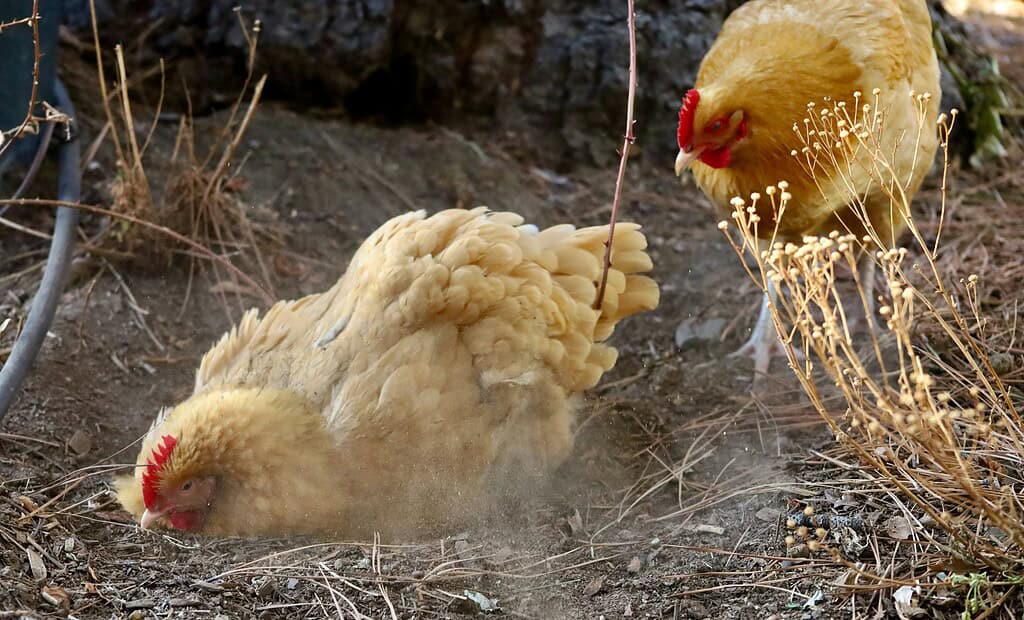
Dust bathing is one of the most natural and important behaviors in a chicken’s daily routine.
It helps them keep their feathers clean, manage body oil, and most importantly, prevent parasites like mites and lice.
Without access to a proper dust bath, your flock may start scratching excessively or even suffer from skin issues.
In this article, you'll learn how to create 7 simple and effective dust bath stations using materials you probably already have at home.
Whether you have a small backyard flock or a larger group, these DIY ideas are budget-friendly, easy to build, and tailored to different coop setups and weather conditions.
What Makes a Good Chicken Dust Bath?
A good dust bath should help chickens clean their feathers, reduce moisture and oils on their skin, and discourage mites, lice, and other parasites.
To do that well, you’ll need the right materials, the right location, and the right setup.
Key Materials to Include
A balanced dust mix gives chickens the texture and ingredients they need to fluff, roll, and scratch comfortably.
- Dry dirt – Fine, loose garden soil or dried topsoil is the main base.
- Sand – Helps break up clumps, improves texture, and prevents compaction.
- Wood ash – Provides anti-parasitic benefits and is rich in minerals. Use only clean, cooled ash from untreated wood.
Optional Additions:
- Diatomaceous earth – Use sparingly and mix well. While effective against mites, too much can irritate the lungs.
- Herbs – Dried lavender, rosemary, or mint can deter pests and add a mild scent.
Proper Depth and Size
Chickens need enough space to dig, roll, and flap without spilling too much outside the container. Aim for:
- At least 6–8 inches deep
- 2–3 feet wide for small flocks
- Wider setups for multiple birds at once
Placement Tips
- Choose a sunny and well-drained area. Moisture ruins the dusting material and encourages mold.
- Avoid shaded, low-lying, or muddy spots.
- For mobile setups, place the bath where chickens already like to gather, ideally near coops built from easy DIY chicken coop plans so dust bathing becomes part of their daily routine.
Should You Cover It?
If you live in a rainy or humid climate, covering the dust bath helps keep it dry and usable. A basic lid, slanted roof, or placing it under an overhang can make a big difference.
7 DIY Chicken Dust Bath Stations (Your Flock Will Actually Use)
You don’t need to spend a lot to give your chickens a proper dust bath. These seven DIY stations use items you likely already have or can find secondhand.
Each one has its own advantages, whether you’re working with limited space, lots of birds, or tricky weather. Start with one that fits your setup, then expand or adjust as needed.
1. Old Tire Dust Bath

Why chickens love it: It’s deep, solid, and heavy enough to stay put even when a few hens hop in at once. Its round shape also makes it ideal for group dusting.
How to make it:
- Lay an old tire flat on the ground in a dry, sunny area.
- Fill the center with a mix of dry dirt, sand, and wood ash.
- Pack the mix slightly so it stays in place but still loose enough for chickens to scratch.
This setup holds the dust well and is low-maintenance. The rubber walls help contain the mix during all the flapping and scratching.
Tip: Paint the tire to match your coop colors or surroundings if you want to improve the look. Just make sure the paint is non-toxic and weather-safe.
2. Plastic Storage Bin Bath
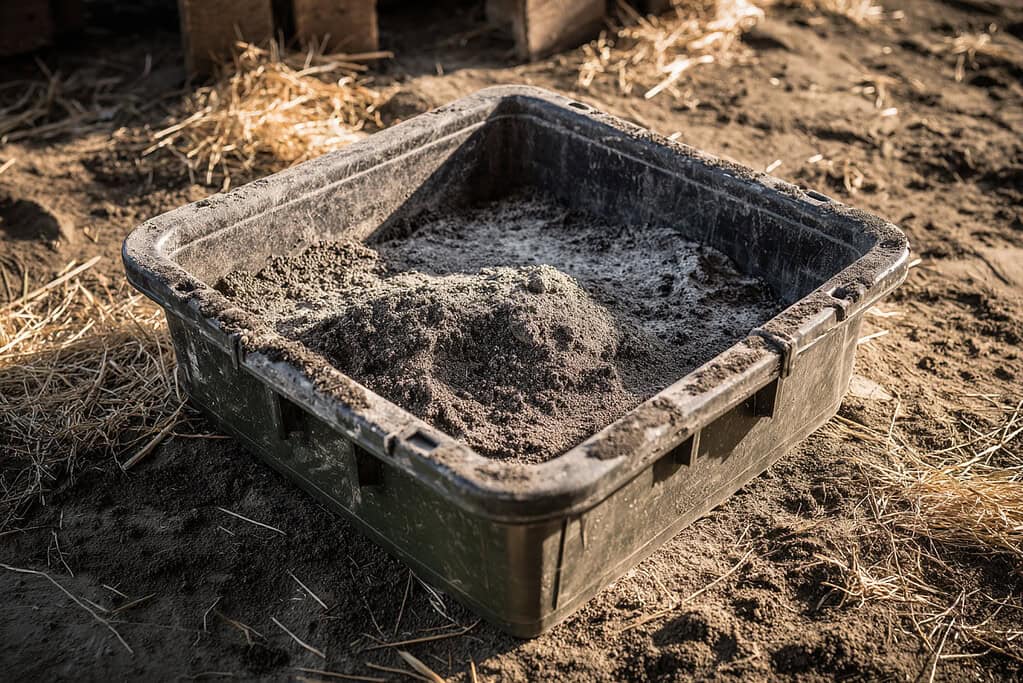
Why chickens love it: The smooth sides keep the dust contained, and the low entry point makes it easy for hens to hop in and out without tipping anything over.
How to make it:
- Choose a shallow plastic storage bin or tote, preferably wide and about 6–8 inches deep.
- Use a handsaw or utility knife to cut down one side, creating a low doorway for easy access.
- Fill the container with your preferred dust mix: dry dirt, sand, and a small amount of wood ash.
- Place it in a sunny, dry area where it won’t collect rain or moisture.
This option works especially well for small backyard flocks or mobile coops. It’s lightweight and easy to move around, which makes cleaning or refilling the dust mix simple.
If you are in a colder or wetter climate, you can slide it into a covered run or sheltered spot during wet seasons to keep it usable.
Planning details like this are part of the must-know tips before you build a chicken run, especially if you want dust baths to stay dry year round.
3. Wooden Crate or Pallet Box
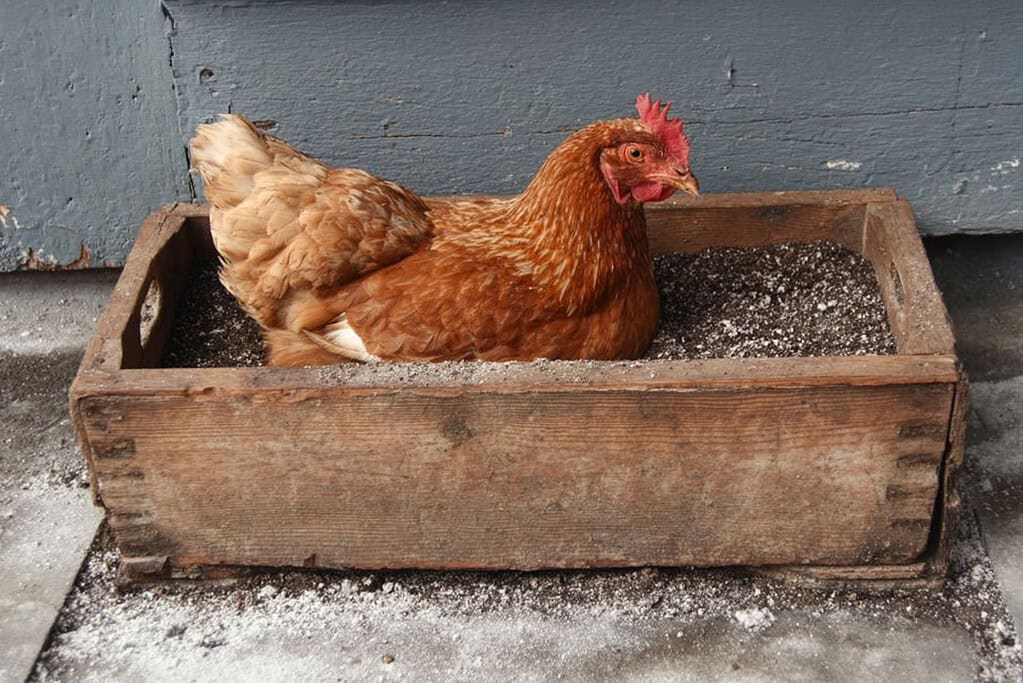
Why chickens love it: The open slats allow airflow, which helps keep the dust dry. The natural wood also blends in well with rustic or outdoor coop setups.
How to make it:
- Find a wooden crate or build a simple box using pallet boards.
- Line the bottom with landscape fabric or a piece of breathable cloth to keep the mix from falling through while still allowing drainage.
- Fill with a mix of dry soil, sand, and wood ash, about 6–8 inches deep.
- Set the box on a few bricks or small wooden blocks to raise it slightly off the ground. This prevents moisture buildup and helps the mix stay dry longer.
Wooden crates are easy to customize in size and shape.
They're also a good way to reuse materials you may already have. For extra durability, choose hardwood or seal the wood with a chicken-safe, weather-resistant finish.
This setup is best for dry climates or covered runs, as untreated wood can absorb moisture if left in the rain.
4. Kiddie Pool Dust Spa
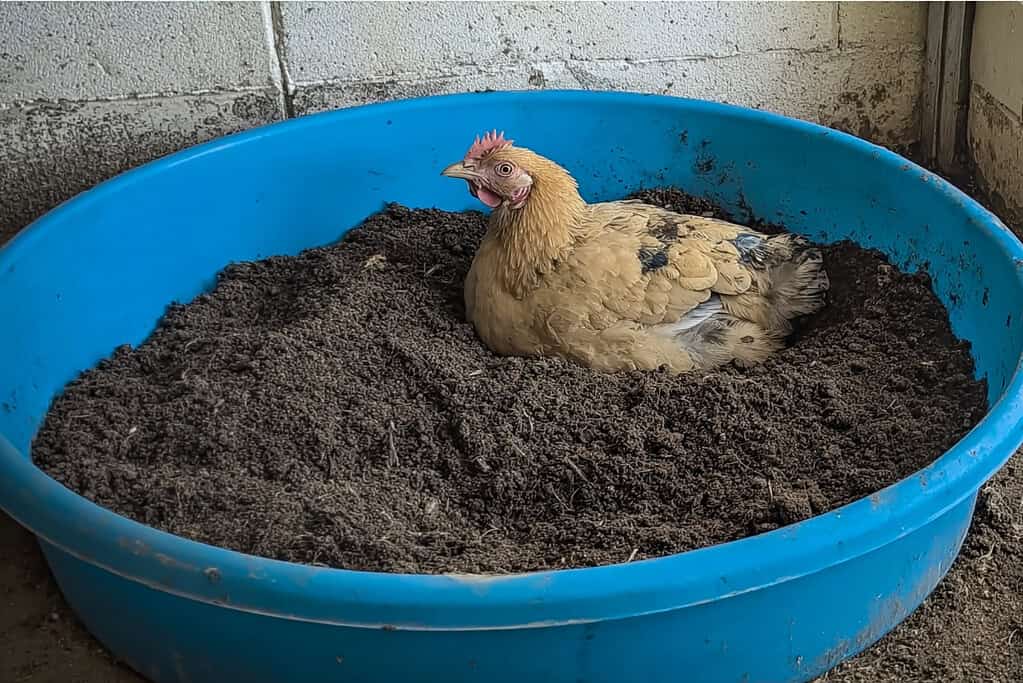
Why chickens love it: It’s wide and shallow, making it easy for several hens to bathe at the same time without crowding. Great for larger flocks or busy coops.
How to make it:
- Use a shallow plastic kiddie pool, the kind sold for small children or pets.
- Drill a few drainage holes in the bottom to prevent water from collecting.
- Bury the pool slightly so the rim sits just above ground level – this makes it easier for chickens to step in without spilling too much.
- Fill it with your standard dust mix: dry soil, sand, and wood ash.
The size of the pool lets multiple birds use it at once, which reduces competition and pecking. It also holds a larger volume of dust mix, so you don’t need to refill it as often.
This option works well in warm, dry weather and open spaces. In rainy areas, it’s best used under a roof or covered run to keep the mix from turning muddy.
5. Ground-Level Natural Pit
Why chickens love it: Chickens naturally seek out dry, dusty spots to bathe in. A simple pit mimics what they’d choose on their own – no container needed.
How to make it:
- Either let your chickens dig their own hole in a dry, loose patch of ground, or dig a shallow pit yourself, about 6–8 inches deep and 2–3 feet wide.
- If the soil is too hard or compacted, loosen it with a shovel or garden fork.
- Mix in a few scoops of fine sand and wood ash to improve texture and help with parasite control.
- Choose a sunny, elevated area to prevent moisture buildup.
This is the lowest-cost option and requires the least effort. Once established, chickens will return to it daily especially if you keep it dry and occasionally top off the mix.
If the soil stays too wet or compacted over time, you can dig a fresh pit nearby and let the old one rest or recover naturally.
6. Covered Dust Bath

Why chickens love it: It stays dry year-round, even in wet or snowy conditions. The cover protects the mix and keeps the dust bath usable no matter the weather.
How to make it:
- Use a wooden or plastic box with sides about 8–12 inches high.
- Add a hinged lid, slanted roof, or plastic cover to keep rain out. You can also place it under an overhang, lean-to, or tree.
- Fill it with your regular dust mix: dry soil, sand, and a small amount of wood ash.
- Make sure the cover provides ventilation while still shielding from moisture.
This setup is ideal for rainy, snowy, or humid climates, where open dust baths tend to stay damp. By keeping the mix dry, it stays effective at keeping parasites away and encourages more frequent use.
Covered boxes also help reduce the amount of debris, chicken poop, and spilled feed that can contaminate the dust area – keeping things cleaner with less maintenance.
If you’re working toward a lower maintenance setup, these DIY chicken feeder ideas are worth adding next.
7. Repurposed Galvanized Metal Tub Bath

Why chickens love it: The weight of a galvanized tub keeps it from tipping while chickens roll and fluff, and the wide sides give them plenty of room to bathe together.
Metal also dries quickly, which helps keep the dust bath light and effective.
How to make it:
- Use a wide, shallow galvanized metal tub (about 16 to 24 inches across works well).
- Set it directly on the ground in a dry, sunny area of the run or yard.
- Fill with a blend of fine sand, dry soil, and wood ash.
- If your area gets a lot of rain, drill a few small drainage holes in the bottom so water does not collect.
This option works especially well for backyard coops and high traffic areas where durability matters. Galvanized tubs hold up to weather, curious animals, and daily use without cracking or breaking.
They also have that classic farmhouse look, so they fit right in with rustic coops, garden runs, and homestead style setups.
Plus, they are easy to move if you like rotating dust bath spots around the yard.
Where to Place Your Dust Bath (And When to Move It)
The location of your dust bath affects how often your chickens use it and how well it holds up over time. Even the best setup won’t work if it’s placed in the wrong spot.
Here’s what to consider when choosing the right place – and when it’s time to move it.
Choose a Dry, Sunny Spot
Dust baths work best when the mix stays dry and loose.
A sunny location helps dry out any moisture and keeps the materials light and fluffy. Avoid shaded or low-lying areas, which tend to stay damp and can cause the mix to clump or grow mold.
Watch for Drainage Issues
Place the dust bath on well-drained ground, especially if you’re not using a container with drainage holes.
Avoid placing it directly on packed clay or near roof runoff areas where water can pool during rain.
Place It Where Chickens Naturally Gather
Observe your flock and see where they already like to lounge or scratch. Putting the dust bath in those areas increases the chances they’ll use it without hesitation.
When to Move the Dust Bath
Even a good setup may need to be moved from time to time. Here are some signs it’s time to shift locations:
- The mix stays damp for days
- The area becomes muddy or smells bad
- It’s filled with droppings or feed waste
- Chickens stop using it altogether
Rotate or Rest the Area
For natural or ground-level setups, rotating the dust bath every few months can help prevent overuse or compaction. Let the used area dry out and recover while the flock adjusts to a new spot nearby.
How to Maintain and Refresh Your Dust Bath Stations
Dust baths don’t require much upkeep, but they do need some regular attention to stay effective.
Chickens will use the same spot over and over, so keeping the mix clean, dry, and loose helps prevent issues like parasites, odor, or compacted material.
How Often to Check and Clean
- Weekly checks are usually enough for most setups.
- Look for signs of moisture, droppings, feathers, or spilled feed in the bath.
- Remove any wet or clumped material and top off with fresh mix as needed.
If the bath gets soaked from rain or snow, scoop out the damp contents and let the container dry fully before refilling.
How to Refresh the Dust Mix
- Every 2–4 weeks, add a fresh layer of sand, dirt, or wood ash to keep the texture loose and effective.
- Stir the mix occasionally with a trowel or gloved hand to break up clumps and redistribute ingredients.
Preventing Moisture Buildup
- Use a lid or cover if your area gets frequent rain or morning dew.
- For open setups, consider moving the bath under shelter during wet seasons.
- Elevate crate- or box-style baths slightly off the ground using bricks or wood blocks to help with drainage.
Dealing With Overuse
- If the same spot becomes too compacted or dusty, give it a break and set up a fresh station nearby.
- Let the old area dry out, and consider rotating between two stations if your flock is large or especially active.
Proper maintenance doesn’t take long and helps keep your flock clean, comfortable, and pest-free throughout the year.
Common Mistakes to Avoid With Dust Baths
Setting up a dust bath is simple, but a few common mistakes can make it less effective or discourage your chickens from using it altogether.
Avoiding these issues will help keep your flock healthy and ensure the dust bath does what it’s supposed to do.
1. Using the Wrong Materials
Not all materials are suitable for dust bathing. Avoid:
- Clay-heavy soil – it clumps and compacts, making it hard for chickens to dig or fluff.
- Gravel or coarse sand – too rough on feathers and skin.
- Ash from treated wood or charcoal briquettes – can contain harmful chemicals.
Stick to a blend of dry dirt, fine sand, and untreated wood ash.
2. Making It Too Shallow or Small
Chickens need space to stretch, flap, and roll. If the dust bath is too shallow, they’ll fling out the mix or avoid it entirely. Aim for:
- 6–8 inches deep
- Wide enough for at least one to two chickens at a time
3. Ignoring Drainage
Placing a dust bath directly on soggy ground or in a spot with poor drainage causes the mix to stay wet and unusable.
Always choose a well-drained, sunny area or use a raised container with drainage holes.
4. Not Maintaining It
Over time, the bath can collect droppings, spilled feed, or moisture. If it’s never refreshed or cleaned, chickens may stop using it. Check weekly and top off or stir as needed.
5. Leaving It Fully Exposed in Wet Weather
Rain or snow can turn your dust bath into a muddy mess.
For open containers or ground-level pits, always provide some type of cover during wet seasons – even something as simple as placing it under a tree, lean-to, or plastic tarp.
Are you looking for ways to keep your chickens cozy and hydrated during winter? Check out these best heated chicken waterers for winter to make sure your flock stays healthy even in freezing conditions.
Keep Your Flock Clean and Content With the Right Dust Bath Setup
Giving your chickens access to a proper dust bath is one of the easiest ways to support their health and natural behaviors.
Whether you build a covered box, repurpose an old tire, or simply let them dig their own pit, the key is keeping the mix dry, deep enough, and placed in a spot they’ll use.
Start with the DIY setup that fits your space and materials, then observe your flock and adjust if needed. A well-used dust bath often becomes one of their favorite hangouts.
Have a go-to dust bath setup that works well for your flock? Comment below and share your tips with other readers!
FAQs
1. Can I add herbs to a chicken dust bath?
Yes, dried herbs like lavender, mint, and rosemary can be added to the mix. They may help deter pests and add a mild scent. Use sparingly, and avoid anything moldy or damp.
2. How do I keep wild birds or animals out of the dust bath?
If you're dealing with wild birds or critters using the bath, place it inside the chicken run or use a covered design with a small opening. Avoid placing food or water near the dust area to reduce attraction.
3. Do chickens need a dust bath during winter?
Yes, they still benefit from dust bathing in winter. Use a covered container placed in a dry, draft-free area, like inside a covered run or barn. Keep the mix dry and top it off regularly.
4. Can I use play sand in a dust bath?
Play sand is safe as long as it’s clean and free from additives like silica dust. Check the label. If unsure, opt for construction-grade sand that’s been sifted and washed.
5. How young can chicks start using a dust bath?
Chicks as young as 1–2 weeks old may start practicing dust bathing.
Offer a shallow dish with fine, dry dirt and keep it separate from their food and bedding. Supervise early use to avoid inhalation risks.
Planting Guides for This Article
Get exact planting dates, frost schedules, and growing tips for your zone: