Fall container gardening is one of the easiest ways to keep your outdoor space looking vibrant, even as temperatures drop!
With just a few smart choices, you can create beautiful seasonal displays without spending much.
Whether you're reusing summer plants, adding natural materials from your yard, or choosing hardy fall favorites, these container ideas offer both style and practicality.
In this article, I'll share 14 budget-friendly ways to update your containers today, using materials that are easy to find, simple to arrange, and made to last through the season.
What Makes a Good Fall Container?
Before you start planting, it helps to know what sets fall containers apart from spring or summer ones.
The season is shorter, the temperatures are cooler, and plants grow more slowly, so your choices should be bold, hardy, and low-maintenance.
A good fall container usually includes:
- Cold-tolerant plants that keep their color after a light frost
- Layered texture and foliage (not just flowers)
- Seasonal accents like gourds, pinecones, or dried grasses
- Full, close planting since there’s no time for plants to fill in
- A sturdy pot with good drainage for cooler, wetter weather
Starting with these basics means your containers stay attractive longer and don’t cost much to maintain.
If you want to take things a step further and grow something you can actually harvest, you can also create an edible-style arrangement (I have a full guide on how to build an edible fall container garden that walks through that process step by step).
Once you’ve got the foundation, the fun part is choosing how to style them – which is where the ideas below come in.
14 Easy Fall Container Garden Ideas on a Budget
Below are 14 practical and low-cost ideas to get you started.
1. Repot Discounted Pre-Made Fall Planters from Garden Centers
Garden centers often sell ready-made fall arrangements using popular seasonal plants like mums, ornamental kale, and pansies.
These containers are usually more expensive early in the season but often get marked down as the weather cools or as inventory needs to be cleared.
Look for these deals and skip the decorative plastic pots they come in. Instead, carefully lift the entire root ball and soil out of the store container and transplant it into a pot you already have at home.
Choose a container that complements your porch or patio style, and tuck in any extra soil around the roots.
This gives your space a polished look without the cost of buying plants individually or paying for custom design services.
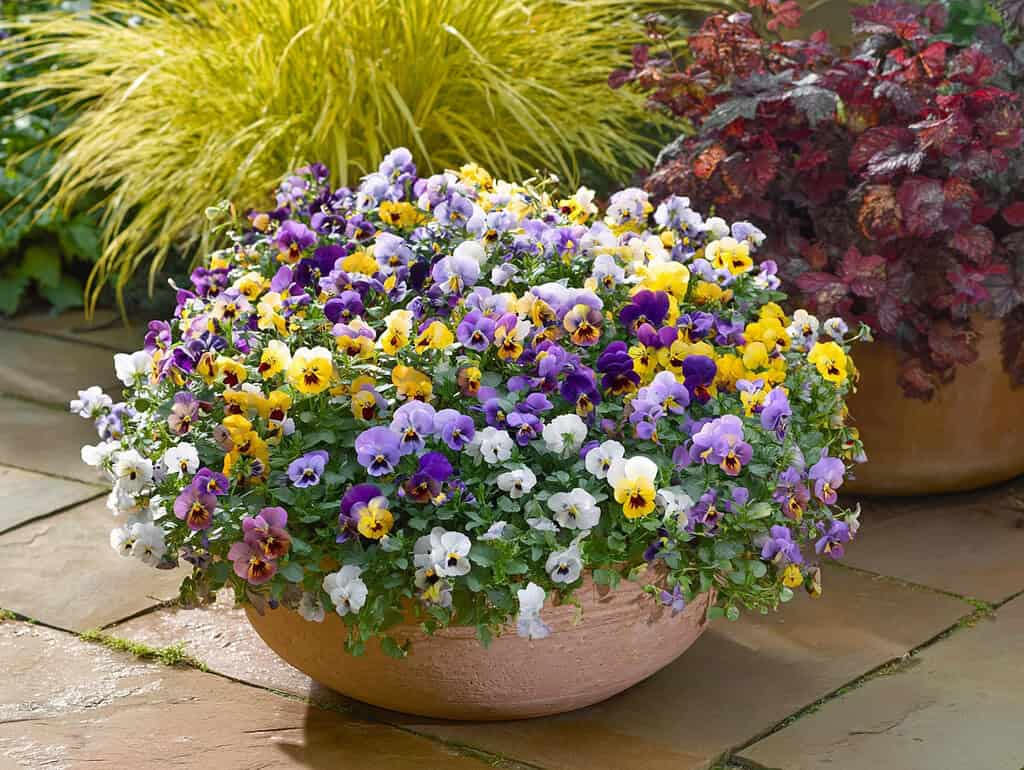
2. Layer Cold-Tolerant Annuals in a Rectangular Trough or Window Box
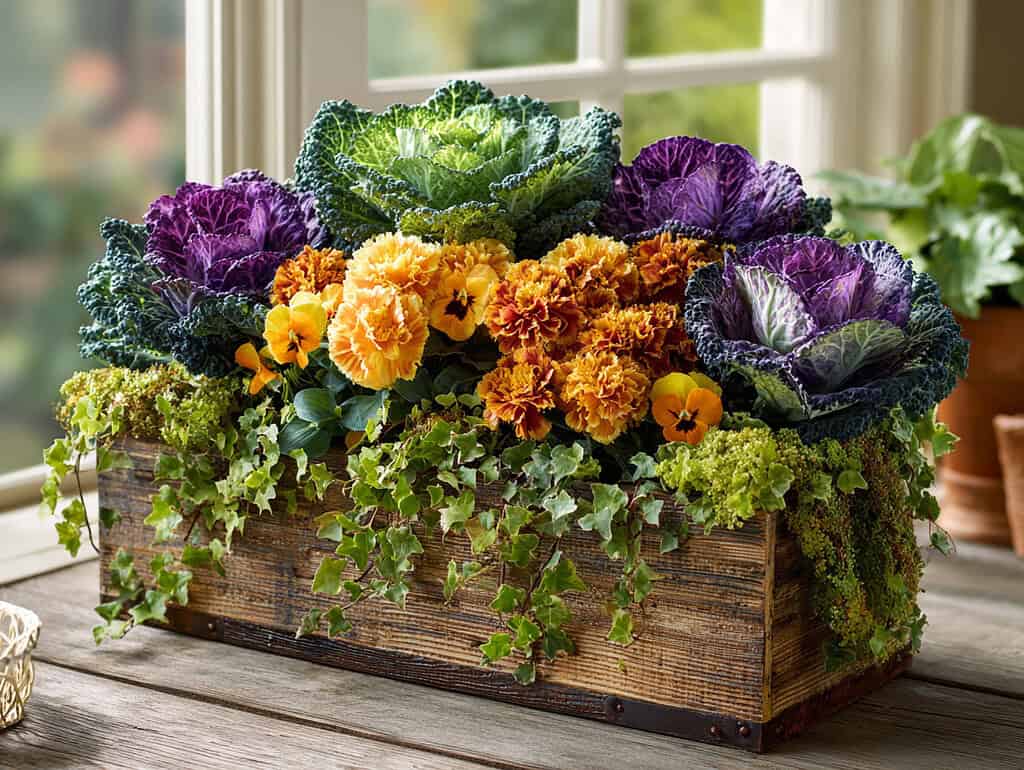
Choose a long, narrow container like a wooden trough, window box, or half-barrel to create a mini fall garden.
Plant taller ornamental kale or cabbage at the back, medium-height pansies or violas in the middle, and trailing creeping Jenny or ivy at the front edges.
The container itself becomes part of the design, highlighting textures, colors, and layers in a compact space.
3. Plant Mini Pumpkins or Gourds in the Container
Instead of just using them as decorative fillers, choose small pumpkins or ornamental gourds that can actually grow in a medium-to-large container.
Pair them with hardy companions like pansies, violas, or ornamental kale to create a living display.
Place one or two mini pumpkins in the center or slightly off to the side and let trailing vines spill naturally over the edge.
This gives your container a festive fall look while keeping everything alive and growing throughout the season.
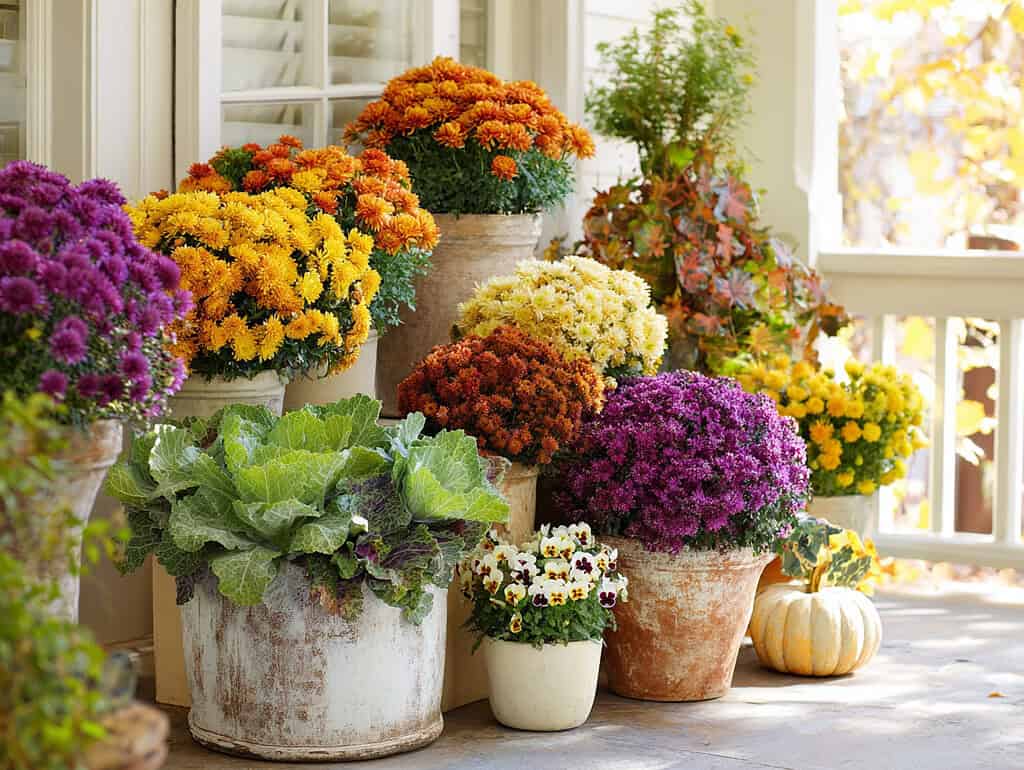
4. Group Inexpensive Mums in Separate Containers
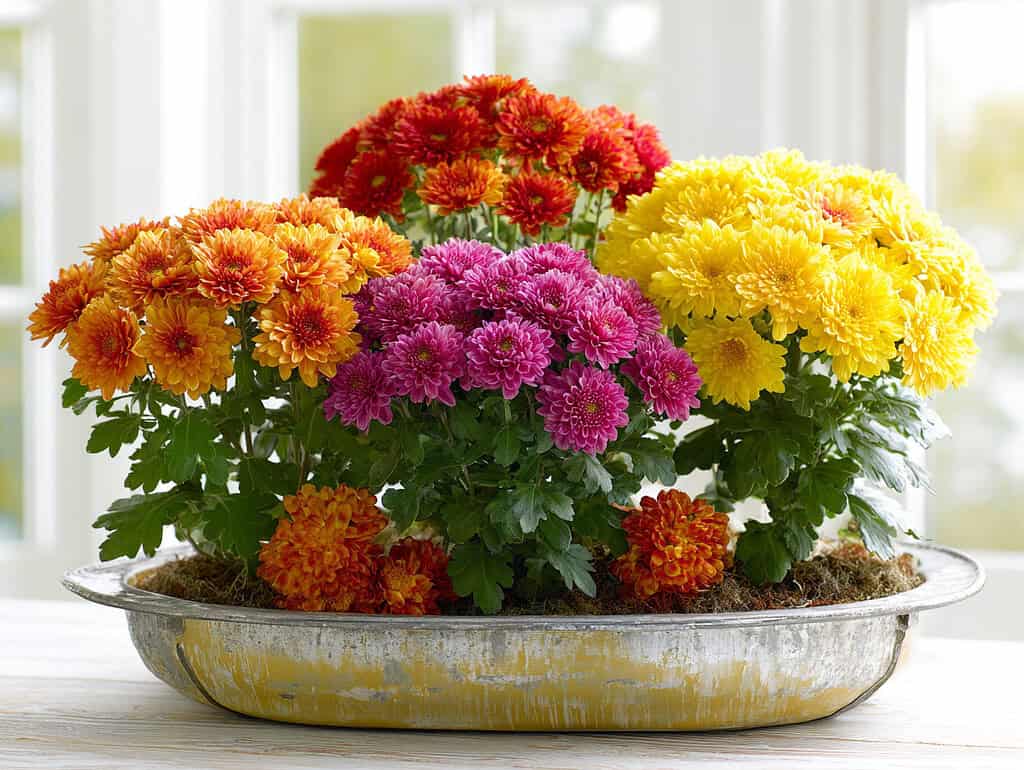
Buy several 4–6 inch pots of chrysanthemums rather than a single large plant.
Place three to five small pots tightly together on a single saucer or inside a larger container to create the look of one big, full arrangement.
Position taller mum varieties toward the back and shorter, mounding types in front so the group reads as layered.
If you want color contrast, pick two complementary hues (for example, deep rust and buttery yellow).
This technique is especially helpful if you don’t have a lot of room on your porch or balcony, since it gives the look of a large planter while using small pots (a common trick in container gardening for small spaces).
Keep the soil moist but not waterlogged – check the top inch of soil daily for dryness in windy spots – and deadhead spent blooms to prolong flowering.
When frost is expected, move the grouped mums against a sheltered wall or under an overhang to extend their display.
5. Plant Ornamental Kale and Cabbage as a Bold, Cheap Centerpiece
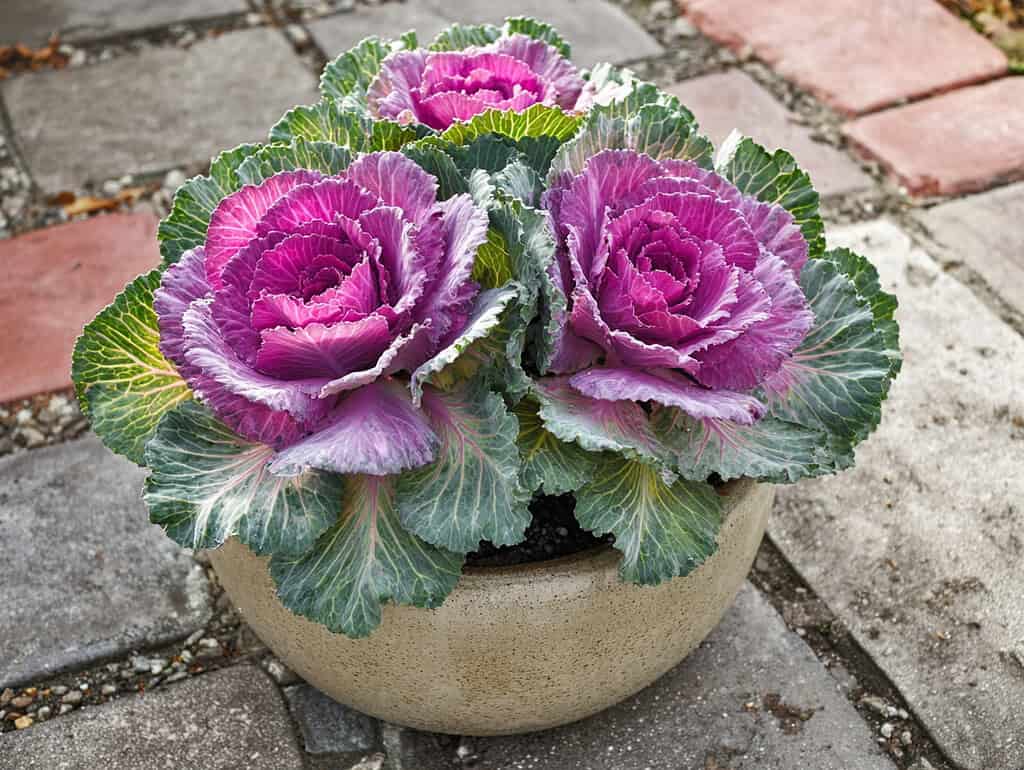
Choose 6–10 inch ornamental kale or cabbage as the “thriller” in a medium to large pot; their rosettes and ruffled leaves give instant drama and last through light frosts.
Plant one large kale in the center of a 12–14 inch pot or cluster three smaller heads in a rectangular trough.
Press them in firmly so the soil sits even with the lower leaves and top with a 1–2 inch layer of compost to hold moisture.
Ornamental brassicas tolerate cold and often develop richer color after a few light frosts.
To keep the look tidy, trim off yellowing outer leaves and remove any caterpillars you find – handpick or use a quick rinse under a hose.
6. Divide and Reuse Summer Plants Like Coleus or Sweet Potato Vine
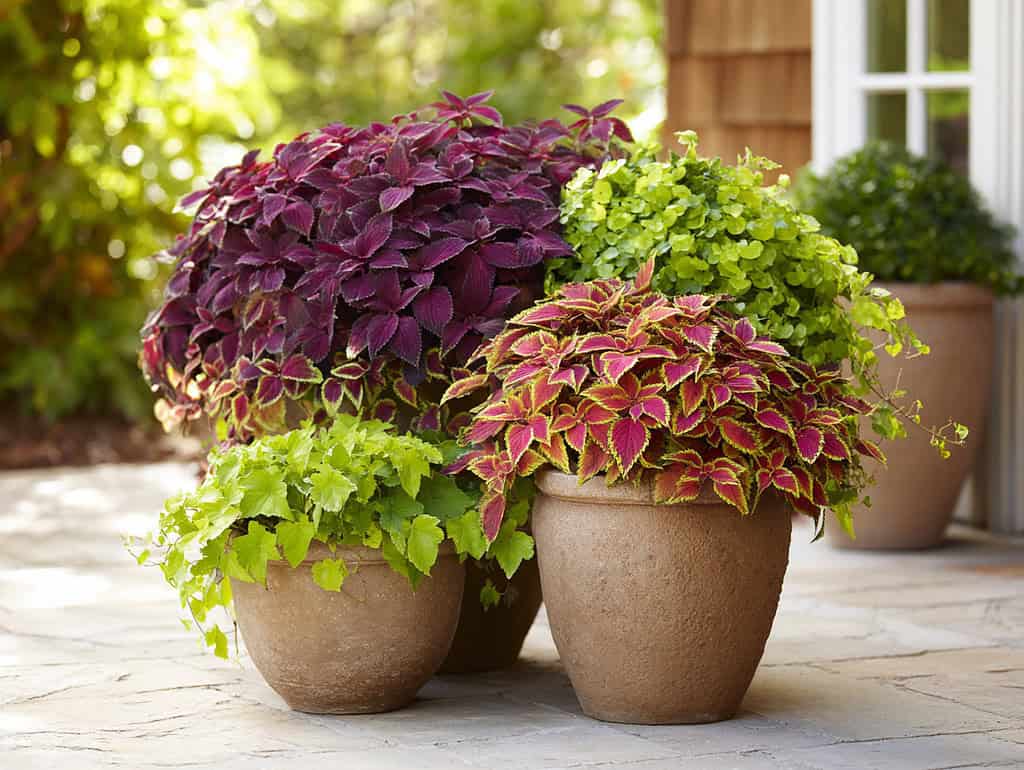
If your coleus or sweet potato vine is still healthy, divide a pot into two or three sections and transplant cuttings into fall containers.
For coleus, pinch 3–4 inch tip cuttings and stick them into moist potting mix; they root quickly and add bright foliage.
For sweet potato vine, cut 6–8 inch runners and bury half the stem in soil so new roots form. Use these as spillers around the edge of a container with a focal plant in the center.
Water well for the first week to establish roots, then reduce frequency – these plants prefer slightly drier soil as temperatures drop.
Reusing what you already have saves money and gives your new arrangements instant fullness.
7. Fill Edges with Creeping Jenny or Ivy Cuttings

Creeping Jenny (Lysimachia nummularia) and common ivy are excellent trailing plants that add movement and color to fall containers.
If you already have them in your garden or in another pot, simply snip a few long strands – 6 to 10 inches is ideal.
Gently tuck them around the outer edge of your container, pressing each cutting slightly into the soil so they make contact and start rooting.
Creeping Jenny offers a bright chartreuse color that pops against darker foliage, while ivy brings deep green or variegated tones.
Both hold up well in cooler temperatures and create a soft, flowing edge that makes your arrangement feel finished and intentional without any added cost.
8. Plant a Bold Fall Display in a Wooden Barrel
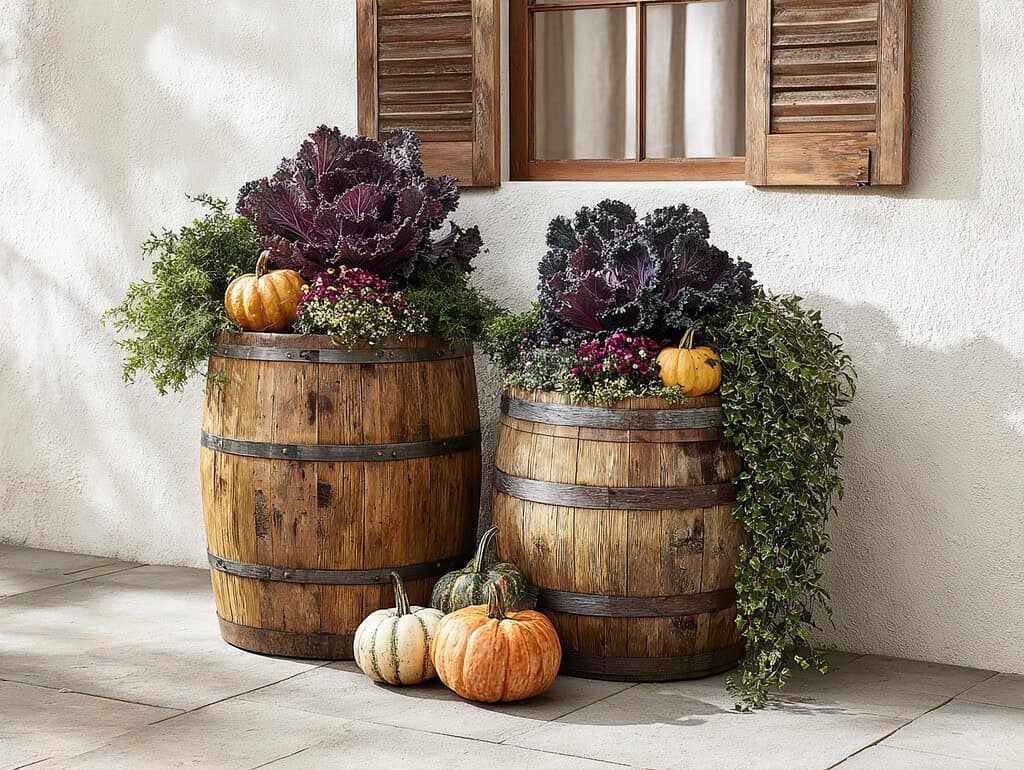
Use a wide, deep container like wooden half-barrel to create a striking fall arrangement.
Fill it with a mix of ornamental kale, small pumpkins or gourds, and trailing ivy or creeping Jenny around the edges.
The tall kale gives structure, the pumpkins add seasonal charm, and the trailing plants soften the container’s edge.
This combination is hardy enough to handle cool temperatures and light frosts, and it makes a full, layered display without needing constant care.
A barrel pot also protects roots from early cold snaps, keeping your arrangement vibrant longer.
9. Use Old Crates, Buckets, or Baskets as Planters
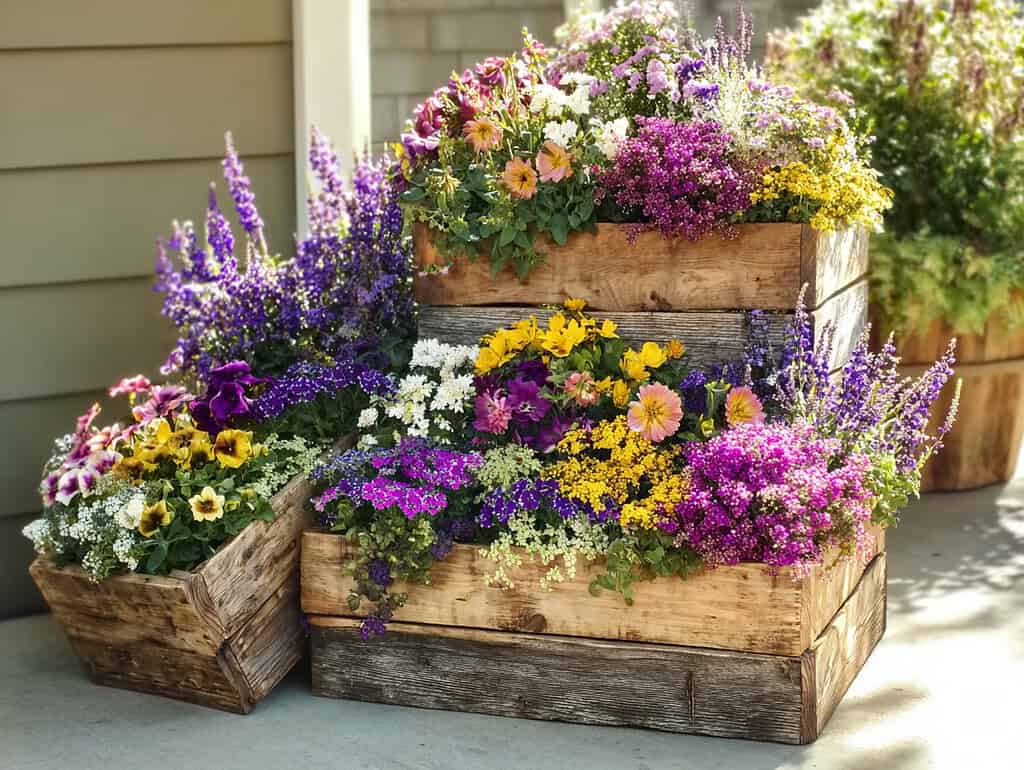
Instead of buying new containers, walk around your home or shed to find unused items like wooden crates, metal buckets, or woven baskets.
These can be turned into rustic fall planters with very little effort. Drill or poke drainage holes in the bottom if needed, or place a plastic nursery pot inside to hold the soil and plants while the outer container acts as a decorative shell.
Line the inside of baskets with a plastic bag or burlap to hold in soil and moisture.
These repurposed containers add character and texture to your display, and they often hold up well through the short fall season – all at no added cost.
And if you love the bucket idea in particular, you can even take it a step further and grow food in them too – here’s a great list of vegetables you should be growing in buckets.
10. Add Dried Hydrangea Blooms or Grass Plumes for Height

If you have hydrangeas or ornamental grasses in your yard, cut a few dried blooms or seed heads to use as upright accents in your fall containers.
Hydrangea flowers from varieties like oakleaf or bigleaf can dry naturally on the plant and keep their shape and color for weeks.
Cut long stems and insert them deep into the soil in the center or back of your container. Similarly, use tall grass plumes from fountain grass or switchgrass to add vertical height and movement.
These dried elements pair well with living plants and require no maintenance. They help fill visual gaps without needing to purchase more plants and hold up well through mild weather changes.
11. Overplant Densely for Instant Fullness
Unlike spring or summer containers, fall planters don’t need room for plants to grow in – the season is short, and temperatures are cooling.
That means you can plant more closely together to make the container look full and lush right away.
Instead of spacing plants 6–8 inches apart, nest them shoulder to shoulder, pressing soil in firmly around each root ball.
This works especially well with mums, violas, kale, and pansies.
The result is a full display from day one, making smaller or younger plants look more impressive and minimizing the need to buy large, mature specimens.
12. Mix in Edible Lettuces and Herbs
Fall lettuces like romaine, red leaf, and oakleaf, along with herbs such as parsley and sage, bring both color and purpose to container displays.
You can start them from seed in early fall or pick up starter plants for just a few dollars.
Tuck them into small gaps around your ornamental plants so they act as living fillers, adding soft greens or rich burgundy tones. Since you’re only harvesting the outer leaves, the container still looks full and decorative while giving you fresh salad ingredients all season.
Because they love cool temperatures, these crops will keep producing right up until frost.
And if you enjoy the edible-plus-beautiful approach, you might also like learning how to build a pallet herb garden at home, which is another great way to grow food in a small space.
13. Use Sedum or Hens-and-Chicks from Other Parts of Your Garden
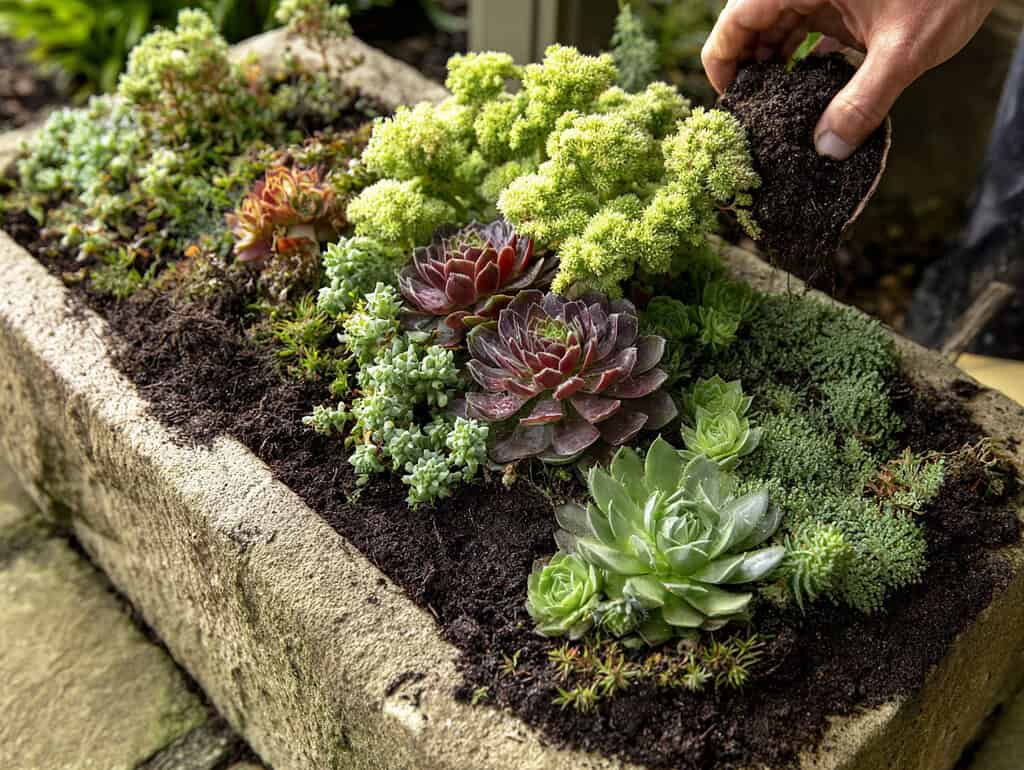
Sedums and Hens-and-Chicks (Sempervivum) are hardy, drought-resistant plants that can be easily divided and reused in fall containers.
Look for varieties like ‘Lemon Coral’ or ‘Autumn Joy’ sedum, which bring rich color and texture.
To transplant, dig up a small clump or offset from your existing garden bed and gently shake off excess soil.
Replant into your container with fresh potting mix, placing them near the front or in between taller plants.
These succulents thrive in cooler temperatures, require very little watering, and hold their shape even after the first frost – making them ideal for low-cost, low-maintenance fall arrangements.
14. Create a Monochromatic Pot Using Only Foliage Plants
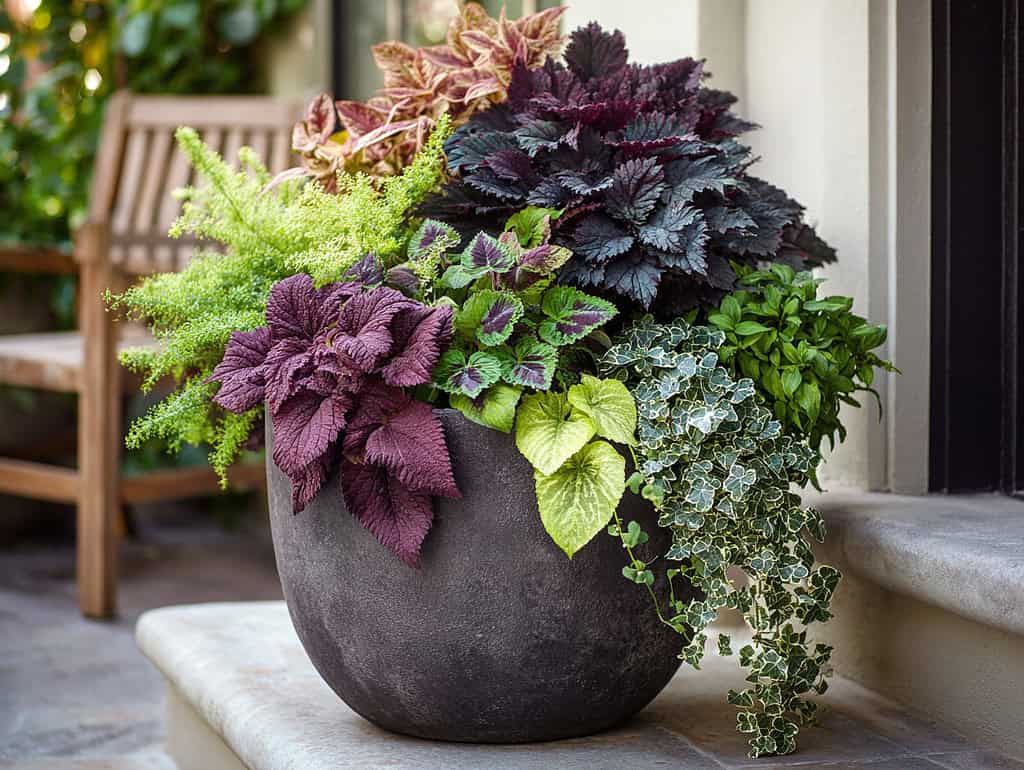
Instead of relying on blooms, which fade quickly in fall, try grouping several foliage plants in similar color tones to create a cohesive, designer look.
For example, pair purple-leaf Heuchera with dark-leaved ornamental cabbage and deep burgundy coleus. Or go for greens with chartreuse Creeping Jenny, variegated ivy, and lemon thyme.
This approach works especially well when you already have some of these plants on hand. The key is to vary the leaf shapes and plant heights while keeping the color palette consistent.
Foliage holds up better than flowers in cooler weather and creates a bold statement with very little upkeep.
How to Choose the Right Container for Fall
Choosing the right container is just as important as selecting the right plants.
Fall weather brings cooler temperatures, fluctuating moisture levels, and the possibility of frost – so your containers need to handle these conditions while supporting healthy plant growth.
Use Materials That Resist Cold and Moisture
Avoid containers made from unglazed clay or thin ceramic if you live in an area with early frosts or heavy rain.
These materials absorb water and are prone to cracking when temperatures drop. Instead, choose:
- Plastic or resin pots – lightweight, affordable, and frost-resistant.
- Glazed ceramic – sealed finish makes them more durable in wet weather.
- Wooden crates or barrels – work well if sealed or lined to prevent rot.
- Metal buckets – weather-resistant, especially if they already have a rustic finish.
If you’re using repurposed items (like baskets or crates), line them with heavy plastic or landscape fabric and poke drainage holes to avoid water buildup.
Prioritize Good Drainage
Plants in fall containers still need airflow and proper drainage, especially as the weather gets wetter. Without it, roots can rot quickly in cooler, damp conditions. Make sure your containers:
- Have at least one drainage hole in the bottom.
- Are raised slightly off the ground (use pot feet, bricks, or an old tile) to allow water to escape freely.
- Use a well-draining potting mix, not garden soil, which can become compacted and soggy.
If your container doesn’t have drainage and can’t be drilled, insert a nursery pot with holes inside and remove it for watering.
Match the Container Size to the Planting Plan
For a balanced look and healthy roots, consider the scale of your container:
- Small containers (8–10 inches) are ideal for single plants like mums or kale.
- Medium containers (12–14 inches) can hold a thriller, filler, and spiller combination.
- Larger containers (16+ inches) are great for mixed plantings or grouping multiple plants together tightly for instant impact.
Deeper containers help protect root systems from temperature swings, while wider pots make it easier to create layered arrangements.
Think About Placement and Weight
Where you plan to place your container matters. If it needs to be moved indoors or to a sheltered spot during frost warnings, choose lighter materials like plastic or resin.
For permanent outdoor placement, heavier pots made from concrete or stone are more stable in windy conditions but harder to move.
Also consider how the container’s shape fits into your overall display. Tall pots work well flanking a doorway, while low, wide planters are better for porch railings or tabletops.
Best Soil Mix and Fertilizer Tips for Fall Planters

Fall containers have different needs than summer ones.
Since plants won’t grow as fast and temperatures are cooler, your soil and fertilizer approach should support healthy roots without overfeeding or holding excess moisture.
A well-prepared container mix gives your plants a strong start and helps them last through the season.
Use a Lightweight, Well-Draining Potting Mix
Avoid using garden soil or topsoil in your containers – they’re too heavy, especially in cooler, wetter fall weather, and can compact easily, leading to poor drainage.
Instead:
- Use a quality potting mix that includes peat moss or coco coir, perlite, and compost.
- If reusing old soil from summer pots, remove old roots and debris, then mix in fresh compost (about one-third of the total volume) to restore nutrients and structure.
- For extra drainage, mix in a few handfuls of perlite or coarse sand, especially if your containers don’t dry out quickly.
A fresh, airy mix allows roots to breathe while keeping moisture levels stable – critical for fall when overwatering becomes a risk.
Don’t Overdo Fertilizer in Fall
Fall plants grow more slowly, so they don’t need as much feeding. In fact, over-fertilizing can push weak, leggy growth that’s more prone to damage from wind or cold. Here’s a simple approach:
- Mix a small amount of slow-release fertilizer (like a balanced 10-10-10) into the soil when planting. This supports steady growth without overwhelming the plants.
- Avoid using high-nitrogen liquid fertilizers that promote leafy growth – they’re better suited for spring and summer.
- Skip mid-season feeding unless plants show clear signs of stress or nutrient deficiency (like pale leaves).
If you're using mostly hardy foliage or ornamental varieties like kale or grasses, they often do fine with just a compost-enriched mix.
Refresh, Don’t Replace – Reusing Soil Wisely
If you're on a tight budget, you can reuse soil from summer containers with a few adjustments:
- Remove the top few inches where most old roots and spent fertilizer build up.
- Break up any compacted areas and remove leftover root balls.
- Add in compost, worm castings, or a bit of slow-release fertilizer to restore nutrients.
This gives you a productive, low-cost soil base without starting from scratch.
Make the Most of Fall Without Overspending
You don’t need a large budget or fancy materials to create stunning fall containers.
By reusing plants, adding seasonal accents from nature, and choosing tough, cool-weather plants, you can easily put together arrangements that last for weeks – sometimes months.
Even the smallest changes, like grouping basic mums or adding dried elements from your yard, can make a big visual impact.
Start with what you already have, then layer in a few hardy additions or natural fillers to stretch your budget further.
Whether you’re decorating a front step, patio, or porch railing, these ideas will help you create something that’s both practical and beautiful.
Have your own favorite fall container tip or question? Comment down below – we’d love to hear what you're growing this season!
FAQs
1. What’s the easiest way to keep squirrels or animals out of fall containers?
Use natural deterrents like crushed red pepper flakes or sprinkle cinnamon around the soil surface. Avoid using edible items like corn or apples in your containers, which attract wildlife. You can also use wire cloches or mesh domes over your planters if pests are persistent.
2. Can I keep my fall containers going into winter?
Yes, if you use hardy perennials or evergreen plants, you can transition them into winter by removing any soft or spent plants and replacing them with pine branches, berries, or cold-hardy greens. Just make sure the soil doesn’t stay soggy and the container won’t crack in freezing temps.
3. How do I water fall containers correctly as temperatures drop?
Water deeply but less frequently. Stick your finger into the soil – if the top inch is dry, water thoroughly. Avoid watering in the late evening when temps drop fast, which can lead to root damage. Morning watering is best.
4. What’s a good setup for containers in shady fall areas?
Use shade-tolerant foliage like ferns, heuchera, ivy, and ornamental cabbage. Avoid flowers that need full sun to bloom. Focus on leaf texture and color instead of blooms to get a strong visual impact in low-light spots.
5. Is it better to use seeds or starter plants for fall containers?
Starter plants are more practical in fall since the growing season is short.
Seeds may not have enough time to germinate and mature unless planted early in the season or started indoors. For quick results, go with transplants.